Ⅰ、Element-plus 提供的Tree树形控件组件与想要目标情况的对比:
其一、Element-ui 自提供的Table代码情况为(示例的代码):
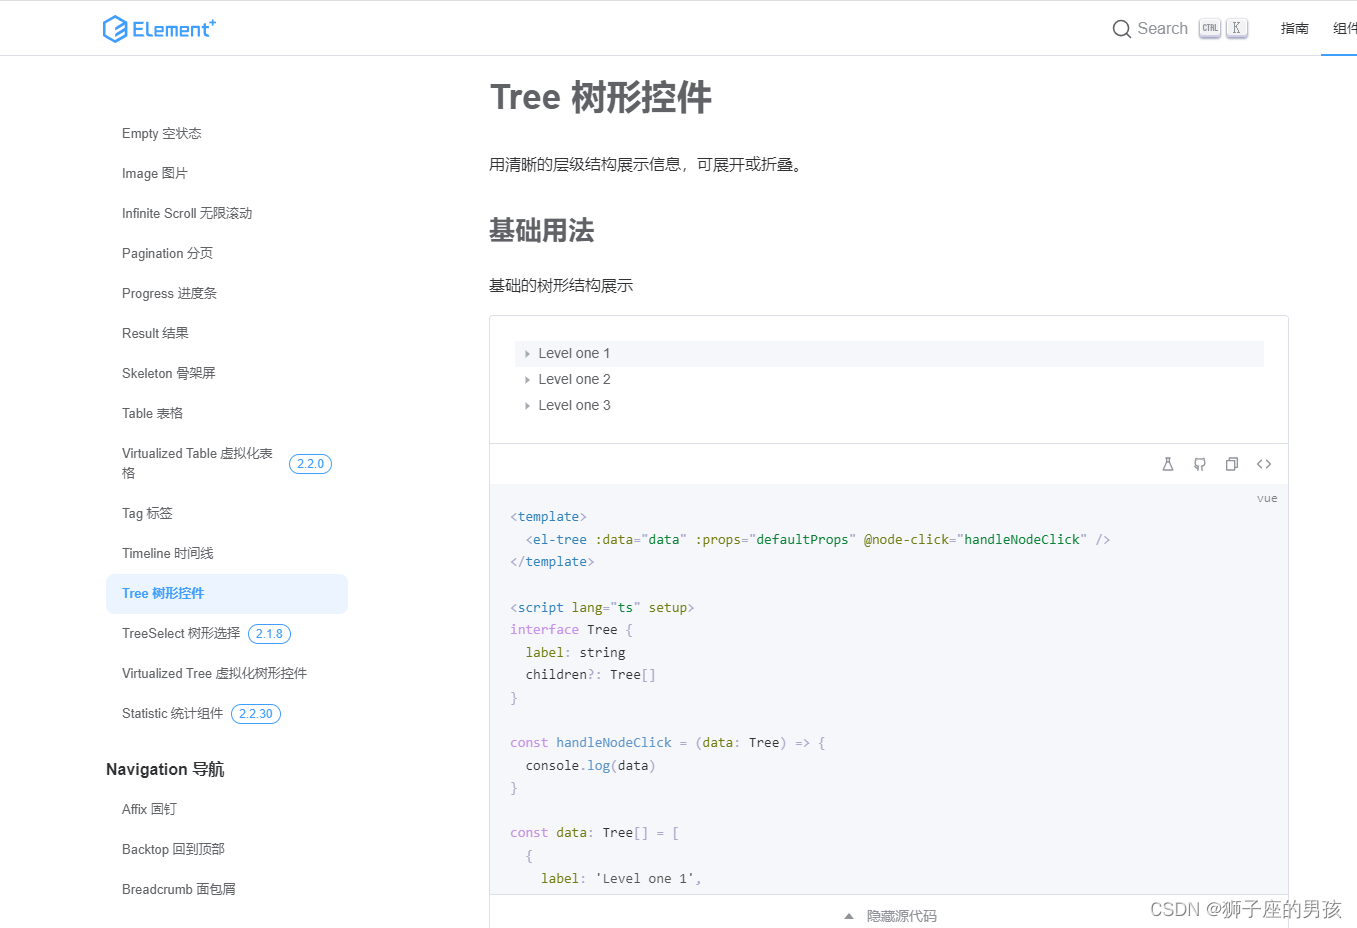
// Element-plus 自提供的代码:
// 此时是使用了 ts 语言环境,但是我在实际项目中并没有使用 ts 语言和环境;
<template>
<el-tree :data="data" :props="defaultProps" @node-click="handleNodeClick" />
</template>
<script lang="ts" setup>
interface Tree {
label: string
children?: Tree[]
}
const handleNodeClick = (data: Tree) => {
console.log(data)
}
const data: Tree[] = [
{
label: 'Level one 1',
children: [
{
label: 'Level two 1-1',
children: [
{
label: 'Level three 1-1-1',
},
],
},
],
},
{
label: 'Level one 2',
children: [
{
label: 'Level two 2-1',
children: [
{
label: 'Level three 2-1-1',
},
],
},
{
label: 'Level two 2-2',
children: [
{
label: 'Level three 2-2-1',
},
],
},
],
},
{
label: 'Level one 3',
children: [
{
label: 'Level two 3-1',
children: [
{
label: 'Level three 3-1-1',
},
],
},
{
label: 'Level two 3-2',
children: [
{
label: 'Level three 3-2-1',
},
],
},
],
},
]
const defaultProps = {
children: 'children',
label: 'label',
}
</script>
代码地址:https://element-plus.gitee.io/zh-CN/component/tree.html
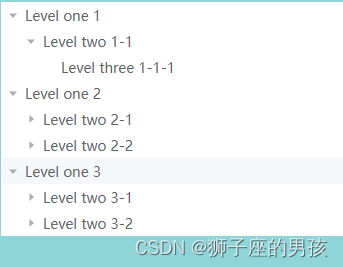
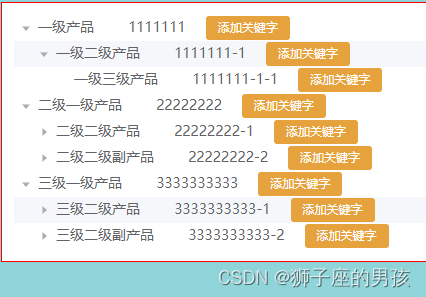
Ⅱ、实现 Tree 树形控件达到目标效果变化的过程:
1、Tree 树形控件成功引入 vue3 项目的过程(去除了 ts 的语法):
其一、代码:
<template>
<!-- div 里面调了一个样式,让组件能够显示在合适的位置; -->
  <div style="margin-top:100px; margin-left: 50px;">
    <el-tree :data="data" :props="defaultProps" @node-click="handleNodeClick" />
</div>
</template>

<script setup>


const handleNodeClick = () => {
  console.log(data)
}

const data = [
  {
    label: 'Level one 1',
    children: [
      {
        label: 'Level two 1-1',
        children: [
          {
            label: 'Level three 1-1-1',
          },
        ],
      },
    ],
  },
  {
    label: 'Level one 2',
    children: [
      {
        label: 'Level two 2-1',
        children: [
          {
            label: 'Level three 2-1-1',
          },
        ],
      },
      {
        label: 'Level two 2-2',
        children: [
          {
            label: 'Level three 2-2-1',
          },
        ],
      },
    ],
  },
  {
    label: 'Level one 3',
    children: [
      {
        label: 'Level two 3-1',
        children: [
          {
            label: 'Level three 3-1-1',
          },
        ],
      },
      {
        label: 'Level two 3-2',
        children: [
          {
            label: 'Level three 3-2-1',
          },
        ],
      },
    ],
  },
]

const defaultProps = {
  children: 'children',
  label: 'label',
}
</script>

<style scoped>
</style>
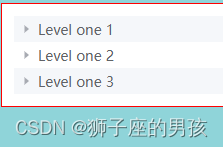
其二、效果展示:
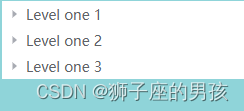
其一、代码:
<template>
  <el-tree :data="data" class="kbc_tree" :props="defaultProps" @node-click="handleNodeClick">
  </el-tree>
</template>

<style scoped>
  .kbc_tree {
  	// 一般是要将边框的颜色设置成白色(即: #ececec),此时设置成红色,是为了做区别;
    // border: 1px solid #ececec;
    border: 1px solid red;
    margin-top: 12px;
    padding: 12px;
  }
</style>
其二、效果展示:
3、Tree 树形控件添加数据展示和 button 的过程:
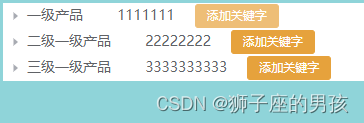
其一、代码:
<template>
    <el-tree :data="data"  :props="defaultProps" @node-click="handleNodeClick">
      <!-- 注意:此时引入数据的用法; -->
      <template #default="{ node, data }">
        <span class="custom_tree_node">
          <span>
            {{isZh()? data.nameCn : data.nameEn}}
            <span class="ctn_id">{{data.categoryId}}</span>
            <span style="margin-left:20px;"><el-button type="warning" size="small" @click="append('add',data,node)">添加关键字</el-button></span>
          </span>
        </span>
      </template>
    </el-tree>
</template>


<script setup>
const isZh = () => {
  return true
}

const handleNodeClick = () => {
  console.log(data)
}

const append = (type,data,node) => {
  console.log(type,11111);
  console.log(data,22222);
  console.log(node,11111);
}

const data = [
  {
    label: 'Level one 1',
    nameCn: '一级产品',
    categoryId: '1111111',
    type: 'parent',
    parentId: '0',
    children: [
      {
        label: 'Level two 1-1',
        nameCn: '一级二级产品',
        categoryId: '1111111-1',
        children: [
          {
            label: 'Level three 1-1-1',
            categoryId: '1111111-1-1',
            nameCn: '一级三级产品'
          },
        ],
      },
    ],
  },
  {
    label: 'Level one 2',
    nameCn: '二级一级产品',
    categoryId: '22222222',
    children: [
      {
        label: 'Level two 2-1',
        nameCn: '二级二级产品',
        categoryId: '22222222-1',
        type: 'parent',
        parentId: '0',
        children: [
          {
            label: 'Level three 2-1-1',
            nameCn: '二级三级产品',
            categoryId: '22222222-1-1',
          },
        ],
      },
      {
        label: 'Level two 2-2',
        nameCn: '二级二级副产品',
        categoryId: '22222222-2',
        children: [
          {
            label: 'Level three 2-2-1',
            nameCn: '二级三级副产品',
            categoryId: '22222222-2-2',
          },
        ],
      },
    ],
  },
  {
    label: 'Level one 3',
    nameCn: '三级一级产品',
    categoryId: '3333333333',
    type: 'parent',
    parentId: '0',
    children: [
      {
        label: 'Level two 3-1',
        nameCn: '三级二级产品',
        categoryId: '3333333333-1',
        children: [
          {
            label: 'Level three 3-1-1',
            nameCn: '三级三级产品',
            categoryId: '3333333333-1-1',
          },
        ],
      },
      {
        label: 'Level two 3-2',
        nameCn: '三级二级副产品',
        categoryId: '3333333333-2',
        children: [
          {
            label: 'Level three 3-2-1',
            nameCn: '三级三级副产品',
            categoryId: '3333333333-2-2',
          },
        ],
      },
    ],
  },
]

const defaultProps = {
  children: 'children',
  label: 'label',
}
</script>

<style lang="scss" scoped>
   // 此时的 lang="scss" 表示使用的是 sass/scss 语言,需要安装 sass-loader;
  .custom_tree_node {
    flex: 1;
    display: flex;
    align-items: center;
    justify-content: space-between;
    font-size: 14px;
    padding-right: 8px;
    // 此时的 ::v-deep 是为了深度穿透,一般是 less 的语法;
    //  .ctn_id ::v-deep {
     .ctn_id {
      margin-left: 30px;
    }
  }
</style>
其二、效果展示:
Ⅲ、修改 Tree 树形控件达到目标效果的展示:
1、整体的代码(即:总的代码):
<template>
  <div style="margin-top:100px; margin-left: 50px;">
    <el-tree :data="data" class="kbc_tree" :props="defaultProps" @node-click="handleNodeClick">
      <template #default="{ node, data }">
        <span class="custom_tree_node">
          <span>
            {{isZh()? data.nameCn : data.nameEn}}
            <span class="ctn_id">{{data.categoryId}}</span>
            <span style="margin-left:20px;"><el-button type="warning" size="small" @click="append('add',data,node)">添加关键字</el-button></span>
          </span>
        </span>
      </template>
    </el-tree>
  </div>
</template>

<script setup>

const isZh = () => {
  return true
}

const handleNodeClick = () => {
  console.log(data)
}

const append = (type,data,node) => {
  console.log(type,11111);
  console.log(data,22222);
  console.log(node,11111);
}

const data = [
  {
    label: 'Level one 1',
    nameCn: '一级产品',
    categoryId: '1111111',
    type: 'parent',
    parentId: '0',
    children: [
      {
        label: 'Level two 1-1',
        nameCn: '一级二级产品',
        categoryId: '1111111-1',
        children: [
          {
            label: 'Level three 1-1-1',
            categoryId: '1111111-1-1',
            nameCn: '一级三级产品'
          },
        ],
      },
    ],
  },
  {
    label: 'Level one 2',
    nameCn: '二级一级产品',
    categoryId: '22222222',
    children: [
      {
        label: 'Level two 2-1',
        nameCn: '二级二级产品',
        categoryId: '22222222-1',
        type: 'parent',
        parentId: '0',
        children: [
          {
            label: 'Level three 2-1-1',
            nameCn: '二级三级产品',
            categoryId: '22222222-1-1',
          },
        ],
      },
      {
        label: 'Level two 2-2',
        nameCn: '二级二级副产品',
        categoryId: '22222222-2',
        children: [
          {
            label: 'Level three 2-2-1',
            nameCn: '二级三级副产品',
            categoryId: '22222222-2-2',
          },
        ],
      },
    ],
  },
  {
    label: 'Level one 3',
    nameCn: '三级一级产品',
    categoryId: '3333333333',
    type: 'parent',
    parentId: '0',
    children: [
      {
        label: 'Level two 3-1',
        nameCn: '三级二级产品',
        categoryId: '3333333333-1',
        children: [
          {
            label: 'Level three 3-1-1',
            nameCn: '三级三级产品',
            categoryId: '3333333333-1-1',
          },
        ],
      },
      {
        label: 'Level two 3-2',
        nameCn: '三级二级副产品',
        categoryId: '3333333333-2',
        children: [
          {
            label: 'Level three 3-2-1',
            nameCn: '三级三级副产品',
            categoryId: '3333333333-2-2',
          },
        ],
      },
    ],
  },
]


const defaultProps = {
  children: 'children',
  label: 'label',
}
</script>

<style lang="scss" scoped>
  .kbc_tree {
    // border: 1px solid #ececec;
    border: 1px solid red;
    margin-top: 12px;
    padding: 12px;
    .custom_tree_node {
      flex: 1;
      display: flex;
      align-items: center;
      justify-content: space-between;
      font-size: 14px;
      padding-right: 8px;
      //  .ctn_id ::v-deep {
      .ctn_id {
        margin-left: 30px;
      }
    }
  }
</style>
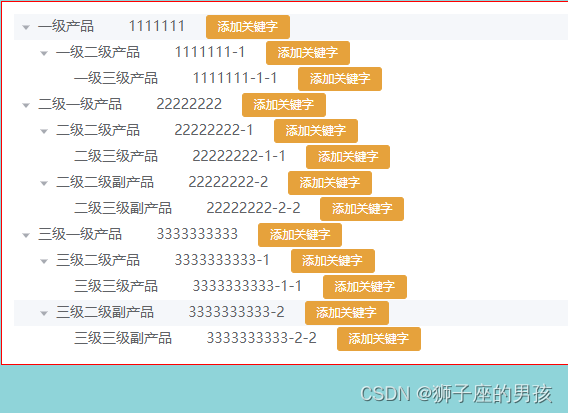
2、整体效果的展示:
Ⅳ、小结:
其一、哪里有不对或不合适的地方,还请大佬们多多指点和交流!
其二、有兴趣的话,可以多多关注这个专栏(Vue(Vue2+Vue3)面试必备专栏):https://blog.csdn.net/weixin_43405300/category_11525646.html?spm=1001.2014.3001.5482
原文地址:https://blog.csdn.net/weixin_43405300/article/details/131175218
本文来自互联网用户投稿,该文观点仅代表作者本人,不代表本站立场。本站仅提供信息存储空间服务,不拥有所有权,不承担相关法律责任。
如若转载,请注明出处:http://www.7code.cn/show_21292.html
如若内容造成侵权/违法违规/事实不符,请联系代码007邮箱:suwngjj01@126.com进行投诉反馈,一经查实,立即删除!
声明:本站所有文章,如无特殊说明或标注,均为本站原创发布。任何个人或组织,在未征得本站同意时,禁止复制、盗用、采集、发布本站内容到任何网站、书籍等各类媒体平台。如若本站内容侵犯了原著者的合法权益,可联系我们进行处理。


