🍁 作者:知识浅谈,CSDN签约讲师,CSDN博客专家,华为云云享专家,阿里云专家博主
📌 擅长领域:全栈工程师、爬虫、ACM算法
💒 公众号:知识浅谈
🔥网站:vip.zsqt.cc
视频教程:
上一篇:SpringSecurity集成JWT实现后端认证授权保姆级教程-工具类准备篇
下一篇:SpringSecurity集成JWT实现后端认证授权保姆级教程-授权配置篇
🤞上边的各种配置都完成之后,本节开始进行SpringSecurity的认证🤞
🎈用户类继承UserDetails
为什么要继承这个UserDetails类呢,因为后续SpringSecurity中进行认证授权都是通过实现UserDetail接口和UserDetailsService
针对数据准备篇的CustUser实体类进行更改,实现UserDetails 并实现其对应的方法
@TableName(value ="cust_user")
@Data
public class CustUser implements Serializable, UserDetails {  //这里新增实现UserDetails
    @TableId(type = IdType.AUTO)
    private Integer id;
    private String username;
    private String nickname;
    private Integer enable;
    private String password;
//----------------------------------------------------以下为新增的部分---------------------------------
    @Override
    public Collection<? extends GrantedAuthority> getAuthorities() {
        return null;
    }
    @Override
    public boolean isAccountNonExpired() {
        return true;
    }
    @Override
    public boolean isAccountNonLocked() {
        return true;
    }
    @Override
    public boolean isCredentialsNonExpired() {
        return true;
    }
    @Override
    public boolean isEnabled() {
        return true;
    }
    //------------------------------------------------------------------------------------------------
    @TableField(exist = false)
    private static final long serialVersionUID = 1L;
}
🎈用户Service实现UserDetailService
实现UserDetailService并实现其对应的loadUserByUsername
-
针对之前的数据准备篇的CustUserService接口 进行更改
public interface CustUserService extends IService<CustUser>, UserDetailsService { //这个地方新增继承这个UserDetailsService接口 } -
针对之前的数据准备篇的CustUserServiceImpl实现类 进行更改
@Service
public class CustUserServiceImpl extends ServiceImpl<CustUserMapper, CustUser> implements CustUserService{ //这个地方新增实现CustUserService接口
//-----------------------------------------------------以下为新增的内容------------------------------------------
    @Autowired
    private CustUserMapper custUserMapper;

    @Autowired
    private SysMenuMapper menuMapper;
    @Override
    public UserDetails loadUserByUsername(String username) throws UsernameNotFoundException {
        LambdaQueryWrapper<CustUser> queryWrapper = new LambdaQueryWrapper<>();
        queryWrapper.eq(CustUser::getUsername, username);
        CustUser user = custUserMapper.selectOne(queryWrapper);
        if (user == null) {
            log.error("用户名不存在");
            throw new UsernameNotFoundException("用户名不存在");
        }else {
            return user;
        }
    }
//----------------------------------------------------------------------------
}
上边的这个主要是实现loadUserByUsername方法在SpringSecurity认证的过程中使用的到。
🎈SecurityConfig配置类重要
在config文件夹下新增Security配置类,这类用于指定拦截路径、设置登录退出接口,异常处理等,直接上代码
package com.example.demo.config;

import com.example.demo.common.Vo.Result;
import com.example.demo.service.CustUserService;
import com.example.demo.utils.JwtUtil;
import com.google.gson.Gson;

import lombok.RequiredArgsConstructor;
import lombok.extern.slf4j.Slf4j;
import org.springframework.beans.factory.annotation.Autowired;
import org.springframework.context.annotation.Bean;
import org.springframework.context.annotation.Configuration;
import org.springframework.security.authentication.AuthenticationManager;
import org.springframework.security.config.annotation.authentication.configuration.AuthenticationConfiguration;
import org.springframework.security.config.annotation.method.configuration.EnableGlobalMethodSecurity;
import org.springframework.security.config.annotation.web.builders.HttpSecurity;
import org.springframework.security.config.annotation.web.configuration.EnableWebSecurity;
import org.springframework.security.config.annotation.web.configurers.AbstractHttpConfigurer;
import org.springframework.security.config.http.SessionCreationPolicy;
import org.springframework.security.crypto.bcrypt.BCryptPasswordEncoder;
import org.springframework.security.web.SecurityFilterChain;
import org.springframework.security.web.authentication.UsernamePasswordAuthenticationFilter;

@Slf4j
@EnableWebSecurity
@Configuration
@RequiredArgsConstructor
@EnableGlobalMethodSecurity(prePostEnabled = true) // 开启方法安全权限校验
public class SecurityConfiguration {

    private final JwtUtil jwtUtil; // 注入JwtUtil
    @Autowired
    private CustUserService custUserService;
    @Bean
    public BCryptPasswordEncoder passwordEncoder(){
         return new BCryptPasswordEncoder();
    }

    /**
     * 获取AuthenticationManager 登录验证的时候使用
     * @param authenticationConfiguration
     * @return
     * @throws Exception
     */
    @Bean
    public AuthenticationManager authenticationManager(AuthenticationConfiguration authenticationConfiguration) throws Exception {
        return authenticationConfiguration.getAuthenticationManager();
    }

    @Bean
    public SecurityFilterChain securityFilterChain(HttpSecurity http) throws Exception {
         http.authorizeHttpRequests(
                (authz)->authz
                        .antMatchers("/user/login").permitAll() // 允许匿名用户访问login用于登录
                        .antMatchers("/user/logout").permitAll() // 允许匿名用户访问logout用于登出
                        .antMatchers("/doc.html", "/webjars/**", "/v2/api-docs", "/swagger-resources/**").permitAll() // 允许匿名用户访问swagger
                        .antMatchers("/test").hasAuthority("test") // 拥有test权限的用户才能访问test接口
                        .anyRequest().authenticated()) // 其他请求必须经过身份验证
                .exceptionHandling(conf->conf // 异常处理
                        .authenticationEntryPoint((req, res, authException) -> { //认证异常
                            log.info("认证异常");
                            res.setContentType( "application/json;charset=utf-8" );
                            res.getWriter().write(new Gson().toJson(Result.error(401, authException.getMessage())));
                        })
                        .accessDeniedHandler((req, res, authException) -> { //权限异常
                            log.info("权限异常");
                            res.setContentType("application/json;charset=utf-8");
                            res.getWriter().write(new Gson().toJson(Result.error(403, authException.getMessage())));
                        })
                )
                .csrf(AbstractHttpConfigurer::disable) // 禁用csrf
                .sessionManagement(conf->conf.sessionCreationPolicy(SessionCreationPolicy.STATELESS)) // 禁用session
//                .addFilterBefore(jwtFilter, UsernamePasswordAuthenticationFilter.class)//指定过滤器
                .cors();
        return http.build();
    }
}
🎈编写登录成功后返回的带有token的实体类
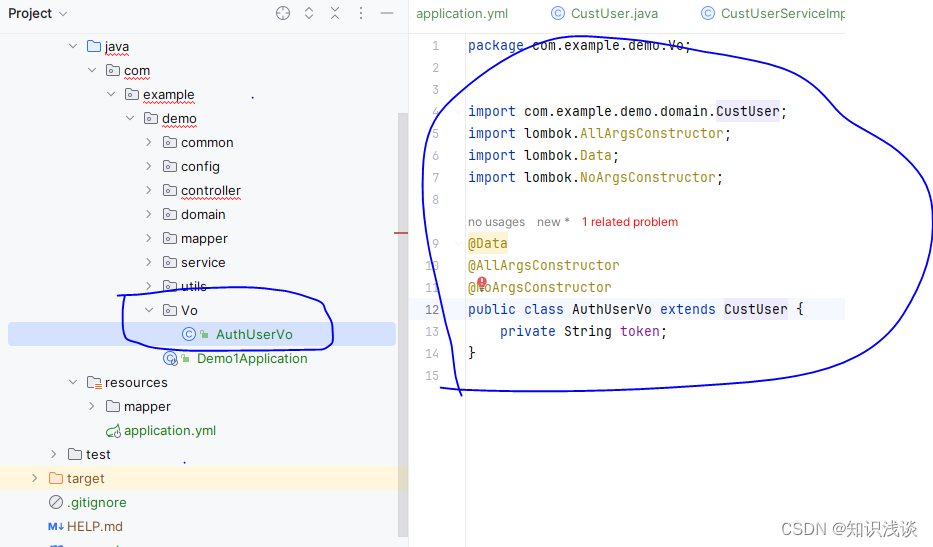
package com.example.demo.Vo;


import com.example.demo.domain.CustUser;
import lombok.AllArgsConstructor;
import lombok.Data;
import lombok.NoArgsConstructor;

@Data
@AllArgsConstructor
@NoArgsConstructor
public class AuthUserVo extends CustUser {
    private String token;
}
🎈编写用户登录退出接口
现在我们要实现的是编写登录接口实现用户登录返回token,上边的配置类放行了/user/login 用作登录,本次是编写后端登自定义登录模块,所以不使用SpringSecurity自带的表单登录。
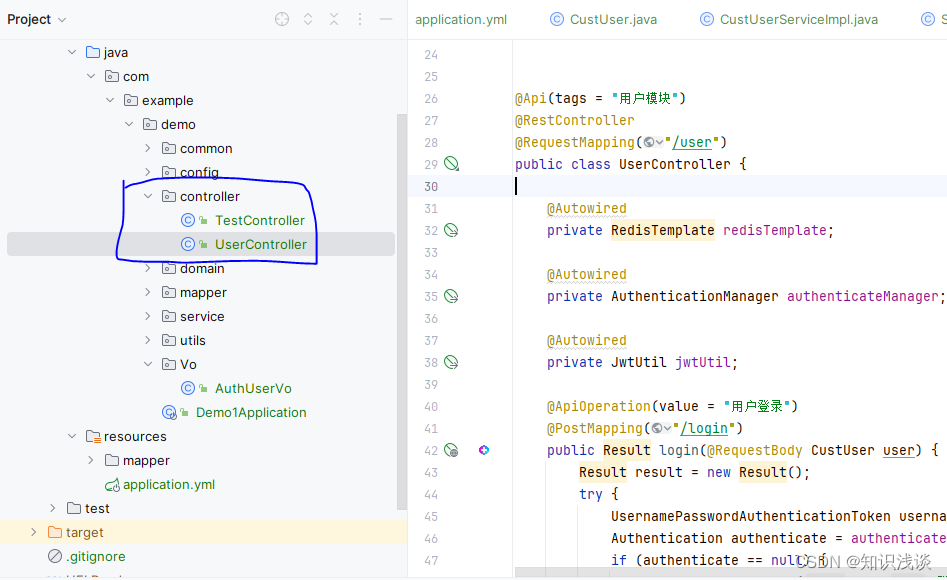
package com.example.demo.controller;
import com.auth0.jwt.interfaces.DecodedJWT;
import com.example.demo.Vo.AuthUserVo;
import com.example.demo.common.Vo.Result;
import com.example.demo.domain.CustUser;
import com.example.demo.utils.JwtUtil;
import io.swagger.annotations.Api;
import io.swagger.annotations.ApiOperation;
import org.springframework.beans.BeanUtils;
import org.springframework.beans.factory.annotation.Autowired;
import org.springframework.data.redis.core.RedisTemplate;
import org.springframework.security.authentication.AuthenticationManager;
import org.springframework.security.authentication.UsernamePasswordAuthenticationToken;
import org.springframework.security.core.Authentication;
import org.springframework.web.bind.annotation.*;
import javax.servlet.http.HttpServletRequest;
import java.util.concurrent.TimeUnit;
import static com.example.demo.common.constants.OtherConstants.AUTH_TOKEN;
import static com.example.demo.common.constants.OtherConstants.USER_PREFIX;


@Api(tags = "用户模块")
@RestController
@RequestMapping("/user")
public class UserController {
    @Autowired
    private RedisTemplate redisTemplate;
    @Autowired
    private AuthenticationManager authenticateManager;
    @Autowired
    private JwtUtil jwtUtil;
    @ApiOperation(value = "用户登录")
    @PostMapping("/login")
    public Result login(@RequestBody CustUser user) {
        Result result = new Result();
        try {
            UsernamePasswordAuthenticationToken usernamePasswordAuthenticationToken = new UsernamePasswordAuthenticationToken(user.getUsername(), user.getPassword());
            Authentication authenticate = authenticateManager.authenticate(usernamePasswordAuthenticationToken);
            if (authenticate == null) {
                return Result.error(401, "登录校验失败");
            } else {
                user = (CustUser) authenticate.getPrincipal();
                String token = jwtUtil.createJwt(user);//创建token
                AuthUserVo authUserVo = new AuthUserVo();
                BeanUtils.copyProperties(user, authUserVo);
                authUserVo.setToken(token);
    //            将token放在redis中
                redisTemplate.opsForValue().set(USER_PREFIX + String.valueOf(user.getId()),user,30, TimeUnit.MINUTES);
                return Result.success(authUserVo);
            }
        } catch (Exception e) {
            return result.error500("登陆失败");
        }
    }


    @ApiOperation(value = "用户退出")
    @GetMapping("/logout")
    public Result logout(HttpServletRequest req) {
        String token = req.getHeader(AUTH_TOKEN);
        if (token == null || "".equals(token)) {
            return Result.error(401, "token为空");
        } else {
            DecodedJWT decodedJWT = jwtUtil.resolveJwt(token);
            CustUser user = jwtUtil.toUser(decodedJWT);
            redisTemplate.delete(USER_PREFIX + String.valueOf(user.getId()));
            return Result.success("退出成功");
        }
    }
}
🎈登录接口测试
因为我们配置了swagger,所以我们直接在swagger测试登录,最后返回了token
swagger文档默认地址(上边的配置文件已经放行文档地址):http://localhost:8080/doc.html
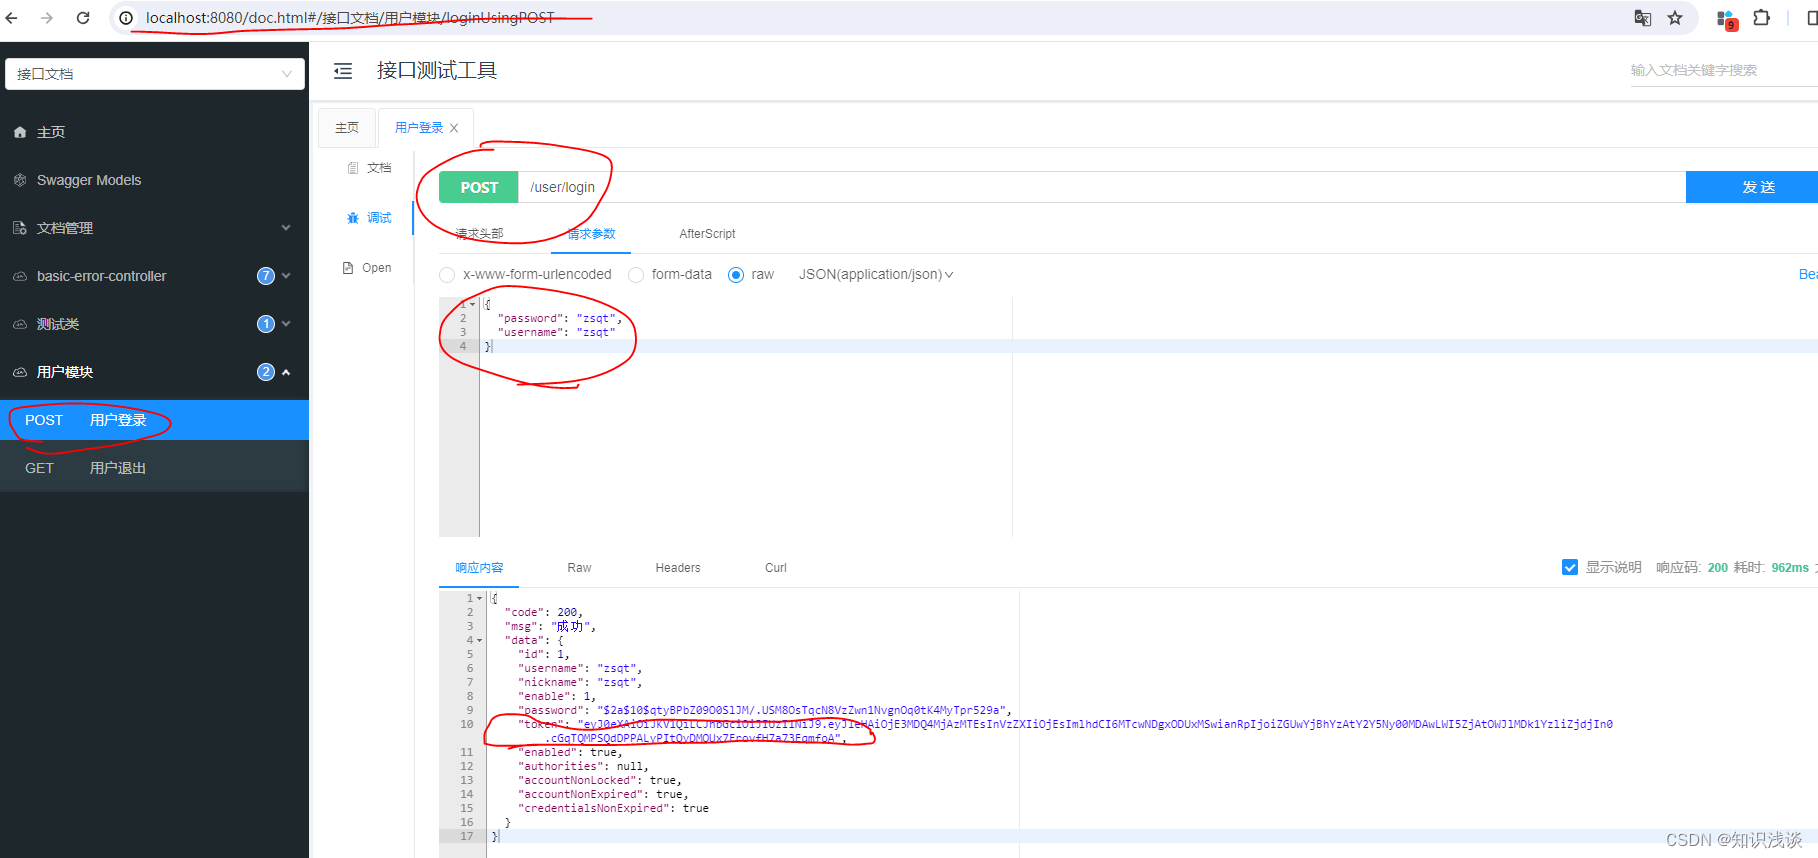
到这认证就已经好了,接下来就要进行授权了。
🍚总结
大功告成,撒花致谢🎆🎇🌟,关注我不迷路,带你起飞带你富。
Writted By 知识浅谈
原文地址:https://blog.csdn.net/qq_37699336/article/details/135442801
本文来自互联网用户投稿,该文观点仅代表作者本人,不代表本站立场。本站仅提供信息存储空间服务,不拥有所有权,不承担相关法律责任。
如若转载,请注明出处:http://www.7code.cn/show_53860.html
如若内容造成侵权/违法违规/事实不符,请联系代码007邮箱:suwngjj01@126.com进行投诉反馈,一经查实,立即删除!


