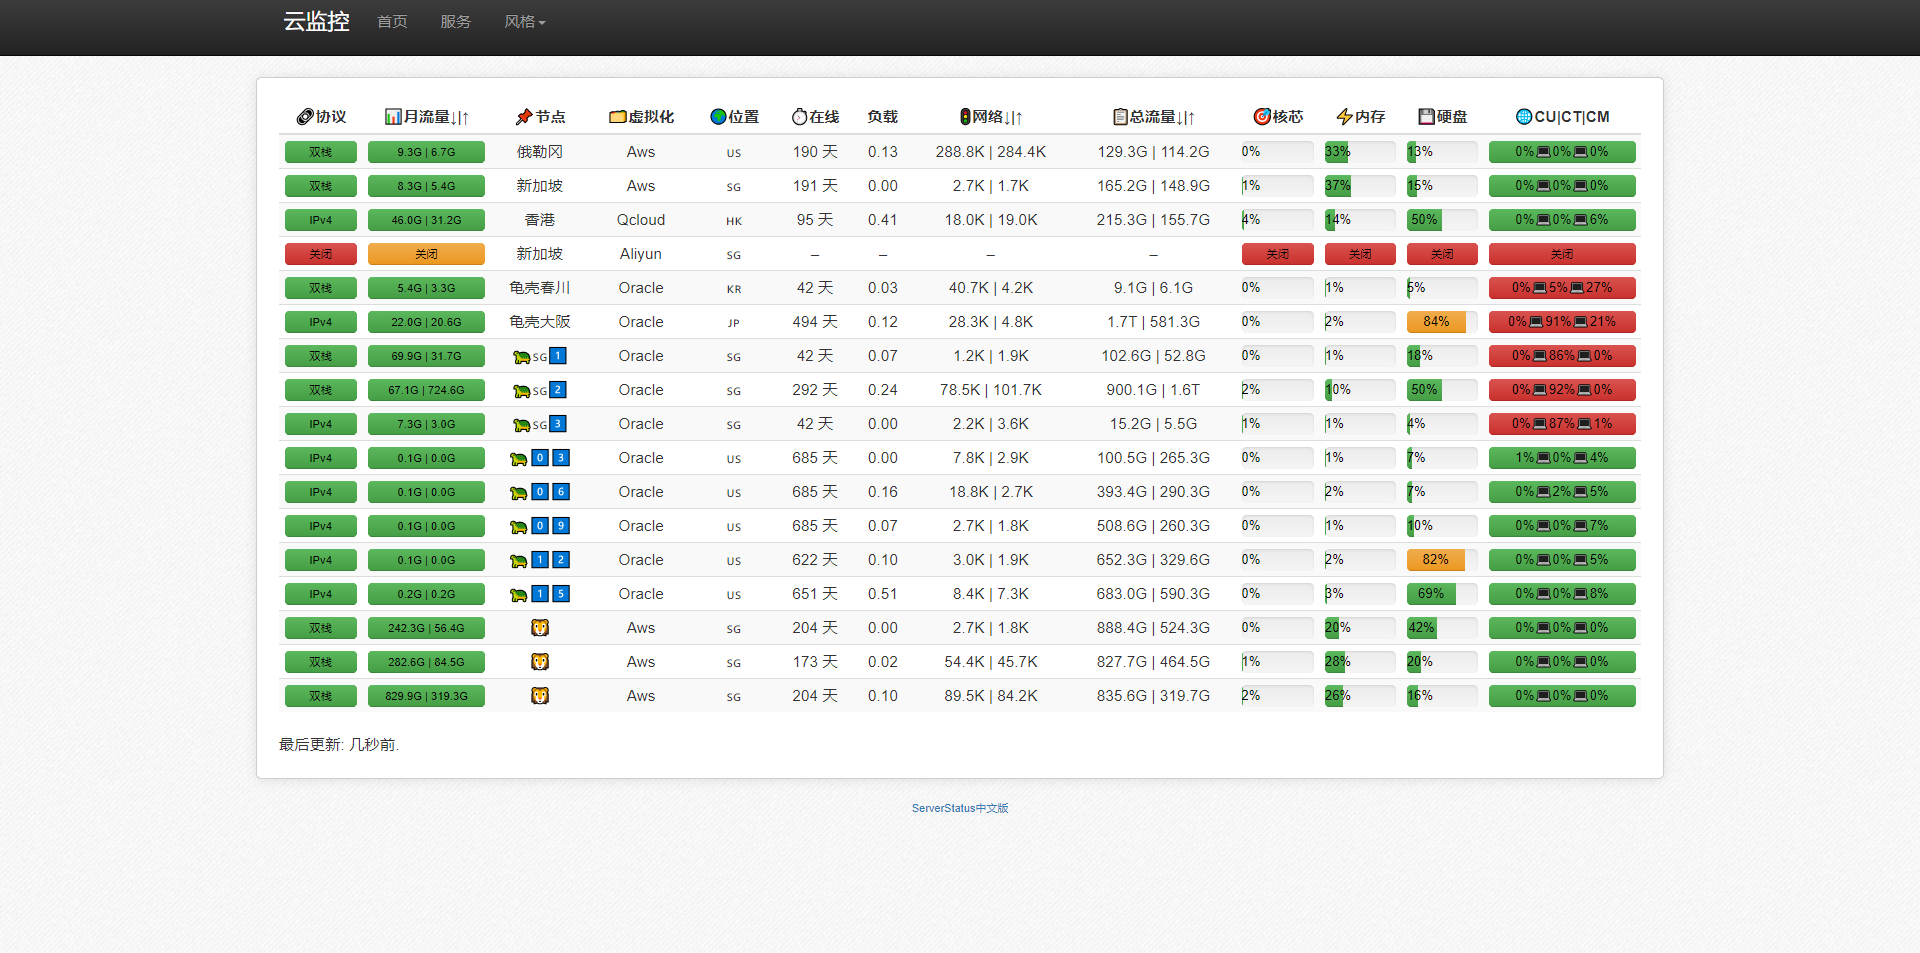
本文介绍: ServerStatus 是一个酷炫高逼格的云探针、云监控、服务器云监控、多服务器探针~。特性使用 Rust 完全重写 Server、Client,单个执行文件部署支持上下线和简单自定义规则告警 (Telegram、 Wechat、 Email、 Webhook)支持 http 协议上报,可以方便部署到各免费容器服务和配合 cf 等优化上报链路支持 vnstat 统计月流量,重启不丢流量数据支持 Railway 快速部署支持 Systemd 开机自启。
一、ServerStatus 介绍
GitHub:https://github.com/cppla/ServerStatus
ServerStatus 是一个酷炫高逼格的云探针、云监控、服务器云监控、多服务器探针~。
特性
- 使用 Rust 完全重写 Server、Client,单个执行文件部署
- 支持上下线和简单自定义规则告警 (Telegram、 Wechat、 Email、 Webhook)
- 支持 http 协议上报,可以方便部署到各免费容器服务和配合 cf 等优化上报链路
- 支持 vnstat 统计月流量,重启不丢流量数据
- 支持 Railway 快速部署
- 支持 Systemd 开机自启

二、检查宿主机系统版本
cat /etc/os-release
三、检查本地 Docker 环境
检查 Docker 服务状态
// 1) 低版本 Docker 安装
yum install docker -y

----
// < '推荐' >
// 2) 高版本 Docker 安装
curl -fsSL https://get.docker.com/ | sh

----
// 关闭防火墙
systemctl disable --now firewalld
setenforce 0

// 启用 Docker
systemctl enable --now docker
检查 Docker 配置信息
docker info
开启 IPv4 forwarding
echo "net.ipv4.ip_forward=1" >>  /etc/sysctl.conf
systemctl restart network
sysctl net.ipv4.ip_forward
四、安装 Docker-compose
下载 Docker-compose 二进制包
curl -L https://github.com/docker/compose/releases/download/v2.2.2/docker-compose-linux-x86_64 -o /usr/local/bin/docker-compose
给文件增加执行权限
chmod +x /usr/local/bin/docker-compose
检查 Docker-compose 版本
docker-compose -v
五、下载 ServerStatus 镜像
docker pull stilleshan/serverstatus
六、使用 Docker-cli 部署
mkdir /docker/ServerStatus/server -p && cd /docker/ServerStatus/server
( 省略 )
docker run -d --name=serverstatus --restart=always
  -p 8888:80
  -p 35601:35601
  -v /docker/ServerStatus/server/config.json:/ServerStatus/server/config.json
  stilleshan/serverstatus
七、下载 ServerStatus 安装文件
创建数据目录
mkdir /docker/ServerStatus/server -p && cd /docker/ServerStatus/server
下载安装文件
yum install git -y
git clone https://github.com/stilleshan/ServerStatus.git
[root@localhost ServerStatus]# ls
config.json  docker-compose.yml  Dockerfile  README.md  screenshot.jpg  status.sh  web
查看 Docker-compose.yaml 文件
[root@localhost ServerStatus]# vim docker-compose.yml
version: "3"
services:
  serverstatus:
    image: stilleshan/serverstatus
    container_name: serverstatus
    ports:
      - 8888:80
      - 35601:35601
    volumes:
      # - ./web:/usr/share/nginx/html
      - ./config.json:/ServerStatus/server/config.json
    environment:
      TZ: Asia/Shanghai
    restart: always
创建 ServerStatus 容器
docker-compose up -d
查看 ServerStatus 容器状态
docker ps

八、访问 ServerStatus 服务端

九、客户端安装
修改 status-client.py
[root@node01 ~] vim status-client.py
# -*- coding: utf-8 -*-

SERVER = "192.168.80.8"	# 填写服务器地址
PORT = 35601
USER = "admin" 			# 设置账号 ( 待会需要在服务端填写 )
PASSWORD = "admin"		# 设置密码 ( 待会需要在服务端填写 )
INTERVAL = 1 			# 更新间隔, 单位: 秒


import socket
import time
import string
import math
import re
import os
import json
import subprocess
import collections
import platform

def get_uptime():
    f = open('/proc/uptime', 'r')
    uptime = f.readline()
    f.close()
    uptime = uptime.split('.', 2)
    time = int(uptime[0])
    return int(time)

def get_memory():
    re_parser = re.compile(r'^(?P<key>S*):s*(?P<value>d*)s*kB')
    result = dict()
    for line in open('/proc/meminfo'):
        match = re_parser.match(line)
        if not match:
            continue;
        key, value = match.groups(['key', 'value'])
        result[key] = int(value)

    MemTotal = float(result['MemTotal'])
    MemFree = float(result['MemFree'])
    Cached = float(result['Cached'])
    MemUsed = MemTotal - (Cached + MemFree)
    SwapTotal = float(result['SwapTotal'])
    SwapFree = float(result['SwapFree'])
    return int(MemTotal), int(MemUsed), int(SwapTotal), int(SwapFree)

def get_hdd():
    p = subprocess.check_output(['df', '-Tlm', '--total', '-t', 'ext4', '-t', 'ext3', '-t', 'ext2', '-t', 'reiserfs', '-t', 'jfs', '-t', 'ntfs', '-t', 'fat32', '-t', 'btrfs', '-t', 'fuseblk', '-t', 'zfs', '-t', 'simfs', '-t', 'xfs']).decode("Utf-8")
    total = p.splitlines()[-1]
    used = total.split()[3]
    size = total.split()[2]
    return int(size), int(used)

def get_load():
    system = platform.linux_distribution()
    if system[0][:6] == "CentOS":
        if system[1][0] == "6":
            tmp_load = os.popen("netstat -anp |grep ESTABLISHED |grep tcp |grep '::ffff:' |awk '{print $5}' |awk -F ':' '{print $4}' |sort -u |grep -E -o '([0-9]{1,3}[.]){3}[0-9]{1,3}' |wc -l").read()
        else:
            tmp_load = os.popen("netstat -anp |grep ESTABLISHED |grep tcp6 |awk '{print $5}' |awk -F ':' '{print $1}' |sort -u |grep -E -o '([0-9]{1,3}[.]){3}[0-9]{1,3}' |wc -l").read()
    else:
        tmp_load = os.popen("netstat -anp |grep ESTABLISHED |grep tcp6 |awk '{print $5}' |awk -F ':' '{print $1}' |sort -u |grep -E -o '([0-9]{1,3}[.]){3}[0-9]{1,3}' |wc -l").read()

    return float(tmp_load)
#return os.getloadavg()[0]

def get_time():
    stat_file = file("/proc/stat", "r")
    time_list = stat_file.readline().split(' ')[2:6]
    stat_file.close()
    for i in range(len(time_list))  :
        time_list[i] = int(time_list[i])
    return time_list
def delta_time():
    x = get_time()
    time.sleep(INTERVAL)
    y = get_time()
    for i in range(len(x)):
        y[i]-=x[i]
    return y
def get_cpu():
    t = delta_time()
    st = sum(t)
    if st == 0:
        st = 1
    result = 100-(t[len(t)-1]*100.00/st)
    return round(result)

class Traffic:
    def __init__(self):
        self.rx = collections.deque(maxlen=10)
        self.tx = collections.deque(maxlen=10)
    def get(self):
        f = open('/proc/net/dev', 'r')
        net_dev = f.readlines()
        f.close()
        avgrx = 0; avgtx = 0

        for dev in net_dev[2:]:
            dev = dev.split(':')
            if dev[0].strip() == "lo" or dev[0].find("tun") > -1:
                continue
            dev = dev[1].split()
            avgrx += int(dev[0])
            avgtx += int(dev[8])

		self.rx.append(avgrx)
		self.tx.append(avgtx)
		avgrx = 0; avgtx = 0

		l = len(self.rx)
		for x in range(l - 1):
			avgrx += self.rx[x+1] - self.rx[x]
			avgtx += self.tx[x+1] - self.tx[x]

		avgrx = int(avgrx / l / INTERVAL)
		avgtx = int(avgtx / l / INTERVAL)

		return avgrx, avgtx

def liuliang():
    NET_IN = 0
    NET_OUT = 0
    with open('/proc/net/dev') as f:
        for line in f.readlines():
            netinfo = re.findall('([^s]+):[s]{0,}(d+)s+(d+)s+(d+)s+(d+)s+(d+)s+(d+)s+(d+)s+(d+)s+(d+)s+(d+)s+(d+)', line)
            if netinfo:
                if netinfo[0][0] == 'lo' or 'tun' in netinfo[0][0] or netinfo[0][1]=='0' or netinfo[0][9]=='0':
                    continue
                else:
                    NET_IN += int(netinfo[0][1])
                    NET_OUT += int(netinfo[0][9])
    return NET_IN, NET_OUT

def get_network(ip_version):
	if(ip_version == 4):
		HOST = "192.168.80.18"		# 客户端地址
	elif(ip_version == 6):
		HOST = "ipv6.google.com"
	try:
		s = socket.create_connection((HOST, 80), 2)
		return True
	except:
		pass
	return False

if __name__ == '__main__':
	socket.setdefaulttimeout(30)
	while 1:
		try:
			print("Connecting...")
			s = socket.socket(socket.AF_INET, socket.SOCK_STREAM)
			s.connect((SERVER, PORT))
			data = s.recv(1024)
			if data.find("Authentication required") > -1:
				s.send(USER + ':' + PASSWORD + 'n')
				data = s.recv(1024)
				if data.find("Authentication successful") < 0:
					print(data)
					raise socket.error
			else:
				print(data)
				raise socket.error

			print(data)
			data = s.recv(1024)
			print(data)

			timer = 0
			check_ip = 0
			if data.find("IPv4") > -1:
				check_ip = 6
			elif data.find("IPv6") > -1:
				check_ip = 4
			else:
				print(data)
				raise socket.error

			traffic = Traffic()
			traffic.get()
			while 1:
				CPU = get_cpu()
				NetRx, NetTx = traffic.get()
				NET_IN, NET_OUT = liuliang()
				Uptime = get_uptime()
				Load = get_load()
				MemoryTotal, MemoryUsed, SwapTotal, SwapFree = get_memory()
				HDDTotal, HDDUsed = get_hdd()

				array = {}
				if not timer:
					array['online' + str(check_ip)] = get_network(check_ip)
					timer = 10
				else:
					timer -= 1*INTERVAL

				array['uptime'] = Uptime
				array['load'] = Load
				array['memory_total'] = MemoryTotal
				array['memory_used'] = MemoryUsed
				array['swap_total'] = SwapTotal
				array['swap_used'] = SwapTotal - SwapFree
				array['hdd_total'] = HDDTotal
				array['hdd_used'] = HDDUsed
				array['cpu'] = CPU
				array['network_rx'] = NetRx
				array['network_tx'] = NetTx
				array['network_in'] = NET_IN
				array['network_out'] = NET_OUT

				s.send("update " + json.dumps(array) + "n")
		except KeyboardInterrupt:
			raise
		except socket.error:
			print("Disconnected...")
			# keep on trying after a disconnect
			s.close()
			time.sleep(3)
		except Exception as e:
			print("Caught Exception:", e)
			s.close()
			time.sleep(3)
在客户端运行 status-client.py 脚本
[root@node01 ~] python status-client.py &
[1] 105194
服务端配置
修改 config.json 文件,必须配置项为 username/password/host
[root@server ServerStatus] vim config.json
{"servers":
 [
  {
   "username": "admin",					# 客户端账号
   "password": "admin",					# 客户端密码
   "name": "腾讯云-上海",
   "type": "KVM",
   "host": "192.168.80.18",			# 填写客户端 IP 地址
   "location": "CN",
   "disabled": false
  },
  {
   "username": "2",
   "password": "xxx",
   "name": "阿里云-香港",
   "type": "KVM",
   "host": "None",
   "location": "HK",
   "disabled": false
  },
  {
   "username": "3",
   "password": "xxxx",
   "name": "谷歌云-日本",
   "type": "KVM",
   "host": "None",
   "location": "JP",
   "disabled": false
  }
 ]
}
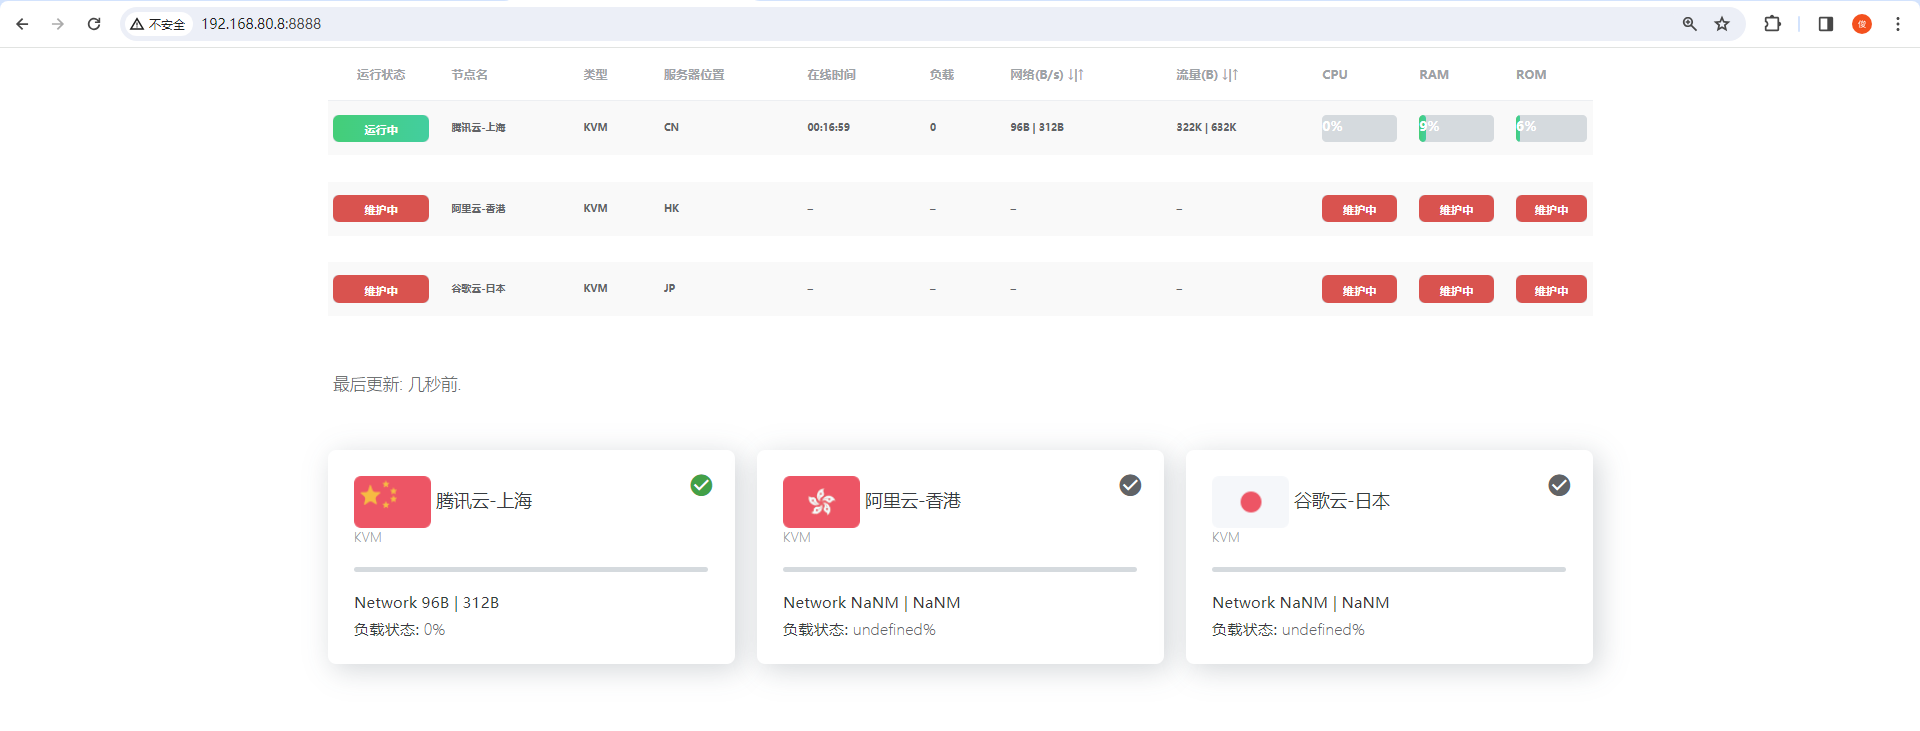
在 Web 监控页查看效果

大功告成~
原文地址:https://blog.csdn.net/weixin_74962223/article/details/135778203
本文来自互联网用户投稿,该文观点仅代表作者本人,不代表本站立场。本站仅提供信息存储空间服务,不拥有所有权,不承担相关法律责任。
如若转载,请注明出处:http://www.7code.cn/show_60917.html
如若内容造成侵权/违法违规/事实不符,请联系代码007邮箱:suwngjj01@126.com进行投诉反馈,一经查实,立即删除!
声明:本站所有文章,如无特殊说明或标注,均为本站原创发布。任何个人或组织,在未征得本站同意时,禁止复制、盗用、采集、发布本站内容到任何网站、书籍等各类媒体平台。如若本站内容侵犯了原著者的合法权益,可联系我们进行处理。


