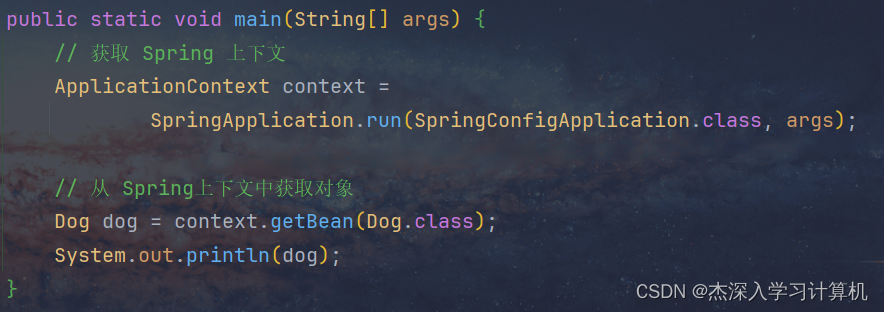
1. 获取Bean
XML文件:
<bean id="helloworld" class="org.kkk.spring6.bean.HelloWorld"></bean>
1.1 根据id获取
@Test
public void testHelloWorld(){
    //加载XML文件
	ApplicationContext context = new ClassPathXmlApplicationContext("beans.xml");
	//根据id获取Bean对象
    HelloWorld bean = context.getBean("helloworld");
    //调用该对象的方法
    bean.sayHello();
}
1.2 根据类型获取
@Test
public void testHelloWorld(){
    //加载XML文件
	ApplicationContext context = new ClassPathXmlApplicationContext("beans.xml");
	//根据类型获取Bean对象
    HelloWorld bean = context.getBean(helloworld.class);
    //调用该对象的方法
    bean.sayHello();
}
1.3 根据id和类型获取
@Test
public void testHelloWorld(){
    //加载XML文件
	ApplicationContext context = new ClassPathXmlApplicationContext("beans.xml");
	//根据类型获取Bean对象
    HelloWorld bean = context.getBean("helloworld", helloworld.class);
    //调用该对象的方法
    bean.sayHello();
}
注意:
-
当根据类型获取bean时,要求IOC容器中指定类型的bean有且只能有一个。
例如以下XML文件,当IOC容器中一共配置了两个,根据类型获取时会抛出异常。
<bean id="helloworldOne" class="org.kkk.spring6.bean.HelloWorld"></bean>
<bean id="helloworldTwo" class="org.kkk.spring6.bean.HelloWorld"></bean>
-
根据类型来获取bean时,在满足bean唯一性的前提下,其实只是看:『对象 instanceof 指定的类型』的返回结果,只要返回的是true就可以认定为和类型匹配,能够获取到。
因此,如果一个接口有多个实现类,这些实现类都配置了 bean,根据接口类型就不可以获取到 bean ,因为不满足唯一性。而如果这个接口只有一个实现类,那就可以获取到。
2. 依赖注入
个人理解:依赖注入就是为对象的属性赋值
2.1 setter注入
通过组件类的setXxx()方法给组件对象设置属性
①创建学生类Student
package org.kkk.spring6.bean;

public class Student {

    private Integer id;

    private String name;

    private Integer age;

    private String sex;

    public Student() {
    }

    public Integer getId() {
        return id;
    }

    public void setId(Integer id) {
        this.id = id;
    }

    public String getName() {
        return name;
    }

    public void setName(String name) {
        this.name = name;
    }

    public Integer getAge() {
        return age;
    }

    public void setAge(Integer age) {
        this.age = age;
    }

    public String getSex() {
        return sex;
    }

    public void setSex(String sex) {
        this.sex = sex;
    }

    @Override
    public String toString() {
        return "Student{" +
                "id=" + id +
                ", name='" + name + ''' +
                ", age=" + age +
                ", sex='" + sex + ''' +
                '}';
    }

}
②配置bean时为属性赋值
spring-di.xml
<bean id="student" class="org.kkk.spring6.bean.Student">
    <!-- property标签:通过组件类的setXxx()方法给组件对象设置属性 -->
    <!-- name属性:指定属性名(这个属性名是getXxx()、setXxx()方法定义的,和成员变量无关) -->
    <!-- value属性:指定属性值 -->
    <property name="id" value="1001"></property>
    <property name="name" value="张三"></property>
    <property name="age" value="23"></property>
    <property name="sex" value="男"></property>
</bean>
③测试
@Test
public void testDIBySet(){
    ApplicationContext context= new ClassPathXmlApplicationContext("spring-di.xml");
    Student student = context.getBean("student", Student.class);
    System.out.println(student);
}
2.2 构造器注入
通过组件类的有参构造方法给组件对象设置属性
①在Student类中添加有参构造
public Student(Integer id, String name, Integer age, String sex) {
    this.id = id;
    this.name = name;
    this.age = age;
    this.sex = sex;
}
②配置bean
spring-di.xml
<bean id="student" class="org.kkk.spring6.bean.Student">
    <constructor-arg value="1002"></constructor-arg>
    <constructor-arg value="李四"></constructor-arg>
    <constructor-arg value="33"></constructor-arg>
    <constructor-arg value="女"></constructor-arg>
</bean>
注意:
constructor-arg标签还有两个属性可以进一步描述构造器参数:
- index属性:指定参数所在位置的索引(从0开始)
- name属性:指定参数名
③测试
@Test
public void testDIByConstructor(){
    ApplicationContext context = new ClassPathXmlApplicationContext("spring-di.xml");
    Student student = context.getBean("student", Student.class);
    System.out.println(student);
}
2.3 特殊值处理
在为属性进行赋值时,可能会出现一些特殊情况要特殊处理。
①null值
<property name="name">
    <null />
</property>
注意:
<property name="name" value="null"></property>以上写法,为name所赋的值是字符串null
②xml实体
<!-- 小于号在XML文档中用来定义标签的开始,不能随便使用 -->
<!-- 解决方案一:使用XML实体来代替 -->
<property name="expression" value="a < b"/>
③CDATA节
<property name="expression">
    <!-- 解决方案二:使用CDATA节 -->
    <!-- CDATA中的C代表Character,是文本、字符的含义,CDATA就表示纯文本数据 -->
    <!-- XML解析器看到CDATA节就知道这里是纯文本,就不会当作XML标签或属性来解析 -->
    <!-- 所以CDATA节中写什么符号都随意 -->
    <value><![CDATA[a < b]]></value>
</property>
2.4 为对象类型属性赋值
当某一个类存在类型为另外一个类的属性时,就不能按照上述一般情况对这个属性赋值。例如,现在有学生类和班级类,为了表示学生和班级的关系,学生类中有一个班级类的属性。
代码表示如下:
班级类Clazz
package org.kkk.spring6.bean

public class Clazz {

    private Integer clazzId;

    private String clazzName;

    public Integer getClazzId() {
        return clazzId;
    }

    public void setClazzId(Integer clazzId) {
        this.clazzId = clazzId;
    }

    public String getClazzName() {
        return clazzName;
    }

    public void setClazzName(String clazzName) {
        this.clazzName = clazzName;
    }

    @Override
    public String toString() {
        return "Clazz{" +
                "clazzId=" + clazzId +
                ", clazzName='" + clazzName + ''' +
                '}';
    }

    public Clazz() {
    }

    public Clazz(Integer clazzId, String clazzName) {
        this.clazzId = clazzId;
        this.clazzName = clazzName;
    }
}
Student类
在Student类中添加以下代码:
private Clazz clazz;

public Clazz getClazz() {
	return clazz;
}

public void setClazz(Clazz clazz) {
	this.clazz = clazz;
}
可以看到,学生类中有一个属性为clazz,其类型为班级类。我们对clazz进行属性赋值,有以下几种方法。
①外部bean
配置Clazz类型的bean:
<bean id="clazz" class="org.kkk.spring6.bean.Clazz">
    <property name="clazzId" value="1001"></property>
    <property name="clazzName" value="c++开发培训班"></property>
</bean>
为Student中的clazz属性赋值:
<bean id="student" class="org.kkk.spring6.bean.Student">
    <property name="id" value="1004"></property>
    <property name="name" value="赵六"></property>
    <property name="age" value="26"></property>
    <property name="sex" value="女"></property>
    <!-- ref属性:引用IOC容器中某个bean的id,将所对应的bean为属性赋值 -->
    <property name="clazz" ref="clazz"></property>
</bean>
如果错把ref属性写成了value属性,会抛出异常: Caused by: java.lang.IllegalStateException: Cannot convert value of type ‘java.lang.String’ to required type ‘org.kkk.spring6.bean.Clazz’ for property ‘clazz’: no matching editors or conversion strategy found
意思是不能把String类型转换成我们要的Clazz类型,说明我们使用value属性时,Spring只把这个属性看做一个普通的字符串,不会认为这是一个bean的id,更不会根据它去找到bean来赋值
② 内部bean
<bean id="student" class="org.kkk.spring6.bean.Student">
    <property name="id" value="1004"></property>
    <property name="name" value="赵六"></property>
    <property name="age" value="26"></property>
    <property name="sex" value="女"></property>
    <property name="clazz">
        <!-- 在一个bean中再声明一个bean就是内部bean -->
        <!-- 内部bean只能用于给属性赋值,不能在外部通过IOC容器获取,因此可以省略id属性 -->
        <bean id="clazzInner" class="org.kkk.spring6.bean.Clazz">
            <property name="clazzId" value="1001"></property>
            <property name="clazzName" value="c++开发培训班"></property>
        </bean>
    </property>
</bean>
③ 级联属性赋值
<bean id="student" class="org.kkk.spring6.bean.Student">
    <property name="id" value="1004"></property>
    <property name="name" value="赵六"></property>
    <property name="age" value="26"></property>
    <property name="sex" value="女"></property>
    <property name="clazz" ref="clazzOne"></property>
    <property name="clazz.clazzId" value="1001"></property>
    <property name="clazz.clazzName" value="c++开发培训班"></property>
</bean>
2.5 为数组类型属性赋值
①修改Student类
在Student类中添加以下代码:
private String[] hobbies;

public String[] getHobbies() {
    return hobbies;
}

public void setHobbies(String[] hobbies) {
    this.hobbies = hobbies;
}
②配置bean
<bean id="student" class="org.kkk.spring.bean6.Student">
    <property name="id" value="1004"></property>
    <property name="name" value="赵六"></property>
    <property name="age" value="26"></property>
    <property name="sex" value="女"></property>
    <!-- ref属性:引用IOC容器中某个bean的id,将所对应的bean为属性赋值 -->
    <property name="clazz" ref="clazz"></property>
    <property name="hobbies">
        <array>
            <value>吃饭</value>
            <value>睡觉</value>
            <value>写代码</value>
        </array>
    </property>
</bean>
2.6 为集合类型属性赋值
①为List集合类型属性赋值
在Clazz类中添加以下代码:
private List<Student> students;

public List<Student> getStudents() {
    return students;
}

public void setStudents(List<Student> students) {
    this.students = students;
}
配置bean:
<bean id="clazz" class="org.kkk.spring6.bean.Clazz">
    <property name="clazzId" value="1002"></property>
    <property name="clazzName" value="Java开发培训班"></property>
    <property name="students">
        <list>
            <ref bean="studentOne"></ref>
            <ref bean="studentTwo"></ref>
            <ref bean="studentThree"></ref>
        </list>
    </property>
</bean>
若为Set集合类型属性赋值,只需要将其中的list标签改为set标签即可
②为Map集合类型属性赋值
创建教师类Teacher:
package org.kkk.spring6.bean;
public class Teacher {

    private Integer teacherId;

    private String teacherName;

    public Integer getTeacherId() {
        return teacherId;
    }

    public void setTeacherId(Integer teacherId) {
        this.teacherId = teacherId;
    }

    public String getTeacherName() {
        return teacherName;
    }

    public void setTeacherName(String teacherName) {
        this.teacherName = teacherName;
    }

    public Teacher(Integer teacherId, String teacherName) {
        this.teacherId = teacherId;
        this.teacherName = teacherName;
    }

    public Teacher() {

    }

    @Override
    public String toString() {
        return "Teacher{" +
                "teacherId=" + teacherId +
                ", teacherName='" + teacherName + ''' +
                '}';
    }
}
在Student类中添加以下代码:
private Map<String, Teacher> teacherMap;

public Map<String, Teacher> getTeacherMap() {
    return teacherMap;
}

public void setTeacherMap(Map<String, Teacher> teacherMap) {
    this.teacherMap = teacherMap;
}
配置bean:
<bean id="teacherOne" class="org.kkk.spring6.bean.Teacher">
    <property name="teacherId" value="1005"></property>
    <property name="teacherName" value="大宝"></property>
</bean>

<bean id="teacherTwo" class="org.kkk.spring6.bean.Teacher">
    <property name="teacherId" value="1006"></property>
    <property name="teacherName" value="二宝"></property>
</bean>

<bean id="studentFour" class="org.kkk.spring6.bean.Student">
    <property name="id" value="1004"></property>
    <property name="name" value="赵六"></property>
    <property name="age" value="26"></property>
    <property name="sex" value="女"></property>
    <!-- ref属性:引用IOC容器中某个bean的id,将所对应的bean为属性赋值 -->
    <property name="clazz" ref="clazzOne"></property>
    <property name="hobbies">
        <array>
            <value>吃饭</value>
            <value>睡觉</value>
            <value>写代码</value>
        </array>
    </property>
    <property name="teacherMap">
        <map>
            <entry>
                <key>
                    <value>1005</value>
                </key>
                <ref bean="teacherOne"></ref>
            </entry>
            <entry>
                <key>
                    <value>1006</value>
                </key>
                <ref bean="teacherTwo"></ref>
            </entry>
        </map>
    </property>
</bean>
③引用集合类型的bean
<!--list集合类型的bean-->
<util:list id="students">
    <ref bean="studentOne"></ref>
    <ref bean="studentTwo"></ref>
    <ref bean="studentThree"></ref>
</util:list>
<!--map集合类型的bean-->
<util:map id="teacherMap">
    <entry>
        <key>
            <value>1005</value>
        </key>
        <ref bean="teacherOne"></ref>
    </entry>
    <entry>
        <key>
            <value>1006</value>
        </key>
        <ref bean="teacherTwo"></ref>
    </entry>
</util:map>
<bean id="clazzTwo" class="org.kkk.spring6.bean.Clazz">
    <property name="clazzId" value="1002"></property>
    <property name="clazzName" value="Java开发培训班"></property>
    <property name="students" ref="students"></property>
</bean>
<bean id="studentFour" class="org.kkk.spring6.bean.Student">
    <property name="id" value="1004"></property>
    <property name="name" value="赵六"></property>
    <property name="age" value="26"></property>
    <property name="sex" value="女"></property>
    <!-- ref属性:引用IOC容器中某个bean的id,将所对应的bean为属性赋值 -->
    <property name="clazz" ref="clazzOne"></property>
    <property name="hobbies">
        <array>
            <value>吃饭</value>
            <value>睡觉</value>
            <value>写代码</value>
        </array>
    </property>
    <property name="teacherMap" ref="teacherMap"></property>
</bean>
使用util:list、util:map标签必须引入相应的命名空间
<?xml version="1.0" encoding="UTF-8"?>
<beans xmlns="http://www.springframework.org/schema/beans"
    xmlns:xsi="http://www.w3.org/2001/XMLSchema-instance"
    xmlns:util="http://www.springframework.org/schema/util"
    xsi:schemaLocation="http://www.springframework.org/schema/util
    http://www.springframework.org/schema/util/spring-util.xsd
    http://www.springframework.org/schema/beans
    http://www.springframework.org/schema/beans/spring-beans.xsd">
2.7 p命名空间
引入p命名空间
<?xml version="1.0" encoding="UTF-8"?>
<beans xmlns="http://www.springframework.org/schema/beans"
       xmlns:xsi="http://www.w3.org/2001/XMLSchema-instance"
       xmlns:util="http://www.springframework.org/schema/util"
       xmlns:p="http://www.springframework.org/schema/p"
       xsi:schemaLocation="http://www.springframework.org/schema/util
       http://www.springframework.org/schema/util/spring-util.xsd
       http://www.springframework.org/schema/beans
       http://www.springframework.org/schema/beans/spring-beans.xsd">
引入p命名空间后,可以通过以下方式为bean的各个属性赋值
<bean id="student" class="org.kkk.spring6.bean.Student"
    p:id="1006" p:name="小明" p:clazz-ref="clazzOne" p:teacherMap-ref="teacherMap"></bean>
2.8 引入外部属性文件
①加入依赖
 <!-- MySQL驱动 -->
<dependency>
    <groupId>mysql</groupId>
    <artifactId>mysql-connector-java</artifactId>
    <version>8.0.30</version>
</dependency>

<!-- 数据源 -->
<dependency>
    <groupId>com.alibaba</groupId>
    <artifactId>druid</artifactId>
    <version>1.2.15</version>
</dependency>
②创建外部属性文件
文件jdbc.properties保存数据库连接信息
jdbc.user=root
jdbc.password=root
jdbc.url=jdbc:mysql://localhost:3306/ssm?serverTimezone=UTC
jdbc.driver=com.mysql.cj.jdbc.Driver
③引入属性文件
引入context 名称空间
<?xml version="1.0" encoding="UTF-8"?>
<beans xmlns="http://www.springframework.org/schema/beans"
       xmlns:xsi="http://www.w3.org/2001/XMLSchema-instance"
       xmlns:context="http://www.springframework.org/schema/context"
       xsi:schemaLocation="http://www.springframework.org/schema/beans
       http://www.springframework.org/schema/beans/spring-beans.xsd
       http://www.springframework.org/schema/context
       http://www.springframework.org/schema/context/spring-context.xsd">

</beans>
<!-- 引入外部属性文件 -->
<context:property-placeholder location="classpath:jdbc.properties"/>
注意:在使用 context:property-placeholder 元素加载外包配置文件功能前,首先需要在 XML 配置的一级标签 中添加 context 相关的约束。
④配置bean
<bean id="druidDataSource" class="com.alibaba.druid.pool.DruidDataSource">
    <property name="url" value="${jdbc.url}"/>
    <property name="driverClassName" value="${jdbc.driver}"/>
    <property name="username" value="${jdbc.user}"/>
    <property name="password" value="${jdbc.password}"/>
</bean>
⑤测试
@Test
public void testDataSource() throws SQLException {
    ApplicationContext context = new ClassPathXmlApplicationContext("spring-datasource.xml");
    DataSource dataSource = context.getBean(DataSource.class);
    Connection connection = dataSource.getConnection();
    System.out.println(connection);
}
2.9 bean的作用域
①概念
在Spring中可以通过配置bean标签的scope属性来指定bean的作用域范围,各取值含义参加下表:
| 取值 | 含义 | 创建对象的时机 |
|---|---|---|
| singleton(默认) | 在IOC容器中,这个bean的对象始终为单实例 | IOC容器初始化时 |
| prototype | 这个bean在IOC容器中有多个实例 | 获取bean时 |
如果是在WebApplicationContext环境下还会有另外几个作用域(但不常用):
| 取值 | 含义 |
|---|---|
| request | 在一个请求范围内有效 |
| session | 在一个会话范围内有效 |
②创建类User
package org.kkk.spring6.bean;
public class User {

    private Integer id;

    private String username;

    private String password;

    private Integer age;

    public User() {
    }

    public User(Integer id, String username, String password, Integer age) {
        this.id = id;
        this.username = username;
        this.password = password;
        this.age = age;
    }

    public Integer getId() {
        return id;
    }

    public void setId(Integer id) {
        this.id = id;
    }

    public String getUsername() {
        return username;
    }

    public void setUsername(String username) {
        this.username = username;
    }

    public String getPassword() {
        return password;
    }

    public void setPassword(String password) {
        this.password = password;
    }

    public Integer getAge() {
        return age;
    }

    public void setAge(Integer age) {
        this.age = age;
    }

    @Override
    public String toString() {
        return "User{" +
                "id=" + id +
                ", username='" + username + ''' +
                ", password='" + password + ''' +
                ", age=" + age +
                '}';
    }
}
③配置bean
<!-- scope属性:取值singleton(默认值),bean在IOC容器中只有一个实例,IOC容器初始化时创建对象 -->
<!-- scope属性:取值prototype,bean在IOC容器中可以有多个实例,getBean()时创建对象 -->
<bean class="org.kkk.spring6.bean.User" scope="prototype"></bean>
④测试
@Test
public void testBeanScope(){
    ApplicationContext context = new ClassPathXmlApplicationContext("spring-scope.xml");
    User user1 = context.getBean(User.class);
    User user2 = context.getBean(User.class);
    System.out.println(user1==user2);
}
如果将scope属性设置为singleton(单例)时,那么user1与user2的地址相同,两者实质上是同一个实例对象。如果scope属性为prototype(多例),那么user1与user2的地址不同。
2.10 基于xml自动装配
自动装配:
根据指定的策略,在IOC容器中匹配某一个bean,自动为指定的bean中所依赖的类类型或接口类型属性赋值
①场景模拟
创建类UserController
package org.kkk.spring6.autowire.controller
public class UserController {

    private UserService userService;

    public void setUserService(UserService userService) {
        this.userService = userService;
    }

    public void saveUser(){
        userService.saveUser();
    }

}
创建接口UserService
package org.kkk.spring6.autowire.service
public interface UserService {

    void saveUser();

}
创建类UserServiceImpl实现接口UserService
package org.kkk.spring6.autowire.service.impl
public class UserServiceImpl implements UserService {

    private UserDao userDao;

    public void setUserDao(UserDao userDao) {
        this.userDao = userDao;
    }

    @Override
    public void saveUser() {
        userDao.saveUser();
    }

}
创建接口UserDao
package org.kkk.spring6.autowire.dao
public interface UserDao {

    void saveUser();

}
创建类UserDaoImpl实现接口UserDao
package org.kkk.spring6.autowire.dao.impl
public class UserDaoImpl implements UserDao {

    @Override
    public void saveUser() {
        System.out.println("保存成功");
    }

}
②配置bean
使用bean标签的autowire属性设置自动装配效果
自动装配方式:byType
byType:根据类型匹配IOC容器中的某个兼容类型的bean,为属性自动赋值
若在IOC中,没有任何一个兼容类型的bean能够为属性赋值,则该属性不装配,即值为默认值null
若在IOC中,有多个兼容类型的bean能够为属性赋值,则抛出异常NoUniqueBeanDefinitionException
<bean id="userController" class="org.kkk.spring6.autowire.controller.UserController" autowire="byType"></bean>

<bean id="userService" class="org.kkk.spring6.autowire.service.impl.UserServiceImpl" autowire="byType"></bean>

<bean id="userDao" class="org.kkk.spring6.autowire.dao.impl.UserDaoImpl"></bean>
自动装配方式:byName
byName:将自动装配的属性的属性名,作为bean的id在IOC容器中匹配相对应的bean进行赋值
<bean id="userController" class="org.kkk.spring6.autowire.controller.UserController" autowire="byName"></bean>

<bean id="userService" class="org.kkk.spring6.autowire.service.impl.UserServiceImpl" autowire="byName"></bean>
<bean id="userServiceImpl" class="org.kkk.spring6.autowire.service.impl.UserServiceImpl" autowire="byName"></bean>

<bean id="userDao" class="org.kkk.spring6.autowire.dao.impl.UserDaoImpl"></bean>
<bean id="userDaoImpl" class="org.kkk.spring6.autowire.dao.impl.UserDaoImpl"></bean>
③测试
@Test
public void testAutoWireByXML(){
    ApplicationContext context = new ClassPathXmlApplicationContext("autowire-xml.xml");
    UserController userController = context.getBean(UserController.class);
    userController.saveUser();
}
原文地址:https://blog.csdn.net/Kaiser__/article/details/135820819
本文来自互联网用户投稿,该文观点仅代表作者本人,不代表本站立场。本站仅提供信息存储空间服务,不拥有所有权,不承担相关法律责任。
如若转载,请注明出处:http://www.7code.cn/show_61733.html
如若内容造成侵权/违法违规/事实不符,请联系代码007邮箱:suwngjj01@126.com进行投诉反馈,一经查实,立即删除!


