本文介绍: 继续上面两篇博客(后台需添加了跨域配置),后台接口已经写好,前端vue使用element–plus,axios实现数据交互后台跨域配置,新建一个文件CorsConfiguration:import org.springframework.context.annotation.Configuration;import org.springframework.web.servlet.config.annotation.CorsRegistry;import org.springfra…
继续上面两篇博客(后台需添加了跨域配置),后台接口已经写好,前端vue使用element–plus,axios实现数据交互
后台跨域配置,新建一个文件CorsConfiguration:

import org.springframework.context.annotation.Configuration;
import org.springframework.web.servlet.config.annotation.CorsRegistry;
import org.springframework.web.servlet.config.annotation.WebMvcConfigurer;

/**
 * @author yyb
 */
@Configuration
public class CorsConfiguration {
    @Bean
    public WebMvcConfigurer corsConfigurer() {
        return new WebMvcConfigurer() {
            @Override
            public void addCorsMappings(CorsRegistry registry) {
                registry.addMapping("/**")
                        .allowCredentials(false)
                        .allowedMethods("POST", "GET", "PUT", "OPTIONS", "DELETE")
                        .allowedOrigins("*");
            }
        };
    }

}
前端也进行跨域配置,创建一个vue.config.js文件,内容如下,注意代理的地址为后端端口号,我这边设置的是8888,port:9876是前端运行的端口号
// 跨域配置
module.exports = {
    devServer: {                //记住,别写错了devServer//设置本地默认端口  选填
        host: 'localhost',
        port: 9876,
        proxy: {                 //设置代理,必须填
            '/api': {              //设置拦截器  拦截器格式   斜杠+拦截器名字,名字可以自己定
                target: 'http://localhost:8888',     //代理的目标地址
                changeOrigin: true,              //是否设置同源,输入是的
                pathRewrite: {                   //路径重写
                    '/api': ''                     //选择忽略拦截器里面的单词
                }
            }
        }
    }
}
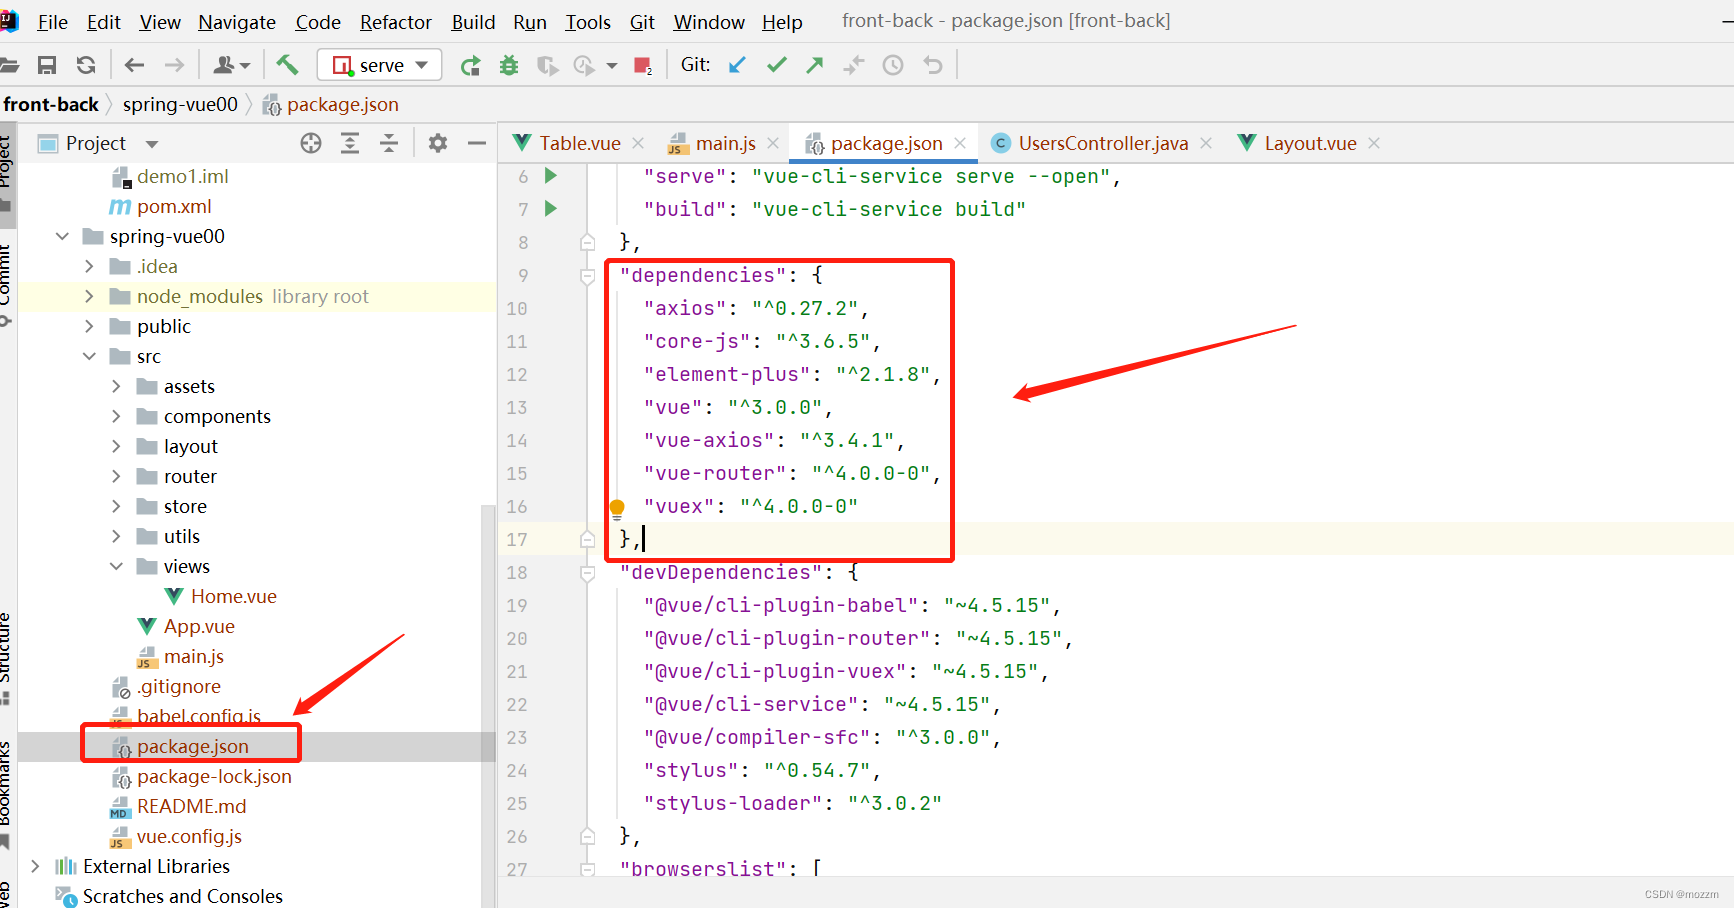
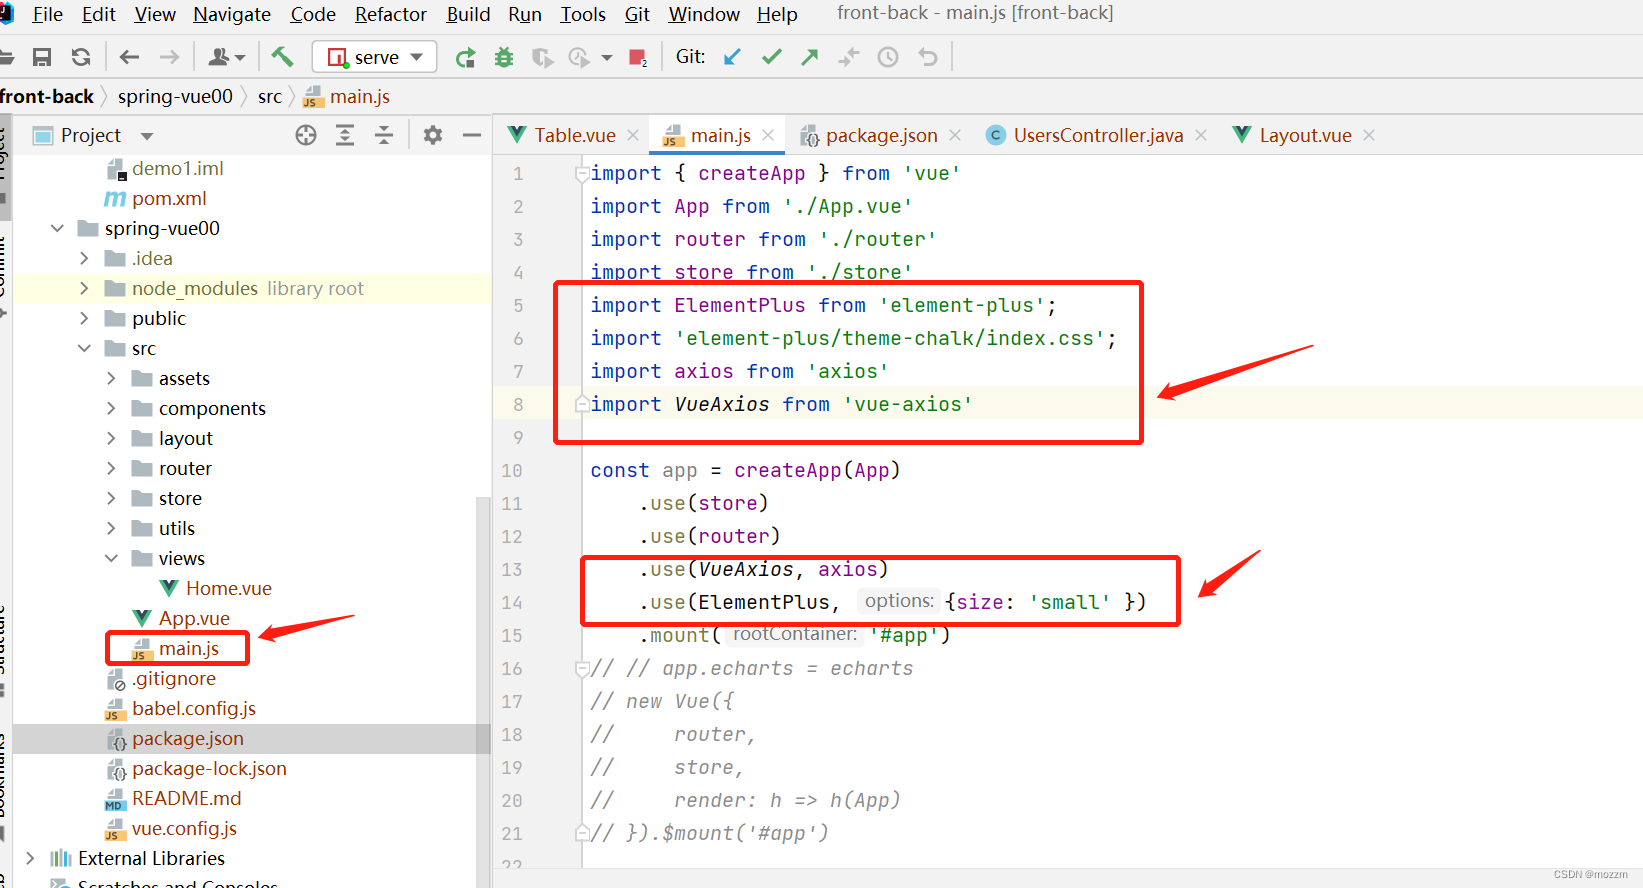
//npm安装element plus
npm install element-plus --save

//npm安装axios
npm install axios

npm install --save axios vue-axios
 随后在组件components下面的table中写入样式,通过axios.get方式获取所有数据,加载到页面
<template>
  <div >
    <el-table :data="tableData"
              border style="width: 100%" v-loading="loading"
              default-expand-all>
      <el-table-column prop="id" label="id" sortable width="220"/>
      <el-table-column prop="username" label="username" width="250"/>
      <el-table-column prop="password" label="password" width="250"/>
      <el-table-column prop="nickname" label="nickname" width="250" />
      <el-table-column fixed="right" label="Operations">
        <template #default>
          <el-button type="text" size="small" @click="handleClick"
          >Detail</el-button
          >
          <el-button type="text" size="small">Edit</el-button>
        </template>
      </el-table-column>
    </el-table>
  </div>
</template>


<script>
import request from "@/utils/request";
import axios from 'axios'

export default {
  name: "Header",
  components:{

  },
  data(){
    return {
      loading: false,
      tableData:[],
    }
  },
  created() {
    this.load()
  },
  methods:{
    load(){
      this.loading = true
      axios.get(`http://localhost:8888/users/all`).then((response) => {
        this.loading = false
        console.log(response.data)
        this.tableData = response.data.data
        console.log(this.tableData)
      })

    }
  },
}
</script>

<style scoped>

</style>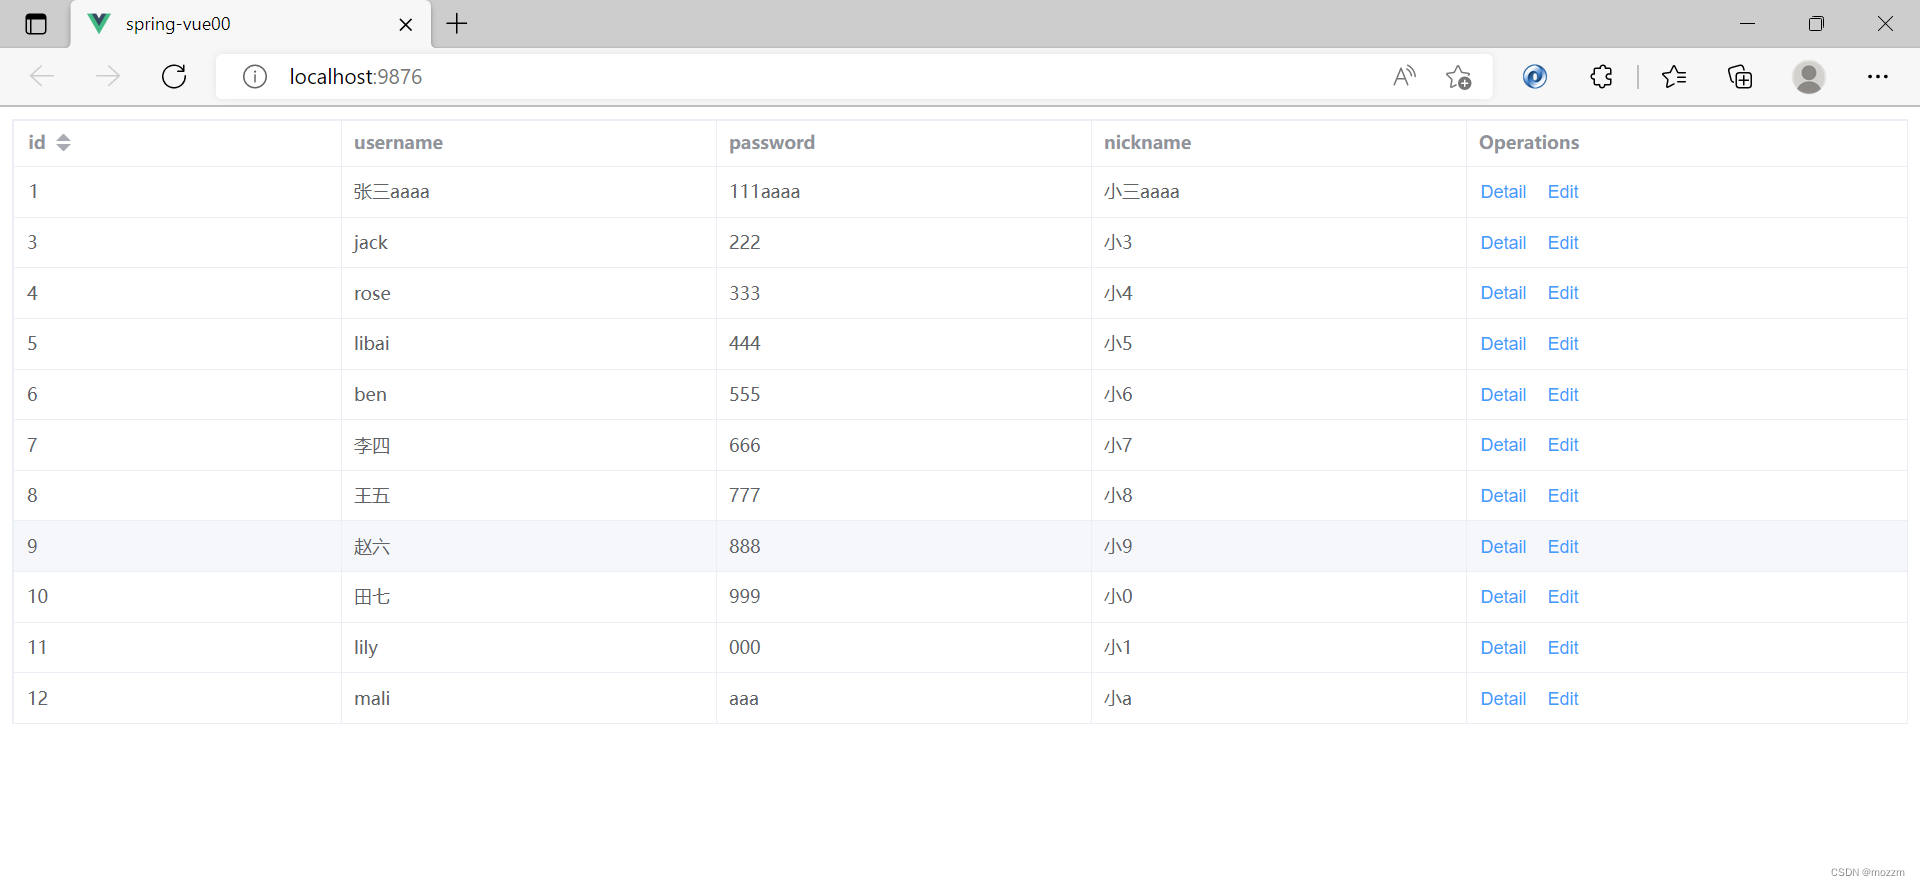

对比可以看到页面数据与后台数据一致,后台数据在前台页面展示成功。
原文地址:https://blog.csdn.net/weixin_48524739/article/details/125016782
本文来自互联网用户投稿,该文观点仅代表作者本人,不代表本站立场。本站仅提供信息存储空间服务,不拥有所有权,不承担相关法律责任。
如若转载,请注明出处:http://www.7code.cn/show_29818.html
如若内容造成侵权/违法违规/事实不符,请联系代码007邮箱:suwngjj01@126.com进行投诉反馈,一经查实,立即删除!
声明:本站所有文章,如无特殊说明或标注,均为本站原创发布。任何个人或组织,在未征得本站同意时,禁止复制、盗用、采集、发布本站内容到任何网站、书籍等各类媒体平台。如若本站内容侵犯了原著者的合法权益,可联系我们进行处理。


