平滑处理–滤波
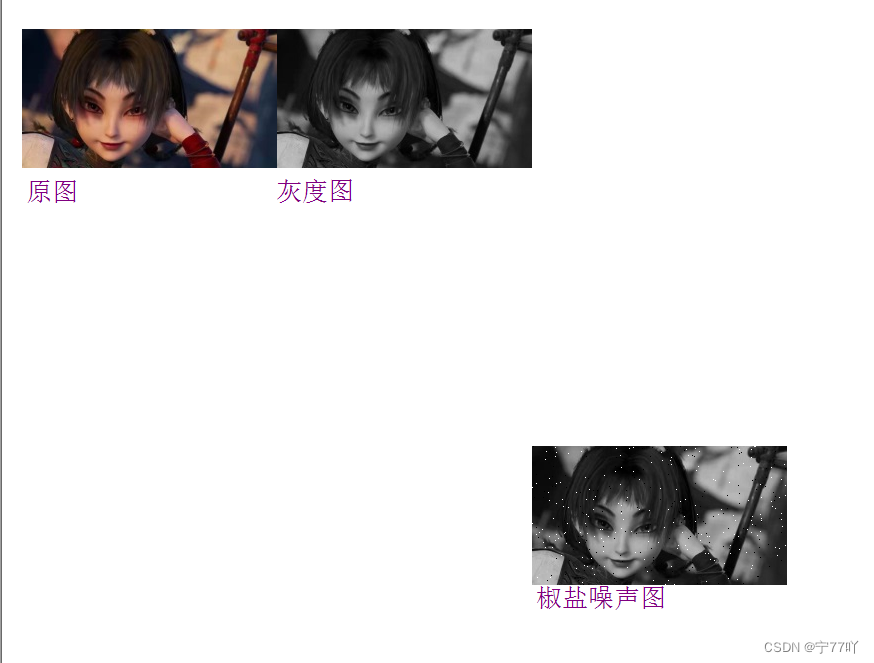
本文使用visual Studio MFC 平台实现对灰度图添加椒盐噪声,并进行均值滤波与中值滤波
关于其他MFC单文档工程可参考
01-Visual Studio 使用MFC 单文档工程绘制单一颜色直线和绘制渐变颜色的直线02-visual Studio MFC 绘制单一颜色三角形、渐变颜色边框三角形、渐变填充三角形、边框渐变的正方形与填充渐变的正方形实例
一、添加椒盐噪声
1.1 添加椒盐噪声的原理
添加椒盐噪声是一种常见的图像噪声引入方式,其原理是在图像中随机选择一些像素点,并将这些像素点的灰度值设置为最大或最小值,通常是白色(最大值)或黑色(最小值)。这样的噪声模拟了图像中出现的随机强烈亮或暗的噪声点,类似于椒盐的颗粒,因此得名。
这样就在图像中引入了椒盐噪声,这种噪声形式使图像中的某些区域变得非常亮或非常暗,从而增加了图像的复杂性和难度。
椒盐噪声主要用于模拟一些特殊环境下的图像问题,例如图像采集中的传感器错误、传输中的丢包等情况。在图像处理中,去除或减轻椒盐噪声的方法通常包括滤波技术,例如中值滤波。
1.2 添加椒盐噪声的代码实现
//添加椒盐噪声
void CMFCApplication1View::OnAddsaltpeppernoise()
{
// TODO: 在此添加命令处理程序代码
if (gray_data != nullptr) {
// 获取绘图设备
CClientDC dc(this);
CDC* pDC = &dc;
// 创建临时数组用于保存添加噪声后的数据
noisy_data = new unsigned char[bmpWidth * bmpHeight];
// 复制原始数据到临时数组
std::copy(gray_data, gray_data + bmpWidth * bmpHeight, noisy_data);
// 添加椒盐噪声
srand(static_cast<unsigned int>(time(nullptr))); // 初始化随机数种子
const double saltPepperRatio = 0.01; // 椒盐噪声比例
for (int i = 0; i < bmpWidth * bmpHeight; ++i) {
double randomValue = static_cast<double>(rand()) / RAND_MAX;
if (randomValue < saltPepperRatio / 2) {
noisy_data[i] = 0; // 添加椒噪声
}
else if (randomValue < saltPepperRatio) {
noisy_data[i] = 255; // 添加盐噪声
}
}
// 绘制带有椒盐噪声的图像
m_pBmp->drawGrayBmp(pDC, noisy_data, bmpWidth, bmpHeight, offset_left+2*bmpWidth, offset_top + 3 * bmpHeight);
关于上面将原来灰度图的数据
复制到新的数组noisy_data中的目的是为了保留添加椒盐噪声后的灰度图的数据,以便后面的平滑操作
1.3 添加椒盐噪声后的效果

二、均值滤波
2.1 均值滤波的原理
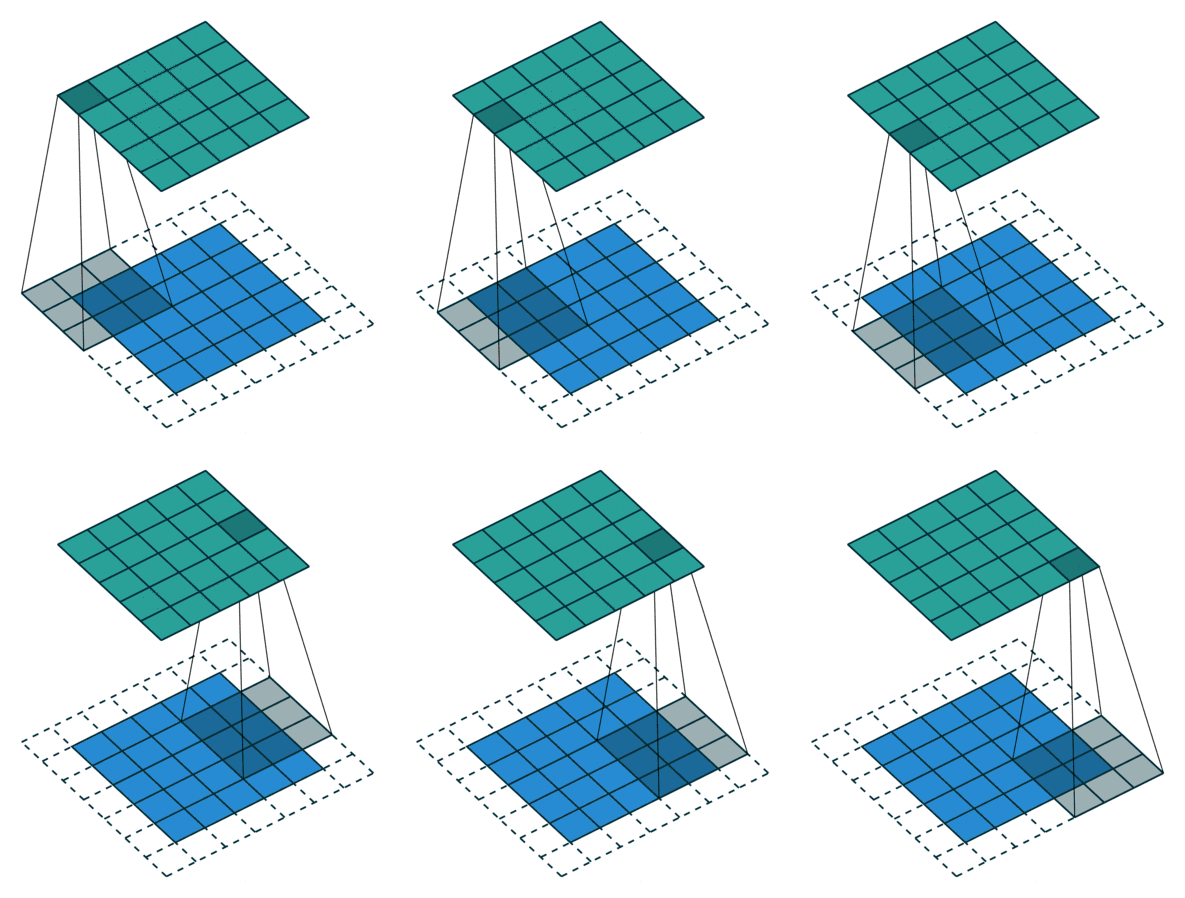
均值滤波是一种常见的图像平滑处理方法,其原理基于对图像的像素值进行平均运算。这种滤波方法主要用于去除图像中的噪声或细小的细节,以产生更平滑的图像。
均值滤波的效果在平滑图像的同时,会导致图像失真,特别是对边缘和细节的处理较为粗糙。这是因为平均操作会模糊图像,擦除图像中的高频信息。
公式表示如下,其中 M 为卷积核的大小,f(x, y) 为原始图像,h(i, j) 为卷积核中的权重:
g
(
,
y
)
=
1
M
∑
i
=
1
M
∑
j
=
1
M
h
(
i
,
j
)
⋅
(
+
i
,
y
+
j
)
g(x, y) = frac{1}{M} sum_{i=1}^{M} sum_{j=1}^{M} h(i, j) cdot f(x+i, y+j)
g(x,y)=M1i=1∑Mj=1∑Mh(i,j)⋅f(x+i,y+j)
其中,g(x, y)是滤波后的像素值。
2.2 均值滤波的代码实现
//均值滤波
void CMFCApplication1View::OnMeanfilter()
{
// TODO: 在此添加命令处理程序代码
if (noisy_data != nullptr) {
// 获取绘图设备
CClientDC dc(this);
CDC* pDC = &dc;
// 创建临时数组用于保存均值滤波后的数据
unsigned char* filtered_data = new unsigned char[bmpWidth * bmpHeight];
// 设置均值滤波的卷积核大小(3x3)
const int kernelSize = 3;
const int kernelHalfSize = kernelSize / 2;
// 应用均值滤波
for (int y = kernelHalfSize; y < bmpHeight - kernelHalfSize; ++y) {
for (int x = kernelHalfSize; x < bmpWidth - kernelHalfSize; ++x) {
int sum = 0;
// 计算卷积核内的像素值之和
for (int ky = -kernelHalfSize; ky <= kernelHalfSize; ++ky) {
for (int kx = -kernelHalfSize; kx <= kernelHalfSize; ++kx) {
int pixelValue = noisy_data[(y + ky) * bmpWidth + (x + kx)];
sum += pixelValue;
}
}
// 计算均值并赋值给滤波后的像素
filtered_data[y * bmpWidth + x] = static_cast<unsigned char>(sum / (kernelSize * kernelSize));
}
}
// 绘制均值滤波后的图像
m_pBmp->drawGrayBmp(pDC, filtered_data, bmpWidth, bmpHeight, offset_left + 3 * bmpWidth, offset_top + 3 * bmpHeight);
// 在图片下方添加文字
GdiplusStartupInput gdiplusStartupInput;
ULONG_PTR gdiplusToken;
GdiplusStartup(&gdiplusToken, &gdiplusStartupInput, nullptr);
{
Graphics graphics(pDC->m_hDC);
Gdiplus::Font font(L"Arial", 12);
SolidBrush brush(Color(255, 128, 0, 128)); // 文字颜色为紫色
// 文字的位置
PointF point(offset_left +3* bmpWidth, offset_top + 4 * bmpHeight);
// 绘制文字
graphics.DrawString(L"均值滤波后的图像", -1, &font, point, &brush);
}
// 释放临时变量的内存
delete[] filtered_data;
GdiplusShutdown(gdiplusToken);
}
else {
// 处理图像未加载的情况
AfxMessageBox(_T("未加载图片"));
}
}
2.3 均值滤波的实验效果

三、 中值滤波
3.1 中值滤波的原理
中值滤波是一种非线性滤波方法,它的原理是用像素点邻域灰度值的中值来代替该像素点的灰度值。中值滤波不会改变图像的灰度平均值,但可以有效地去除图像中的椒盐噪声等离群点,对于保持图像边缘细节方面也有一定的优势。
中值滤波的优点在于能够有效地去除椒盐噪声,但在一些情况下可能会导致图像细节模糊。它特别适用于去除局部性较强的噪声。
3.2 中值滤波的C++实现
//中值滤波
void CMFCApplication1View::OnMedianfilter()
{
 // TODO: 在此添加命令处理程序代码
 if (noisy_data != nullptr) {
  // 获取绘图设备
  CClientDC dc(this);
  CDC* pDC = &dc;

  // 创建临时数组用于中值滤波处理
  unsigned char* median_filtered_data = new unsigned char[bmpWidth * bmpHeight];

  // 中值滤波的处理代码
  int filter_size = 3;  // 中值滤波的邻域大小,可以根据实际情况调整
  int filter_radius = filter_size / 2;

  for (int y = filter_radius; y < bmpHeight - filter_radius; ++y) {
   for (int x = filter_radius; x < bmpWidth - filter_radius; ++x) {
    // 获取邻域内的像素值
    std::vector<unsigned char> neighborhood;
    for (int j = -filter_radius; j <= filter_radius; ++j) {
     for (int i = -filter_radius; i <= filter_radius; ++i) {
      neighborhood.push_back(noisy_data[(y + j) * bmpWidth + (x + i)]);
     }
    }

    // 对邻域内的像素值进行排序
    std::sort(neighborhood.begin(), neighborhood.end());

    // 计算中值并赋值给当前像素
    median_filtered_data[y * bmpWidth + x] = neighborhood[filter_size * filter_size / 2];
   }
  }

  // 绘制中值滤波后的图像
  m_pBmp->drawGrayBmp(pDC, median_filtered_data, bmpWidth, bmpHeight, offset_left + 4 * bmpWidth, offset_top + 3 * bmpHeight);

  // 在图片下方添加文字
  GdiplusStartupInput gdiplusStartupInput;
  ULONG_PTR gdiplusToken;
  GdiplusStartup(&gdiplusToken, &gdiplusStartupInput, nullptr);
  {
   Graphics graphics(pDC->m_hDC);
   Gdiplus::Font font(L"Arial", 12);
   SolidBrush brush(Color(255, 128, 0, 128));  // 文字颜色为紫色

   // 文字的位置
   PointF point(offset_left + 4 * bmpWidth, offset_top + 4 * bmpHeight);

   // 绘制文字
   graphics.DrawString(L"中值滤波", -1, &font, point, &brush);
  }

  // 释放临时数组的内存
  delete[] median_filtered_data;

  GdiplusShutdown(gdiplusToken);
 }
 else {
  // 处理图像未加载的情况
  AfxMessageBox(_T("未加载图片"));
 }
}
3.3中值滤波后的效果图

原文地址:https://blog.csdn.net/qq_63831368/article/details/134742754
本文来自互联网用户投稿,该文观点仅代表作者本人,不代表本站立场。本站仅提供信息存储空间服务,不拥有所有权,不承担相关法律责任。
如若转载,请注明出处:http://www.7code.cn/show_43172.html
如若内容造成侵权/违法违规/事实不符,请联系代码007邮箱:suwngjj01@126.com进行投诉反馈,一经查实,立即删除!


![[MFC] MFC消息机制的补充](https://img-blog.csdnimg.cn/direct/4e6d632d6c144126a691d901337a1749.png)


