一、项目创建步骤
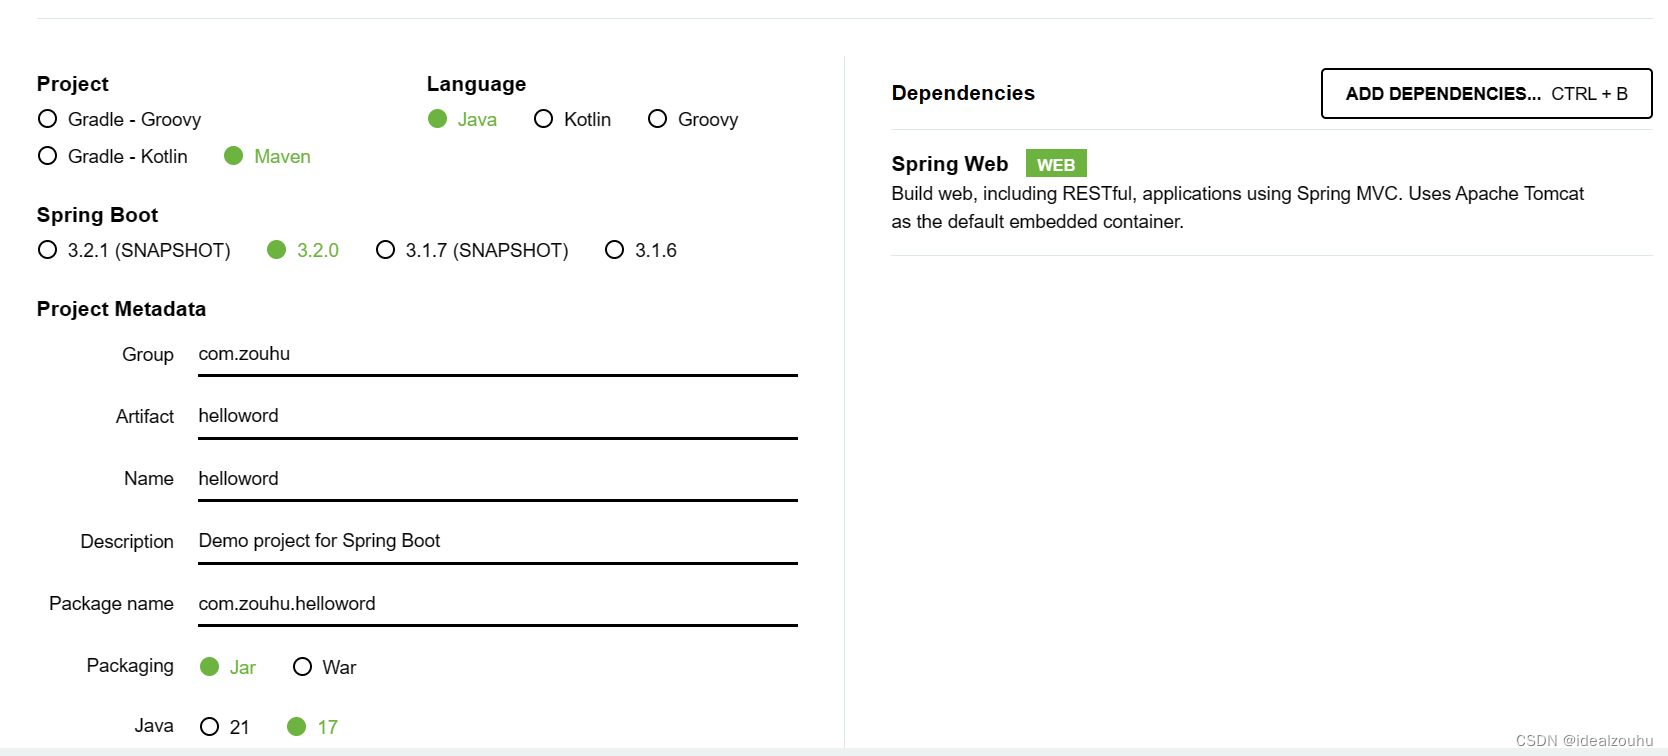
1.1 创建项目
1.2 添加代码
在IDE中打开项目并在src/main/java/com/zouhu/helloword文件夹中找到HellowordApplication.java文件,现在通过添加下面代码中显示的额外方法和注释来更改文件的内容。
package com.example.demo;
import org.springframework.boot.SpringApplication;
import org.springframework.boot.autoconfigure.SpringBootApplication;
import org.springframework.web.bind.annotation.GetMapping;
import org.springframework.web.bind.annotation.RequestParam;
import org.springframework.web.bind.annotation.RestController;

@SpringBootApplication
@RestController
public class DemoApplication {
    public static void main(String[] args) {
      SpringApplication.run(DemoApplication.class, args);
    }
    @GetMapping("/hello")
    public String hello(@RequestParam(value = "name", defaultValue = "World") String name) {
      return String.format("Hello %s!", name);
    }
}
hello()方法被设计为采用一个名为name的String参数,然后将该参数与代码中的单词“Hello”结合起来。这意味着如果您在请求中将姓名设置为“Amy”,则响应将是“Hello Amy”。
@RestController注释告诉Spring,这段代码描述了一个应该在Web上可用的端点。
@GetMap(“/hello”)告诉Spring使用我们的hello()方法来回答发送到http://localhost:8080/hello地址的请求。
最后,@RequestParam告诉Spring期望请求中有一个名称值,但如果不存在,它将默认使用单词“World”
1.3 运行
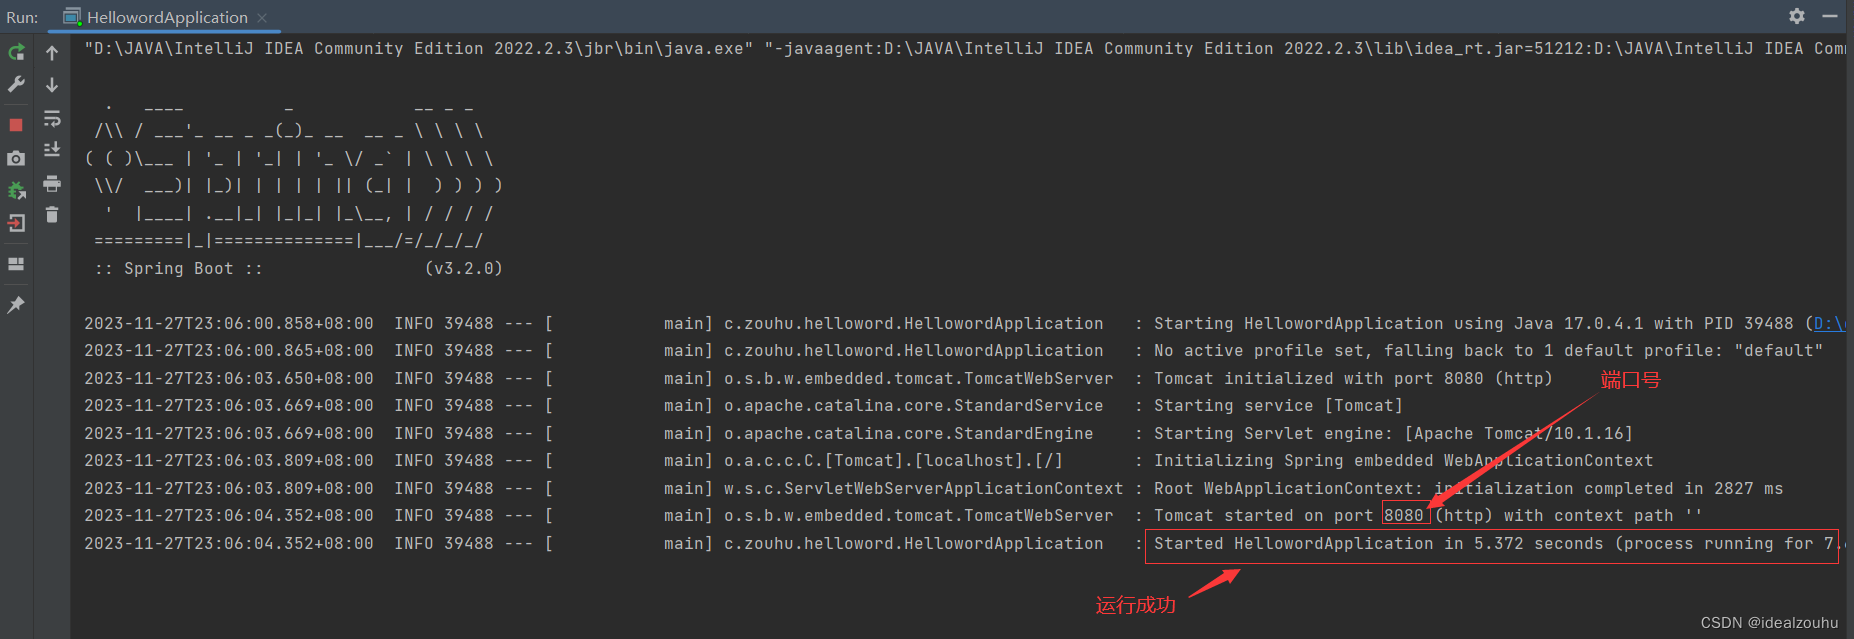
根据启动界面可以看到以下信息:Spring Boot的嵌入式Apache Tomcat服务器充当网络服务器,并在localhost端口8080上侦听请求。
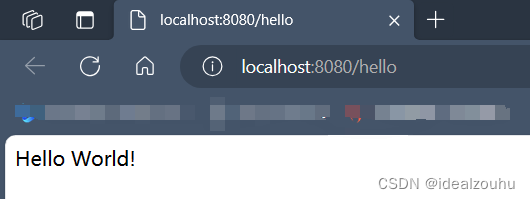
打开浏览器,在顶部的地址栏中输入http://localhost:8080/hello即可访问
参考教程
原文地址:https://blog.csdn.net/weixin_44814196/article/details/134657098
本文来自互联网用户投稿,该文观点仅代表作者本人,不代表本站立场。本站仅提供信息存储空间服务,不拥有所有权,不承担相关法律责任。
如若转载,请注明出处:http://www.7code.cn/show_1066.html
如若内容造成侵权/违法违规/事实不符,请联系代码007邮箱:suwngjj01@126.com进行投诉反馈,一经查实,立即删除!


