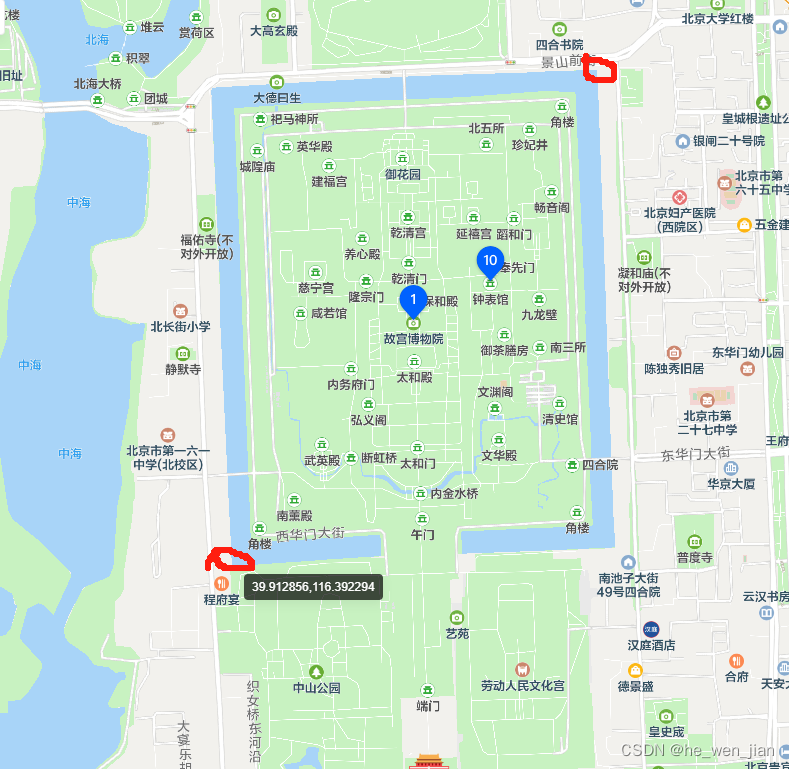
第一章 效果图
- 小编该案例主要实现的两个点的思路:1、有两个正常的经纬度就可以在地图中绘制出汽车从起点到终点的路线规划;2、当用户经纬度发生变化时,用户可以通过某个操作,或者程序员通过某种方式,再次调用接口,从而实现线路的变化
- 小编转换成两个情景:1、首次进入地图渲染汽车的规划路径;2、通过点击事件表示经纬度发生变化,需要重新规划路线

第二章 源代码
<template>
<div>
<a-button @click="refreshDriving">刷新路径</a-button><br>
<div>
<div id="container" ref="amap"></div>
<div id="panel"></div>
</div>
</div>
</template>
<script>
import AMapLoader from '@amap/amap-jsapi-loader'
export default {
data () {
return {
map: null,
lnglat: [], // [long,lat]
driving: null,
mapModule: null // AMap
}
},
mounted () {
window._AMapSecurityConfig = {
securityJsCode: '申请key对应的秘钥' // 申请key对应的秘钥
}
this.initAMap()
},
destroyed () {
this.map.destroy()
},
methods: {
initAMap () {
const _this = this
AMapLoader.load({
key: '申请的key', // 申请好的Web端开发者Key,首次调用 load 时必填
version: '2.0', // 指定要加载的 JSAPI 的版本,缺省时默认为 1.4.15
plugins: []
})
.then((AMap) => {
_this.mapModule = AMap
const map = new AMap.Map('container', {
// 设置地图容器id
viewMode: '3D', // 默认2d地图模式
zoom: 12, // 初始化地图级别
zooms: [5, 30],
// 可以设置初始化当前位置
// center: new AMap.LngLat(121.378945, 31.264033), // 上海
// center: [118.118547, 24.475637], // 厦门
center: [116.397428, 39.90923], // 北京
resizeEnable: true
})
// 添加控件
AMap.plugin(
[
'AMap.ElasticMarker',
'AMap.Scale',
'AMap.ToolBar',
'AMap.HawkEye',
'AMap.MapType',
'AMap.Geolocation',
'AMap.Driving',
'AMap.AutoComplete',
'AMap.PlaceSearch',
'AMap.MarkerClusterer'
],
() => {
map.addControl(new AMap.ElasticMarker())
map.addControl(new AMap.Scale())
map.addControl(new AMap.ToolBar())
map.addControl(new AMap.HawkEye())
map.addControl(new AMap.MapType())
map.addControl(new AMap.Geolocation())
}
)
_this.map = map
// 驾驶路线
_this.toDriving()
})
.catch((e) => {
console.log(e)
})
},
toDriving () {
const _this = this
const driving = new _this.mapModule.Driving({
map: this.map,
panel: 'panel'
})
this.driving = driving
this.driving.search(
new _this.mapModule.LngLat(121.378945, 31.264033),
new _this.mapModule.LngLat(121.504128, 31.318716),
// [121.378945, 31.264033],
// [121.504128, 31.318716],
function (status, result) {
// result 即是对应的驾车导航信息,相关数据结构文档请参考 https://lbs.amap.com/api/javascript-api/reference/route-search#m_DrivingResult
if (status === 'complete') {
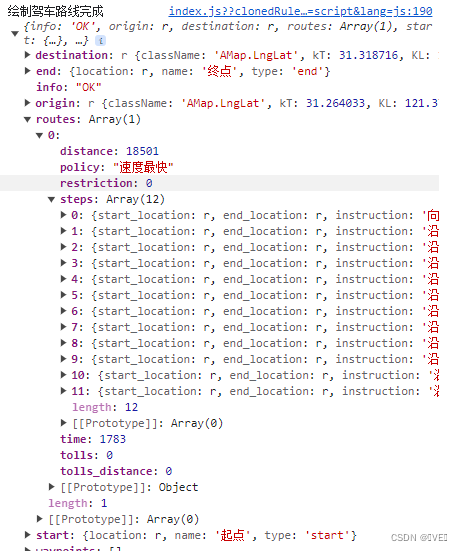
console.log('绘制驾车路线完成', result)
} else {
console.log('获取驾车数据失败:' + result)
}
}
)
},
refreshDriving () {
const _this = this
_this.driving.search(
new _this.mapModule.LngLat(121.378945, 32.265033),
new _this.mapModule.LngLat(121.504128, 31.319716),
function (status, result) {
if (status === 'complete') {
console.log('绘制驾车路线完成', result)
} else {
console.log('获取驾车数据失败:' + result)
}
}
)
},
}
}
</script>
<style lang='less' scoped>
#container {
padding: 0px;
margin: 0px;
width: 100%;
height: 900px;
}
</style>


- 待扩展:
- 接口文档如下:
原文地址:https://blog.csdn.net/qq_45796592/article/details/134397095
本文来自互联网用户投稿,该文观点仅代表作者本人,不代表本站立场。本站仅提供信息存储空间服务,不拥有所有权,不承担相关法律责任。
如若转载,请注明出处:http://www.7code.cn/show_12615.html
如若内容造成侵权/违法违规/事实不符,请联系代码007邮箱:suwngjj01@126.com进行投诉反馈,一经查实,立即删除!
声明:本站所有文章,如无特殊说明或标注,均为本站原创发布。任何个人或组织,在未征得本站同意时,禁止复制、盗用、采集、发布本站内容到任何网站、书籍等各类媒体平台。如若本站内容侵犯了原著者的合法权益,可联系我们进行处理。


