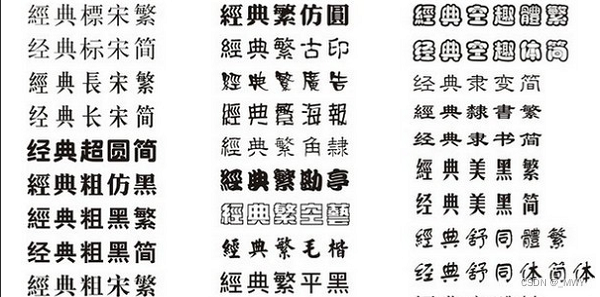
产品告诉UI设计设计图时要使用炫酷字体。因为Android不像网页项目可以使用浏览器本机的字体,Android只有那几种字体。

Android自带字体库![]() https://blog.csdn.net/weixin_41620505/article/details/114673516
https://blog.csdn.net/weixin_41620505/article/details/114673516
import android.content.Context
import android.graphics.Typeface

object FontsOverride {

/**
*staticTypefaceFieldName :最好是 normal、sans、serif、monospace其中一个
*/
    fun setDefaultFont(context: Context, staticTypefaceFieldName: String, fontAssetName: String?) {
        val regular = Typeface.createFromAsset(context.assets, fontAssetName)
        replaceFont(staticTypefaceFieldName, regular)
    }

    internal fun replaceFont(staticTypefaceFieldName: String, newTypeface: Typeface?) {
        try {
            val staticField = Typeface::class.java.getDeclaredField(staticTypefaceFieldName)
            staticField.isAccessible = true
            staticField[null] = newTypeface
        } catch (e: NoSuchFieldException) {
            e.printStackTrace()
        } catch (e: IllegalAccessException) {
            e.printStackTrace()
        }
    }
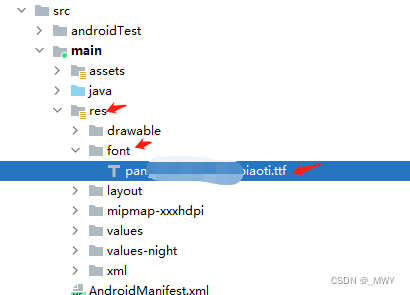
}要把字体ttf文件放到assets/fonts目录下,没有此目录手动创建
//staticTypefaceFieldName :最好是 normal、sans、serif、monospace其中一个
FontsOverride.setDefaultFont(this, "SERIF", "fonts/pangmenzhengdaobiaoti.ttf")
    <TextView
                android:id="@+id/newHomeLoction"
                android:textColor="@color/white"
                android:textSize="26sp"
                android:typeface="serif"
                app:layout_constraintStart_toStartOf="@+id/newHomeLeaveTitle"
                app:layout_constraintTop_toBottomOf="@+id/newHomeLeaveTitle" />
        <TextView
                android:id="@+id/newHomeLoction"
                android:layout_width="match_parent"
                android:layout_height="0dp"
                android:layout_weight="1"
                android:gravity="bottom|end"
                android:includeFontPadding="false"
                android:paddingBottom="28dp"
                android:fontFamily="@font/pangiaoti"
android:text="字体水水水水" />使用typeface这种方式不用每一个TextView都需要写,因为有默认字体样式(monospace)
使用fontFamily方式需要每一个TextView需要写一遍
在xml布局使用的
1:
android:typeface2:
android:fontFamily做好区分
原文地址:https://blog.csdn.net/weixin_41620505/article/details/128632616
本文来自互联网用户投稿,该文观点仅代表作者本人,不代表本站立场。本站仅提供信息存储空间服务,不拥有所有权,不承担相关法律责任。
如若转载,请注明出处:http://www.7code.cn/show_13315.html
如若内容造成侵权/违法违规/事实不符,请联系代码007邮箱:suwngjj01@126.com进行投诉反馈,一经查实,立即删除!