系列文章目录(点击查看)
前言
作为vue全家桶重要的一环,vue-router 极为重要。Vue Router 是 Vue.js 的官方路由管理器。它在单页面应用程序 (SPA) 开发过程中提供路由功能。Vue Router 允许你定义前端路由,实现页面之间的跳转和组件的加载。它支持动态路由、嵌套路由、路由参数等高级特性,能够帮助开发者构建结构清晰、交互流畅的前端应用程序。官网地址:https://router.vuejs.org/zh/
一、介绍
Vue Router 是 Vue.js 的官方路由。它与 Vue.js 核心深度集成,让用 Vue.js 构建单页应用变得轻而易举。功能包括:
- 嵌套路由映射
- 动态路由选择
- 模块化、基于组件的路由配置
- 路由参数、查询、通配符
- 展示由 Vue.js 的过渡系统提供的过渡效果
- 细致的导航控制
- 自动激活 CSS 类的链接
- HTML5 history 模式或 hash 模式
- 可定制的滚动行为
- URL 的正确编码
二、安装
# npm 安装
npm install @types/vue-router

# yarn 安装
yarn add @types/vue-router

三、基础用法
1、基础路由配置
import { RouteConfig } from 'vue-router';

// 公共路由
export const constantRoutes: RouteConfig[] = [
  {
    path: '/',
    redirect: '/login'
  },
  {
    path: '/login',
    component: () => import('@/views/login/index.vue'),
    name: 'Login',
    meta: { title: 'login' }
  },
]
import { createRouter, createWebHistory } from 'vue-router'
import { constantRoutes } from './route'

const router = createRouter({
  history: createWebHistory('/'),
  routes: constantRoutes
})

export default router
import { createApp } from 'vue'
import App from './App.vue'

import 'normalize.css'
import './styles/index.scss'

import router from './router' # 新增
import ElementPlus from 'element-plus'
import 'element-plus/dist/index.css'

const app = createApp(App) # 新增

app.use(router)

app.use(ElementPlus)
app.mount('#app')
<template>
<div>
login
</div>
</template>
<script setup lang="ts">
</script>
<style lang="scss" scoped>
</style>
<template>
  <router-view></router-view>
</template>

<script setup lang="ts">

</script>

<style scoped></style>

2、声明式导航和编程式导航
1、声明式导航
使用 <router-link></router-link> 创建 a 标签 来定义导航链接的称为声明式导航,to 显示的指明了导航的目的地。
2、编程式导航
编程式导航,顾名思义,就是通过代码来进行路由的跳转。想要导航到不同的 URL,可使用 router.push 方法。在 Vue 实例内部,你可以通过 $router 访问路由实例,因此使用 $router.push('/home') 进行路由的跳转与以下声明式跳转等效
常用API
// 向 history 栈添加一个新的记录,当用户点击浏览器后退按钮时,则回到之前的 URL
router.push(location, onComplete?, onAbort?)// onComplete 与 onAbort 可选

// 跟 router.push 很像,唯一的不同就是,它不会向 history 添加新记录,而是跟它的方法名一样,替换掉当前的 history 记录
router.replace(location, onComplete?, onAbort?)// onComplete 与 onAbort 可选

// 在浏览器记录中前进一步,等同于 window.history.forward()
router.go(1)

// 后退一步记录,等同于 window.history.back()
router.go(-1)
3、嵌套路由
我们知道 router 控制的视图(views)是在 <router-view></router-view> 中显示的,那么要实现路由嵌套,则在组件中放入 <router-view></router-view> 即可,同时在路由配置中将嵌套路由放入 children 字段。

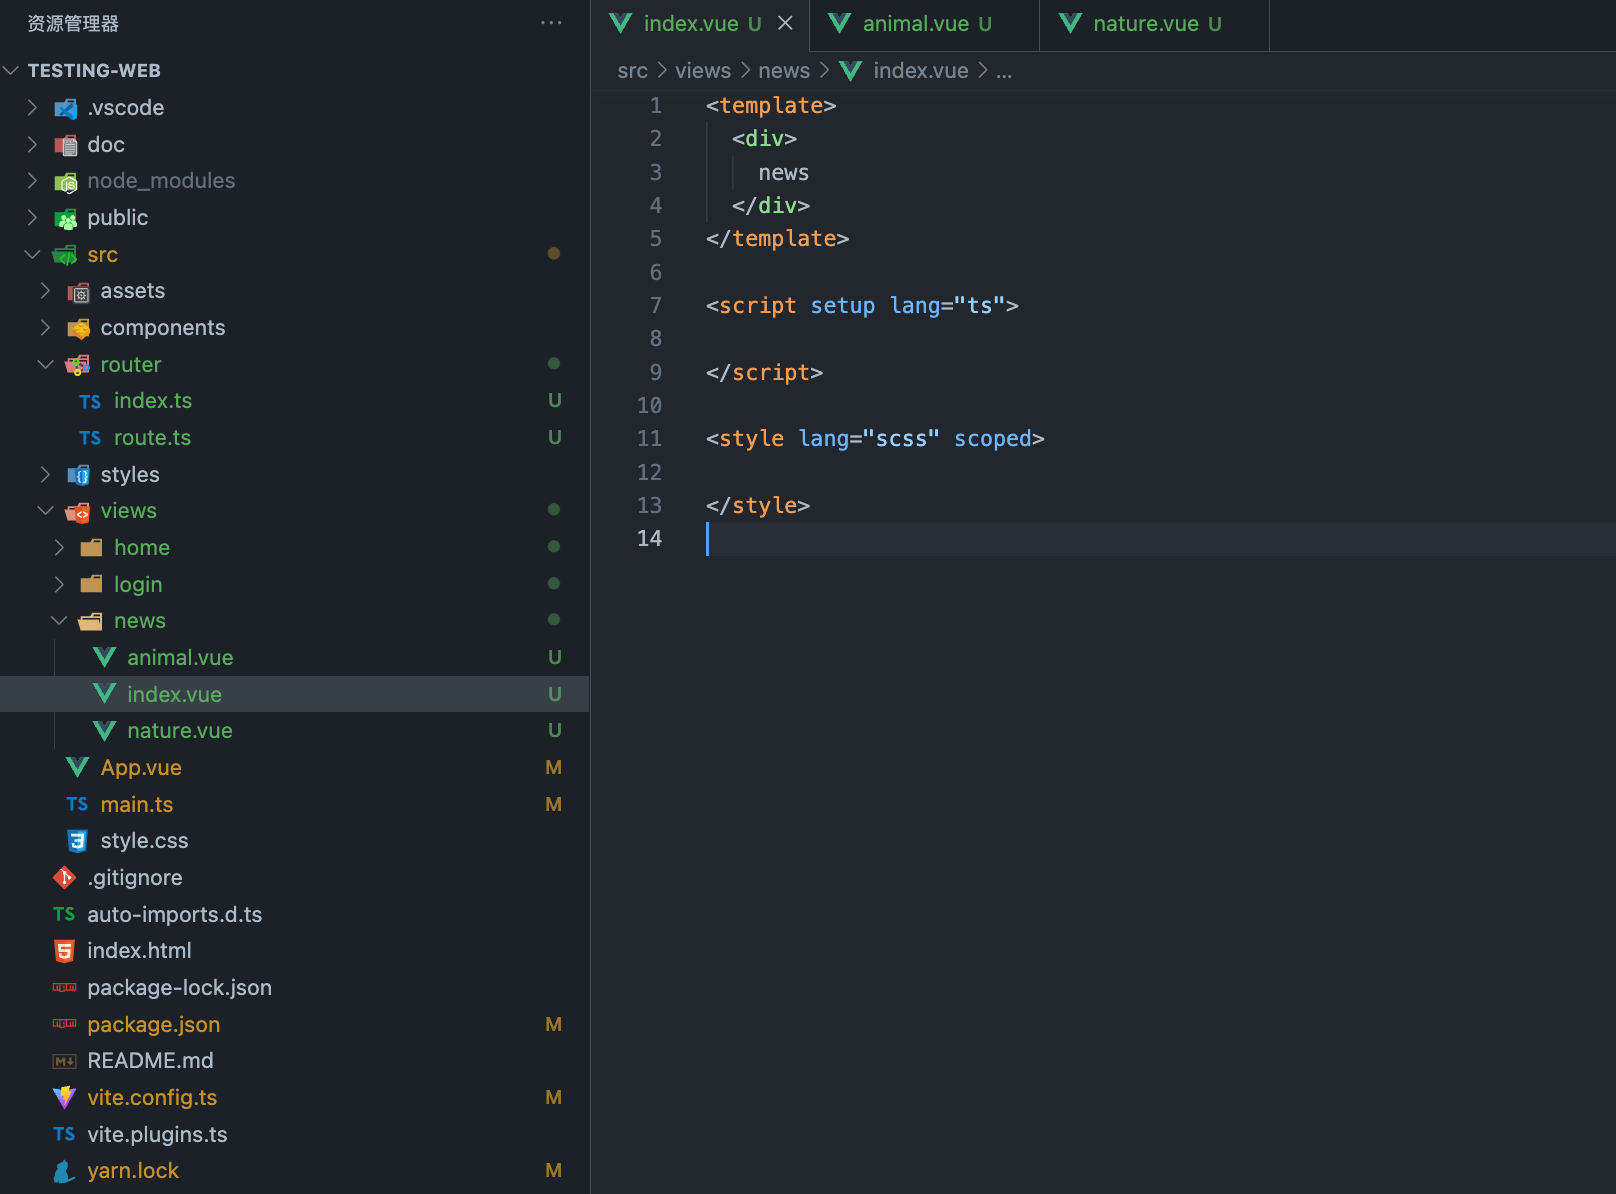
我们在views文件下,创建news目录,然后在里面创建几个相应类别的文件。
animal.vue文件
<template>
  <div>
    animal
  </div>
</template>

<script setup lang="ts">

</script>

<style lang="scss" scoped>

</style>
<template>
  <div>
    nature
  </div>
</template>

<script setup lang="ts">

</script>

<style scoped>

</style>
{
    path: '/news',
    component: () => import('@/views/news/index.vue'),
    name: 'News',
    meta: { title: 'news' },
    children: [
      {
        path: 'animal',
        component: () => import('@/views/news/animal.vue'),
        name: 'AnimalList',
        meta: { title: 'animalList' }
      },
      {
        path: 'nature',
        component: () => import('@/views/news/nature.vue'),
        name: 'NatureList',
        meta: { title: 'natureList' }
      }
    ]
  }
4、动态路由匹配
1、如何将多路径映射至同一组件
在某些时候,我们需要将某些具有相同特征的路由(routes)映射至同一视图(component)下。例如我们有一个 ArticleDetail 组件,不同 id 显示不同内容的文章内容,都要使用这个组件来渲染。那么,我们可以在 vue-router 的路由路径中使用“动态路径参数”(dynamic segment)来达到这个效果。
2、代码演示
route.ts 文件
{
    path: '/news',
    component: () => import('@/views/news/index.vue'),
    name: 'News',
    meta: { title: 'news' },
    redirect: '/news/animal',
    children: [
      {
        path: 'animal',
        component: () => import('@/views/news/animal.vue'),
        name: 'AnimalList',
        meta: { title: 'animalList' }
      },
      {
        path: 'nature',
        component: () => import('@/views/news/nature.vue'),
        name: 'NatureList',
        meta: { title: 'natureList' }
      },
      // 增加文章详情组件
      {
        path: 'article/:id',
        component: () => import('@/views/news/article.vue'),
        name: 'Article',
        meta: { title: 'article' }
      }
    ]
  }
<template>
  <router-view></router-view>
</template>

<script setup lang="ts">

</script>

<style lang="scss" scoped>

</style>
<template>
  <div>
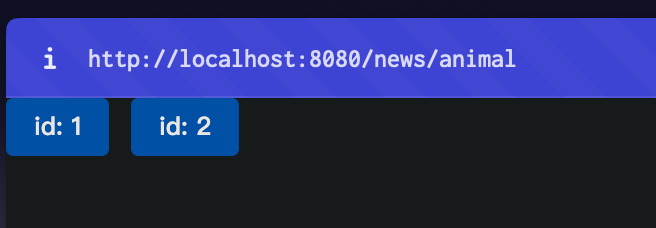
    <el-button type="primary" @click="showArticleInfo(1)">id: 1</el-button>
    <el-button type="primary" @click="showArticleInfo(2)">id: 2</el-button>
  </div>
</template>

<script setup lang="ts">
import { useRouter } from "vue-router";

const router = useRouter();
const showArticleInfo = (id: number) => {
  router.push({
    path: `/news/article/${id}`,
  });
};
</script>

<style lang="scss" scoped></style>

新增 article.vue 组件
<template>
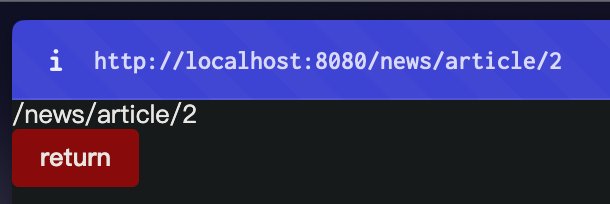
  <div>{{ route.path }}</div>
  <el-button type="danger" @click="goBack">return</el-button>
</template>

<script setup lang="ts">
import { useRoute, useRouter } from "vue-router";

const route = useRoute();
const router = useRouter();

const goBack = () => {
  router.go(-1);
};
</script>

<style lang="scss" scoped></style>


5、命名、重定向和别名
1、命名
实际的开发中存在这样一种情况,某个路由下有多个视图容器(<router-view>),那么多个视图容器必然需要多个组件去填充,使用一种手段将视图容器与组件关联起来即可(router-view 的 name 属性)。
<router-view name="first"><router-view>
<router-view name="second"><router-view>
<router-view name="third"><router-view>
// ...... //
2、重定向
类似上面 news 界面的配置,我们使用 redirect 属性对路由进行重定向。
{
    path: '/news',
    component: () => import('@/views/news/index.vue'),
    name: 'News',
    meta: { title: 'news' },
    redirect: '/news/animal', // 重定向
    children: [
      {
        path: 'animal',
        component: () => import('@/views/news/animal.vue'),
        name: 'AnimalList',
        meta: { title: 'animalList' }
      },
      {
        path: 'nature',
        component: () => import('@/views/news/nature.vue'),
        name: 'NatureList',
        meta: { title: 'natureList' }
      },
      {
        path: 'article/:id',
        component: () => import('@/views/news/article.vue'),
        name: 'Article',
        meta: { title: 'article' }
      }
    ]
  }
3、路由别名
// 绝对路径别名配置
{ path: 'aaa', component: AAA, alias: '/aaa-alias' },
// 相对路径别名配置 (指向 /home/bar-alias)
{ path: 'bbb', component: BBB, alias: 'bbb-alias' },
// 多别名配置
{ path: 'ccc', component: CCC, alias: ['/c1-alias', 'c2-alias'] },
6、路由传参
vue有很多传参的方式,例如 props,eventBus 等,路由传参也是其中重要的一种传参方式,我们在界面打印 route 来查看路由属性。

vue-router中路由组件传参的方式主要有以下几种:
-
路由参数
(Route Parameters):通过在路由路径中定义参数,然后在组件中通过$route.params来访问。以对象的形式传递参数,使用params传参只能由name引入路由,如果写成path页面会显示警告,说参数会被忽略,params相当于post请求,参数不会再地址栏中显示。 -
查询参数
(Query Parameters):可以通过在路由路径后面加上查询参数的方式进行传参,然后在组件中通过$route.query来访问。这种方式是在url后面拼接参数,参数在?后面,且参数之间用&符分隔,query相当于get请求,可以在地址栏看到参数。 -
路由元信息
(Route Meta Fields):可以在路由配置中定义meta字段,然后在组件中通过$route.meta来访问。这种方式适合于在路由级别传递一些额外的信息,例如页面标题、权限等。
值得强调的一点是:params 传参刷新会无效,但是 query 会保存传递过来的值,刷新不变,如果想要用 params 模拟 query 传参让数据持久化,可以配合 loaclStorage 来实现。
7、不同的历史模式
1、hash模式
hash 模式是用 createWebHashHistory() 创建的。它在内部传递的实际 URL 之前使用了一个哈希字符(#)。由于这部分 URL 从未被发送到服务器,所以它不需要在服务器层面上进行任何特殊处理。不过,它在 SEO 中确实有不好的影响。如果你担心这个问题,可以使用 html5 模式。
2、html5模式
html5 模式用 createWebHistory() 创建,推荐使用这个模式。当使用这种历史模式时,URL 会看起来很 “正常”,例如 https://example.com/user/id。
不过,问题来了。由于我们的应用是一个单页的客户端应用,如果没有适当的服务器配置,用户在浏览器中直接访问 https://example.com/user/id,就会得到一个 404 错误。要解决这个问题,你需要做的就是在你的服务器上添加一个简单的回退路由。如果 URL 不匹配任何静态资源,它应提供与你的应用程序中的 index.html 相同的页面。
3、两种模式差异
hash 模式和 html5 模式都是前端路由的实现方式。在 hash 模式中,路由信息被存储在URL的哈希部分(即#号后面),而在 html5 模式中,路由信息直接显示在 URL 的路径部分。这两种模式在以下几个方面有所不同:
-
兼容性:
hash模式的兼容性更好,因为它不要求服务器端的特殊配置,并且支持所有现代浏览器。而html5模式则需要服务器端配置,仅在较新的浏览器中才能完全支持。 -
美观性:
html5模式的URL更加美观,因为不带有#号,并且更类似传统的URL结构。相比之下,hash模式的URL中会包含#号,视觉上可能不够清晰和美观。 -
404 错误处理:在
html5模式中,如果用户在直接访问包含前端路由的URL时,需要后端服务器做相应的配置,以避免出现404错误。而hash模式不需要这种处理,因为路由信息位于哈希部分,对服务器端而言是不可见的。
四、路由守卫
1、完整的导航解析流程
- 导航被触发。
- 在失活的组件里调用
beforeRouteLeave守卫 - 调用全局的
beforeEach守卫 - 在重用的组件里调用
beforeRouteUpdate守卫 - 在路由配置里调用
beforeEnter - 解析异步路由组件
- 在被激活的组件里调用
beforeRouteEnter - 调用全局的
beforeResolve守卫 - 导航被确认
- 调用全局的
afterEach钩子 - 触发
DOM更新 - 调用
beforeRouteEnter守卫中传给next的回调函数,创建好的组件实例会作为回调函数的参数传入
2、全局前置守卫
使用 router.beforeEach 注册一个全局前置守卫
const router = createRouter({ ... })

router.beforeEach((to, from) => {
  // ...
  // 返回 false 以取消导航
  return false
})
当一个导航触发时,全局前置守卫按照创建顺序调用。守卫是异步解析执行,此时导航在所有守卫 resolve 完之前一直处于等待中。
import { createRouter, createWebHistory } from 'vue-router'
import { ElMessage } from "element-plus";
import { constantRoutes } from './route'
import { Local } from '@/cache'

const router = createRouter({
  history: createWebHistory('/'),
  routes: constantRoutes
})

/**
 * 全局前置路由守卫,每一次路由跳转前都进入这个 beforeEach 函数
 */
router.beforeEach((to, _from, next) => {
  if (to.path == '/login') {
    // 登录或者注册才可以往下进行
    next();
  } else {
    // 获取 token
    const token = Local.get('token');
    // token 不存在
    if (token === null || token === '') {
      ElMessage.error('登录失败,请先登录');
      next('/login');
    } else {
      next();
    }
  }
});

export default router
这里我们使用本地存储来进行获取 token,相应的 cache 部分代码为:
/**
 * window.localStorage 浏览器永久缓存
 * @method set 设置永久缓存
 * @method get 获取永久缓存
 * @method remove 移除永久缓存
 * @method clear 移除全部永久缓存
 */
export const Local = {
  // 设置永久缓存
  set(key: string, val: any) {
    window.localStorage.setItem(key, JSON.stringify(val));
  },

  // 获取永久缓存
  get(key: string) {
    let json: any = window.localStorage.getItem(key);
    return JSON.parse(json);
  },

  // 移除永久缓存
  remove(key: string) {
    window.localStorage.removeItem(key);
  },

  // 移除全部永久缓存
  clear() {
    window.localStorage.clear();
  },
};

/**
 * window.sessionStorage 浏览器临时缓存
 * @method set 设置临时缓存
 * @method get 获取临时缓存
 * @method remove 移除临时缓存
 * @method clear 移除全部临时缓存
 */
export const Session = {
  // 设置临时缓存
  set(key: string, val: any) {
    window.sessionStorage.setItem(key, JSON.stringify(val));
  },

  // 获取临时缓存
  get(key: string) {
    let json: any = window.sessionStorage.getItem(key);
    return JSON.parse(json);
  },

  // 移除临时缓存
  remove(key: string) {
    window.sessionStorage.removeItem(key);
  },

  // 移除全部临时缓存
  clear() {
    window.sessionStorage.clear();
  },
};
3、全局解析守卫
你可以用 router.beforeResolve 注册一个全局守卫。这和 router.beforeEach 类似,因为它在每次导航时都会触发,不同的是,解析守卫刚好会在导航被确认之前、所有组件内守卫和异步路由组件被解析之后调用。
router.beforeResolve 是获取数据或执行任何其他操作(如果用户无法进入页面时你希望避免执行的操作)的理想位置,详见官网。
4、全局后置钩子
可以使用 afterEach 来注册全局后置钩子,然而和守卫不同的是,这些钩子不会接受 next 函数也不会改变导航本身。
在 afterEach 钩子函数中,你可以访问到两个参数:to 和 from,它们分别表示要导航到的目标路由和当前的路由。
使用 afterEach 钩子函数可以方便地处理路由导航完成后的业务逻辑,例如页面访问统计、页面加载时的进度条控制等。
router.afterEach((to, from) => {
  doSomething(to.fullPath)
})
5、路由独享的守卫
你可以直接在路由配置上定义 beforeEnter 守卫。
const routes = [
  {
    path: 'article/:id',
    component: () => import('@/views/news/article.vue'),
    beforeEnter: (to, from) => {
      return false
    },
  },
]
beforeEnter 守卫 只在进入路由时触发,不会在 params、query 或 hash 改变时触发。例如,从 /article/1 进入到 /article/2 或者从 /article/1#title 进入到 /article/1#detail。它们只有在 从一个不同的 路由导航时,才会被触发。
6、组件内的守卫
可以在路由组件内直接定义路由导航守卫(传递给路由配置的)
API配置:
const UserDetails = {
  template: `...`,
  beforeRouteEnter(to, from) {
    // 在渲染该组件的对应路由被验证前调用
    // 不能获取组件实例 `this` !
    // 因为当守卫执行时,组件实例还没被创建!
  },
  beforeRouteUpdate(to, from) {
    // 在当前路由改变,但是该组件被复用时调用
    // 举例来说,对于一个带有动态参数的路径 `/users/:id`,在 `/users/1` 和 `/users/2` 之间跳转的时候,
    // 由于会渲染同样的 `UserDetails` 组件,因此组件实例会被复用。而这个钩子就会在这个情况下被调用。
    // 因为在这种情况发生的时候,组件已经挂载好了,导航守卫可以访问组件实例 `this`
  },
  beforeRouteLeave(to, from) {
    // 在导航离开渲染该组件的对应路由时调用
    // 与 `beforeRouteUpdate` 一样,它可以访问组件实例 `this`
  },
}
五、动态路由
1、添加路由
动态路由主要通过两个函数实现。router.addRoute() 和 router.removeRoute()。它们只注册一个新的路由,也就是说,如果新增加的路由与当前位置相匹配,就需要你用 router.push() 或 router.replace() 来手动导航,才能显示该新路由。
const router = createRouter({
  history: createWebHistory(),
  routes: [{ path: '/:articleName', component: Article }],
})

router.addRoute({ path: '/about', component: About })
// 我们也可以使用 this.$route 或 route = useRoute() (在 setup 中)
router.replace(router.currentRoute.value.fullPath)
// 如果你需要等待新的路由显示,可以使用 await router.replace()
2、删除路由
router.addRoute({ path: '/about', name: 'about', component: About })
// 这将会删除之前已经添加的路由,因为他们具有相同的名字且名字必须是唯一的
router.addRoute({ path: '/other', name: 'about', component: Other })
- 通过调用 router.addRoute() 返回的回调:
const removeRoute = router.addRoute(routeRecord)
removeRoute() // 删除路由如果存在的话
当路由没有名称时,这很有用。
router.addRoute({ path: '/about', name: 'about', component: About })
// 删除路由
router.removeRoute('about')
需要注意的是,如果你想使用这个功能,但又想避免名字的冲突,可以在路由中使用 Symbol 作为名字。
当路由被删除时,所有的别名和子路由也会被同时删除
3、添加嵌套路由
要将嵌套路由添加到现有的路由中,可以将路由的 name 作为第一个参数传递给 router.addRoute(),这将有效地添加路由,就像通过 children 添加的一样。
router.addRoute({ name: 'admin', path: '/admin', component: Admin })
router.addRoute('admin', { path: 'settings', component: AdminSettings })
与下面代码等效
router.addRoute({
  name: 'admin',
  path: '/admin',
  component: Admin,
  children: [{ path: 'settings', component: AdminSettings }],
})
4、查看现有路由
六、其他配置
1、路由元信息
在 Vue.js 中,路由元信息是与路由相关的附加信息,它们可以在路由对象中进行定义。路由元信息通常用于存储一些和路由相关的额外数据,例如页面标题、需要的权限、页面类别等等。
要在 Vue Router 中使用路由元信息,你可以在路由配置中为每个路由对象添加 meta 字段,然后在路由导航过程中访问这些元信息,我们上面已经大量使用了 meta 这一属性。
简单代码演示:
const routes = [
  {
    path: '/home',
    component: Home,
    meta: { requiresAuth: true, title: '首页' } // meta 信息
  },
  {
    path: '/about',
    component: About,
    meta: { title: '关于我们' } // meta 信息
  }
]

const router = new VueRouter({
  routes
})

router.beforeEach((to, from, next) => {
  // 访问元信息
  const pageTitle = to.meta.title
  document.title = pageTitle || '默认标题'

  // 检查权限
  if (to.meta.requiresAuth && !isAuthenticated()) {
    next('/login')
  } else {
    next()
  }
})
在上面的示例中,我们为两个路由添加了不同的元信息,并在全局的 beforeEach 导航守卫中访问这些元信息。我们可以在 beforeEach 守卫中根绝路由的元信息来动态设置页面的标题,或者检查用户权限等操作。
2、路由懒加载
在 Vue.js 中,路由懒加载是一种优化技术,可以帮助减少初始加载时间,通过按需加载路由组件。vue-router 支持使用路由懒加载来异步加载路由组件,以提高应用程序的性能和速度。
要使用路由懒加载,你可以使用动态导入语法(dynamic import syntax)来异步加载组件。
简单代码演示:
const Foo = () => import('./Foo.vue')
const Bar = () => import('./Bar.vue')

const routes = [
  {
    path: '/foo',
    component: Foo
  },
  {
    path: '/bar',
    component: Bar
  }
]
使用动态导入语法 import() 来加载 Foo 和 Bar 组件。当该路由被访问时,对应的组件才会被加载,而不是在初始加载时就加载所有的组件。这样可以提高应用程序的加载速度,并降低初始加载时所需的资源。
3、类型化路由(新功能:v4.1.0+)
在 Vue.js 中,从 vue-router 4.1.0 版本开始,支持了类型化路由。类型化路由允许你在编译阶段对路由进行类型检查,以提高代码的可靠性和可维护性。
要使用类型化路由,你可以使用 TypeScript 或者 Flow 等静态类型检查工具,并且按照以下步骤进行设置:
- 定义路由配置
// router.ts
import { createRouter, createWebHistory, RouteRecordRaw } from 'vue-router'

const routes: Array<RouteRecordRaw> = [
  {
    path: '/',
    name: 'Home',
    component: () => import('../views/Home.vue')
  },
  // 更多路由定义
]

const router = createRouter({
  history: createWebHistory(process.env.BASE_URL),
  routes
})

export default router
- 定义路由类型
// routes.d.ts
import { RouteRecordRaw } from 'vue-router'

declare module 'vue-router' {
  interface RouteMeta {
    requiresAuth?: boolean
  }
}

declare module 'vue-router' {
  interface RouteMeta {
    title: string
  }
}
- 在组件中使用路由
<template>
  <router-link :to="{ name: 'Home' }">Home</router-link>
  <router-view></router-view>
</template>

<script lang="ts">
import { defineComponent } from 'vue'

export default defineComponent({
  // 组件逻辑
})
</script>
我们通过 TypeScript 定义了路由配置,并且使用模块扩展的方式定义了路由元信息的类型。这样就可以在编译时进行路由类型检查,从而减少因为拼写错误或者类型不一致造成的错误,提高了代码的可靠性。
总结
本文深入解读了 vue-router 的各个属性,并结合代码示例进行了详细演示,为您提供了全面的理解。通过本文,您可以更好地掌握 vue-router 的核心概念和功能。上文中的配置代码可在 github 仓库中直接 copy,仓库路径:https://github.com/SmallTeddy/testing-web。
原文地址:https://blog.csdn.net/SmallTeddy/article/details/134513245
本文来自互联网用户投稿,该文观点仅代表作者本人,不代表本站立场。本站仅提供信息存储空间服务,不拥有所有权,不承担相关法律责任。
如若转载,请注明出处:http://www.7code.cn/show_13879.html
如若内容造成侵权/违法违规/事实不符,请联系代码007邮箱:suwngjj01@126.com进行投诉反馈,一经查实,立即删除!


