uniCloud 是 DCloud 联合阿里云、腾讯云,为开发者提供的基于 serverless 模式和 js 编程的云开发平台。
官方文档:https://uniapp.dcloud.net.cn/uniCloud/uni-captcha.html
下载地址:https://ext.dcloud.net.cn/plugin?id=4048
GitCode 仓库:https://gitee.com/dcloud/uni-captcha
-
激励领取:防止被批量褥羊毛
组成部分
-
服务端,创建验证码,即:向数据表opendb–verify-codes中创建状态为待验证的验证码记录(作废同一个设备id和场景值的旧验证码记录),并返回格式为base64的图形验证码资源数据。提示:这里的数据表,状态字段名:state用0表示待验证,用2表示已作废。
-
服务端,云函数或clientDB action中校验验证码,决定是否执行业务逻辑。如果验证码错误则返回错误信息,客户端再重复步骤1-3。提示:验证验证码,可以使用封装好的公共模块的verify方法详情,也可以直接查库校验。
一、创建Demo
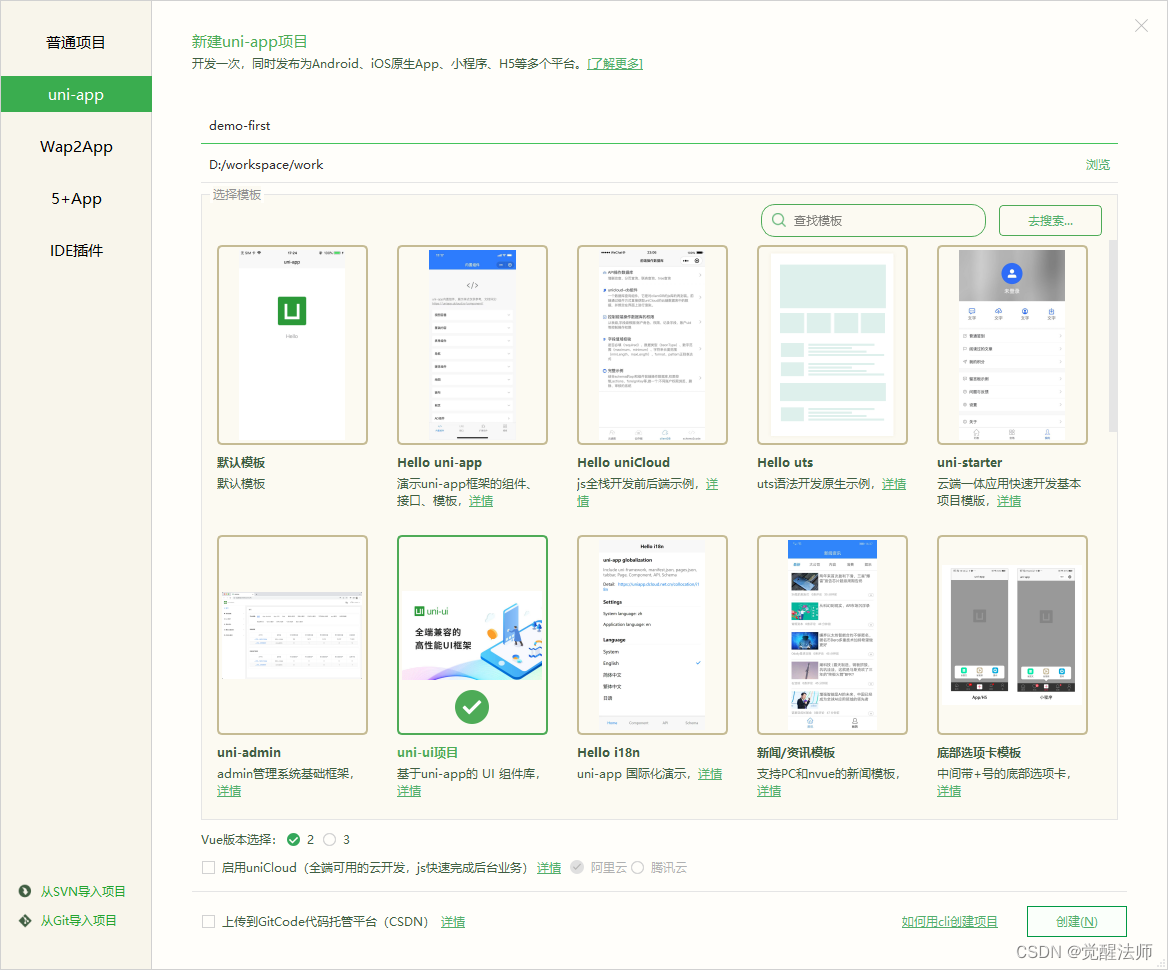
首先我们创建一个uni–app的demo,来演示功能效果。首先打开HBuilderX,选择:文件->新建->项目->uni-app,选择模板uni-ui项目,如下图:
二、创建云函数
Demo创建好后,我们来创建uni-captcha云函数,如下图右击cloudfunctions,选择新建云函数/云对象。


弹出如下图后,我们选择uni-captcha即可,点击确认。

然后cloudfunctions中,则会生成common/uni-captcha和uni-captcha-co两个模块。这时我们先到此为止,后续使用到云函数再作详解。


三、创建login登录页
demo和云函数都创建成功后,我们实现一个简单的登录页面,如下图:

这里我们使用普通验证码组件uni-captcha,代码如下:
<template>
<view class="login-wrap">
<uni-forms ref="form" :modelValue="formData" :rules="rules">
<uni-forms-item required label="账号" name="name">
<uni-easyinput type="text" v-model="formData.name" placeholder="请输入姓名" />
</uni-forms-item>
<uni-forms-item required label="密码" name="password">
<uni-easyinput type="password" v-model="formData.password" placeholder="请输入姓名" />
</uni-forms-item>
<uni-forms-item required name="captcha" label="验证码">
<uni-captcha :scene="formData.scene" v-model="formData.captcha"></uni-captcha>
</uni-forms-item>
</uni-forms>
<button type="primary" @click="submitForm">登录</button>
</view>
</template>
<script>
export default {
data() {
return {
formData:{
captcha:"",
scene:"login"
},
rules: {}
}
},
methods: {
submitForm(){
}
}
}
</script>
<style lang="scss">
.login-wrap{
padding: 30rpx;
}
</style>四、表单校验
uni-forms 需要通过 rules 属性传入约定的校验规则。如果你对uni扩展组件还不了解的,可以去官网查看。
地址:https://uniapp.dcloud.net.cn/component/uniui/uni-forms.html
4.1 必填校验
rules: {
    name: {
        rules: [
            { required: true, errorMessage: '请输入姓名' }
        ]
    },
    password: {
        rules: [
            { required: true, errorMessage: '请输入密码' }
        ]
    },
    captcha: {
        rules: [
            { required: true, errorMessage: '请输入验证码' }
        ]
    }
}然后在methods方法中,给提交函数添加表单校验执行函数,代码如下:
submitForm(){
    this.$refs.form.validate().then(res=>{
        console.log('表单数据信息:', res);
    }).catch(err =>{
        console.log('表单错误信息:', err);
    })
}此时,点击“登录”按钮,如果未填写任务信息,则表单会提示相应错误,如下图:

4.2 创建云对象
此时我们创建一个云对象uni-captcha-demo,用于对表单中输入的验证码,进行校验其是否正确。还是在cloudfunctions上右击,选择“新建云函数/云对象”,如下图:

点击创建后,cloudfunctions中会生成uni-captcha-demo云对象。如下图:
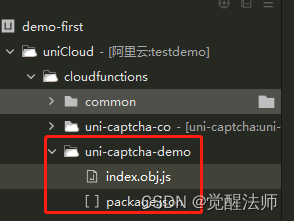
此时可以在index.obj.js中添加图形验证码校验功能,返回校验结果。代码如下:
//导入验证码公共模块
const uniCaptcha = require('uni-captcha')
//获取数据库对象
const db = uniCloud.database()
//获取数据表opendb-verify-codes对象
const verifyCodes = db.collection('opendb-verify-codes')
module.exports = {
    async verify({scene,captcha}) {
        let res = await uniCaptcha.verify({scene,captcha})
        return res;
    }
}同样,uni-captcha-demo云对象完成后,也需要右击选择”上传部署“。
4.3 验证码校验
validateFunction 异步校验:如果需要异步校验,validateFunction 需要返回一个 Promise ,校验不通过 执行 reject(new Error(‘错误信息‘)) 返回对应的错误信息,如果校验通过则直接执行 resolve() 即可,在异步校验方法中,不需要使用 callback 。
<script>
    //引入uni-captcha-demo云对象
    const uniCaptchaDemoCo = uniCloud.importObject("uni-captcha-demo");
    export default {
        data() {
            return {
                //...
            }
        },
        methods: {
            //...
        }
    }
</script>rules: {
//...
captcha: {
rules: [
{ required: true, errorMessage: '请输入验证码' },
{ validateFunction: (rule, value, data, callback) => {
return new Promise((resolve, reject) => {
//调用verify函数进行校验
uniCaptchaDemoCo.verify(this.formData).then(e=>{
resolve();
}).catch(e => {
reject(new Error(e.errMsg));
});
})
} }
]
},
}五、解决MODULE_NOT_FOUND
以上校验功能已全部完成了,但此时大家会发现,所有信息都填写后,点击“登录“会报如下图错误:
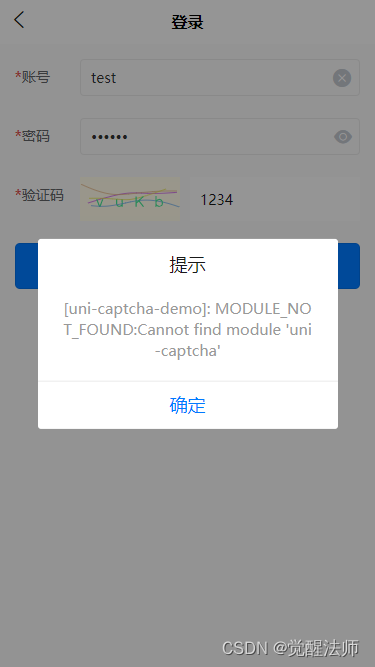
这是因为在创建云对象uni-captcha-demo时,内部使用到了uni-captcha模块,需要将其关联上。在uni-captcha-demo上鼠标右击,选择”管理公共模块或扩展库依赖“
。

选择”uni-captcha“公共模板,点击确认。然后再次右击uni-captcha-demo选择”上传部署“即可。

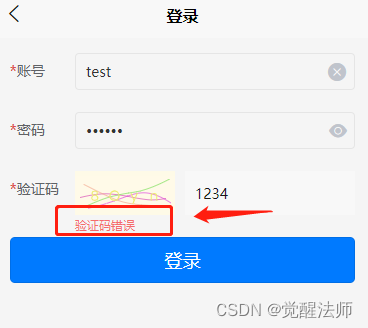
以上步骤完成后,我们再次将验证码输入错误,点击”登录“后则会显示”验证码错误“,如下图:
六、刷新验证码
另外,我们发现如果验证码错误后,显示的验证码不会自动刷新。由于这里我们使用的是uni-app的扩展UI组件,功能不好升级维护,如果觉得此组件不好用,也可以自己使用uni-captcha-co获取验证进行个性化操作。
这里主要是为了演示,就先在原基本上完成刷新功能。打开uni_modules目录,找到uni-captcha组件,再打开components目录中的uni-captcha,我们来看下内部是如何实现的。
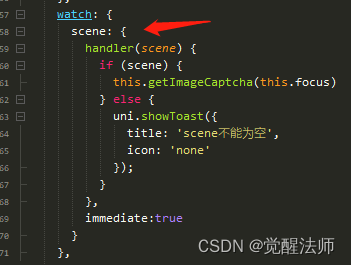
如上图所示,我们发现应用场景发生改变后,验证码会重新获取。那我们对代码进行如下修改即可,代码如下:
<script>
    const uniCaptchaDemoCo = uniCloud.importObject("uni-captcha-demo");
    //索引
    let index = 0;
    export default {
        data() {
            return {
                formData:{
                    captcha:"",
                    scene:"login"
                },
                rules: {
                    //...

                    captcha: {
                        rules: [
                            { required: true, errorMessage: '请输入验证码' },
                            { validateFunction: (rule, value, data, callback) => {
                                return new Promise((resolve, reject) => {
                                    uniCaptchaDemoCo.verify(this.formData).then(e=>{
                                        resolve();
                                    }).catch(e => {
                                        //修改场景值,重新获取验证码
                                        this.formData['scene'] = 'login'+(++index);
                                        reject(new Error(e.errMsg));
                                    });
                                })
                            } }
                        ]
                    },
                },
                //rules end
            }
        },
        methods: {
            //...
        }
    }
</script>
七、公共模块
云端一体组件uni-captcha和uni-popup-captcha,已经集成公共模块的获取验证码接口,这里不使用组件模块,直接通过接口获取验证码和校验功能。
在上面创建uni-captcha模块时,已生成了uni-captcha-co云对象。
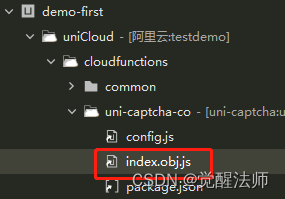
7.1 获取验证码
uni-captcha-co云函数中,已实现了获取验证码功能,直接调用即可,代码如下:
//导入验证码公共模块
const uniCaptcha = require('uni-captcha')
//获取数据库对象
const db = uniCloud.database();
//获取数据表opendb-verify-codes对象
const verifyCodes = db.collection('opendb-verify-codes');

module.exports = {
    //获取验证码
    async getImageCaptcha({
        scene
    }) {
        //获取设备id
        let {
            deviceId,
            platform
        } = this.getClientInfo();
        //根据:设备id、场景值、状态,查找记录是否存在
        let res = await verifyCodes.where({
            scene,
            deviceId,
            state: 0
        }).limit(1).get();
        //如果已存在则调用刷新接口,反之调用插件接口
        let action = res.data.length ? 'refresh' : 'create';
        //执行并返回结果
        //导入配置,配置优先级说明:此处配置 > uni-config-center
        return await uniCaptcha[action]({
            scene, //来源客户端传递,表示:使用场景值,用于防止不同功能的验证码混用
            uniPlatform: platform
        })
    }
}将前面登录页面引入的云对象更换成“uni-captcha-co”,然后定义getVerifyImage()函数,获取图形验证码。
公共模块中提供了刷新验证码功能,测试发现设备校验这块,本地模拟测试存在问题,所以这里未使用,有需要的可以自行研究。
页面代码如下:
<template>
    <view class="login-wrap">
        <uni-forms ref="form" :modelValue="formData" :rules="rules">
            <uni-forms-item required label="账号" name="name">
                <uni-easyinput type="text" v-model="formData.name" placeholder="请输入姓名" />
            </uni-forms-item>
            <uni-forms-item required label="密码" name="password">
                <uni-easyinput type="password" v-model="formData.password" placeholder="请输入姓名" />
            </uni-forms-item>
            <uni-forms-item required name="captcha" label="验证码">
                <!-- uni-captch-box -->
                <view class="uni-captch-box">
                    <uni-easyinput type="password" v-model="formData.captcha" placeholder="请输入验证码" />
                    <image class="captcha-img" mode="aspectFill" :src="imgUrl" @click="getVerifyImage"></image>
                </view>
                <!-- /uni-captch-box -->
            </uni-forms-item>
        </uni-forms>
        <button type="primary" @click="submitForm">登录</button>
    </view>
</template>

<script>
    const uniCaptchCo = uniCloud.importObject('uni-captcha-co');

    export default {
        data() {
            return {
                imgUrl: "",
                formData:{
                    captcha:"",
                    scene:"login"
                },
                rules: {
                    name: {
                        rules: [
                            { required: true, errorMessage: '请输入姓名' }
                        ]
                    },
                    password: {
                        rules: [
                            { required: true, errorMessage: '请输入密码' }
                        ]
                    },
                    captcha: {
                        rules: [
                            { required: true, errorMessage: '请输入验证码' }
                        ]
                    },
                },
                //rules end
            }
        },
        created() {
            this.getVerifyImage();
        },
        methods: {
            //获取验证码
            getVerifyImage(){
                uniCaptchCo.getImageCaptcha({scene: this.formData.scene}).then(res => {
                    if(res.code==0){
                        this.imgUrl = res.captchaBase64;
                    }else{
                        uni.showToast({
                            icon: 'none',
                            title: res.message
                        });
                    }
                }).catch(e => {});
            },
            //表单校验
            submitForm(){
                this.$refs.form.validate().then(res=>{
                    console.log('表单数据信息:', res);
                    uni.showToast({
                        icon: 'none',
                        title: '校验成功~'
                    });
                }).catch(err =>{
                    // console.log('表单错误信息:', err);
                })
            }
        }
    }
</script>

<style lang="scss">
.login-wrap{
    padding: 30rpx;
}

.uni-captch-box{ position: relative; padding-right: 240rpx;
    .captcha-img{ width: 200rpx; height: 70rpx; border: 3rpx solid #F0F0F0; border-radius: 5rpx; position: absolute; top: 0; right: 0; z-index: 10; background-color: #aaa; }
}
</style>
7.2校验验证码
把校验验证码功能函数拷到uni-captcha-co/index.obj.js中,代码如下:
// 开发文档: https://uniapp.dcloud.net.cn/uniCloud/cloud-obj
//导入验证码公共模块
const uniCaptcha = require('uni-captcha')
//获取数据库对象
const db = uniCloud.database();
//获取数据表opendb-verify-codes对象
const verifyCodes = db.collection('opendb-verify-codes');

module.exports = {
    //校验验证码
    async verify({scene,captcha}) {
        let res = await uniCaptcha.verify({scene,captcha})
        return res;
    },
    //获取验证码
    //...
}
这里将前面实现的rules校验,修改成uni-captcha-co对象uniCaptchCo即可,如下:
rules: {
    //...

    captcha: {
        rules: [
            { required: true, errorMessage: '请输入验证码' },
            { validateFunction: (rule, value, data, callback) => {
                return new Promise((resolve, reject) => {
                    //调用verify函数进行校验
                    uniCaptchCo.verify(this.formData).then(e=>{
                        resolve();
                    }).catch(e => {
                        reject(new Error(e.errMsg));
                    });
                })
            } }
        ]
    },
}原文地址:https://blog.csdn.net/jiciqiang/article/details/129254510
本文来自互联网用户投稿,该文观点仅代表作者本人,不代表本站立场。本站仅提供信息存储空间服务,不拥有所有权,不承担相关法律责任。
如若转载,请注明出处:http://www.7code.cn/show_14781.html
如若内容造成侵权/违法违规/事实不符,请联系代码007邮箱:suwngjj01@126.com进行投诉反馈,一经查实,立即删除!


