POST请求
<!DOCTYPE html>
<html lang="en">
<head>
<meta charset="UTF-8">
<meta name="viewport" content="width=device-width, initial-scale=1.0">
<title>AJAX POST 请求</title>
<style>
#result{
width:200px;
height:100px;
border:solid 1px #903;
}
</style>
</head>
<body>
<div id="result"></div>
<script>
//获取元素对象
const result = document.getElementById("result");
//绑定事件
result.addEventListener("mouseover", function(){
//1.创建对象
const xhr=new XMLHttpRequest();
//2.初始化 设置类型与URL
xhr.open('POST','http://127.0.0.1:8000/server')
//3.发送
xhr.send()
//4.事件绑定
xhr.onreadystatechange=function(){
//判断
if(xhr.readyState==4){
if(xhr.status>=200 && xhr.status<300){
//设置 result 的文本
result.innerHTML = xhr.response;
}
}
}
});
</script>
</body>
</html>
//1. 引入express
const express = require('express');

//2. 创建应用对象
const app = express();

//3. 创建路由规则
// request 是对请求报文的封装
// response 是对响应报文的封装
app.get('/server', (request, response) => {
    //设置响应头  设置允许跨域
    response.setHeader('Access-Control-Allow-Origin', '*');
    //设置响应体
    response.send('HELLO AJAX - 2');
});
//POST规划路由
app.post('/server', (request, response) => {
    //设置响应头  设置允许跨域
    response.setHeader('Access-Control-Allow-Origin', '*');

    //设置响应体
    response.send('HELLO AJAX POST');
});
//4. 监听端口启动服务
app.listen(8000, () => {
    console.log("服务已经启动, 8000 端口监听中....");
});
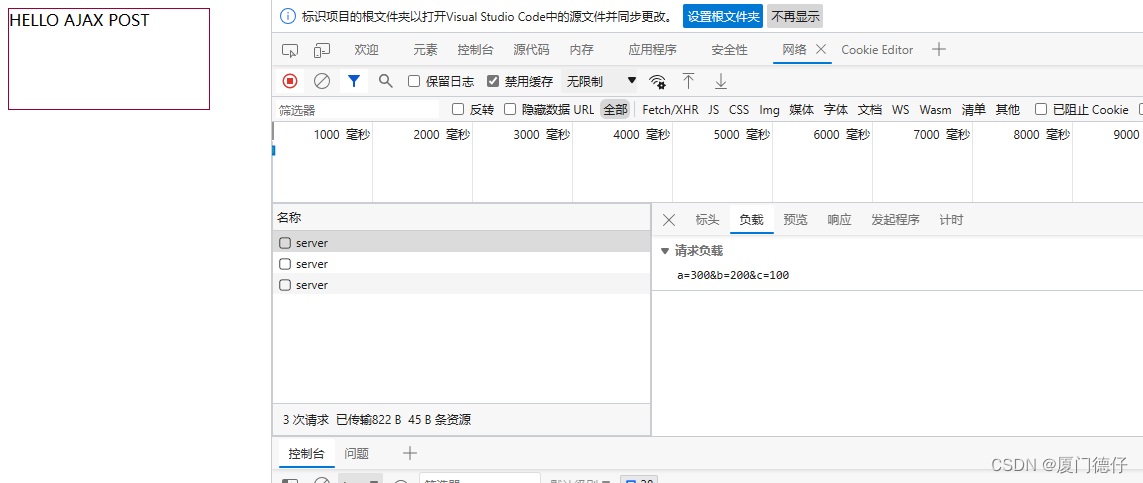
POST请求携带参数的方试
//获取元素对象
const result = document.getElementById("result");
//绑定事件
result.addEventListener("mouseover", function(){
//1.创建对象
const xhr=new XMLHttpRequest();
//2.初始化 设置类型与URL
xhr.open('POST','http://127.0.0.1:8000/server')
//3.发送
let params = 'a=300&b=200&c=100'
xhr.send(params) //post请求携带参数,是在发送请求的时候携带的
//4.事件绑定
xhr.onreadystatechange=function(){
//判断
if(xhr.readyState==4){
if(xhr.status>=200 && xhr.status<300){
//设置 result 的文本
result.innerHTML = xhr.response;
}
}
}
});

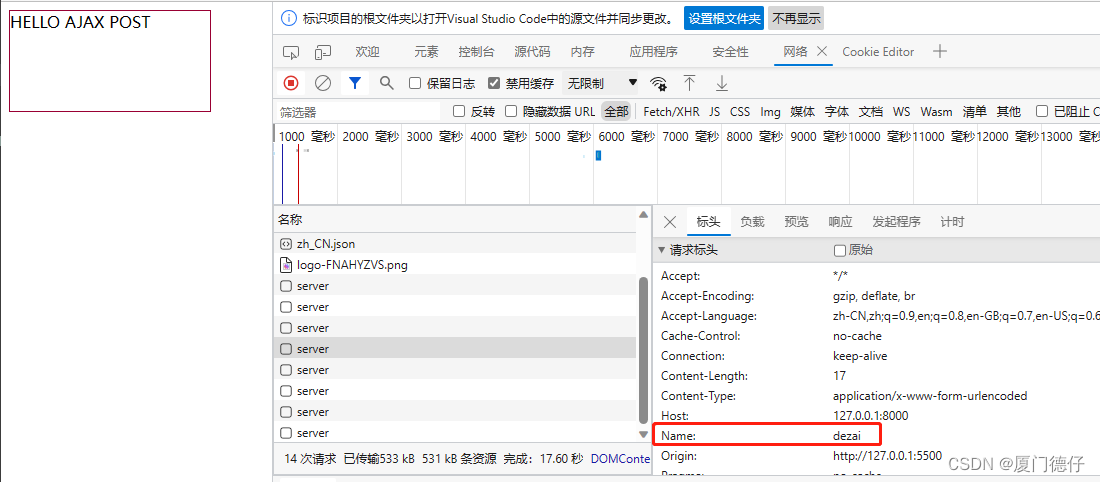
设置请求头
const result = document.getElementById("result");
result.addEventListener("mouseover", function(){
const xhr=new XMLHttpRequest();
xhr.open('POST','http://127.0.0.1:8000/server')
//设置请求头信息 使用setRequestHeader 需要在open之后,send之前使用中,其中的参数键值对,第一个为键。第二个为值
xhr.setRequestHeader('Content-Type','application/x-www-form-urlencoded')
xhr.setRequestHeader('name','dezai')//可以设置自定义请求头,但是需要后台设置允许自定义请求头
let params = 'a=300&b=200&c=100'
xhr.send(params) //post请求携带参数,是在发送请求的时候携带的
xhr.onreadystatechange=function(){
//判断
if(xhr.readyState==4){
if(xhr.status>=200 && xhr.status<300){
//设置 result 的文本
result.innerHTML = xhr.response;
}
}
}
});

原文地址:https://blog.csdn.net/david_520042/article/details/131694006
本文来自互联网用户投稿,该文观点仅代表作者本人,不代表本站立场。本站仅提供信息存储空间服务,不拥有所有权,不承担相关法律责任。
如若转载,请注明出处:http://www.7code.cn/show_15511.html
如若内容造成侵权/违法违规/事实不符,请联系代码007邮箱:suwngjj01@126.com进行投诉反馈,一经查实,立即删除!
声明:本站所有文章,如无特殊说明或标注,均为本站原创发布。任何个人或组织,在未征得本站同意时,禁止复制、盗用、采集、发布本站内容到任何网站、书籍等各类媒体平台。如若本站内容侵犯了原著者的合法权益,可联系我们进行处理。


