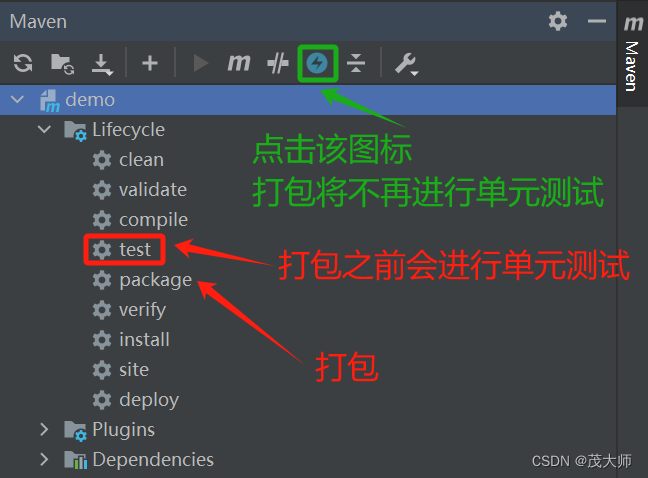
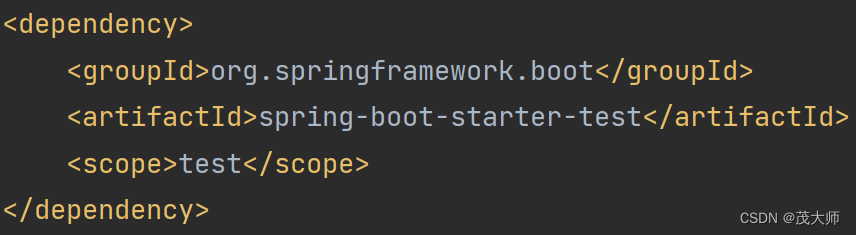
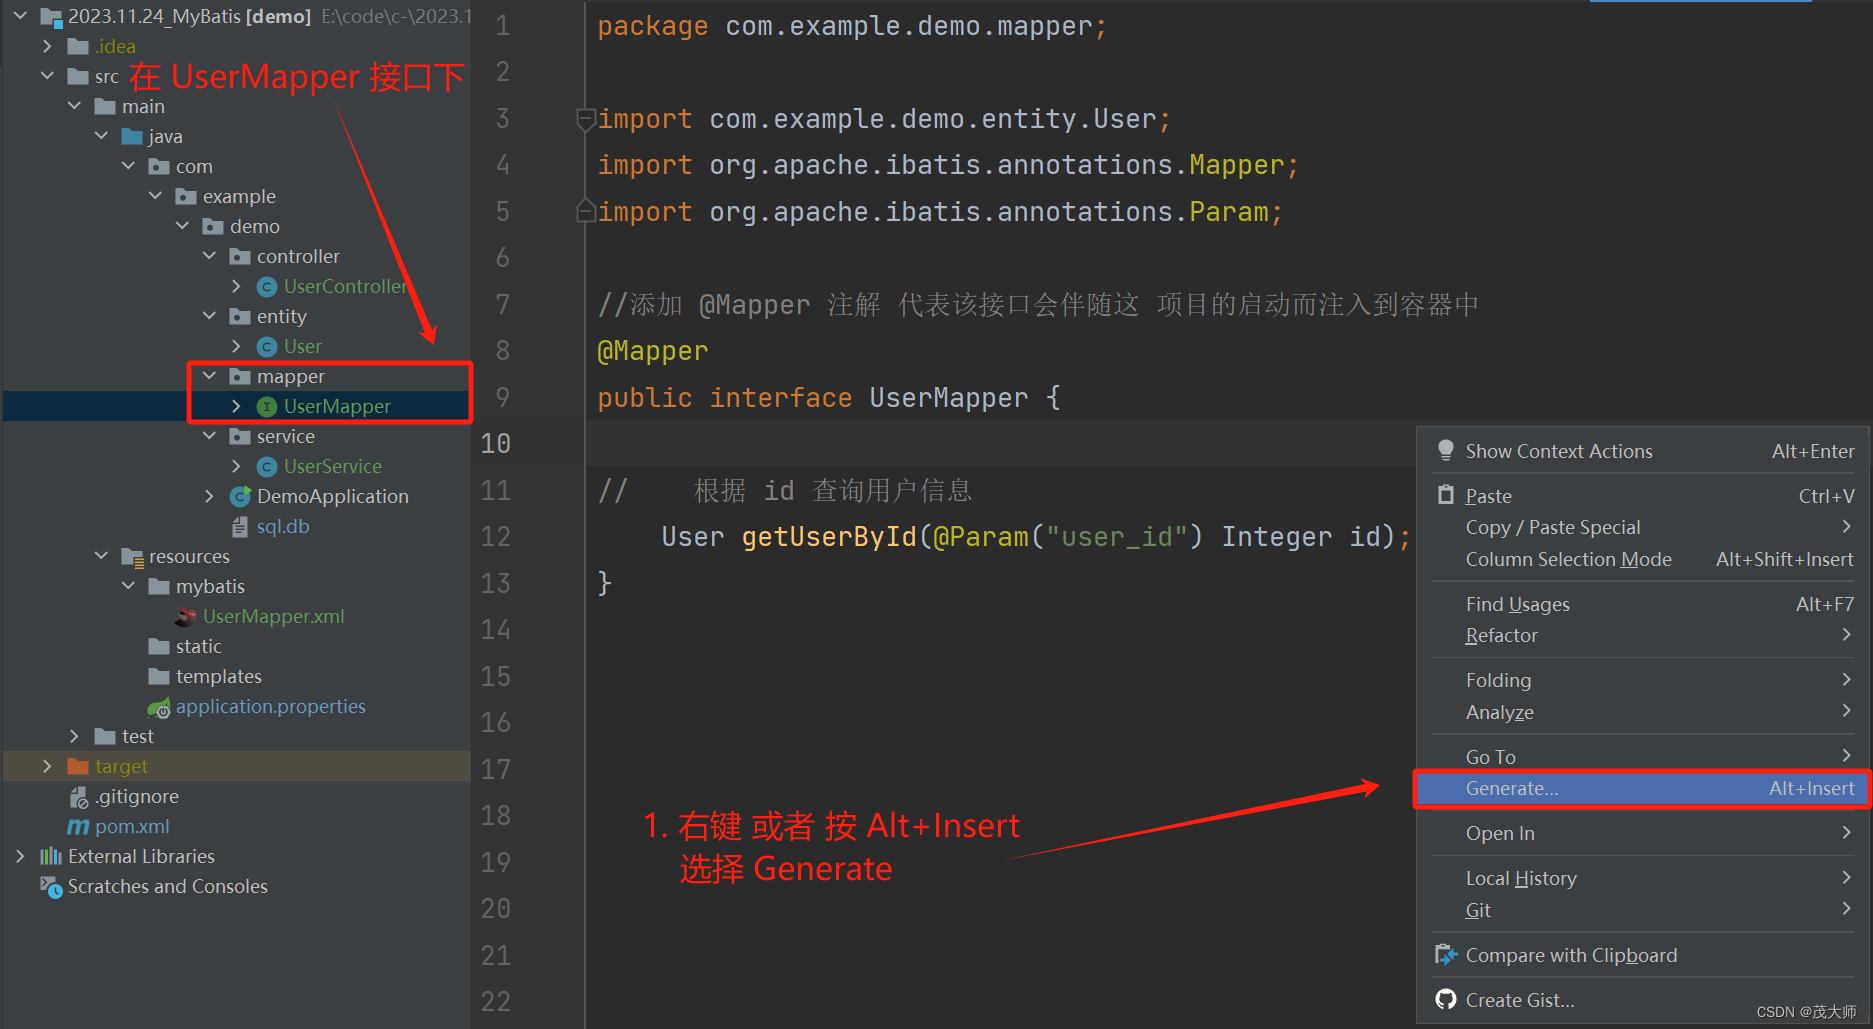
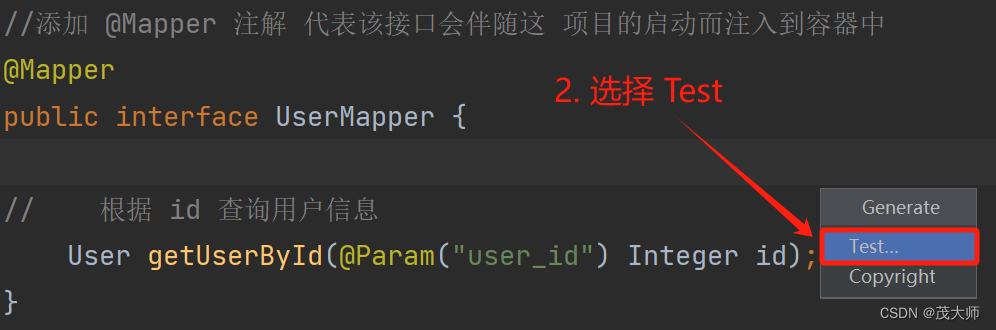
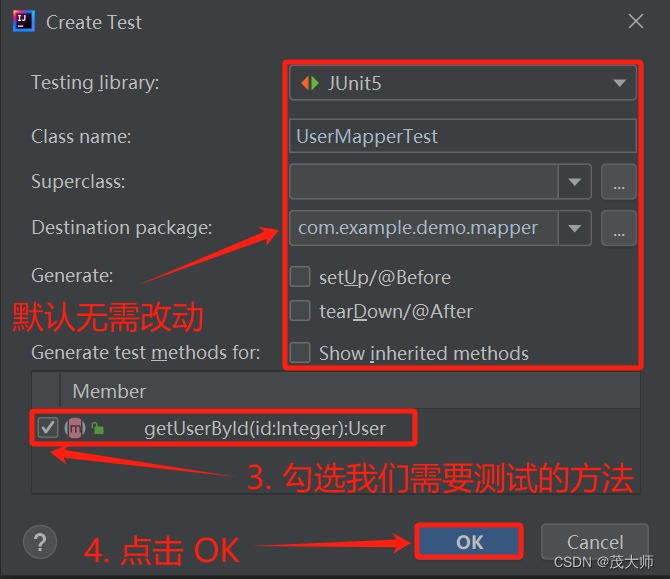
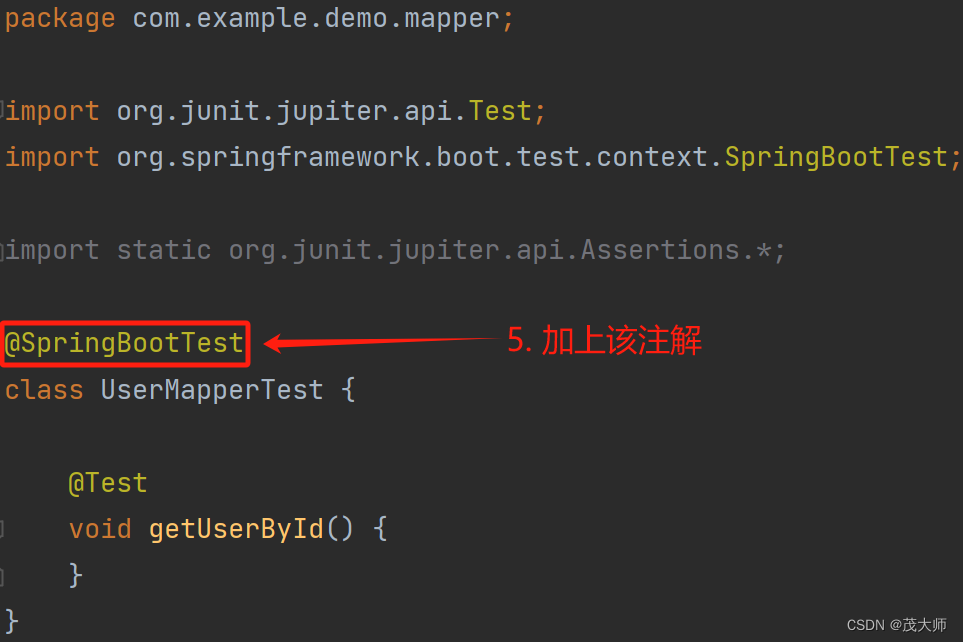
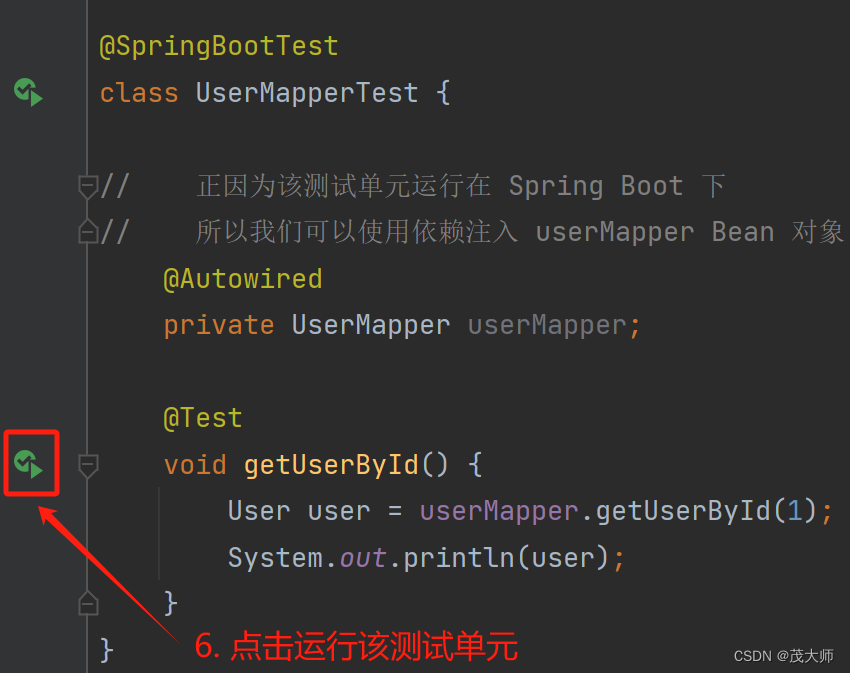
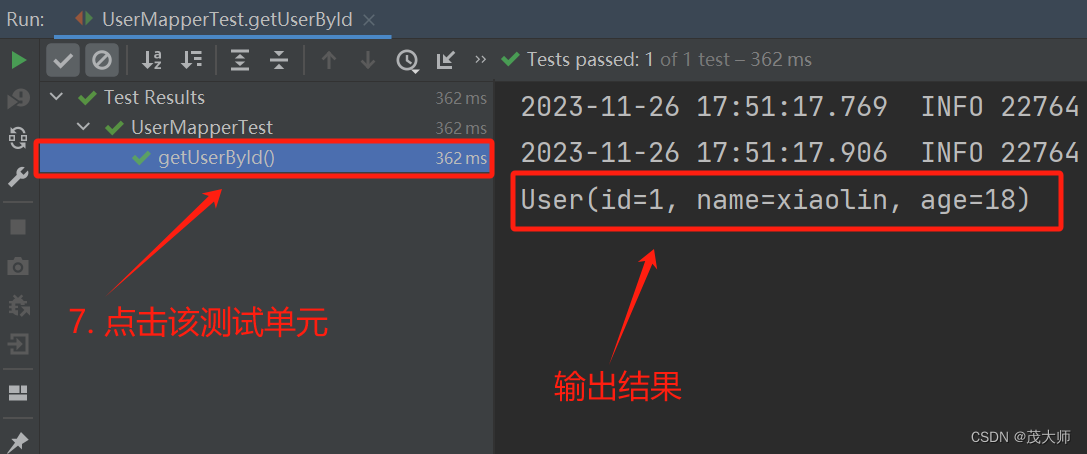
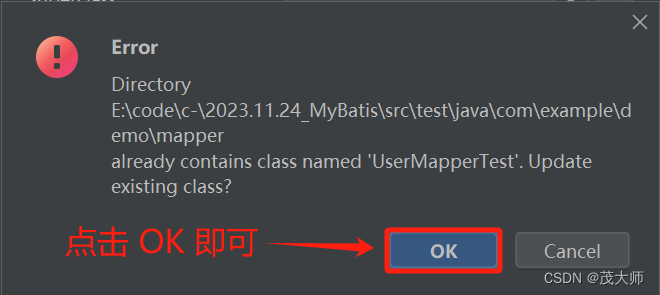
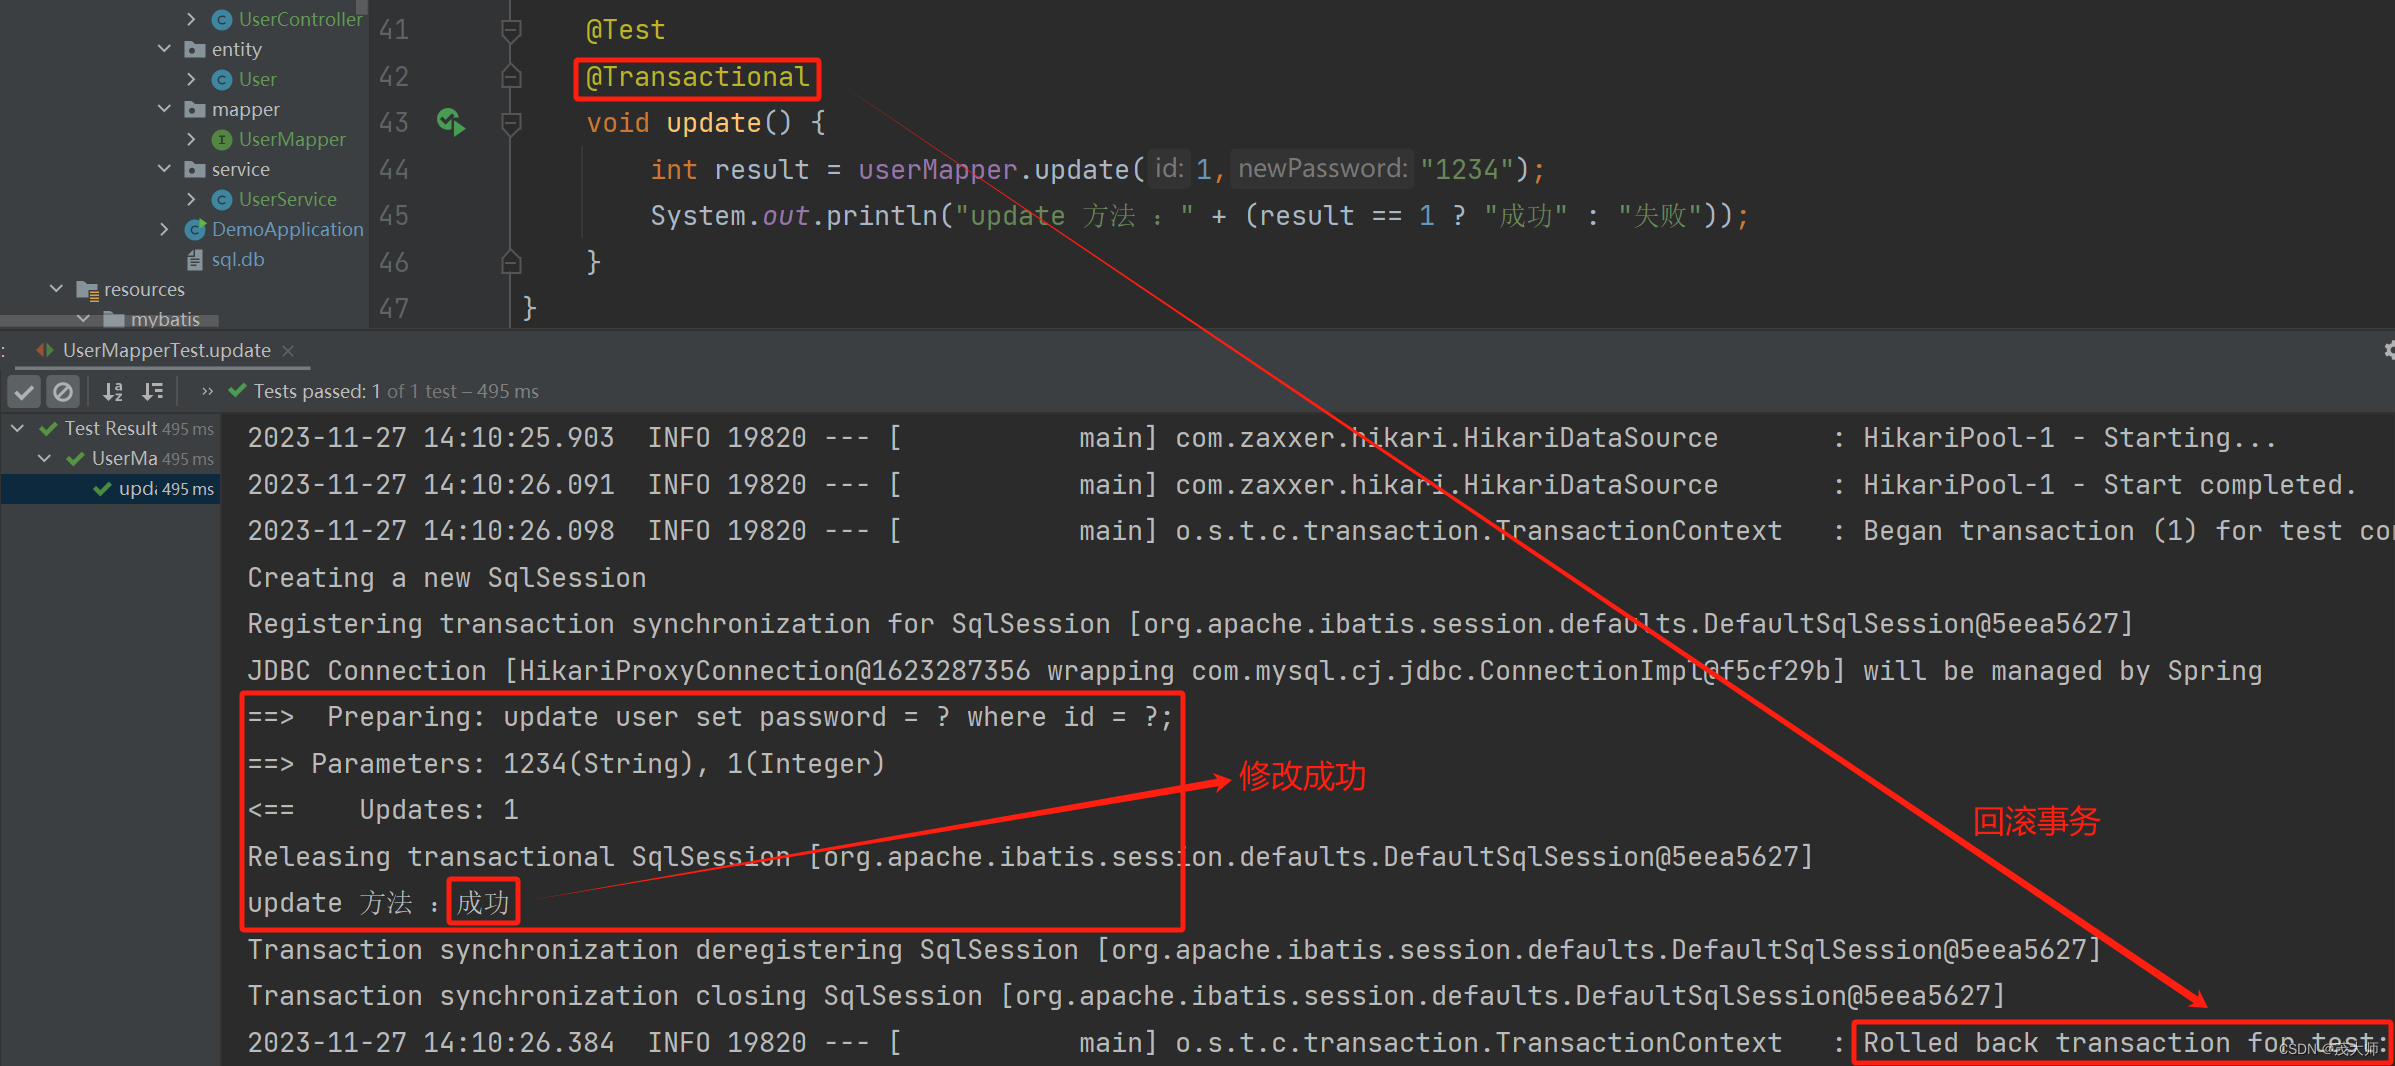
当前位置: 首页spring正文 本文介绍: 单元测试优势单元测试的使用具体步骤实现不污染数据库 目录 单元测试 优势 单元测试的使用 具体步骤 实现不污染数据库 阅读下面文章之前 建议点击下方链接了解 MyBatis 的创建与使用 MyBatis 的配置与使用 单元测试 单元测试 指对软件中的最小可测试单元进行检查和验证的过程 单元测试 由开发人员在编码阶段完成,通常用于检测被测代码的一个很小的、很明确的功能是否正确 如果测试结构符合我们的预期,称之为测试通过,否则就是测试未通过 优势 可以简单、直观、快速的测试某一功能是否正确 在打包项目之前,所有的单元测试必须通过,否则不能打包成功,所以可以帮助我们发现问题 使用单元测试,在测试功能的时候,可以不污染连接的数据库,即能在不对数据库进行任何改变的情况下,测试功能(需使用 @Transactional 注解) 单元测试的使用 每个 Spring Boot 项目均会内置 单元测试的依赖 该单元测试框架主要是依赖于 JUnit 实现的 具体步骤 此处我们测试 根据 id 查询用户对象 功能 加上该注释表明当前单元测试的类是运行在 Spring Boot 环境中的 一定不能省略!!! 加上注释后,完善我们的测试代码 import com.example.demo.entity.User; import org.junit.jupiter.api.Test; import org.springframework.beans.factory.annotation.Autowired; import org.springframework.boot.test.context.SpringBootTest; import static org.junit.jupiter.api.Assertions.*; @SpringBootTest class UserMapperTest { // 正因为该测试单元运行在 Spring Boot 下 // 所以我们可以使用依赖注入 userMapper Bean 对象 @Autowired private UserMapper userMapper; @Test void getUserById() { User user = userMapper.getUserById(1); System.out.println(user); } } 运行观察输出结果 实现不污染数据库 当我们想要测试一些会对数据库进行 增删改 的 方法时,这必然会改动我们数据库中的数据 为了避免出现上述情况,我们可以在 测试方法上添加 @Transactional 注解 添加上该注解,在测试完成后会自动回滚事务,从而避免对数据库进行修改 实例理解 我们想要修改 user 表中的 id = 1 的用户密码,其修改为 1234 如上表所示,该用户的原始密码为 123456 初始化 UserMapper 接口 此处我们在接口中添加一个 update 方法 import com.example.demo.entity.User; import org.apache.ibatis.annotations.Mapper; import org.apache.ibatis.annotations.Param; //添加 @Mapper 注解 代表该接口会伴随这 项目的启动而注入到容器中 @Mapper public interface UserMapper { // 根据 id 修改用户密码 Integer update(@Param("user_id") Integer id, @Param("new_password") String newPassword); } 初始化 UserMapper XML 文件 在与 接口相对应的 XML 文件中 添加上与 update 方法 相对应的 sql 语句 <?xml version="1.0" encoding="UTF-8"?> <!DOCTYPE mapper PUBLIC "-//mybatis.org//DTD Mapper 3.0//EN" "http://mybati s.org/dtd/mybatis-3-mapper.dtd"> <mapper namespace="com.example.demo.mapper.UserMapper"> <update id="update"> update user set password = #{new_password} where id = #{user_id}; </update> </mapper> 创建 update 的测试方法 注意 如果出现该报错,直接点击 OK 即可 因为我们之前 测试 getUserById 方法时已经创建过 UserMapperTest 类了 所以我们仅点击 OK,将该类更新即可 即在原 UserMapperTest 类中,更新添加上我们需要测试的 update 方法 此处给 update 方法传入 id = 1 和 newPassword = “1234” @Test @Transactional void update() { int result = userMapper.update(1,"1234"); System.out.println("update 方法 :" + (result == 1 ? "成功" : "失败")); } 执行测试方法 测试方法执行成功 重新查询数据库,发生数据并未污染 对 JUnit5 感兴趣的 可以点击下方链接详细了解 关于 JUnit5 详解 原文地址:https://blog.csdn.net/weixin_63888301/article/details/134629279 本文来自互联网用户投稿,该文观点仅代表作者本人,不代表本站立场。本站仅提供信息存储空间服务,不拥有所有权,不承担相关法律责任。 如若转载,请注明出处:http://www.7code.cn/show_21632.html 如若内容造成侵权/违法违规/事实不符,请联系代码007邮箱:suwngjj01@126.com进行投诉反馈,一经查实,立即删除! 主题授权提示:请在后台主题设置-主题授权-激活主题的正版授权,授权购买:RiTheme官网显示所有内容声明:本站所有文章,如无特殊说明或标注,均为本站原创发布。任何个人或组织,在未征得本站同意时,禁止复制、盗用、采集、发布本站内容到任何网站、书籍等各类媒体平台。如若本站内容侵犯了原著者的合法权益,可联系我们进行处理。bbootg 代码007普通 打赏 收藏 海报 链接