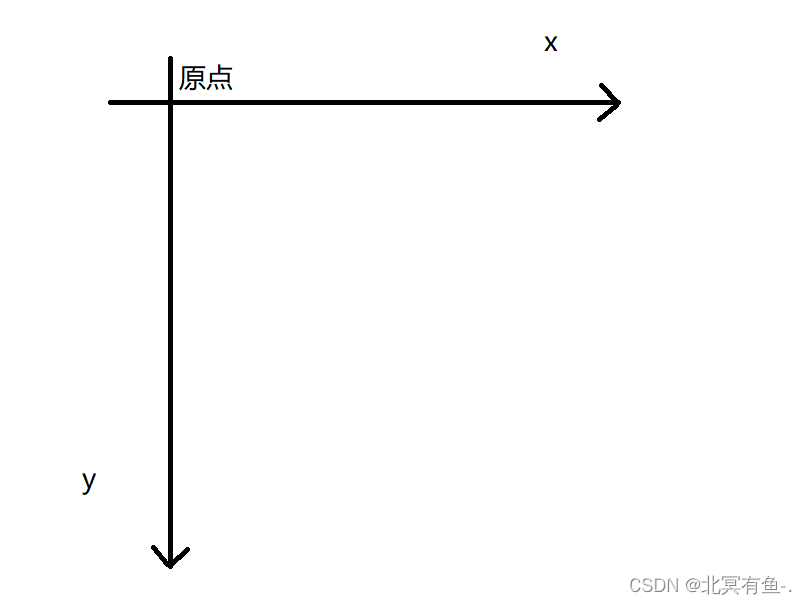
CSS
<body>
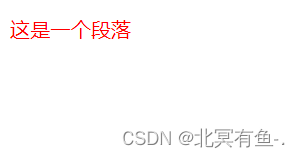
    <p>
        这是一个段落
    </p>
    <!-- style标签可以放到任何位置 -->
    <style>
        p {
            color: red;
        }
    </style>
这个{ } 里面的 CSS 属性, 是可以写一个或多个
每个属性都是一个键值对, 键和值之间使用 : 分割,
键值对之间使用 ; 分割
每个键值对可以独占一行, 也可以不独占
三种写 CSS 的方式
- 使用 style 便签, 直接把 CSS 写到 html 文件中的.此时的 style 标签可以放到任何位置, 一般建议放到 head 标签里.
- 内联样式: 使用 style 属性, 针对指定的元素设置样式. (此时不需要写选择器, 直接写属性键值对), 这个时候只是针对当前元素生效.
- 外部样式: 把 css 代码单独作为一个 .css 文件, 再让 html 引入该css文件
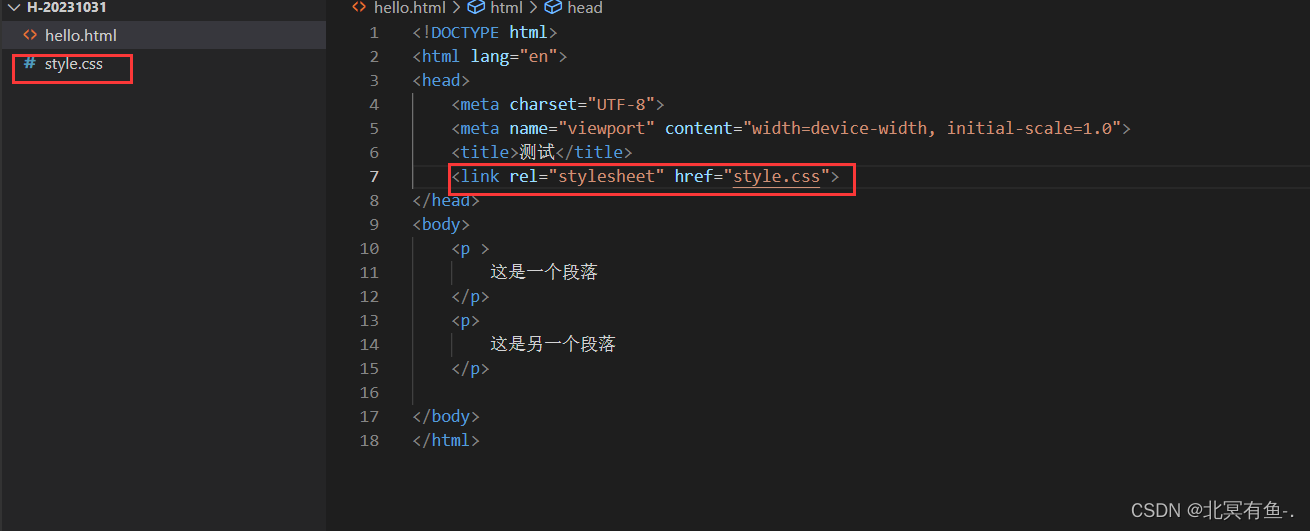
在实际开发中, 一般都是使用外部样式来写css, 让 html 和 css 分离开
CSS 选择器
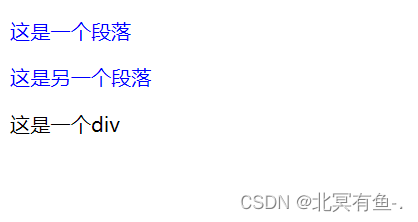
<body>
    <style>
        p {
            color: blue;
            font: 40px;
        }
    </style>
    <p >
        这是一个段落
    </p>
    <p>
        这是另一个段落
    </p>
    <div>
        这是一个div
    </div>
</body>
2. 类选择器
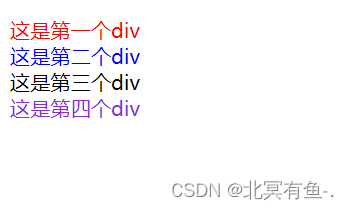
更好的选择, 可以创建 CSS 类, 手动指定哪些元素应用这个类
<style>
        /* 此处定义了一个 CSS 类, 名字就叫做 one , CSS 类定义的时候需要使用. 开头 */
        .one {
            color:red;
        }
        .two {
            color:blue
        }
        .thread {
            color: black;
        }
        .four {
            color: blueviolet;
        }

    </style>
    <div class="one">
        这是第一个div
    </div>
    <div class="two">
        这是第二个div
    </div>
    <div class="thread">
        这是第三个div
    </div>
    <div class="four">
        这是第四个div
    </div>
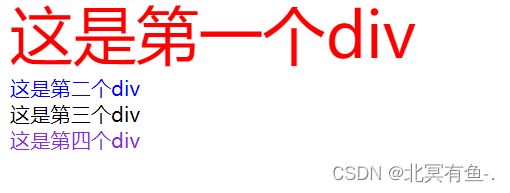
<style>
        /* 此处定义了一个 CSS 类, 名字就叫做 one , CSS 类定义的时候需要使用. 开头 */
        .one {
            color:red;
        }
        .two {
            color:blue
        }
        .thread {
            color: black;
        }
        .four {
            color: blueviolet;
        }
        .five {
            font-size: 50px;
        }
    </style>
    <div class="one five">
        这是第一个div
    </div>
    <div class="two">
        这是第二个div
    </div>
    <div class="thread">
        这是第三个div
    </div>
    <div class="four">
        这是第四个div
    </div>
- ID 选择器
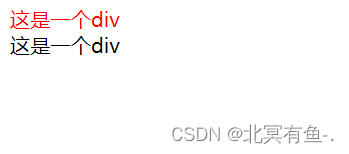
html 页面中的每个元素, 都是可以设置一个唯一的id, 作为元素的身份标识, 给元素安培 id 后, 就可以通过 id 来选中对应的元素了.
<style>
        #oneDiv{
            color: red;
        }
    </style>

    <div id="oneDiv">
        这是一个div
    </div>
    <div id="twoDiv">
        这是一个div
    </div>
类选择器, 是可以让多个元素对应同一个类
id 选择器, 则只能针对唯一的元素生效, 因为在一个页面中, 只能又唯一的id
<style>
        ul li {
            color: blue;
        }
    </style>

    <ol>
        <li>aaa</li>
        <li>bbb</li>
        <li>ccc</li>
        <li>ddd</li>
    </ol>
    <ul>
        <li>aaa</li>
        <li>bbb</li>
        <li>ccc</li>
        <li>ddd</li>
    </ul>
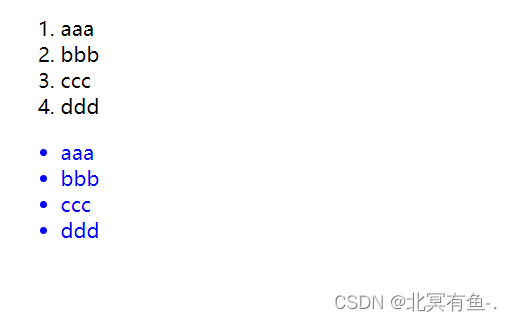
先找页面中所有的ul. 然后在这些 ul 里找所有的 li
只要是 ul 的后代即可 , 不一定非的是”子元素”
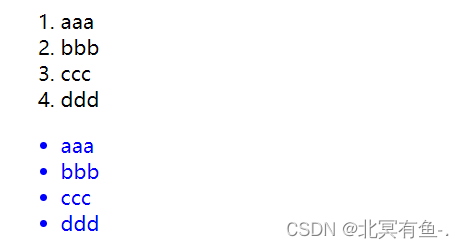
 <style>
        .one li {
            color: blue;
        }
    </style>

    <ol>
        <li>aaa</li>
        <li>bbb</li>
        <li>ccc</li>
        <li>ddd</li>
    </ol>
    <ul class="one">
        <li>aaa</li>
        <li>bbb</li>
        <li>ccc</li>
        <li>ddd</li>
    </ul>
5. 子选择器
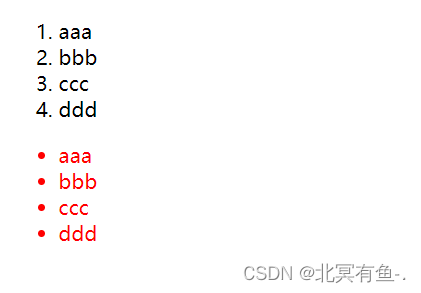
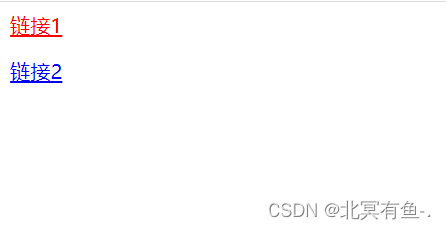
这个也是把简单多个的基础选择器组合(标签, 类, id选择器),只是找匹配的子元素, 不找孙子元素之类的.
 <style>
        .one>li {
            color: red;
        }
    </style>

    <ol>
        <li>aaa</li>
        <li>bbb</li>
        <li>ccc</li>
        <li>ddd</li>
    </ol>
    <ul class="one">
        <li>aaa</li>
        <li>bbb</li>
        <li>ccc</li>
        <li>ddd</li>
    </ul>
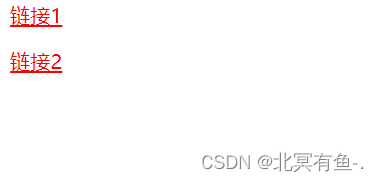
<style>
    .one a {
        color: red;
    }
   </style>

    <div class="one">
        <a href="#">链接1</a>
        <p>
            <a href="#">链接2</a>
        </p>
    </div>
<style>
    .one>a {
        color: blue;
    }
   </style>

    <div class="one">
        <a href="#">链接1</a>
        <p>
            <a href="#">链接2</a>
        </p>
    </div>
- 并集选择器
选择器1, 选择器2 {
属性…
}
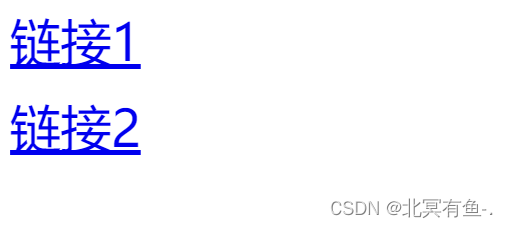
多组选择器, 应用同样的样式
   <style>
    /* .two {
        font-size: 40px;
    }
    .three {
        font-size: 40px;
    } */
    .two, .three {
        font-size: 40px;
    }

   </style>

    <div class="one">
        <a href="#" class="two">链接1</a>
        <p>
            <a href="#" class="three">链接2</a>
        </p>
    </div>
7. 伪类选择器(复合选择器的特殊用法)
上面讲的选择器是选中某个元素
伪类选择器选中某个元素的某个特定状态
<style>
        .one:hover {
            color:green;
            font-size:70px;
        }
        .one:active {
            color: blueviolet;
            font-size: 90px;
        }
    </style>
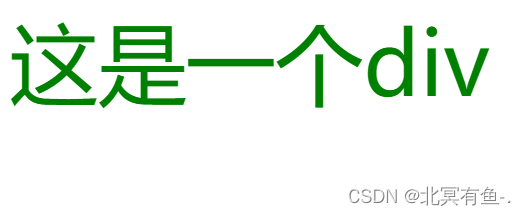
    <div class="one">
        这是一个div
    </div>
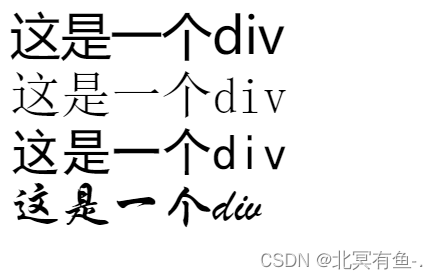
字体属性
<style>
        .one {
            font-size: 40px;
            font-family: '微软雅黑';
        }
        .two {
            font-size: 40px;
            font-family: '宋体';
        }
        .three {
            font-size: 40px;
            font-family: '黑体';
        }
        .four {
            font-size: 40px;
            font-family: '华文行楷';
        }

    </style>
    <div class="one">
        这是一个div
    </div>
    <div class="two">
        这是一个div
    </div>
    <div class="three">
        这是一个div
    </div>
    <div class="four">
        这是一个div
    </div>
浏览器的每个文字, 可以视为是一个”方框”
如果是英文, 阿拉伯数字, 方框就比较宅, 如果是中文, 一般就是一个正方形
设置 font-size : 20px; 文字框的高度就是20px
- 文字粗细
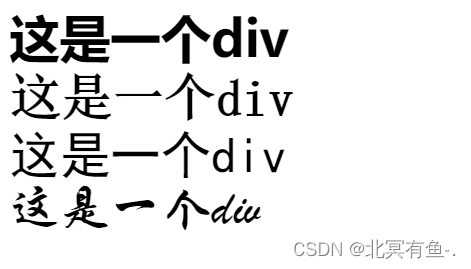
font-weight 设置
<style>
        .one {
            font-size: 40px;
            font-family: '微软雅黑';
            font-weight: bolder;
        }
        .two {
            font-size: 40px;
            font-family: '宋体';
            font-weight: 700;
        }
        .three {
            font-size: 40px;
            font-family: '黑体';
            font-weight: 400;
        }
        .four {
            font-size: 40px;
            font-family:'华文行楷';
            font-weight: 200;
        }

    </style>
    <div class="one">
        这是一个div
    </div>
    <div class="two">
        这是一个div
    </div>
    <div class="three">
        这是一个div
    </div>
    <div class="four">
        这是一个div
    </div>
- 设置倾斜
font-style: italic;

- 文字颜色
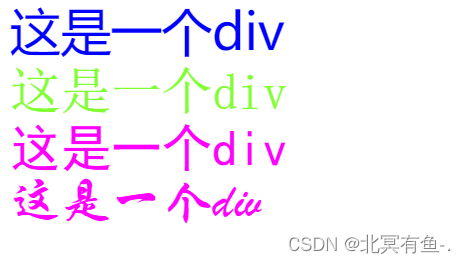
color 属性
计算机是如何表示颜色呢?
红绿蓝三原色 等比例混合
计算机表示颜色一种典型方式:RGB的表示方式
在前端中, 每个分量都使用一个字节来表示
范围 0~255 (0 ~ 0xff)
<style>
        .one {
            font-size: 40px;
            font-family: '微软雅黑';
            color: blue;
        }
        .two {
            font-size: 40px;
            font-family: '宋体';
            color: rgb(128,255,50);
        }
        .three {
            font-size: 40px;
            font-family: '黑体';
            color: #ff00ff;
        }
        .four {
            font-size: 40px;
            font-family:'华文行楷';
            color: #f0f;
        }

    </style>
    <div class="one">
        这是一个div
    </div>
    <div class="two">
        这是一个div
    </div>
    <div class="three">
        这是一个div
    </div>
    <div class="four">
        这是一个div
    </div>
- 文字对齐
靠左靠右居中
<style>
        .one {
            font-size: 40px;
            font-family: '微软雅黑';
            color: blue;
            text-align: left;
        }
        .two {
            font-size: 40px;
            font-family: '宋体';
            color: rgb(128,255,50);
        }
        .three {
            font-size: 40px;
            font-family: '黑体';
            color: #ff00ff;
            text-align: right;
        }
        .four {
            font-size: 40px;
            font-family:'华文行楷';
            color: #f0f;
            text-align: center;
        }

    </style>
    <div class="one">
        这是一个div
    </div>
    <div class="two">
        这是一个div
    </div>
    <div class="three">
        这是一个div
    </div>
    <div class="four">
        这是一个div
    </div>

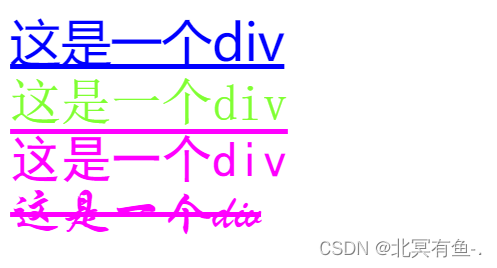
text-decoration: [值];
常用取值:
<style>
        .one {
            font-size: 40px;
            font-family: '微软雅黑';
            color: blue;
            text-decoration: underline;
        }
        .two {
            font-size: 40px;
            font-family: '宋体';
            color: rgb(128,255,50);
            text-decoration: none;
        }
        .three {
            font-size: 40px;
            font-family: '黑体';
            color: #ff00ff;
            text-decoration: overline;
        }
        .four {
            font-size: 40px;
            font-family:'华文行楷';
            color: #f0f;
            text-decoration: line-through;
        }

    </style>
    <div class="one">
        这是一个div
    </div>
    <div class="two">
        这是一个div
    </div>
    <div class="three">
        这是一个div
    </div>
    <div class="four">
        这是一个div
    </div>
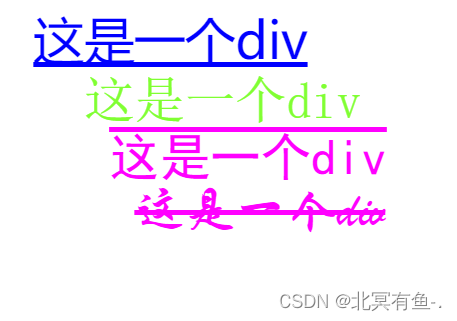
text-indent
<style>
        .one {
            font-size: 40px;
            font-family: '微软雅黑';
            color: blue;
            text-decoration: underline;
            text-indent: 20px;
        }
        .two {
            font-size: 40px;
            font-family: '宋体';
            color: rgb(128,255,50);
            text-decoration: none;
            text-indent: 60px;
        }
        .three {
            font-size: 40px;
            font-family: '黑体';
            color: #ff00ff;
            text-decoration: overline;
            text-indent: 80px;
        }
        .four {
            font-size: 40px;
            font-family:'华文行楷';
            color: #f0f;
            text-decoration: line-through;
            text-indent: 100px;

        }

    </style>
    <div class="one">
        这是一个div
    </div>
    <div class="two">
        这是一个div
    </div>
    <div class="three">
        这是一个div
    </div>
    <div class="four">
        这是一个div
    </div>
但是在开发中, 往往很少用 px 来进行缩进, 因为px是个绝对的值.
em 则是一个相对的量, 是以文字尺寸为基础来设置的.
假如文字大小为 40px
1em => 40px
2em => 80px
0.5em => 20px
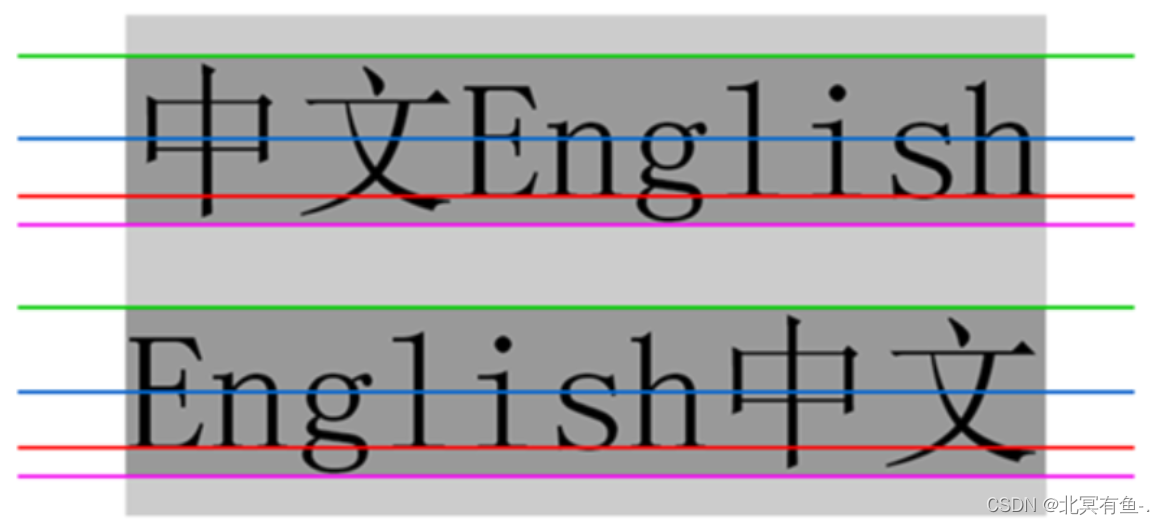
- 顶线
- 中线
- 基线 (相当于英语四线格的倒数第二条线)
- 底线
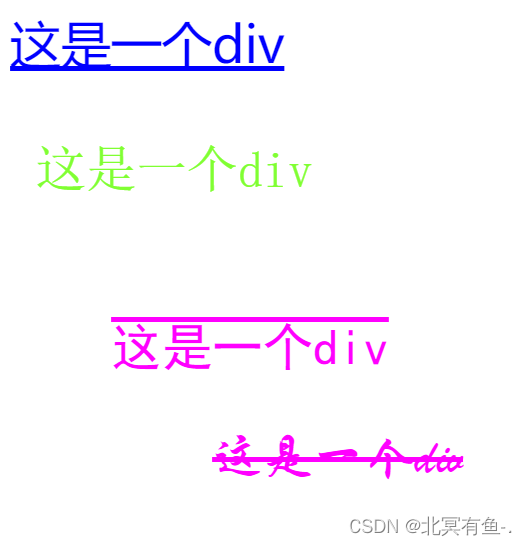
<style>
        .one {
            font-size: 40px;
            font-family: '微软雅黑';
            color: blue;
            text-decoration: underline;
            line-height: 2em;
        }
        .two {
            font-size: 40px;
            font-family: '宋体';
            color: rgb(128,255,50);
            text-decoration: none;
            text-indent: 0.5em;
            line-height: 3em;

        }
        .three {
            font-size: 40px;
            font-family: '黑体';
            color: #ff00ff;
            text-decoration: overline;
            text-indent: 2em;
            line-height: 4em;

        }
        .four {
            font-size: 40px;
            font-family:'华文行楷';
            color: #f0f;
            text-decoration: line-through;
            text-indent: 4em;
            line-height: 20px;
        }

    </style>
    <div class="one">
        这是一个div
    </div>
    <div class="two">
        这是一个div
    </div>
    <div class="three">
        这是一个div
    </div>
    <div class="four">
        这是一个div
    </div>
背景属性
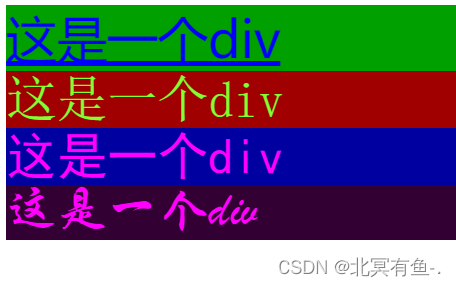
- background-color: [指定颜色]
- 默认是 transparent (透明) 的. 可以通过设置颜色的方式修改
<style>
        .one {
            font-size: 40px;
            font-family: '微软雅黑';
            color: blue;
            text-decoration: underline;
            background-color: rgb(0,160,0);
        }
        .two {
            font-size: 40px;
            font-family: '宋体';
            color: rgb(128,255,50);
            text-decoration: none;
            background-color: rgb(160,0,0);


        }
        .three {
            font-size: 40px;
            font-family: '黑体';
            color: #ff00ff;
            background-color: rgb(0,0,160);


        }
        .four {
            font-size: 40px;
            font-family:'华文行楷';
            color: #f0f;
            background-color: rgb(50,0,50);

        }

    </style>
    <div class="one">
        这是一个div
    </div>
    <div class="two">
        这是一个div
    </div>
    <div class="three">
        这是一个div
    </div>
    <div class="four">
        这是一个div
    </div>
注意:
/* background-color: #ff00ff; */
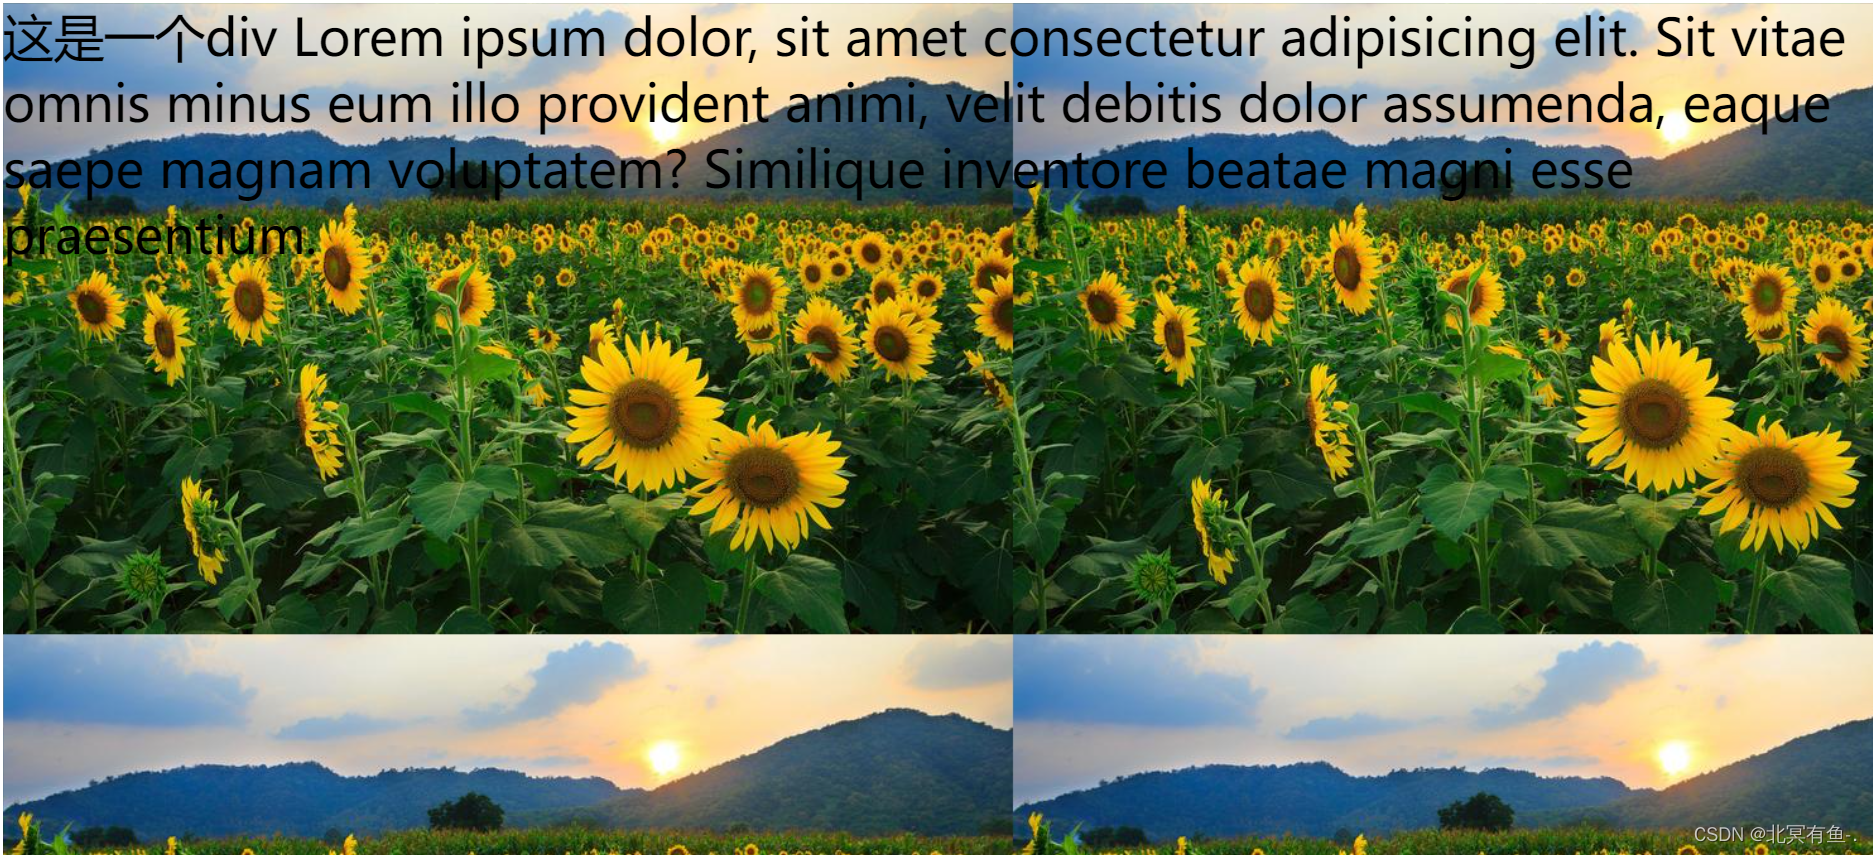
            background-image: url(xiangrikui.jpg);
            height: 2000px;
重要取值:
如果不想平铺, 使用 background-repeat:none
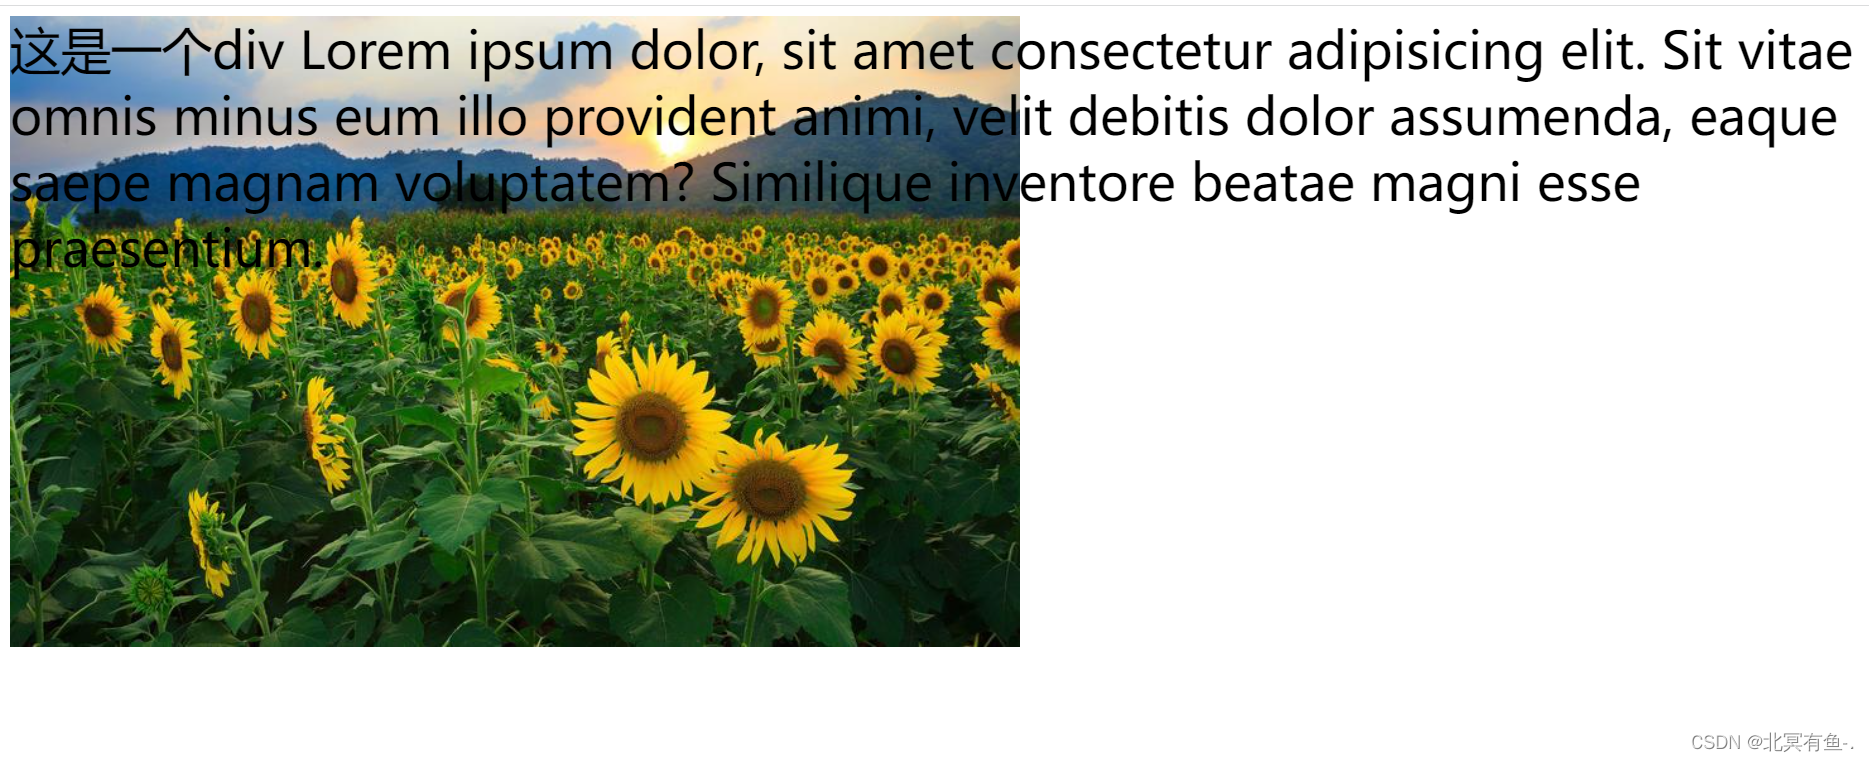
禁止平铺之后, 图片就出现在左上角
			background-repeat: no-repeat;
            /* 顶端居中 */
            background-position: top center;
            /* 水平垂直都居中 */
            background-position: center center;
             /* 右下角 */
            background-position: right bottom;
            /* 自定义位置 */
            background-position: 15 30;
- 可以填具体的数值: 如 40px 60px 表示宽度为 40px, 高度为 60px
- 也可以填百分比: 按照父元素的尺寸设置.
- cover: 把背景图像扩展至足够大,以使背景图像完全覆盖背景区域。背景图像的某些部分也许无法显示在背景定位区域中。
- contain: 把图像图像扩展至最大尺寸,以使其宽度和高度完全适应内容区域.
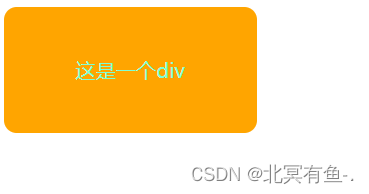
圆角矩形
html 元素默认都是一个一个的矩形
有时候需要表示”带有圆角“的矩形

<style>
        .one{
        width: 200px;
        height: 100px;
        background-color: orange;
        color: aquamarine;
        text-align: center;
        line-height: 100px;
        /* 矩形效果 */
        border-radius: 10px;
    }
    </style>
    <div class="one">
        这是一个div
    </div>
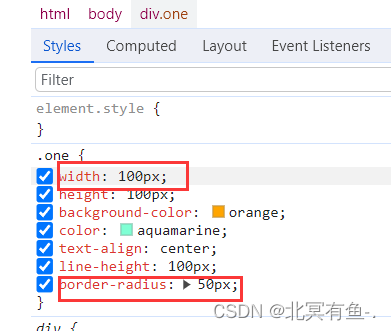
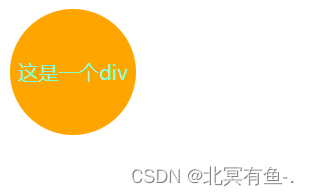
元素设置为正方形. 内切圆半径为高度一半就能把元素设置为圆形
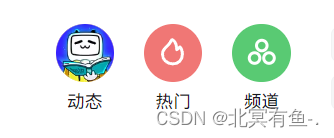
网页上也有很多这样的应用
元素的显示模式
- 块级元素会独占一行, 行内元素不独占一行
- 块级元素, 高度宽度, 内外边距都可以设置, 行内元素, 高度宽度行高无效, 内边距有效, 外边距有时候有效, 有时候无效
- 块级元素默认宽度是和父元素一样宽, 行内元素默认宽度是和里面的内容一样宽
CSS 盒子模型
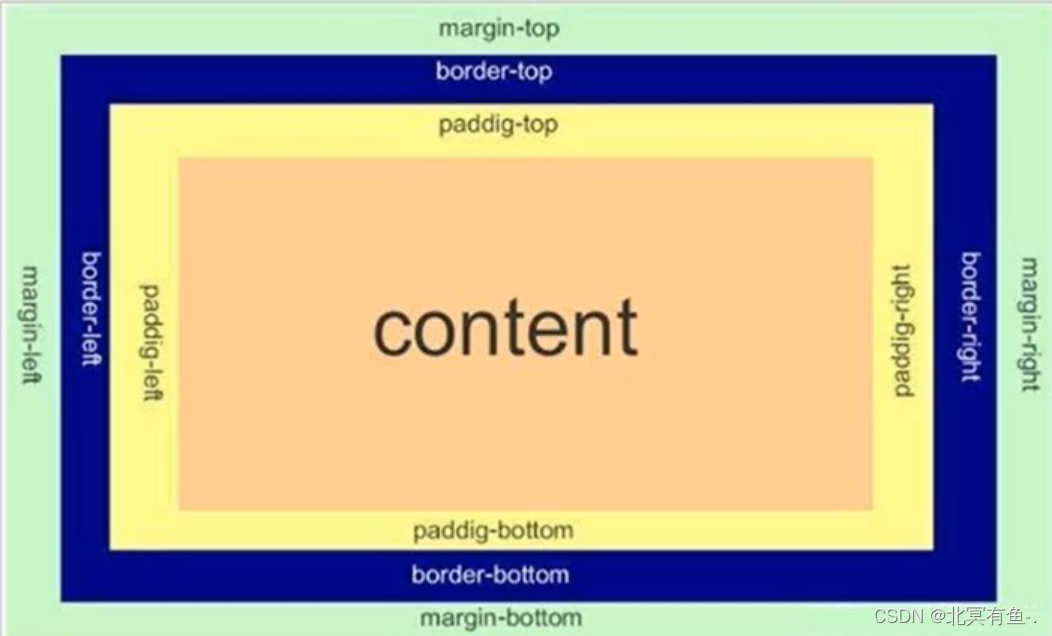
任何一个 html 元素都是一个矩形的盒子, 盒子里可以放内容(可以使文本, 可以使其他元素)
边框
border 属性是直接设置了四个方向
还可以使用border–top/bottom/left/right
设置边框要设置三个方面
<style>
        .one{
        width: 200px;
        height: 100px;
        background-color: orange;
        color: aquamarine;
        text-align: center;
        line-height: 100px;
        /* 矩形效果 */
        /* border-radius: 10px; */
        /* solid 表示的就是实线 */
        border: 5px #6666 solid;

        /* 防止盒子被撑大 */
            box-sizing: border-box;
    }

    .two {
        width: 200px;
        height: 100px;
        background-color: orange;
        color: aquamarine;
        line-height: 100px;
        border: 5px #6666 dashed;

    }
    .three {
            width: 200px;
        height: 100px;
        background-color: orange;
        color: aquamarine;
        line-height: 100px;
        border: 5px #6666 dotted ;
    }
    </style>
    <div class="one">
        这是一个div
    </div>
    <br>
    <div class="two">
        这是一个div
    </div>
    <br>
    <div class="three">
        这是一个div
    </div>
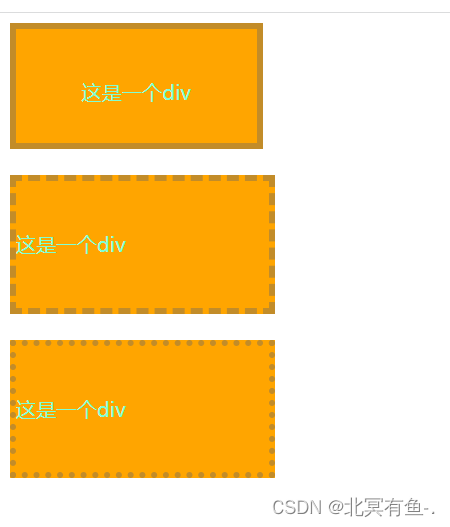
内边距
padding: 10px; 表示4个方向都是 10px
padding: 10px 20px; 表示上下边距是10px, 左右边距是20px
padding: 10px 20px 30px 40px 分别表示上右下左(顺时针)的边距
margin: 10px; 四个方向都是 10 px
margin: 10px 20px; 表示上下外边距是10px, 左右外边距是20px
margin: 10px 20px 30px 40px 表示上右下左(顺时针)的外边距
margin 的特殊用法
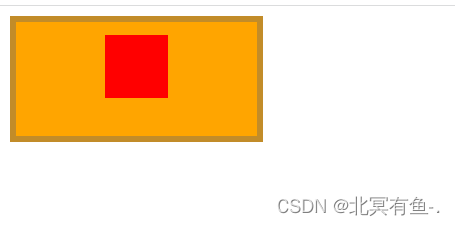
margin-left 和 margin-right 设置为 auto (让浏览器自动调节)
这样就能使 该元素在父元素内部居中放置(此处限于水平方向)
 </div> -->
    <style>
        .one{
        width: 200px;
        height: 100px;
        background-color: orange;
        color: aquamarine;
        text-align: center;
        line-height: 100px;
        border: 5px #6666 solid;
        /* 防止盒子被撑大 */
        box-sizing: border-box;
        padding:  10px;
        margin: ;
    }
    .three {
         width: 50px;
         height: 50px;
         background-color: red;
         margin-left: auto;
         margin-right:  auto;

        }
    </style>
    <div class="one">

        <div class="three">

        </div>
    </div>
弹性布局
弹性布局是用来实现页面布局的(控制某个指定元素)
行内元素虽然是在水平方向上排列的, 但是不适合进行水平布局, 因为尺寸边距啥的不好控
display: flex;
<style>
        div{
            width: 100%;
            height: 150px;
            background-color: red;
            /* 开启弹性布局 */
            display: flex;
        }
         div>span {
            background-color: green;
            width: 100px;
         }
     </style>
     <div>
        <span>1</span>
        <span>2</span>
        <span>3</span>
     </div>
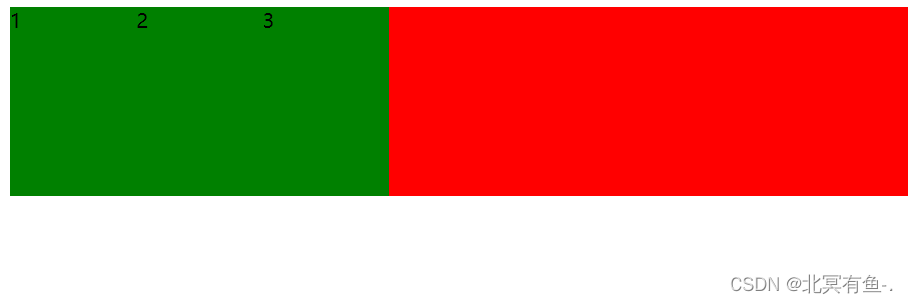
此时, 弹性容器里面的元素, 则不在是”块级” “行内元素”, 而是成了弹性元素, 是遵守弹性布局的, 可以设置尺寸和边框了
给 div 加上 justify–content: space-around; 此时效果为

把 justify–content: space-around; 改为 justify–content: flex–end; 可以看到此时三个元素在
右侧显示了

设置 jutify-content: center , 此时元素居中排列
平分了剩余空间.

设置 justify–content: space-between;
先两边元素贴近边缘, 再平分剩余空间.

<style>
        div{
            width: 100%;
            height: 150px;
            background-color: red;
            /* 开启弹性布局 */
            display: flex;
            justify-content: space-around;
            justify-content: space-around;
            align-items: center;
        }
         div>span {
            background-color: green;
            width: 100px;
            height: 100px;
         }
     </style>
     <div>
        <span>1</span>
        <span>2</span>
        <span>3</span>
     </div>

flex 是 flexible box 的缩写. 意思为 “弹性盒子”.
任何一个 html 元素, 都可以指定为 display:flex 完成弹性布局.
flex 布局的本质是给父盒子添加 display:flex 属性, 来控制子盒子的位置和排列方式.
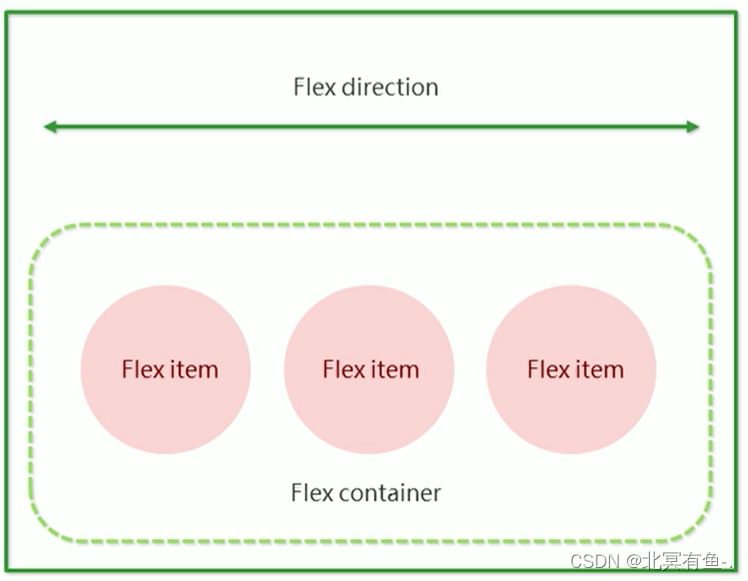
基础概念:
- 被设置为 display:flex 属性的元素, 称为 flex container
- 它的所有子元素立刻称为了该容器的成员, 称为 flex item
- flex item 可以纵向排列, 也可以横向排列, 称为 flex direction(主轴)
注意:
当父元素设置为 display: flex 之后, 子元素的 float, clear, vertical-align 都会失效.
原文地址:https://blog.csdn.net/qq_43339789/article/details/134149638
本文来自互联网用户投稿,该文观点仅代表作者本人,不代表本站立场。本站仅提供信息存储空间服务,不拥有所有权,不承担相关法律责任。
如若转载,请注明出处:http://www.7code.cn/show_23076.html
如若内容造成侵权/违法违规/事实不符,请联系代码007邮箱:suwngjj01@126.com进行投诉反馈,一经查实,立即删除!


