一、拦截器
1.添加拦截器的作用:
2.拦截器的回调方法里我们可以做那些事情:
当前的请求还没有发给服务器,比如我们在与服务器通信的时候,一个应用中很多地方都会跟服务器发起通信。不同的接口请求都希望你带上你的应用版本号,那么我们就需要给每个request对象添加请求参数带给服务器。因为我们在每个请求都以添加请求头的方式添加请求参数带给服务器就会很麻烦。因此我们可以对添加请求头进行统一的处理,只要我们用同一个 okHttpClient发起的request请求,我们就能在这个拦截器里面拿到这个request对象。拿到对象之后我们就可以在拦截器里面给request添加请求头
OkHttpClient okHttpClient = new OkHttpClient.Builder().addInterceptor(new XXX).build();
OkHttpClicent okHttpClient = new OkHttpClient.Builder().addNetworkInterceptor(new XXX)bulider();二、使用拦截器.addInterrceptor的代码展示
public class InterceptorUnitTest {
    //使用添加了拦截器的okhttpClicent实例对象的话,在请求的过程中就会回调一次intercept方法
    //拦截方法里面我们可以做那些事情呢:当前的请求还没有发给服务器

    //在上面情况下需要用到拦截器呢?比如说我们在与服务器通信的时候,这个应用中很多地方都会跟服务器发起通信。不同接口请求我都希望你带上你应用的版本号。
    //那么我们就需要要给每个request对象添加请求参数带给服务器。
    //如果我们在每个请求都以添加请求头的方式添加数据就很麻烦

    //因此我们可以对添加请求头进行统一的处理,只要我们用同一个okHttpClicent发起的request请求,我们就能在这个拦截器里面拿到这个request对象。拿到对象之后我们就可以在拦截器里面给request添加请求头
    @Test
    public void InterceptorTest() {
        OkHttpClient okHttpClient = new OkHttpClient.Builder().addInterceptor(new Interceptor() {
            @NonNull
            @Override
            public Response intercept(@NonNull Chain chain) throws IOException {
//                return chain.proceed(chain.request());//现在拦截器没有做任何处理

                //进行自定义的处理
                //可以在调用process之前进行请求之前的处理
//                Response response = chain.proceed(chain.request());
                //在调用process之后进行请求之后的处理


                //测试
                Request request = chain.request().newBuilder().addHeader("os", "android")
                        .addHeader("version", "1.0").build();
                Response response = chain.proceed(request);
                return response;
            }
        }).build();
        Request request = new Request.Builder().url("https://httpbin.org/get?a=1&b=2").build();
        //一个准备好请求的call对象
        Call call = okHttpClient.newCall(request);

        try {
            Response response = call.execute();
            System.out.println(response.body().string());
        } catch (IOException e) {
            throw new RuntimeException(e);
        }


    }
}
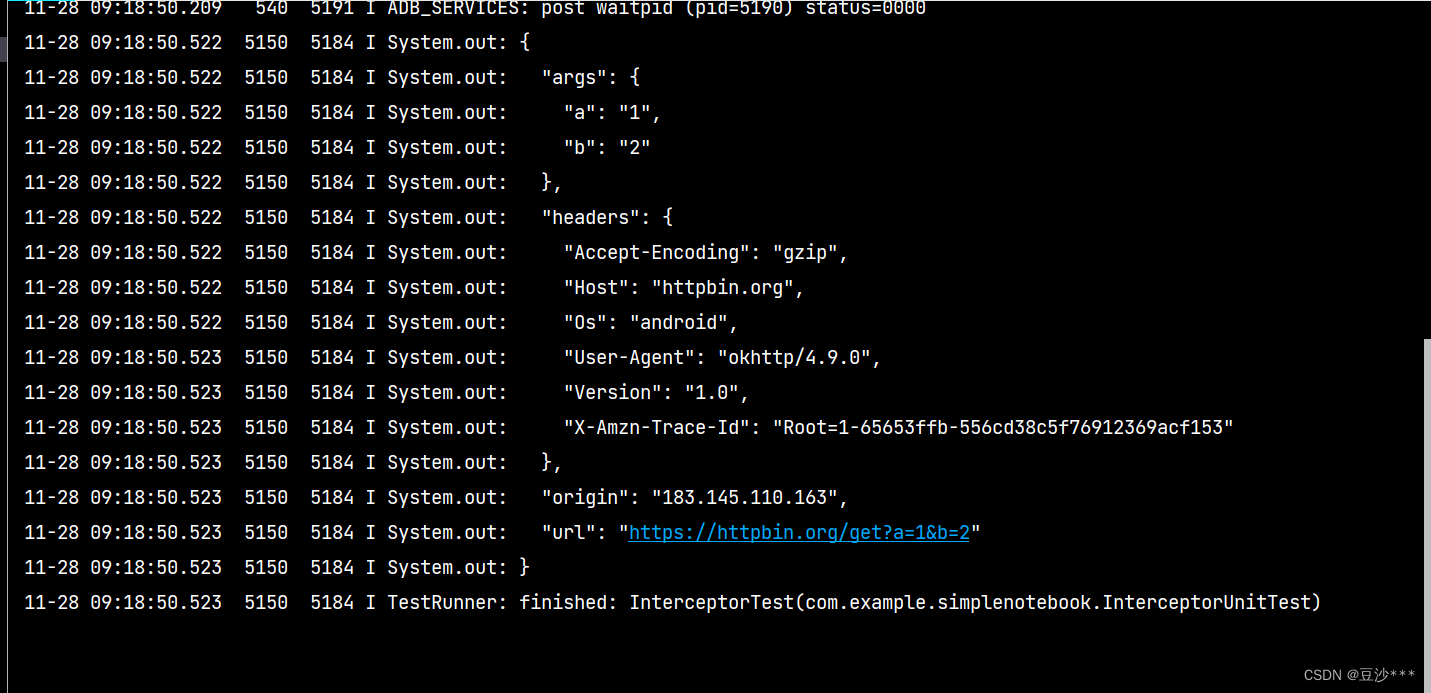
三、.addInterrceptor运行效果展示

四、拦截器可以添加无数个
五、除了上诉所说的拦截器还有.addNetworkInterceptor(),那么两者谁先执行呢?
public class InterceptorUnitTest {

    @Test
    public void InterceptorTest() {
        OkHttpClient okHttpClient = new OkHttpClient.Builder().addInterceptor(new Interceptor() {
            @NonNull
            @Override
            public Response intercept(@NonNull Chain chain) throws IOException {
                //测试
                Request request = chain.request().newBuilder().addHeader("os", "android")
                        .addHeader("version", "1.0").build();
                Response response = chain.proceed(request);
                return response;
            }
        }).addNetworkInterceptor(new Interceptor() {
            @NonNull
            @Override
            public Response intercept(@NonNull Chain chain) throws IOException {
                System.out.println("version:"+chain.request().header("version"));
                return chain.proceed(chain.request());
            }
        }).build();
        Request request = new Request.Builder().url("https://httpbin.org/get?a=1&b=2").build();
        //一个准备好请求的call对象
        Call call = okHttpClient.newCall(request);

        try {
            Response response = call.execute();
            System.out.println(response.body().string());
        } catch (IOException e) {
            throw new RuntimeException(e);
        }


    }
}发现之前在前一个拦截器里面设置的版本号在.addNetworkIntercepter里面可以获取到,由此证明.addIntercepter()先执行,而.addNetworkIntercepter后执行。那么他们换一个位置会是什么样子呢!
六、将两者调换位置判断两个拦截器的执行顺序
1.调换代码位置
public class InterceptorUnitTest {

    @Test
    public void InterceptorTest() {
        OkHttpClient okHttpClient = new OkHttpClient.Builder().addNetworkInterceptor(new Interceptor() {
            @NonNull
            @Override
            public Response intercept(@NonNull Chain chain) throws IOException {
                System.out.println("version:"+chain.request().header("version"));
                return chain.proceed(chain.request());
            }
        }).addInterceptor(new Interceptor() {
            @NonNull
            @Override
            public Response intercept(@NonNull Chain chain) throws IOException {
                //测试
                Request request = chain.request().newBuilder().addHeader("os", "android")
                        .addHeader("version", "1.0").build();
                Response response = chain.proceed(request);
                return response;
            }
        }).build();
        Request request = new Request.Builder().url("https://httpbin.org/get?a=1&b=2").build();
        //一个准备好请求的call对象
        Call call = okHttpClient.newCall(request);

        try {
            Response response = call.execute();
            System.out.println(response.body().string());
        } catch (IOException e) {
            throw new RuntimeException(e);
        }


    }
}
2.运行结果

运行结果还是这样,说明这两个拦截器.addIntercepter先于.addNetworkIntercepter.
七、OkHttp的另外两个配置“缓存和Cookie”
1.缓存是什么:
OkHttp按照Http协议规则实现了缓存处理,缓存是比如:当前我们发起第一次请求之后,如果后续还要进行同样的请求,此时如果如何缓存规则,则可以减少与服务器的通信,直接从本地文件缓存中读取响应返回给请求者,但是默认情况下,Okhttp的缓存时关闭状态,需要我们开启。

public class InterceptorUnitTest {

    @Test
    public void InterceptorTest() {
        OkHttpClient okHttpClient = new OkHttpClient.Builder().cache(new Cache(new File("C:\Users\Anglin\Desktop1.doc")
                , 1024 * 1024)).addNetworkInterceptor(new Interceptor() {
            @NonNull
            @Override
            public Response intercept(@NonNull Chain chain) throws IOException {
                System.out.println("version:" + chain.request().header("version"));
                return chain.proceed(chain.request());
            }
        }).addInterceptor(new Interceptor() {
            @NonNull
            @Override
            public Response intercept(@NonNull Chain chain) throws IOException {
                //测试
                Request request = chain.request().newBuilder().addHeader("os", "android")
                        .addHeader("version", "1.0").build();
                Response response = chain.proceed(request);
                return response;
            }
        }).build();
        Request request = new Request.Builder().url("https://httpbin.org/get?a=1&b=2").build();
        //一个准备好请求的call对象
        Call call = okHttpClient.newCall(request);

        try {
            Response response = call.execute();
            System.out.println(response.body().string());
        } catch (IOException e) {
            throw new RuntimeException(e);
        }


    }
}
2.cookie是什么:
Cookie是某网站为了辨别用户身份,进行会话跟踪(比如确定登录状态)而储存在用户本地终端上的数据(通常经过加密),由用户客户端计算机暂时或永久保存的信息。
代码中的网址使用的是”玩安卓“中的开放接口玩Android – wanandroid.com – 每日推荐优质文章


public class CookieUnitTest {
Map<String,List<Cookie>> cookies = new HashMap<>();//全局变量接收cookie
@Test
public void cookieTest() {
OkHttpClient okHttpClient = new OkHttpClient.Builder()
.cookieJar(new CookieJar() {
@Override
public void saveFromResponse(@NonNull HttpUrl httpUrl, @NonNull List<Cookie> list) {
//把cookie数据封装成一个集合回调给我们我要做的就是把cookie给保存起来
cookies.put(httpUrl.host(),list);
}
@NonNull
@Override
public List<Cookie> loadForRequest(@NonNull HttpUrl httpUrl) {
List<Cookie> cookies = CookieUnitTest.this.cookies.get(httpUrl.host());
return cookies == null ? new ArrayList<>() : cookies;
}
})
.build();
//设置请求体
FormBody formBody = new FormBody.Builder().add("username", "Anglin")
.add("password", "rssqzqyp").build();
Request request = new Request.Builder().url("https://www.wanandroid.com/user/login").post(formBody).build();
//准备好请求的call对象
Call call = okHttpClient.newCall(request);
try {
Response response = call.execute();
System.out.println(response.body().string());
} catch (IOException e) {
throw new RuntimeException(e);
}
request = new Request.Builder().url("https://www.wanandroid.com/lg/collect/1165/json").build();
//准备好请求的call对象
call = okHttpClient.newCall(request);
try {
Response response = call.execute();
System.out.println(response.body().string());
} catch (IOException e) {
throw new RuntimeException(e);
}
}
}原文地址:https://blog.csdn.net/Rssqzqyp/article/details/134640615
本文来自互联网用户投稿,该文观点仅代表作者本人,不代表本站立场。本站仅提供信息存储空间服务,不拥有所有权,不承担相关法律责任。
如若转载,请注明出处:http://www.7code.cn/show_27726.html
如若内容造成侵权/违法违规/事实不符,请联系代码007邮箱:suwngjj01@126.com进行投诉反馈,一经查实,立即删除!


![[设计模式Java实现附plantuml源码~行为型]请求的链式处理——职责链模式](https://img-blog.csdnimg.cn/direct/699aac3ed0c446d088772a0ed4c444ed.png)


