本文介绍: 注意事项:1,发送者和接收者都需要是QObject的子类(当然,槽函数是全局函数、Lambda表达式等无需接收者的时候除外)2,信号和槽函数返回值类型是void3,信号只需要声明不需要实现4,槽函数需要声明也需要实现5,槽函数是普通的成员函数,作为成员函数,会受到publicprivateprotected的影响;6,使用emit在恰当的位置发送信号;7,使用connect()函数连接信号和槽。8,任何成员函数、static。
1.qt概述
件编程。
3.安装
见之前博客
2.创建项目


3.工程.pro文件说明
SOURCES +
=
=
HEADERS +
=
=
4.窗口属性
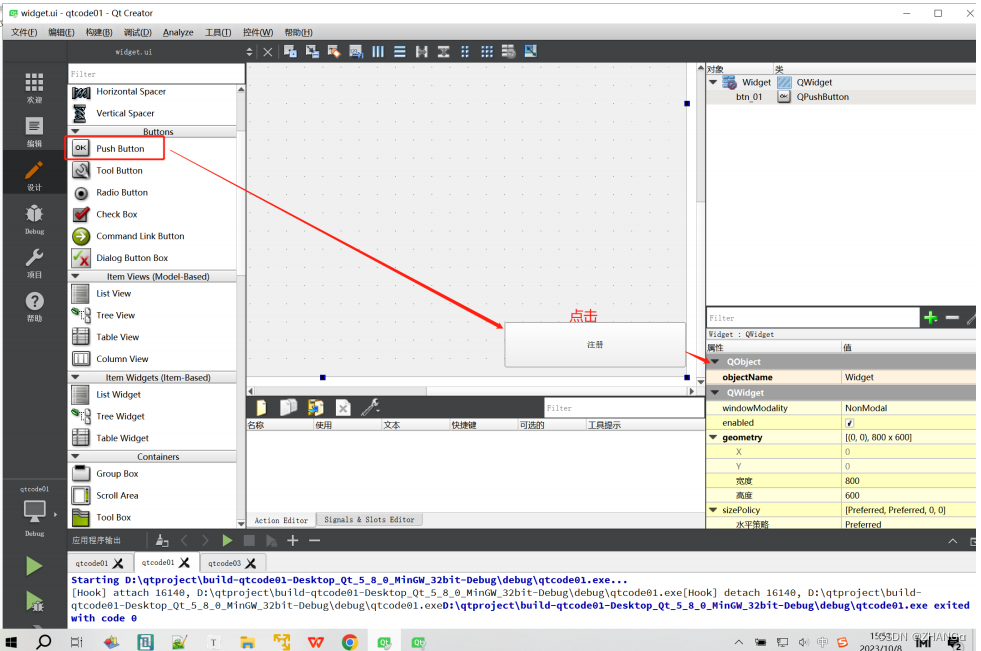
5.按钮Qpushbutton
#include "widget.h"
#include "ui_widget.h"
#include <QPushButton>//1,引入按钮所需头文件
Widget::Widget(QWidget *parent) :
QWidget(parent),
ui(new Ui::Widget)
{
    ui->setupUi(this);
    //设置窗口大小
    //1参:宽度
    //2参:高度
    this->resize(800,600);
    //设置窗口标题
    this->setWindowTitle("德玛西亚");
    //设置窗口大小不可改变
    this->setFixedSize(800,600);
    //2,创建按钮对象
    QPushButton* btn = new QPushButton;
    //3,设置按钮的父容器
    btn->setParent(this);
    //4,设置位置
    btn->move(100,100);
    //5,设置文本
    btn->setText("登录");
    }
Widget::~Widget()
{
    delete ui;
}
6.信号与槽机制
1.注意
2.信号与槽的连接
connect()函数
slot:槽函数
示例1
//信号与槽函数有参数
系统提供的信号与槽
信号:
槽:
void update()
信号:
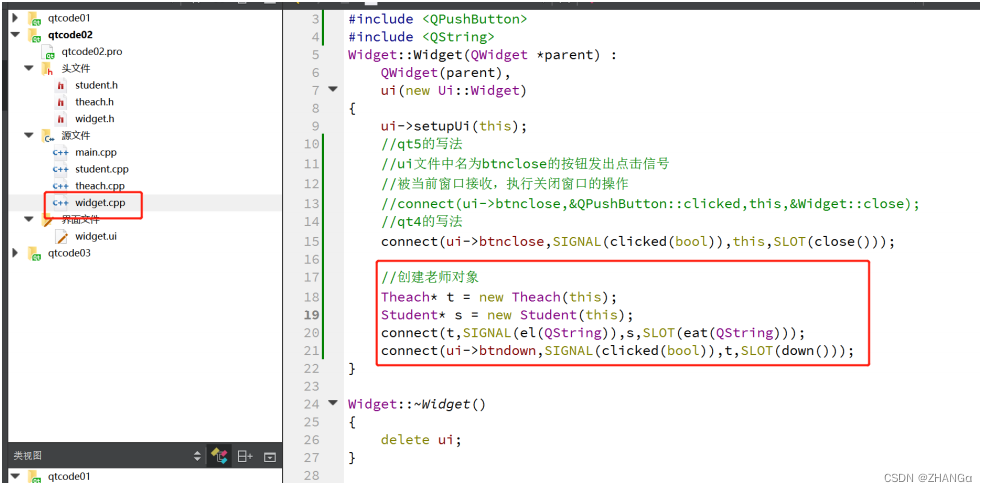
自定义信号与槽
注意事项:
的影响;


信号槽拓展
1,一个信号可以和多个槽相连
示例:
#include "mainwindow.h"
#include "ui_mainwindow.h"
#include <QPushButton>
#include <QDebug>
MainWindow::MainWindow(QWidget *parent) :
QMainWindow(parent),
ui(new Ui::MainWindow)
{
ui->setupUi(this);
QPushButton* btn = new QPushButton(this);
btn->setText("按钮");
void (QPushButton:: *cli_p)(bool) = &QPushButton::clicked;
connect(btn,cli_p,this,&MainWindow::fun01);
connect(btn,cli_p,this,&MainWindow::fun02);
connect(btn,cli_p,this,&MainWindow::fun03);
}
MainWindow::~MainWindow()
{
delete ui;
}
void MainWindow::fun01()
{
qDebug() << "fun0111111" << endl;
}
void MainWindow::fun02()
{
qDebug() << "fun0222222" << endl;
}
void MainWindow::fun03()
{
qDebug() << "fun0333333" << endl;
}2,多个信号可以连接到一个槽
示例:
#include "mainwindow.h"
#include "ui_mainwindow.h"
#include <QPushButton>
#include <QDebug>
MainWindow::MainWindow(QWidget *parent) :
QMainWindow(parent),
ui(new Ui::MainWindow)
{
ui->setupUi(this);
QPushButton* btn1 = new QPushButton(this);
btn1->setText("按钮1");
QPushButton* btn2 = new QPushButton(this);
btn2->setText("按钮2");
btn2->move(0,50);
void (QPushButton:: *cli_p)(bool) = &QPushButton::clicked;
connect(btn1,cli_p,this,&MainWindow::fun01);
connect(btn2,cli_p,this,&MainWindow::fun01);
}
MainWindow::~MainWindow()
{
delete ui;
}
void MainWindow::fun01()
{
qDebug() << "fun0111111" << endl;
}3,一个信号可以连接到另外的一个信号
示例:
#include "mainwindow.h"
#include "ui_mainwindow.h"
#include <QPushButton>
#include <QDebug>
MainWindow::MainWindow(QWidget *parent) :
QMainWindow(parent),
ui(new Ui::MainWindow)
{
    ui->setupUi(this);
    QPushButton* btn = new QPushButton(this);
    btn->setText("按钮");
    void (QPushButton:: *cli_p)(bool) = &QPushButton::clicked;
    connect(btn,cli_p,this,&MainWindow::mySignal);
    connect(this,&MainWindow::mySignal,this,&MainWindow::fun01);
}
MainWindow::~MainWindow()
{
    delete ui;
}
void MainWindow::fun01()
{
    qDebug() << "fun0111111" << endl;
}4,信号槽可以断开
示例:
#include "mainwindow.h"
#include "ui_mainwindow.h"
#include <QPushButton>
#include <QDebug>
MainWindow::MainWindow(QWidget *parent) :
QMainWindow(parent),
ui(new Ui::MainWindow)
{
    ui->setupUi(this);
    QPushButton* btn = new QPushButton(this);
    btn->setText("按钮");
    void (QPushButton:: *cli_p)(bool) = &QPushButton::clicked;
    connect(btn,cli_p,this,&MainWindow::fun01);
    //断开信号与槽的连接
    btn->disconnect(this);
}
MainWindow::~MainWindow()
{
    delete ui;
}
void MainWindow::fun01()
{
    qDebug() << "fun0111111" << endl;
}5,槽可以被取消链接
对象上面的槽
6.使用lambda表达式
原文地址:https://blog.csdn.net/aisheisadas/article/details/134650032
本文来自互联网用户投稿,该文观点仅代表作者本人,不代表本站立场。本站仅提供信息存储空间服务,不拥有所有权,不承担相关法律责任。
如若转载,请注明出处:http://www.7code.cn/show_29148.html
如若内容造成侵权/违法违规/事实不符,请联系代码007邮箱:suwngjj01@126.com进行投诉反馈,一经查实,立即删除!
声明:本站所有文章,如无特殊说明或标注,均为本站原创发布。任何个人或组织,在未征得本站同意时,禁止复制、盗用、采集、发布本站内容到任何网站、书籍等各类媒体平台。如若本站内容侵犯了原著者的合法权益,可联系我们进行处理。


