文章demo在我的百度云
链接:https://pan.baidu.com/s/1W6DbxfrXfapHwMhkQzfR_w
提取码:wxih
CAS介绍
简介:
CAS是Central Authentication Service的缩写,中央认证服务,一种独立开放指令协议。CAS 是 耶鲁大学(Yale University)发起的一个开源项目,旨在为 Web 应用系统提供一种可靠的单点登录方法,CAS 在 2004 年 12 月正式成为 JA-SIG 的一个项目。
特点:
3、CAS Client 支持非常多的客户端(这里指单点登录系统中的各个 Web 应用),包括 Java, .Net, PHP, Perl, Apache, uPortal, Ruby 等。
4、CAS属于Apache 2.0许可证,允许代码修改,再发布(作为开源或商业软件)。
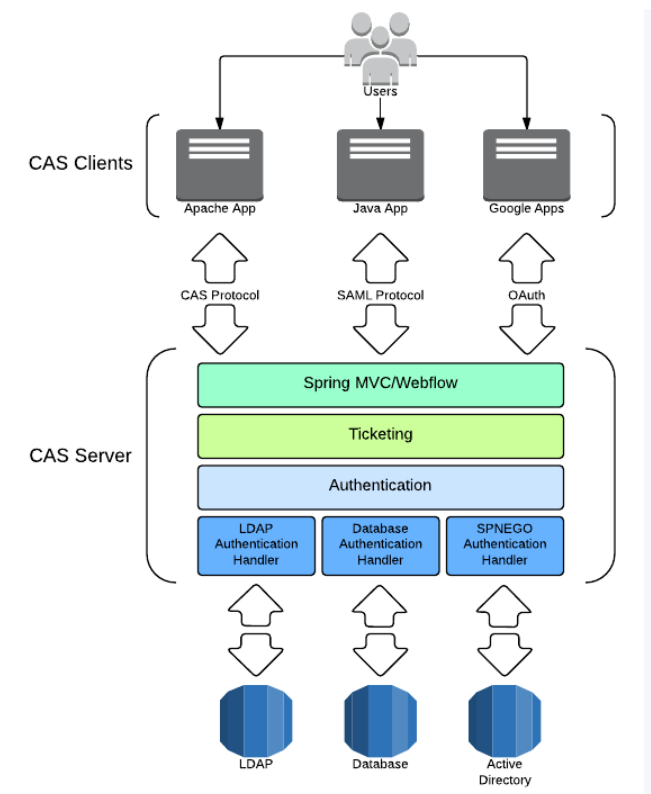
从结构上看,CAS 包含两个部分: CAS Server 和 CAS Client。CAS Server 需要独立部署,主要负责对用户的认证工作;CAS Client 负责处理对客户端受保护资源的访问请求,需要登录时,重定向到 CAS Server。图1 是 CAS 最基本的协议过程:
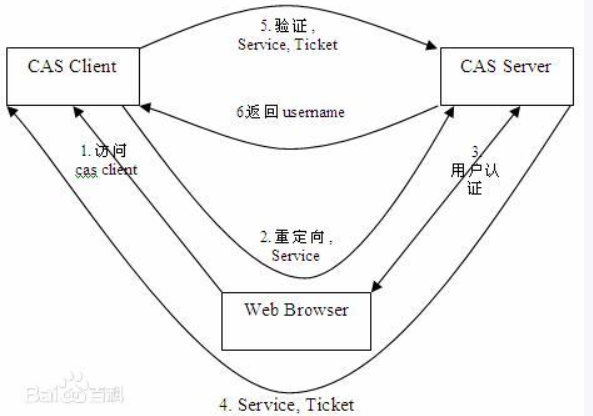
CAS Client 与受保护的客户端应用部署在一起,以 Filter 方式保护受保护的资源。对于访问受保护资源的每个 Web 请求,CAS Client 会分析该请求的 Http 请求中是否包含 Service Ticket,如果没有,则说明当前用户尚未登录,于是将请求重定向到指定好的 CAS Server 登录地址,并传递 Service (也就是要访问的目的资源地址),以便登录成功过后转回该地址。用户在第 3 步中输入认证信息,如果登录成功,CAS Server 随机产生一个相当长度、唯一、不可伪造的 Service Ticket,并缓存以待将来验证,之后系统自动重定向到 Service 所在地址,并为客户端浏览器设置一个 Ticket Granted Cookie(TGC),CAS Client 在拿到 Service 和新产生的 Ticket 过后,在第 5,6 步中与 CAS Server 进行身份核实,以确保 Service Ticket 的合法性。
在该协议中,所有与 CAS 的交互均采用 SSL 协议,确保,ST 和 TGC 的安全性。协议工作过程中会有 2 次重定向的过程,但是 CAS Client 与 CAS Server 之间进行 Ticket 验证的过程对于用户是透明的。
另外,CAS 协议中还提供了 Proxy (代理)模式,以适应更加高级、复杂的应用场景,具体介绍可以参考 CAS 官方网站上的相关文档。 [1]
搭建Tomcat HPPTS的支持
第一步:生成秘钥库
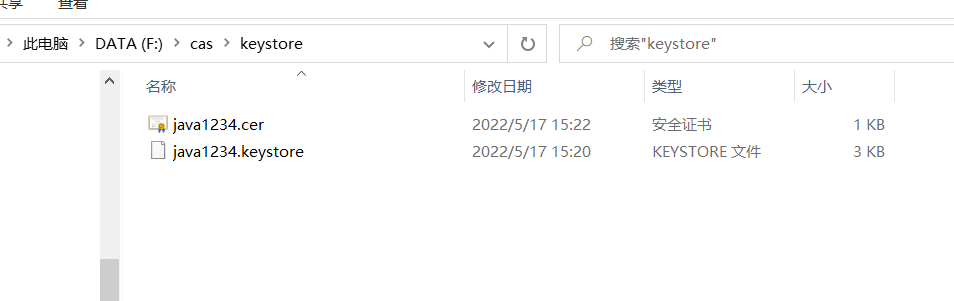
别名 java1234 存储路径 F:caskeystore
keytool -genkey -v -alias java1234 -keyalg RSA -keystore F:caskeystorejava1234.keystore

这里需要填写一些信息,注意填写要域名;
第二步:从秘钥库里导出证书
keytool -export -trustcacerts -alias java1234 -file F:/cas/keystore/java1234.cer -keystore F:/cas/keystore/java1234.keystore

第三步:将证书导入到JDK证书库
keytool -import -trustcacerts -alias java1234 -file F:/cas/keystore/java1234.cer -keystore "D:/Program Files/Java/jdk/jre/lib/security/cacerts"
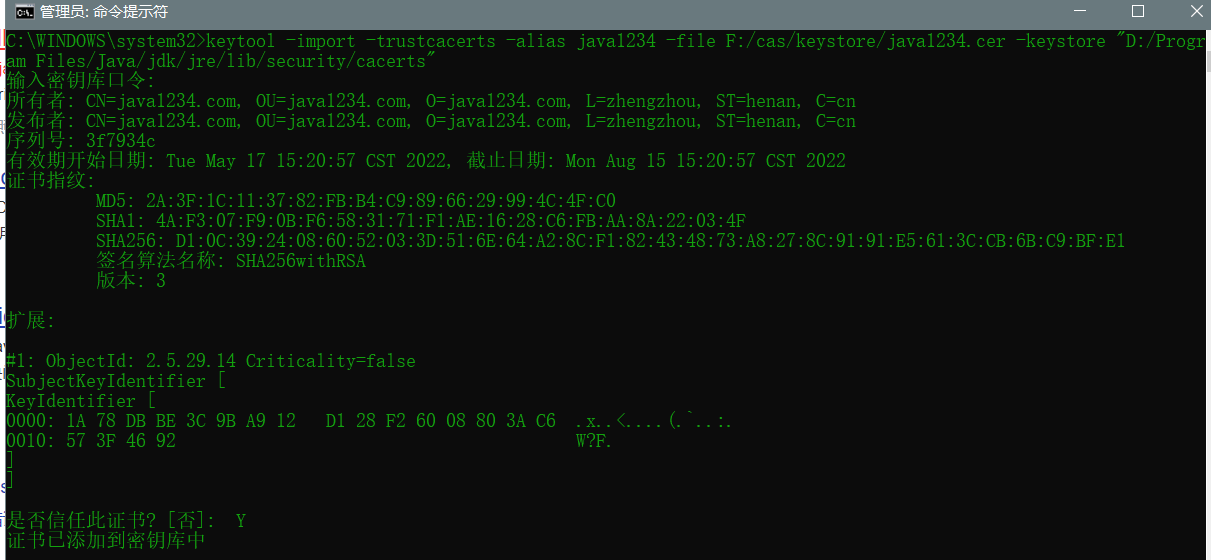
密码:changeit
第四步:tomcat配置https支持
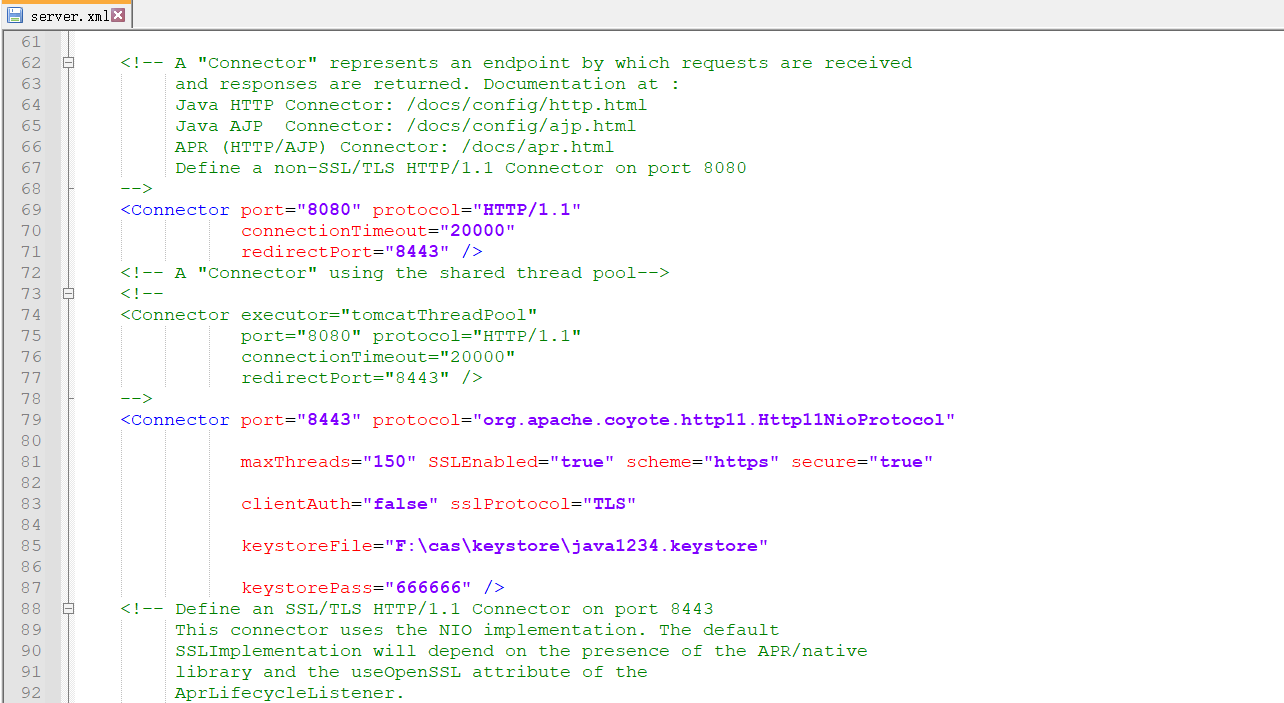
<Connector port="8443" protocol="org.apache.coyote.http11.Http11NioProtocol"
maxThreads="150" SSLEnabled="true" scheme="https" secure="true"
clientAuth="false" sslProtocol="TLS"
keystoreFile="F:caskeystorejava1234.keystore"
keystorePass="666666" />
(默认有中文乱码,可以我们来到tomcat目录的conf子目录中,找到一个名为 “logging.properties” 的文件,打开这个文本文件,找到如下配置项:
java.util.logging.ConsoleHandler.encoding = UTF-8
java.util.logging.ConsoleHandler.encoding = GBK
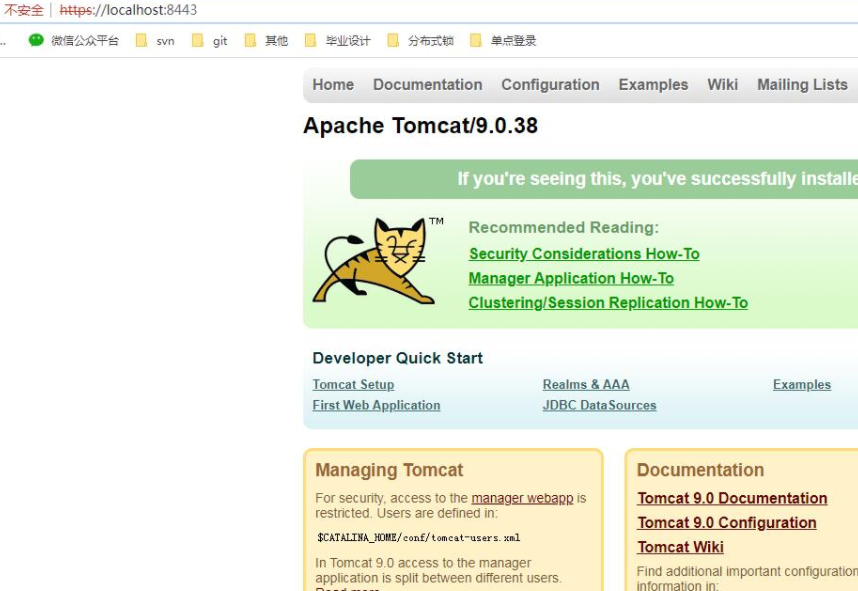
第五步:测试
访问 https://localhost:8443
忽略不安全
CAS Server 服务端的搭建
CAS Server war下载
cas架构cs架构图:
github官网:https://github.com/apereo/cas
https://github.com/apereo/cas-overlay–template
https://repo1.maven.org/maven2/cas/
https://repo1.maven.org/maven2/org/apereo/cas/cas-server–webapp–tomcat/5.3.14/
下载:cas-server–webapp–tomcat-5.3.14
CAS Server发布到tomcat
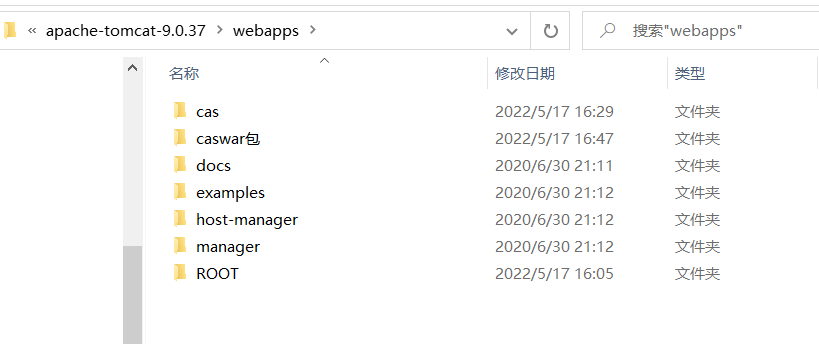
把war包放tomcat下,启动tomcat会自动解压,我们把名称改成cas,方便访问;
cas 8443端口
配置hosts: C:WindowsSystem32driversetc
https://java1234.com:8443/cas
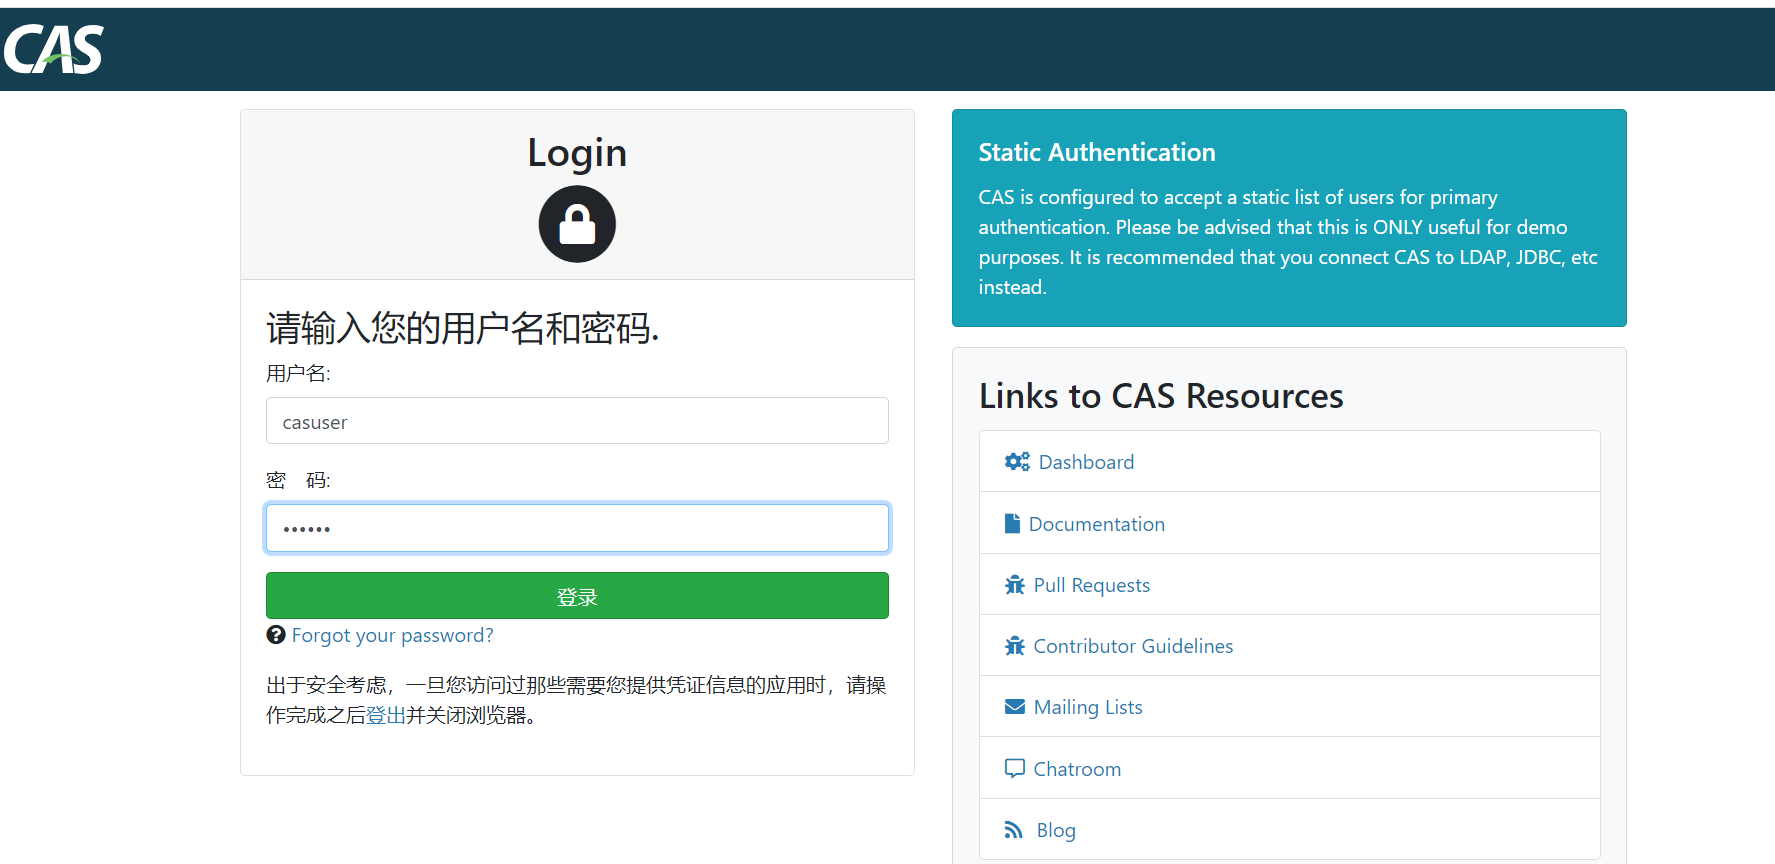
用户名:casuser
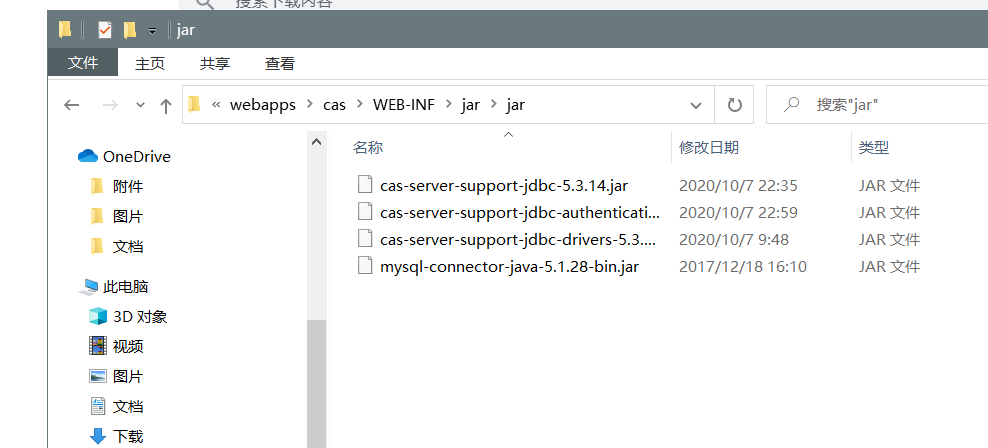
配置数据源 数据库认证
CREATE DATABASE /*!32312 IF NOT EXISTS*/`db_sso` /*!40100 DEFAULT CHARACTER SET utf8 */;
USE `db_sso`;
/*Table structure for table `t_cas` */
DROP TABLE IF EXISTS `t_cas`;
CREATE TABLE `t_cas` (
`id` int(11) NOT NULL AUTO_INCREMENT,
`username` varchar(30) DEFAULT NULL,
`password` varchar(100) DEFAULT NULL,
PRIMARY KEY (`id`)
) ENGINE=InnoDB AUTO_INCREMENT=2 DEFAULT CHARSET=utf8;
/*Data for the table `t_cas` */
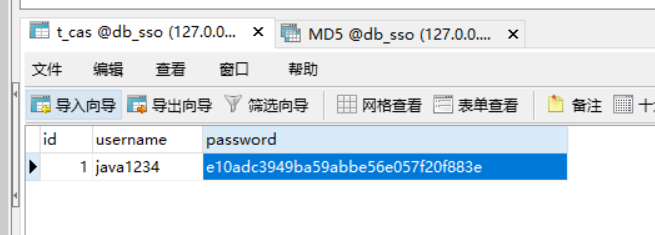
insert into `t_cas`(`id`,`username`,`password`) values (1,'java1234','123456');
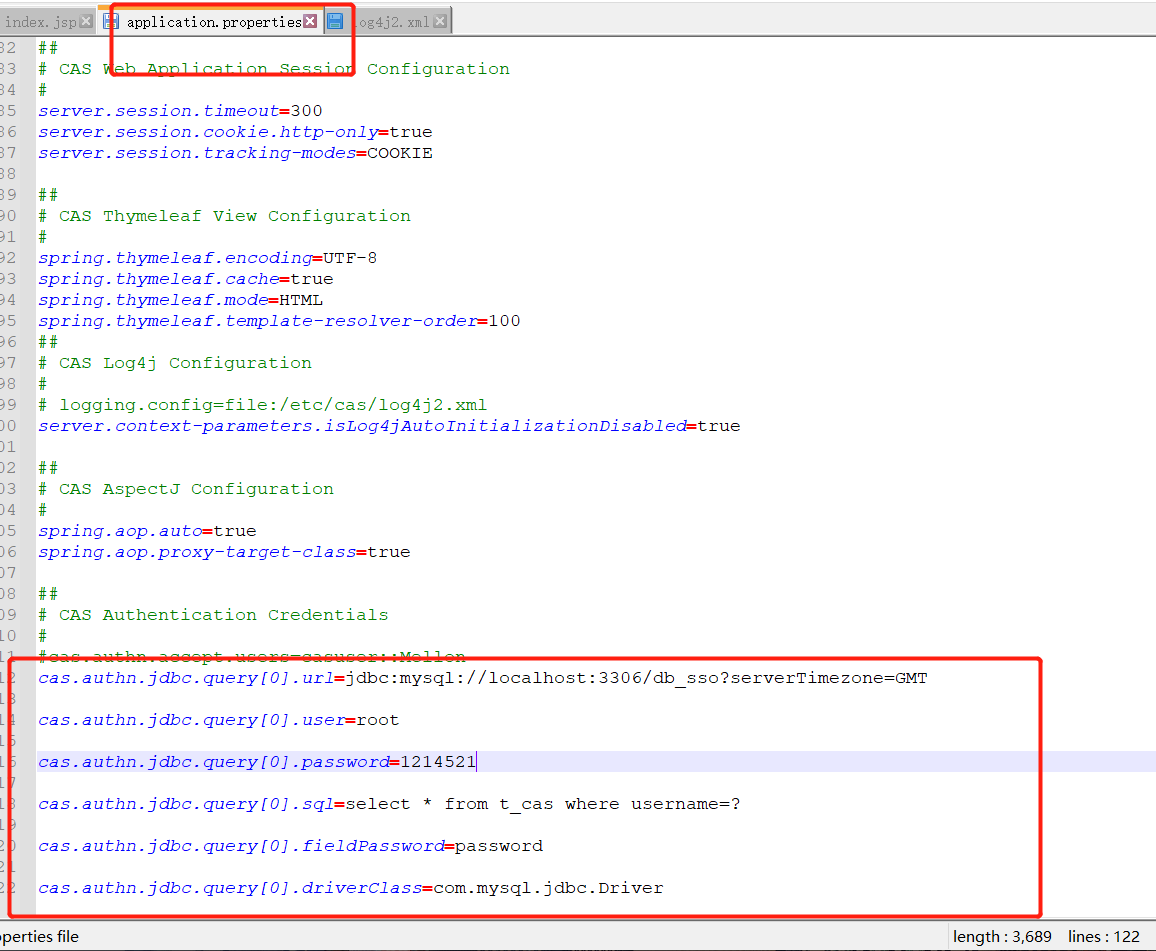
第二步:修改application.properties配置文件
# cas.authn.accept.users=casuser::Mellon

# cas.authn.jdbc.query[0].dialect=org.hibernate.dialect.MySQL5Dialect

cas.authn.jdbc.query[0].url=jdbc:mysql://localhost:3306/db_sso?serverTimezone=GMT

cas.authn.jdbc.query[0].user=root

cas.authn.jdbc.query[0].password=123456

cas.authn.jdbc.query[0].sql=select * from t_cas where username=?

cas.authn.jdbc.query[0].fieldPassword=password

cas.authn.jdbc.query[0].driverClass=com.mysql.jdbc.Driver

MD5加密
SELECT MD5(‘123456’);
第二步:修改application.properties配置文件
cas.authn.jdbc.query[0].passwordEncoder.type=DEFAULT

cas.authn.jdbc.query[0].passwordEncoder.characterEncoding=UTF-8

#MD5加密策略

cas.authn.jdbc.query[0].passwordEncoder.encodingAlgorithm=MD5

第三步:测试OK
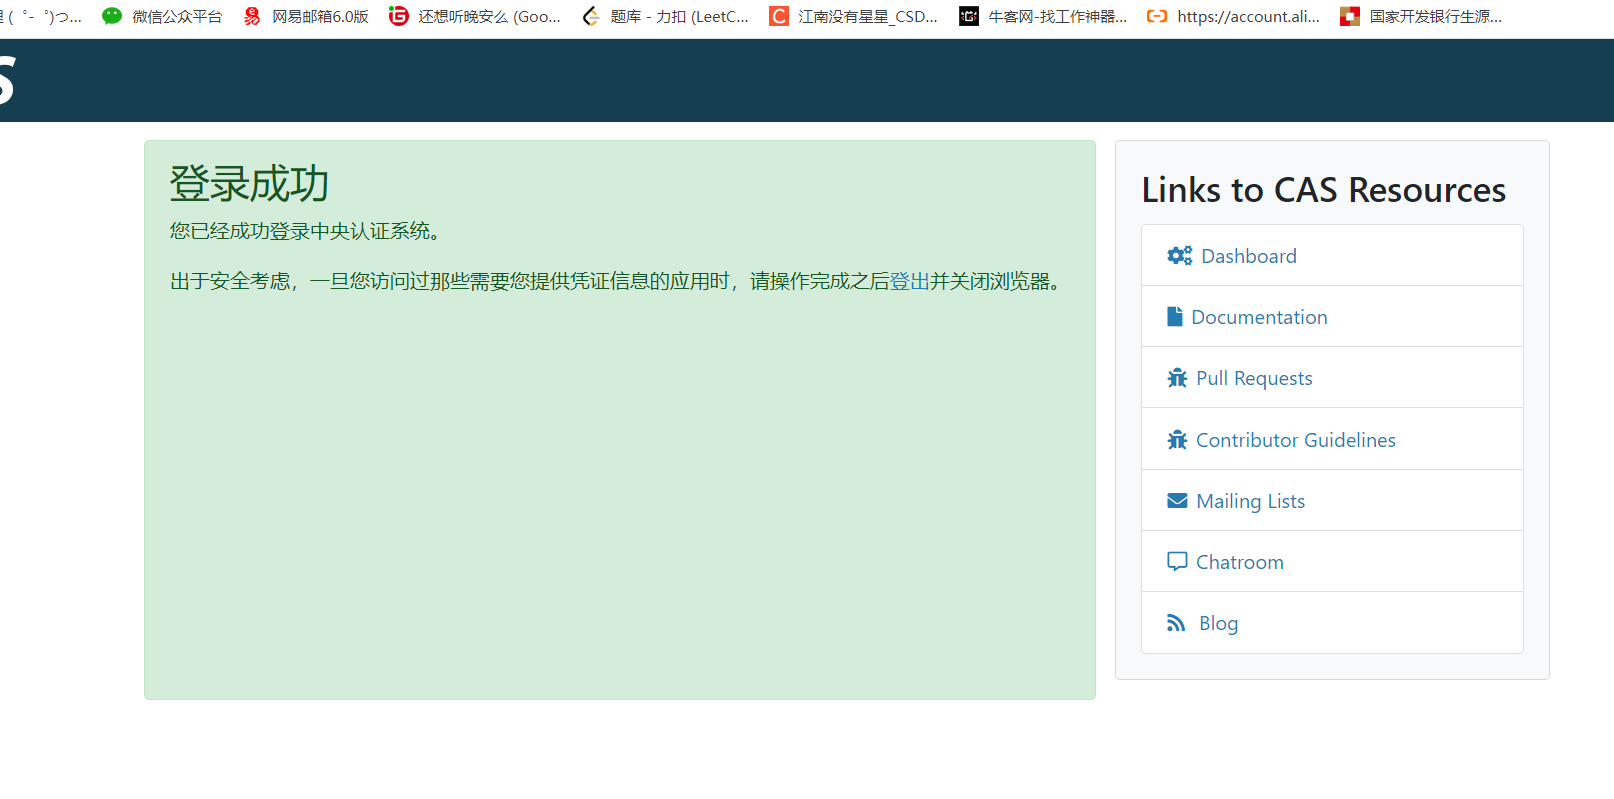
123456仍然可以登录成功
client+springboot客户端整合搭建
<!-- https://mvnrepository.com/artifact/org.jasig.cas.client/cas-client-core -->
<dependency>
<groupId>org.jasig.cas.client</groupId>
<artifactId>cas-client-core</artifactId>
<version>3.6.1</version>
</dependency>
springboot项目整合cas
application.yml加配置:
cas:
server-url-prefix: https://java1234.com:8443/cas
server-login-url: https://java1234.com:8443/cas/login
client-host-url: http://java1234.com:7777
validation-type: cas3
启动类加注解:
@EnableCasClient
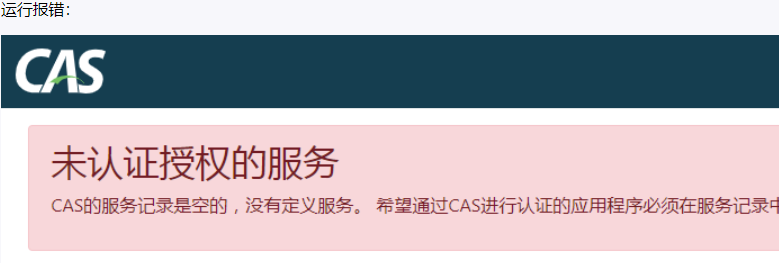
报错原因是cas服务器默认不支持http请求,我们可以通过配置来让其支持http请求;
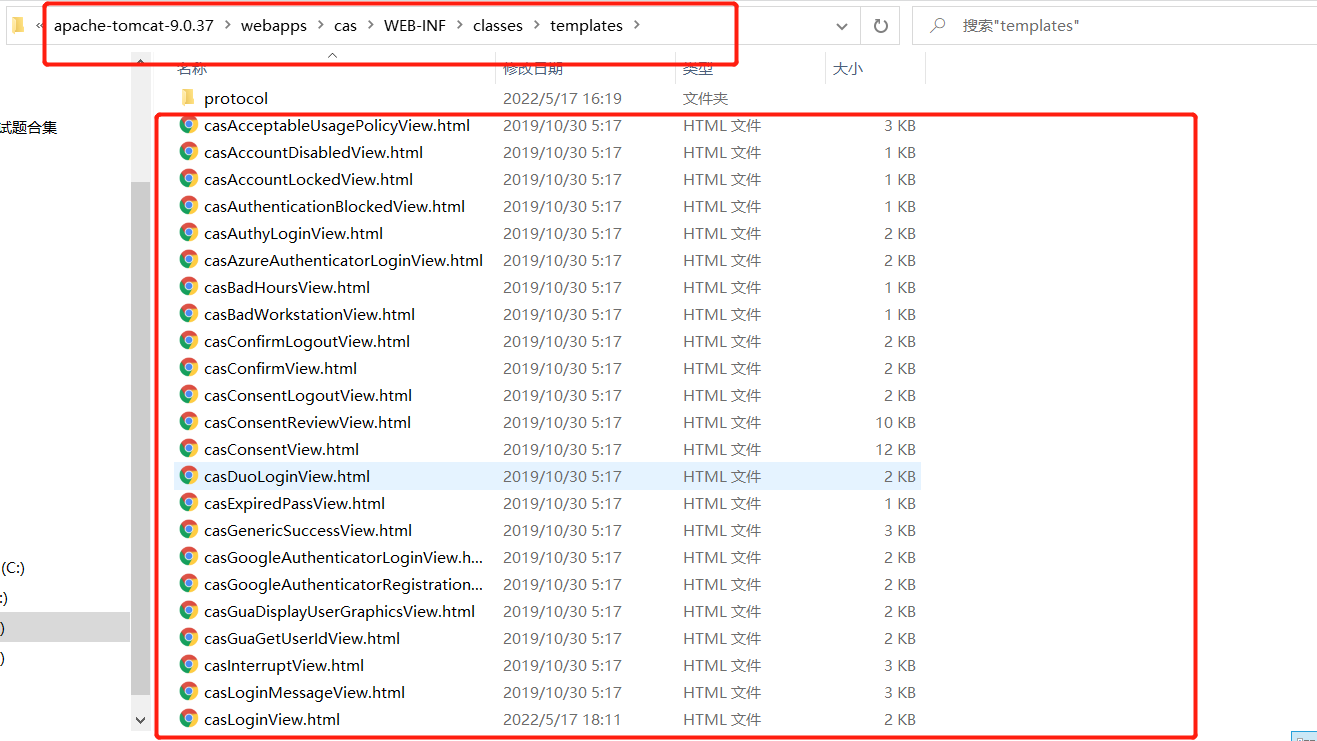
D:casapache–tomcat-9.0.38webappscasWEB-INFclassesservices
修改HTTPSandIMAPS-10000001.json文件;
解决办法:
1、修改配置文件WEB-INFclassesservicesHTTPSandIMAPS-10000001.json
将
"serviceId" : "^(https|imaps)://.*"
改为
"serviceId" : "^(https|http|imaps)://.*",
2、修改配置文件WEB-INFclassesapplication.properties
cas.tgc.secure=false

cas.serviceRegistry.initFromJson=true
显示用户名
我们cas客户端经过cas server认证后,cas客户端可以去cas server端拿到登录认证的信息,比如用户名。
thymeleaf页面可以${session.const_cas_assertion.principal.name} 这么取值;
具体我们通过源码找到Servlet3AuthenticationFilter
org.jasig.cas.client.jaas Servlet3AuthenticationFilter
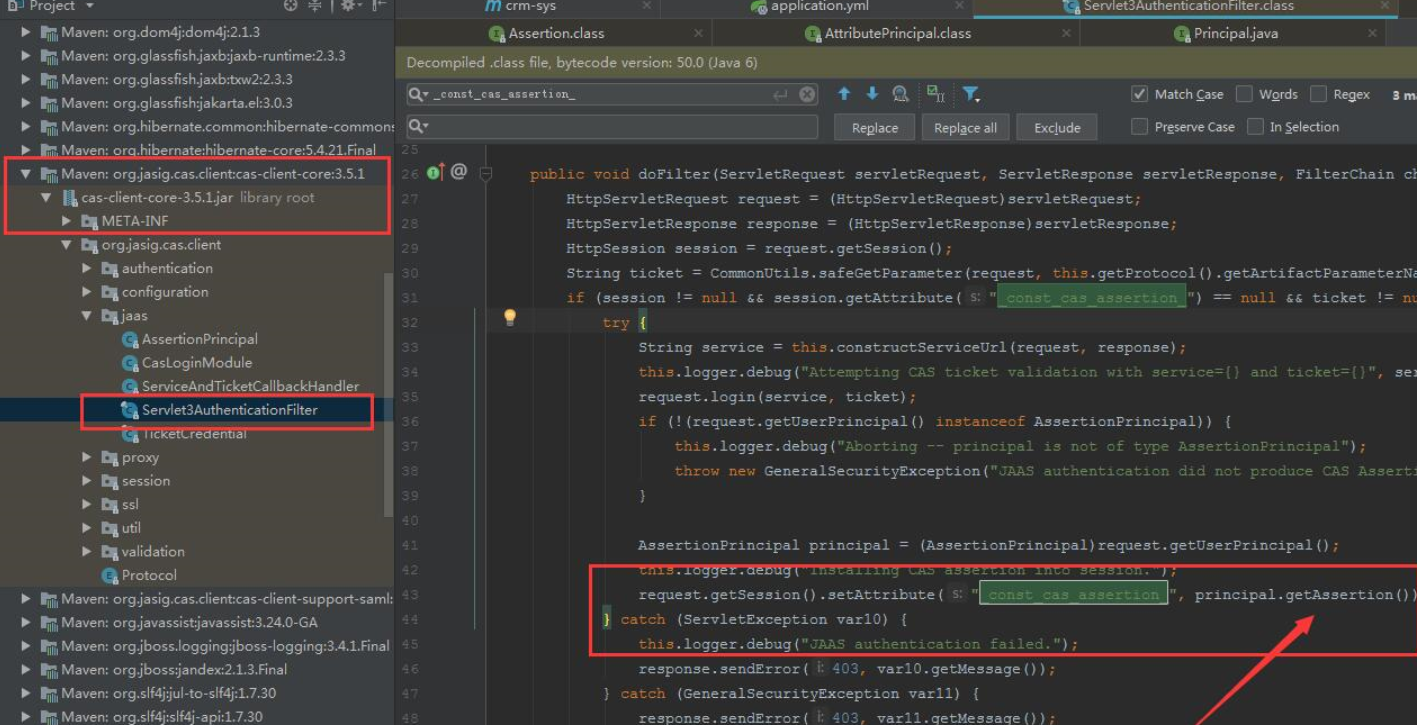
从cas server端获取认证信息后,设置到 const_cas_assertion 里去,通过查看 principal.getAssertion() 可以发现有principal的name属性就是用户名;
注销
我们通过重定向到cas服务端的logout接口,来实现统一注销。
CAS Server界面修改
cas server用到springmvc+webflow实现的;
Spring Web Flow构建于Spring MVC之上,允许实现Web应用程序的“流程”。流程封装了一系列步骤,指导用户执行某些业务任务。它跨越多个HTTP请求,具有状态,处理事务数据,可重用,并且可能是动态的,并且本质上是长期运行的。
整体代码
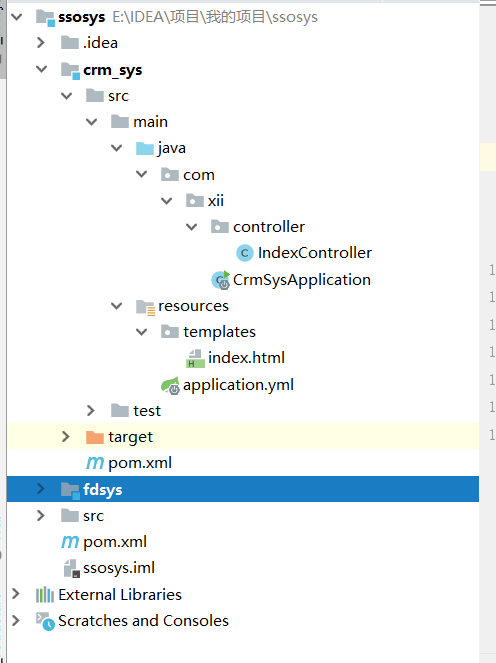
package com.xii.controller;


import org.springframework.stereotype.Controller;
import org.springframework.web.bind.annotation.RequestMapping;
import org.springframework.web.servlet.ModelAndView;

import javax.servlet.http.HttpSession;

@Controller
public class IndexController {

    /**
     * 网站根目录请求
     * @return
     */
    @RequestMapping("/crm")
    public ModelAndView root(HttpSession session){
        ModelAndView mav=new ModelAndView();
        mav.setViewName("index");
        return mav;
    }

    /**
     * 注销
     * @return
     */
    @RequestMapping("/logout")
    public String logout(){
        return "redirect:https://localhost:8443/cas/logout";
    }
}
package com.xii;

import net.unicon.cas.client.configuration.EnableCasClient;
import org.springframework.boot.SpringApplication;
import org.springframework.boot.autoconfigure.SpringBootApplication;
import org.springframework.boot.autoconfigure.jdbc.DataSourceAutoConfiguration;

/**
}

 * 开启CAS @EnableCasClient
 */

@SpringBootApplication(exclude = DataSourceAutoConfiguration.class)
@EnableCasClient
public class CrmSysApplication {

    public static void main(String[] args) {
        SpringApplication.run(CrmSysApplication.class, args);
    }
}
<!DOCTYPE html>
<html xmlns:th="http://www.thymeleaf.org">
<head>
<meta charset="UTF-8"/>
<title>crm客户关系</title>
</head>
<body>
<h2>crm客户关系</h2>
欢迎:&nbsp;&nbsp;<font th:text="${session._const_cas_assertion_.principal.name}"></font>&nbsp;&nbsp;进入crm客户关系;
<br/><br/>
<a href="http://java1234.com:7777/" target="_blank">crm客户关系</a>
<a href="http://java1234.com:8888/" target="_blank">fd财务系统</a>
&nbsp;&nbsp;<a href="/logout">安全退出</a>
</body>
</html>
server:
  port: 7777

#开启cas 配置对应的路由
cas:
  server-url-prefix: https://java1234.com:8443/cas
  server-login-url: https://java1234.com:8443/cas/login
  client-host-url: http://java1234.com:7777/
  validation-type: cas3
测试:当一个子项目登陆成功之后,进入另一个子项目就不需要登录认证。
补充密码配置说明:
##
# JDBC配置
#
#查询账号密码SQL,必须包含密码字段
cas.authn.jdbc.query[0].sql=select * from user where username=?

#指定上面的SQL查询字段名(必须)
cas.authn.jdbc.query[0].fieldPassword=password

#指定过期字段,1为过期,若过期不可用
cas.authn.jdbc.query[0].fieldExpired=expired

#为不可用字段段,1为不可用,需要修改密码
cas.authn.jdbc.query[0].fieldDisabled=disabled

#数据库连接
cas.authn.jdbc.query[0].url=jdbc:mysql://127.0.0.1:3306/cas?useUnicode=true&characterEncoding=UTF-8&autoReconnect=true&useSSL=false

#数据库dialect配置
cas.authn.jdbc.query[0].dialect=org.hibernate.dialect.MySQLDialect

#数据库用户名
cas.authn.jdbc.query[0].user=root

#数据库用户密码
cas.authn.jdbc.query[0].password=123

#数据库事务自动提交
cas.authn.jdbc.query[0].autocommit=false

#数据库驱动
cas.authn.jdbc.query[0].driverClass=com.mysql.jdbc.Driver

#超时配置
cas.authn.jdbc.query[0].idleTimeout=5000

#默认加密策略,通过encodingAlgorithm来指定算法,默认NONE不加密
# NONE|DEFAULT|STANDARD|BCRYPT|SCRYPT|PBKDF2
cas.authn.jdbc.query[0].passwordEncoder.type=DEFAULT
# 字符类型
cas.authn.jdbc.query[0].passwordEncoder.characterEncoding=UTF-8
# 加密算法
cas.authn.jdbc.query[0].passwordEncoder.encodingAlgorithm=MD5
# 加密盐
#cas.authn.jdbc.query[0].passwordEncoder.secret=
# 加密字符长度
#cas.authn.jdbc.query[0].passwordEncoder.strength=16
原文地址:https://blog.csdn.net/wang121213145/article/details/124822899
本文来自互联网用户投稿,该文观点仅代表作者本人,不代表本站立场。本站仅提供信息存储空间服务,不拥有所有权,不承担相关法律责任。
如若转载,请注明出处:http://www.7code.cn/show_30322.html
如若内容造成侵权/违法违规/事实不符,请联系代码007邮箱:suwngjj01@126.com进行投诉反馈,一经查实,立即删除!