1、main.js
import { createApp } from 'vue' import App from './App.vue' import ElementPlus from 'element-plus' import 'element-plus/dist/index.css' import zhCn from 'element-plus/dist/locale/zh-cn.mjs' let app = createApp(App); app.use(ElementPlus, { locale: zhCn, }) app.mount('#app')2、util/request.js
import axios from "axios"; let request = axios.create({ baseURL: "http://localhost:8080", timeout: 50000 }); export default request3、api/schedule.js
import request from "../util/request.js"; export let getScheduleList = () => { return request.get('/schedule') }; export let updateSchedule=data=>{ return request.put("/schedule",data) }4、App.vue
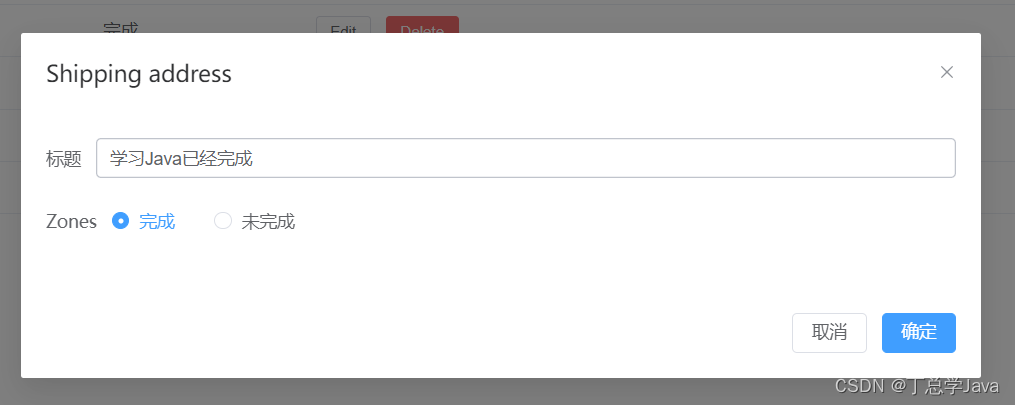
<template> <el-container> <el-row> <el-button type="primary" plain>新增</el-button> </el-row> <el-table :data="scheduleList" style="width: 100%"> <el-table-column label="编号" width="180"> <template #default="scope"> <div style="display: flex; align-items: center"> <span style="margin-left: 10px">{{ scope.row.id }}</span> </div> </template> </el-table-column> <el-table-column label="学习计划" width="180"> <template #default="scope"> <div style="display: flex; align-items: center"> <span style="margin-left: 10px">{{ scope.row.title }}</span> </div> </template> </el-table-column> <el-table-column label="是否完成" width="180"> <template #default="scope"> <div style="display: flex; align-items: center"> <span style="margin-left: 10px">{{ scope.row.completed?'完成':'未完成' }}</span> </div> </template> </el-table-column> <el-table-column label="其他操作"> <template #default="scope"> <el-button size="small" @click="handleEdit(scope.row)">Edit</el-button> <el-button size="small" type="danger" @click="handleDelete(scope.$index, scope.row)">Delete</el-button> </template> </el-table-column> </el-table> <el-dialog v-model="dialogFormVisible" title="Shipping address"> <el-form :model="form"> <el-form-item label="标题"> <el-input v-model="form.title" autocomplete="off" /> </el-form-item> <el-form-item label="Zones" > <el-radio-group v-model="form.completed"> <el-radio :label="true">完成</el-radio> <el-radio :label="false">未完成</el-radio> </el-radio-group> </el-form-item> </el-form> <template #footer> <span class="dialog-footer"> <el-button @click="dialogFormVisible = false">取消</el-button> <el-button type="primary" @click="update">确定</el-button> </span> </template> </el-dialog> </el-container> </template> <script lang="ts" setup> import {getScheduleList, updateSchedule} from './api/schedule.js'; import {onMounted, reactive, ref} from 'vue'; let dialogFormVisible = ref(false); let form=reactive({ id: 0, title: '', completed: false }) let scheduleList=reactive([]) let loadData=()=>{ getScheduleList().then(response=>{ Object.assign(scheduleList,response.data.data) }) } onMounted(()=>{ loadData(); }) let update=async ()=>{ await updateSchedule(form) dialogFormVisible.value = false loadData(); } interface scheduleList { id: Number title: string completed: boolean } const handleEdit = row => { dialogFormVisible.value = true; Object.assign(form, row); } const handleDelete = (index: number, row: scheduleList) => { console.log(index, row) } </script>5、ScheduleController.java
package com.atguigu.schedule;
import com.atguigu.schedule.controller.Result;
import com.atguigu.schedule.pojo.Schedule;
import com.atguigu.schedule.service.ScheduleService;
import org.springframework.beans.factory.annotation.Autowired;
import org.springframework.web.bind.annotation.*;
@CrossOrigin
@RestController
@RequestMapping("/schedule")
public class ScheduleController {

    @Autowired
    private ScheduleService scheduleService;

    @GetMapping
    public Result list() {
        return Result.ok(scheduleService.getScheduleList());
    }

    @PostMapping
    public Result save(@RequestBody Schedule schedule) {
        scheduleService.add(schedule);
        return Result.ok();
    }

    @PutMapping
    public Result update(@RequestBody Schedule schedule) {
        scheduleService.update(schedule);
        return Result.ok();
    }

    @DeleteMapping("/{id}")
    public Result del(@PathVariable Integer id) {
        scheduleService.del(id);
        return Result.ok();
    }
}
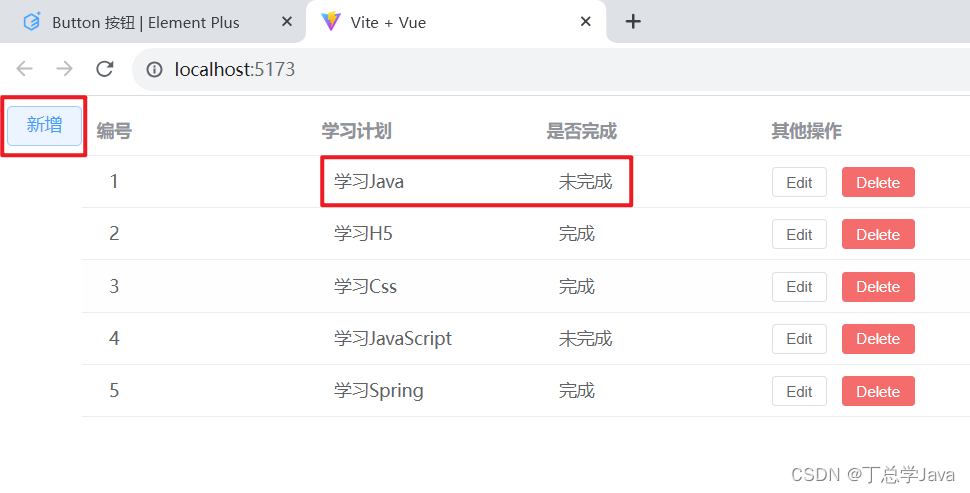
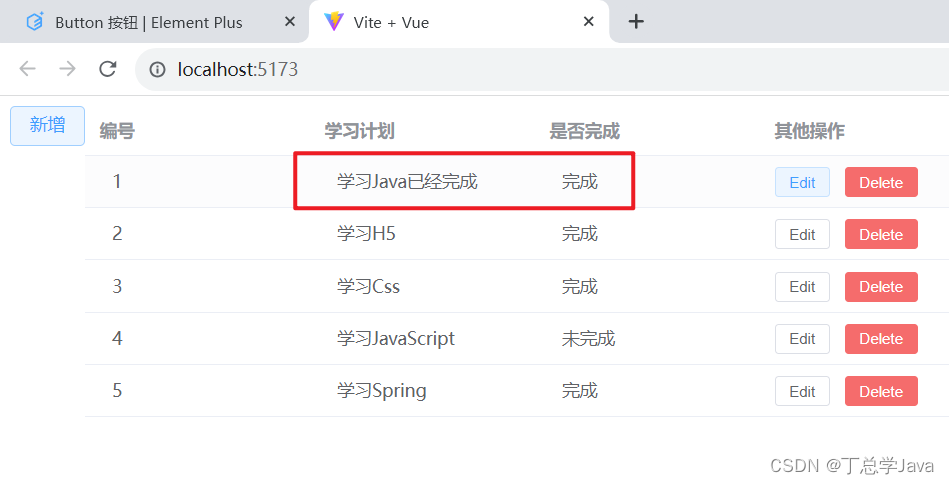
6、Object.assign
在Vue3中,Object.assign()方法主要用于合并对象,也可以用于浅拷贝对象。这个方法将所有可枚举的自身属性从一个或多个源对象复制到目标对象,返回目标对象。
在Vue3中,Object.assign()通常用于合并对象,如Vue的组件选项。
例如
let options1 = {a: 1};
let options2 = {b: 2};
let options3 = {c: 3};

let mergedOptions = Object.assign({}, options1, options2, options3);
在上面的例子中,
mergedOptions将会得到{a: 1, b: 2, c: 3}。在Vue3中,Object.assign()也常用于拷贝数据。由于它执行的是浅拷贝,对于深层对象,它只会拷贝对象的引用而不是拷贝整个对象。所以如果你需要深层拷贝对象,可能需要使用其他方法,比如使用JSON的
parse()和stringify()方法,或者使用递归函数来实现深拷贝。
在Vue3中,Object.assign() 并不是一个特别重要的方法,但它仍然可以用于合并对象或克隆对象。Vue3主要使用 ES6 的新特性,如 Proxy, Reflect, WeakMap, Symbol等,因此 Object.assign() 不再是 Vue3 的主要工具。
Object.assign() 是一个用于将所有可枚举属性的值从一个或多个源对象复制到目标对象的方法,它将返回目标对象。但在 Vue3 中,更推荐使用深度复制或克隆对象的方法,如 JSON 的 parse() 和 stringify() 方法,或者使用一个专门的深度复制库,如 lodash 的 _.cloneDeep() 方法。
Vue3 更重视的是响应式系统,它使用 ES6 的 Proxy 和 Reflect 来实现响应式数据。当你改变一个响应式对象的属性时,Vue3 会跟踪这个变化并更新相关的视图。因此,Object.assign() 在 Vue3 中的使用场景并不多,但在某些特定情况下,例如你需要合并或克隆一些普通的 JavaScript 对象时,你仍然可以使用它。
原文地址:https://blog.csdn.net/m0_65152767/article/details/134631106
本文来自互联网用户投稿,该文观点仅代表作者本人,不代表本站立场。本站仅提供信息存储空间服务,不拥有所有权,不承担相关法律责任。
如若转载,请注明出处:http://www.7code.cn/show_3289.html
如若内容造成侵权/违法违规/事实不符,请联系代码007邮箱:suwngjj01@126.com进行投诉反馈,一经查实,立即删除!

