本文介绍: /一、自定义密码处理组件@Component@Override//进行MD5加密@Override//判断是否相等/*** 自定义用户类(继承Security里的User类)*/@Getter@Setter@ToString@Schema(description = “自定义用户类: 继承Security里的User类”)/*** 我们自己的用户实体对象,要调取用户信息时直接获取这个实体对象*///调用父类构造器初始化信息。
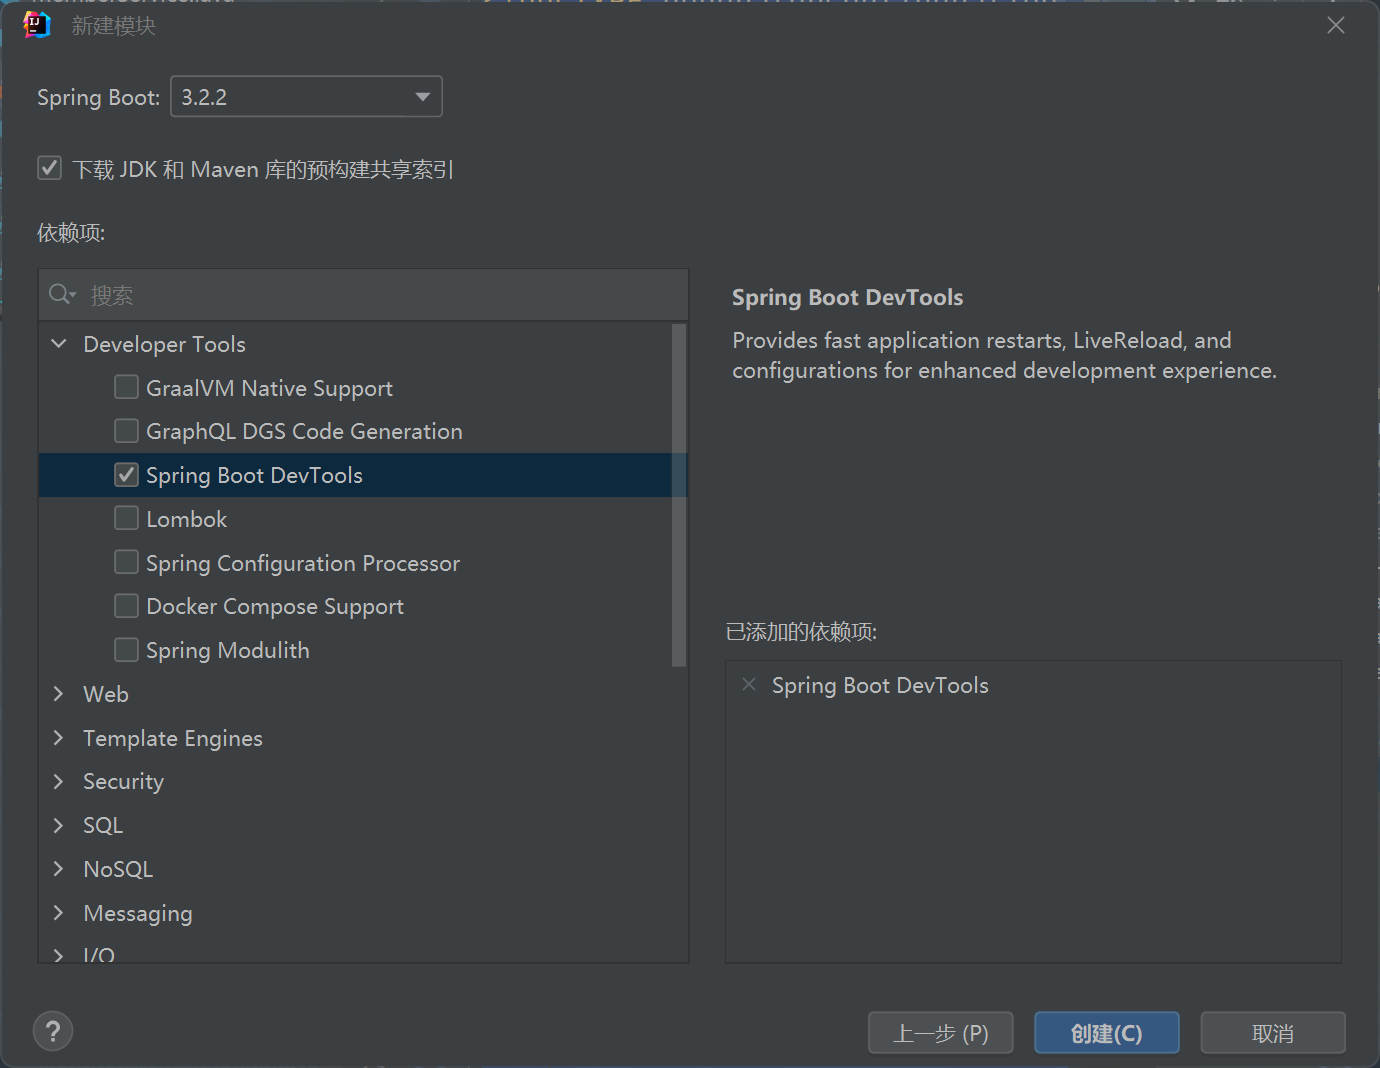
一、导入依赖(pom.xml)
<?xml version="1.0" encoding="UTF-8"?>
<project xmlns="http://maven.apache.org/POM/4.0.0" xmlns:xsi="http://www.w3.org/2001/XMLSchema-instance"
xsi:schemaLocation="http://maven.apache.org/POM/4.0.0 https://maven.apache.org/xsd/maven-4.0.0.xsd">
<modelVersion>4.0.0</modelVersion>
<groupId>com.wgz</groupId>
<artifactId>wgz-security-auth</artifactId>
<version>0.0.1-SNAPSHOT</version>
<name>wgz-security-auth</name>
<description>账号统一认证</description>
<properties>
<java.version>8</java.version>
<maven.compiler.source>1.8</maven.compiler.source>
<maven.compiler.target>1.8</maven.compiler.target>
<spring-boot.version>2.7.12</spring-boot.version>
<spring-cloud.version>2021.0.7</spring-cloud.version>
<spring-cloud-alibaba.version>2021.0.5.0</spring-cloud-alibaba.version>
<project.build.sourceEncoding>UTF-8</project.build.sourceEncoding>
<lombok.version>1.18.24</lombok.version>
<mysql.version>8.0.31</mysql.version>
<mybatis-plus.version>3.5.3.1</mybatis-plus.version>
<pagehelper.version>1.4.6</pagehelper.version>
<knife4j.version>4.1.0</knife4j.version>
<fastjson.version>2.0.23</fastjson.version>
<redisson-spring.version>3.13.6</redisson-spring.version>
</properties>
<dependencies>
<dependency>
<groupId>org.springframework.boot</groupId>
<artifactId>spring-boot-starter-web</artifactId>
</dependency>
<dependency>
<groupId>org.springframework.boot</groupId>
<artifactId>spring-boot-starter-security</artifactId>
</dependency>
<!--mybatis分页插件-->
<dependency>
<groupId>com.github.pagehelper</groupId>
<artifactId>pagehelper-spring-boot-starter</artifactId>
</dependency>
<!--参数验证依赖-->
<dependency>
<groupId>org.springframework.boot</groupId>
<artifactId>spring-boot-starter-validation</artifactId>
</dependency>
<!--thymeleaf模板引擎-->
<dependency>
<groupId>org.springframework.boot</groupId>
<artifactId>spring-boot-starter-thymeleaf</artifactId>
</dependency>
<dependency>
<groupId>org.thymeleaf.extras</groupId>
<artifactId>thymeleaf-extras-springsecurity5</artifactId>
</dependency>
<!-- 热部署插件-->
<dependency>
<groupId>org.springframework.boot</groupId>
<artifactId>spring-boot-devtools</artifactId>
<scope>runtime</scope>
<optional>true</optional>
</dependency>
<!--使用redisson作为分布式锁-->
<dependency>
<groupId>org.redisson</groupId>
<artifactId>redisson-spring-boot-starter</artifactId>
</dependency>
<!-- mysql数据库驱动 -->
<dependency>
<groupId>com.mysql</groupId>
<artifactId>mysql-connector-j</artifactId>
<version>${mysql.version}</version>
</dependency>
<!--mybati-plus-->
<dependency>
<groupId>com.baomidou</groupId>
<artifactId>mybatis-plus-boot-starter</artifactId>
<version>${mybatis-plus.version}</version>
</dependency>
<dependency>
<groupId>com.baomidou</groupId>
<artifactId>mybatis-plus-generator</artifactId>
<version>${mybatis-plus.version}</version>
</dependency>
<!--引入spring boot 集成的PageHelper分页插件-->
<dependency>
<groupId>com.github.pagehelper</groupId>
<artifactId>pagehelper-spring-boot-starter</artifactId>
<version>${pagehelper.version}</version>
</dependency>
<!--lombok依赖-->
<dependency>
<groupId>org.projectlombok</groupId>
<artifactId>lombok</artifactId>
</dependency>
<!--添加fastjson依赖-->
<dependency>
<groupId>com.alibaba</groupId>
<artifactId>fastjson</artifactId>
<version>${fastjson.version}</version>
</dependency>
<!-- 文档工具 knife4j-openapi3-->
<dependency>
<groupId>com.github.xiaoymin</groupId>
<artifactId>knife4j-openapi3-spring-boot-starter</artifactId>
<version>${knife4j.version}</version>
</dependency>
<!-- https://mvnrepository.com/artifact/io.jsonwebtoken/jjwt -->
<dependency>
<groupId>io.jsonwebtoken</groupId>
<artifactId>jjwt</artifactId>
<version>0.9.1</version>
</dependency>
</dependencies>
<dependencyManagement>
<dependencies>
<!-- spring boot 依赖 -->
<dependency>
<groupId>org.springframework.boot</groupId>
<artifactId>spring-boot-dependencies</artifactId>
<version>${spring-boot.version}</version>
<type>pom</type>
<scope>import</scope>
</dependency>
<!-- spring cloud 依赖 -->
<dependency>
<groupId>org.springframework.cloud</groupId>
<artifactId>spring-cloud-dependencies</artifactId>
<version>${spring-cloud.version}</version>
<type>pom</type>
<scope>import</scope>
</dependency>
<!-- spring cloud alibaba 依赖 -->
<dependency>
<groupId>com.alibaba.cloud</groupId>
<artifactId>spring-cloud-alibaba-dependencies</artifactId>
<version>${spring-cloud-alibaba.version}</version>
<type>pom</type>
<scope>import</scope>
</dependency>
<!--使用redisson作为分布式锁-->
<dependency>
<groupId>org.redisson</groupId>
<artifactId>redisson-spring-boot-starter</artifactId>
<version>${redisson-spring.version}</version>
</dependency>
<dependency>
<groupId>org.redisson</groupId>
<artifactId>redisson-spring-data-27</artifactId>
<version>${redisson-spring.version}</version>
</dependency>
</dependencies>
</dependencyManagement>
<build>
<plugins>
<plugin>
<groupId>org.apache.maven.plugins</groupId>
<artifactId>maven-compiler-plugin</artifactId>
<version>3.9.0</version>
<configuration>
<source>${java.version}</source>
<target>${java.version}</target>
<encoding>${project.build.sourceEncoding}</encoding>
<annotationProcessorPaths>
<path>
<groupId>com.github.therapi</groupId>
<artifactId>therapi-runtime-javadoc-scribe</artifactId>
<version>0.15.0</version>
</path>
<path>
<groupId>org.projectlombok</groupId>
<artifactId>lombok</artifactId>
<version>${lombok.version}</version>
</path>
<path>
<groupId>org.springframework.boot</groupId>
<artifactId>spring-boot-configuration-processor</artifactId>
<version>${spring-boot.version}</version>
</path>
</annotationProcessorPaths>
</configuration>
</plugin>
</plugins>
<resources>
<resource>
<directory>src/main/resources</directory>
<!-- 关闭过滤 -->
<filtering>false</filtering>
</resource>
<resource>
<directory>src/main/resources</directory>
<!-- 引入所有 匹配文件进行过滤 -->
<includes>
<include>application*</include>
<include>bootstrap*</include>
<include>banner*</include>
</includes>
<!-- 启用过滤 即该资源中的变量将会被过滤器中的值替换 -->
<filtering>true</filtering>
</resource>
</resources>
</build>
<profiles>
<profile>
<id>dev</id>
<properties>
<!-- 环境标识,需要与配置文件的名称相对应 -->
<profiles.active>dev</profiles.active>
<logging.level>info</logging.level>
</properties>
</profile>
<profile>
<id>test</id>
<properties>
<!-- 环境标识,需要与配置文件的名称相对应 -->
<profiles.active>test</profiles.active>
<logging.level>debug</logging.level>
</properties>
</profile>
<profile>
<id>uat</id>
<properties>
<profiles.active>uat</profiles.active>
<logging.level>debug</logging.level>
</properties>
</profile>
<profile>
<id>prod</id>
<properties>
<profiles.active>prod</profiles.active>
<logging.level>warn</logging.level>
</properties>
</profile>
</profiles>
</project>二、application配置
1、application.yml
spring:
  profiles:
    active: @profiles.active@
  main:
    allow-circular-references: true
  web:
    resources:
      static-locations: classpath:/static/
  thymeleaf:
    cache: false
    prefix: classpath:/templates/
  security:
    user:
      name: jing
password: 12342、application-dev.yml
server:
  port: 3001

spring:
  #数据源
  datasource:
    mysql:
      driverClassName: com.mysql.cj.jdbc.Driver
      jdbcUrl: jdbc:mysql://127.0.0.1:3306/wgz-security-auth?characterEncoding=utf8&useSSL=false&serverTimezone=UTC&rewriteBatchedStatements=true&allowPublicKeyRetrieval=true&autoReconnect=true&allowMultiQueries=true
      type: com.zaxxer.hikari.HikariDataSource
      username: root
      password: 123456
      initialSize: 10
      maxActive: 20
      minIdle: 1
      maximumPoolSize: 20
      autoCommit: true
      poolName: HikariPool_mysql
      maxLifetime: 600000
      connectionTestQuery: SELECT 1

  # redis
  redis:
    database: 2
    host: 127.0.0.1
    port: 6379
    username:
    password: 123456
    timeout: -1
    lettuce:
      pool:
        max-active: 8  # 连接池最大连接数(使用负值表示没有限制) 默认 8
        max-wait: -1   # 连接池最大阻塞等待时间(使用负值表示没有限制) 默认 -1
        max-idle: 8    # 连接池中的最大空闲连接 默认 8
        min-idle: 0    # 连接池中的最小空闲连接 默认 0


#knife4j文档配置
knife4j:
  enable: true  #是否开启Swagger
  production: false #当前环境是否为生产环境
  basic:
    enable: true  #进入界面是否需要账号密码
    username: admin
password: admin123131三、security config配置
import com.wgz.auth.Filter.TokenAuthenticationFilter;
import com.wgz.auth.Filter.TokenLoginFilter;
import com.wgz.auth.service.impl.UserDetailServiceImpl;
import com.wgz.auth.util.CustomPwdEncoderUtil;
import lombok.RequiredArgsConstructor;
import lombok.extern.slf4j.Slf4j;
import org.springframework.context.annotation.Bean;
import org.springframework.context.annotation.Configuration;
import org.springframework.data.redis.core.RedisTemplate;
import org.springframework.security.authentication.AuthenticationManager;
import org.springframework.security.config.annotation.authentication.builders.AuthenticationManagerBuilder;
import org.springframework.security.config.annotation.method.configuration.EnableGlobalMethodSecurity;
import org.springframework.security.config.annotation.web.builders.HttpSecurity;
import org.springframework.security.config.annotation.web.builders.WebSecurity;
import org.springframework.security.config.annotation.web.configuration.EnableWebSecurity;
import org.springframework.security.config.annotation.web.configuration.WebSecurityConfigurerAdapter;
import org.springframework.security.config.http.SessionCreationPolicy;
import org.springframework.security.web.authentication.UsernamePasswordAuthenticationFilter;

/**
 * spring security 配置
 * 1.AuthenticationManager 认证管理器bean对象
 * 2.configure HttpSecurity 需要开启和绕过防护的接口 + 过滤器注册 + session管理
 * 3.configure AuthenticationManagerBuilder 认证管理器使用的资源
 * 4.configure WebSecurity 不需要拦截的路径
 */
@Slf4j
@Configuration
@EnableWebSecurity
@RequiredArgsConstructor
@EnableGlobalMethodSecurity(prePostEnabled = true)
public class SecurityConfig extends WebSecurityConfigurerAdapter {
    /**
     * 自定义查询用户信息类(默认在providerService查询)
     */
    private final UserDetailServiceImpl userService;
    /**
     * 自定义加密工具类
     */
    private final CustomPwdEncoderUtil customPwdEncoder;
    /**
     * redis存储对象
     */
    private final RedisTemplate<String, String> redisTemplate;

    /**
     * 配置认证管理器bean对象
     */
    @Bean
    @Override
    public AuthenticationManager authenticationManagerBean() throws Exception {
        return super.authenticationManagerBean();
    }
    /**
     * 防护配置:配置需要开启和绕过防护的接口 + 过滤器注册 + session管理
     */
    @Override
    protected void configure(HttpSecurity http) throws Exception {
        //          //自定义登陆页面
        //        http
        //                .formLogin()
        //                //登陆页面设置(页面访问的地方)
        //                .loginPage("/login")
        //                //登陆访问路径(表单访问的地方[post])
        //                .loginProcessingUrl("/login/doLogin")
        //                //登陆成功后跳转路径(页面)
        //                .defaultSuccessUrl("/login/success").permitAll()
        //                .and()
        //                .authorizeRequests()
        //                //设置不需要认证的访问路径,可以直接访问
        //                .antMatchers("/", "/login/doLogin").permitAll();
        //配置认证信息:配置绕过的接口和注册过滤器(1.登录验证过滤器 + 2.token认证过滤器)
        http
                //关闭csrf
                .csrf().disable()
                //开启跨域以便前端调用接口
                .cors()
                .and()
                .authorizeRequests()
                //配置不需要认证的接口 如:登录接口
                .antMatchers("/login/doLogin")
                .anonymous()
                //其他所有接口需要认证才能访问
                .anyRequest().authenticated()
                .and()
                //添加token认证过滤器 方式一
        //                .addFilterBefore(new TokenAuthenticationFilter(redisTemplate), UsernamePasswordAuthenticationFilter.class)
        //添加登录过滤器
                .addFilter(new TokenLoginFilter(authenticationManagerBean(), redisTemplate))
                //添加token认证过滤器 方式二
                .addFilterAfter(new TokenAuthenticationFilter(redisTemplate), UsernamePasswordAuthenticationFilter.class);

        //配置session信息:禁用
        http.sessionManagement().sessionCreationPolicy(SessionCreationPolicy.STATELESS);
    }
    /**
     * 配置认证管理器使用的资源:
     * 1.查询用户信息的类
     * 2.自定义加密器
     */
    @Override
    protected void configure(AuthenticationManagerBuilder auth) throws Exception {
        auth.userDetailsService(userService).passwordEncoder(customPwdEncoder);
    }
    /**
     * 配置不需要拦截的路径
     * 配置后将不再进入过滤器进行校验,直接请求到对应的资源地址
     * 如:包含/login/doLogin ,
     * 那在请求这个接口时,直接到达该接口地址,
     * 不再进入security过滤器
     */
    @Override
    public void configure(WebSecurity web) {
        web.ignoring().antMatchers(
                "/favicon.ico",
        "/swagger-resources/**",
        "/webjars/**",
        "/v2/**",
        "/v3/**",
        //                "/login/**", //放开该地址后,请求将不再进入过滤器校验与认证,如:不使用过滤器的方式校验登录
        "/swagger-ui.html",
        "/doc.html");
    }
}
四、redis配置
1、redis config
import lombok.RequiredArgsConstructor;
import org.springframework.boot.autoconfigure.AutoConfigureBefore;
import org.springframework.boot.autoconfigure.data.redis.RedisAutoConfiguration;
import org.springframework.cache.annotation.EnableCaching;
import org.springframework.context.annotation.Bean;
import org.springframework.context.annotation.Configuration;
import org.springframework.data.redis.connection.RedisConnectionFactory;
import org.springframework.data.redis.core.*;
import org.springframework.data.redis.serializer.JdkSerializationRedisSerializer;
import org.springframework.data.redis.serializer.StringRedisSerializer;

/**
 * redis配置
 */
@EnableCaching
@Configuration(proxyBeanMethods = false)
@RequiredArgsConstructor
@AutoConfigureBefore(RedisAutoConfiguration.class)
public class RedisConfig {
    private final RedisConnectionFactory factory;

    @Bean
    public RedisTemplate<String, Object> redisTemplate() {
        RedisTemplate<String, Object> redisTemplate = new RedisTemplate<>();
        redisTemplate.setKeySerializer(new StringRedisSerializer());
        redisTemplate.setHashKeySerializer(new StringRedisSerializer());
        redisTemplate.setValueSerializer(new JdkSerializationRedisSerializer());
        redisTemplate.setHashValueSerializer(new JdkSerializationRedisSerializer());
        redisTemplate.setConnectionFactory(factory);
        return redisTemplate;
    }

    @Bean
    public HashOperations<String, String, Object> hashOperations(RedisTemplate<String, Object> redisTemplate) {
        return redisTemplate.opsForHash();
    }

    @Bean
    public ValueOperations<String, String> valueOperations(RedisTemplate<String, String> redisTemplate) {
        return redisTemplate.opsForValue();
    }

    @Bean
    public ListOperations<String, Object> listOperations(RedisTemplate<String, Object> redisTemplate) {
        return redisTemplate.opsForList();
    }

    @Bean
    public SetOperations<String, Object> setOperations(RedisTemplate<String, Object> redisTemplate) {
        return redisTemplate.opsForSet();
    }

    @Bean
    public ZSetOperations<String, Object> zSetOperations(RedisTemplate<String, Object> redisTemplate) {
        return redisTemplate.opsForZSet();
    }
}2、redisson config
import org.redisson.Redisson;
import org.redisson.api.RedissonClient;
import org.redisson.config.Config;
import org.redisson.config.SingleServerConfig;
import org.springframework.beans.factory.annotation.Value;
import org.springframework.context.annotation.Bean;
import org.springframework.context.annotation.Configuration;
import org.springframework.util.StringUtils;

/**
 * redisson配置
 */
@Configuration
public class RedissonConfig {

    @Value("${spring.redis.host:127.0.0.1}")
    private String host;

    @Value("${spring.redis.port:6379}")
    private String port;

    @Value("${spring.redis.password}")
    private String password;

    @Value("${spring.redis.username:''}")
    private String username;

    @Value("${spring.redis.database:1}")
    private Integer database;

    @Bean
    public RedissonClient singleRedisClient() {
        Config config = new Config();
        SingleServerConfig singleServerConfig = config.useSingleServer();

        if (StringUtils.hasLength(password)) {
            singleServerConfig.setPassword(password);
        }
        if (StringUtils.hasLength(username)) {
            singleServerConfig.setUsername(username);
        }
        String url = "redis://" + host + ":" + port;
        singleServerConfig.setAddress(url);
        singleServerConfig.setDatabase(database);
        return Redisson.create(config);
    }
}五、mysql config配置
import com.baomidou.mybatisplus.extension.spring.MybatisSqlSessionFactoryBean;
import com.zaxxer.hikari.HikariDataSource;
import org.apache.ibatis.session.SqlSessionFactory;
import org.mybatis.spring.SqlSessionTemplate;
import org.mybatis.spring.annotation.MapperScan;
import org.springframework.beans.factory.annotation.Qualifier;
import org.springframework.boot.context.properties.ConfigurationProperties;
import org.springframework.context.annotation.Bean;
import org.springframework.context.annotation.Configuration;
import org.springframework.core.io.Resource;
import org.springframework.core.io.support.PathMatchingResourcePatternResolver;
import org.springframework.jdbc.support.JdbcTransactionManager;
import org.springframework.transaction.TransactionManager;

import javax.sql.DataSource;
import java.util.*;

/**
 * 数据源配置
 */
@Configuration
//这里设置扫描dao接口了,启动类与dao接口就不用在配置mapper扫描注解
@MapperScan(basePackages = "com.wgz.auth.mapper", sqlSessionFactoryRef = "mySqlSessionFactory")
public class HikariMySqlConfig {
    /**
     * @ConfigurationProperties 读取yml中的配置参数映射成为一个对象
     */
    @Bean(name = "mySqlDataSource")
    @ConfigurationProperties(prefix = "spring.datasource.mysql")
    public HikariDataSource mySqlDateSource() {
        return new HikariDataSource();
    }

    @Bean(name = "mySqlSessionFactory")
    public SqlSessionFactory mysqlSqlSessionFactory(@Qualifier("mySqlDataSource") DataSource datasource) throws Exception {
        MybatisSqlSessionFactoryBean bean = new MybatisSqlSessionFactoryBean();
        bean.setDataSource(datasource);
        //-----多路径是扫描
        //配置xml扫描路径
        List<String> resourcePatterns = new ArrayList<>();
        resourcePatterns.add("classpath*:mapper/*.xml");
        resourcePatterns.add("classpath*:mapper/*/*.xml");
        Set<Resource> resources = new LinkedHashSet<>(resourcePatterns.size());
        for (String resourcePattern : resourcePatterns) {
            Resource[] resource = new PathMatchingResourcePatternResolver().getResources(resourcePattern);
            resources.addAll(Arrays.asList(resource));
        }
        Resource[] resourcesArr = new Resource[resources.size()
        ];
        //mybatis扫描xml所在位置
        bean.setMapperLocations(resources.toArray(resourcesArr));

        //-----单路径是扫描
        //mybatis扫描xml所在位置
        //bean.setMapperLocations(new PathMatchingResourcePatternResolver().getResources("classpath*:mapper/*.xml"));
        return bean.getObject();
    }

    @Bean("mySqlSessionTemplate")
    public SqlSessionTemplate mysqlSqlSessionTemplate(@Qualifier("mySqlSessionFactory") SqlSessionFactory sqlSessionFactory) {
        return new SqlSessionTemplate(sqlSessionFactory);
    }
    //不配值这个bean,@Transaction注解可能失效
    //使用时 @Transactional(value = "mySqlTransactionManager",rollbackFor = {Exception.class, RuntimeException.class})
    @Bean("mySqlTransactionManager")
    public TransactionManager mysqlTransactionManager() {
        return new JdbcTransactionManager(mySqlDateSource());
    }
}
六、Open Api文档配置
import io.swagger.v3.oas.models.OpenAPI;
import io.swagger.v3.oas.models.info.Contact;
import io.swagger.v3.oas.models.info.Info;
import io.swagger.v3.oas.models.info.License;
import org.springframework.context.annotation.Bean;
import org.springframework.context.annotation.Configuration;

/**
 * OpenApi 配置
 */
@Configuration
public class OpenApiConfig {

    @Bean
    public OpenAPI customOpenAPI() {
        return new OpenAPI().info(new Info()
                .title("认证中心")
                .contact(new Contact().name("XX.XX").email("xxx@zz.com"))
                .version("1.0")
                .description("认证中心接口文档")
                .license(new License().name("Apache 2.0")));
    }
}七、AES加密工具
import org.springframework.util.DigestUtils;
import sun.misc.BASE64Decoder;
import sun.misc.BASE64Encoder;

import javax.crypto.Cipher;
import javax.crypto.spec.SecretKeySpec;
import java.security.SecureRandom;

import static com.wgz.auth.constant.Common.AES_SECRET_KEY;

/**
 * AES 加密工具类
 */
public class AesUtil {
    // 加密算法RSA
    public static final String KEY_ALGORITHM = "AES";
    //编码方式
    public static final String CODE_TYPE = "UTF-8";
    //填充类型 AES/ECB/PKCS5Padding   AES/ECB/ISO10126Padding
    public static final String AES_TYPE = "AES/ECB/PKCS5Padding";

    /**
     * 自定义内容加盐,生成AES秘钥
     */
    public static String generateAESKey() {
        return DigestUtils.md5DigestAsHex(getSalt(6));
    }
    /**
     * 随机生成加盐类
     */
    public static byte[] getSalt(int n) {
        char[] chars = ("ABCDEFGHIJKLMNOPQRSTUVWXYZabcdefghijklmnopqrstuvwxyz" +
                "1234567890!@#$%^&*()_+").toCharArray();
        StringBuilder stringBuilder = new StringBuilder();
        SecureRandom random = new SecureRandom();
        for (int i = 0; i < n; i++) {
            stringBuilder.append(chars[random.nextInt(chars.length)
            ]);
        }
        return stringBuilder.toString().getBytes();
    }
    /**
     * 加密
     *
     * @param clearText 明文
     * @param aesKey    AES秘钥
     * @return 加密串
     */
    public static String encryptAes(String clearText, String aesKey) {
        try {
            SecretKeySpec key = new SecretKeySpec(aesKey.getBytes(), KEY_ALGORITHM);
            Cipher cipher = Cipher.getInstance(AES_TYPE);
            cipher.init(Cipher.ENCRYPT_MODE, key);
            byte[] encryptedData = cipher.doFinal(clearText.getBytes(CODE_TYPE));
            return new BASE64Encoder().encode(encryptedData);
        } catch (Exception e) {
            throw new RuntimeException("加密失败", e);
        }
    }
    /**
     * 解密
     *
     * @param encryptText 密文
     * @param aesKey      AES秘钥
     * @return 解密串
     */
    public static String decryptAes(String encryptText, String aesKey) {
        try {
            byte[] byteMi = new BASE64Decoder().decodeBuffer(encryptText);
            SecretKeySpec key = new SecretKeySpec(aesKey.getBytes(), KEY_ALGORITHM);
            Cipher cipher = Cipher.getInstance(AES_TYPE);
            cipher.init(Cipher.DECRYPT_MODE, key);
            byte[] decryptedData = cipher.doFinal(byteMi);
            return new String(decryptedData, CODE_TYPE);
        } catch (Exception e) {
            throw new RuntimeException("解密失败", e);
        }
    }

    public static void main(String[] args) {
        //String aesKey = generateAESKey();
        String json = "admin123131";
        //加密
        System.out.println("字符串:" + json);
        String encrypt = encryptAes(json, AES_SECRET_KEY);
        System.out.println("加密后字符串:" + encrypt);
        //私钥解密
        System.out.println("解密后字符串:" + decryptAes(encrypt, AES_SECRET_KEY));
    }
}八、自定义密码处理组件
import org.springframework.security.crypto.password.PasswordEncoder;
import org.springframework.stereotype.Component;

import static com.wgz.auth.constant.Common.AES_SECRET_KEY;

//一、自定义密码处理组件
@Component
public class CustomPwdEncoderUtil implements PasswordEncoder {

    @Override
    public String encode(CharSequence rawPassword) {
        //进行MD5加密
        //MD5.encrypt(rawPassword.toString());
        return AesUtil.encryptAes(String.valueOf(rawPassword), AES_SECRET_KEY);
    }

    @Override
    public boolean matches(CharSequence rawPassword, String encodePassword) {
        //判断是否相等
        //return encodePassword.equals(MD5.encrypt(rawPassword.toString()));
        return AesUtil.encryptAes(String.valueOf(rawPassword), AES_SECRET_KEY).equals(encodePassword);
    }
}九、Response工具
import com.fasterxml.jackson.databind.ObjectMapper;
import com.wgz.auth.constant.Result;
import org.springframework.http.HttpStatus;
import org.springframework.http.MediaType;

import javax.servlet.http.HttpServletResponse;
import java.io.IOException;

public class ResponseUtil {

    public static void out(HttpServletResponse response, Result r) {
        ObjectMapper mapper = new ObjectMapper();
        response.setStatus(HttpStatus.OK.value());
        response.setContentType(MediaType.APPLICATION_JSON_UTF8_VALUE);
        try {
            mapper.writeValue(response.getWriter(), r);
        } catch (IOException e) {
            e.printStackTrace();
        }
    }
}十、common constant 常量
import java.time.Duration;

public interface Common {
    /**
     * spring security 继承过滤器(UsernamePasswordAuthenticationFilter)验证方式:TokenLoginFilter
     */
    String TOKEN_PREF_DEFAULT = "AUTH:TOKEN:DEFAULT:";
    /**
     * spring security 自定义接口验证方式:
     * com.wgz.auth.controller.LoginController#doLogin(com.wgz.auth.entity.UserLoginDto)
     */
    String TOKEN_PREF_INTERFACE = "AUTH:TOKEN:INTERFACE:";
    /**
     * 登录过期时间
     */
    Duration REDIS_TIME_OUT = Duration.ofHours(3);

    /**
     * AES密钥
     */
    String AES_SECRET_KEY = "a57e3db23f9c89e606abe9b9b5fc7f30";
}十一、自定义UserDetail类
import com.wgz.auth.entity.user.UserVo;
import io.swagger.v3.oas.annotations.media.Schema;
import lombok.*;
import org.springframework.security.core.GrantedAuthority;
import org.springframework.security.core.userdetails.User;

import java.util.Collection;

/**
 * 自定义用户类(继承Security里的User类)
 */
@Getter
@Setter
@ToString
@Schema(description = "自定义用户类: 继承Security里的User类")
public class CustomUser extends User {
    /**
     * 我们自己的用户实体对象,要调取用户信息时直接获取这个实体对象
     */
    private UserVo userVo;

    public CustomUser(UserVo userVo, Collection<? extends GrantedAuthority> authorities) {
        //调用父类构造器初始化信息
        super(userVo.getUserName(), userVo.getPassword(), authorities);
        this.userVo = userVo;
    }
}
十二、登录过滤器配置
import com.alibaba.fastjson.JSONObject;
import com.fasterxml.jackson.databind.ObjectMapper;
import com.wgz.auth.entity.user.UserLoginDto;
import com.wgz.auth.constant.ResponseEnum;
import com.wgz.auth.constant.Result;
import com.wgz.auth.handler.CustomException;
import com.wgz.auth.util.ResponseUtil;
import lombok.SneakyThrows;
import org.springframework.data.redis.core.RedisTemplate;
import org.springframework.security.authentication.AuthenticationManager;
import org.springframework.security.authentication.UsernamePasswordAuthenticationToken;
import org.springframework.security.core.Authentication;
import org.springframework.security.core.AuthenticationException;
import org.springframework.security.web.authentication.UsernamePasswordAuthenticationFilter;
import org.springframework.security.web.util.matcher.AntPathRequestMatcher;

import javax.servlet.FilterChain;
import javax.servlet.http.HttpServletRequest;
import javax.servlet.http.HttpServletResponse;
import java.util.HashMap;
import java.util.Map;
import java.util.UUID;

/**
 * token 登录过滤器:
 * 1.【只对】配置的登录路径进行拦截,
 * 2.拦截后再对提交的登录信息进行认证
 * 3.认证成功后颁发token,认证失败提示
 */
public class TokenLoginFilter extends UsernamePasswordAuthenticationFilter {

    private RedisTemplate<String, String> redisTemplate;

    /**
     * 初始化:资源准备
     */
    public TokenLoginFilter(AuthenticationManager authenticationManager, RedisTemplate<String, String> redisTemplate) {
        this.redisTemplate = redisTemplate;
        //设置/初始化  认证管理器
        this.setAuthenticationManager(authenticationManager);
        //取消 只针对post请求
        this.setPostOnly(false);
        //指定登录接口及提交方式,可以指定任意路径
        this.setRequiresAuthenticationRequestMatcher(new AntPathRequestMatcher("/login/doLogin",
        "POST"));
    }
    /**
     * 拦截提交的登录信息并进行认证
     */
    @SneakyThrows
    @Override
    public Authentication attemptAuthentication(HttpServletRequest request, HttpServletResponse response) {
        //        //1.request param body为form-data的方式(如:一般未处理的表单提交方式)
        //        UserLoginDto loginDto = new UserLoginDto();
        //        loginDto.setUsername(request.getParameter("username"));
        //        loginDto.setPassword(request.getParameter("password"));
        //2.request param body为json的方式
        UserLoginDto loginDto = new ObjectMapper().readValue(request.getInputStream(), UserLoginDto.class);
        //创建UsernamePasswordAuthenticationToken对象,封装用户名和密码,得到认证对象
        Authentication authenticationToken = new UsernamePasswordAuthenticationToken(loginDto.getUsername(), loginDto.getPassword());
        //返回目标认证对象
        return this.getAuthenticationManager().authenticate(authenticationToken);
    }
    /**
     * 认证成功后的方法
     */
    @Override
    protected void successfulAuthentication(HttpServletRequest request,
                                            HttpServletResponse response,
                                            FilterChain chain,
                                            Authentication auth) {
        if (auth.getPrincipal() == null) {
            throw new CustomException(ResponseEnum.PARAM_ERROR.getCode(),
            "用户名或密码错误!");
        }
        String token = UUID.randomUUID().toString().replaceAll("-",
        "");
        Map<String, String> result = new HashMap<>();
        result.put("token", token);
        redisTemplate.opsForValue().set(TOKEN_PREF_DEFAULT + token, JSONObject.toJSONString(auth.getPrincipal()), REDIS_TIME_OUT);
        ResponseUtil.out(response, Result.data(result));

//        CustomUser user = (CustomUser) auth.getPrincipal();
        //        //2.生成token
        //        String token = JwtHelper.createToken(null, user.getUsername());
        //        //3.返回(通过响应工具)
        //        Map<String, Object> map = new HashMap<>();
        //        map.put("token", token);
        //        request.getSession().setAttribute("token",token);
        //        ResponseUtil.out(response, Result.data(result));
    }
    /**
     * 认证失败后的方法
     */
    @Override
    protected void unsuccessfulAuthentication(HttpServletRequest request,
                                              HttpServletResponse response,
                                              AuthenticationException e) {
        e.printStackTrace();
        ResponseUtil.out(response, new Result(ResponseEnum.PARAM_ERROR.getCode(),
        "用户名或密码错误!", null));
    }
}
十三、认证过滤器配置
import com.alibaba.fastjson.JSONObject;
import com.wgz.auth.constant.ResponseEnum;
import com.wgz.auth.constant.Result;
import com.wgz.auth.entity.user.UserVo;
import com.wgz.auth.util.ResponseUtil;
import org.springframework.data.redis.core.RedisTemplate;
import org.springframework.security.authentication.UsernamePasswordAuthenticationToken;
import org.springframework.security.core.context.SecurityContextHolder;
import org.springframework.util.ObjectUtils;
import org.springframework.util.StringUtils;
import org.springframework.web.filter.OncePerRequestFilter;

import javax.servlet.FilterChain;
import javax.servlet.ServletException;
import javax.servlet.http.HttpServletRequest;
import javax.servlet.http.HttpServletResponse;
import java.io.IOException;

import static com.wgz.auth.constant.Common.TOKEN_PREF_DEFAULT;
import static com.wgz.auth.constant.Common.TOKEN_PREF_INTERFACE;

/**
 * token认证过滤器:
 * 1.对没有开放拦截的接口进行token认证
 * 2.认证成功放行、认证失败拦截并提示
 * PS: 注册方式 addFilterBefore or addFilterAfter
 */
public class TokenAuthenticationFilter extends OncePerRequestFilter {

    private RedisTemplate<String, String> redisTemplate;

    /**
     * 初始化:资源准备
     */
    public TokenAuthenticationFilter(RedisTemplate<String, String> redisTemplate) {
        this.redisTemplate = redisTemplate;
    }
    /**
     * 拦截没有未开放的接口并认证token是否有效,
     * token有效放行、token无效拦截并提示
     */
    @Override
    protected void doFilterInternal(HttpServletRequest request,
                                    HttpServletResponse response,
                                    FilterChain filterChain) throws ServletException, IOException {
        //1.获取认证信息
        UsernamePasswordAuthenticationToken authentication = getAuthentication(request, response);
        //2.将认证信息存储到SecurityContextHolder对象中
        SecurityContextHolder.getContext().setAuthentication(authentication);
        filterChain.doFilter(request, response);
    }
    /**
     * 获取用户信息,一级校验token
     * 一、TOKEN_PREF_DEFAULT:
     * 1.spring security 过滤器登录方式:在TokenLoginFilter(继承 UsernamePasswordAuthenticationFilter )的attemptAuthentication方法中验证登录信息、
     * 2.在TokenLoginFilter中指定登录接口
     * 二、TOKEN_PREF_INTERFACE
     * 1.spring security 自定义接口登录方式: 在自己的controller接口内验证登录信息、
     * 2.在SecurityConfig放开指定的登录接口
     */
    private UsernamePasswordAuthenticationToken getAuthentication(HttpServletRequest request, HttpServletResponse response) {
        String token = request.getHeader("token");
        if (!StringUtils.hasLength(token)) {
            return null;
        }
        //        //自定义的接口登录方式
        //        String redisStr = redisTemplate.opsForValue().get(TOKEN_PREF_INTERFACE + token);
        //默认的继承过滤器方式
        String redisStr = redisTemplate.opsForValue().get(TOKEN_PREF_DEFAULT + token);
        if (!StringUtils.hasLength(redisStr)) {
            ResponseUtil.out(response, new Result(ResponseEnum.NOT_PERMISSION.getCode(),
            "无效的token,请重新登录!", null));
            return null;
        }
        UserVo user = JSONObject.parseObject(redisStr, UserVo.class);
        if (ObjectUtils.isEmpty(user)) {
            ResponseUtil.out(response, new Result(ResponseEnum.SERVICE_ERROR.getCode(),
            "认证信息转换失败,请联系客户或管理员!", null));
            return null;
        }
        //1.从redis中获取权限信息
        //2.将权限信息传给 UsernamePasswordAuthenticationToken
        //返回认证信息
        return new UsernamePasswordAuthenticationToken(user.getUserName(),
        null, null);
    }
}十四、自定义UserDetailServiceImpl
import com.baomidou.mybatisplus.core.conditions.query.LambdaQueryWrapper;
import com.wgz.auth.entity.security.CustomUser;
import com.wgz.auth.entity.user.UserVo;
import com.wgz.auth.mapper.UserMapper;
import lombok.RequiredArgsConstructor;
import org.springframework.security.core.GrantedAuthority;
import org.springframework.security.core.authority.AuthorityUtils;
import org.springframework.security.core.userdetails.UserDetails;
import org.springframework.security.core.userdetails.UserDetailsService;
import org.springframework.security.core.userdetails.UsernameNotFoundException;
import org.springframework.stereotype.Service;

import java.util.List;

@Service
@RequiredArgsConstructor
public class UserDetailServiceImpl implements UserDetailsService {

    private final UserMapper userMapper;

    @Override
    public UserDetails loadUserByUsername(String username) throws UsernameNotFoundException {
        LambdaQueryWrapper<UserVo> lambdaQueryUser = new LambdaQueryWrapper<>();
        lambdaQueryUser.eq(UserVo: :getUserName, username);
        lambdaQueryUser.eq(UserVo: :getIsDelete,
        0);
        lambdaQueryUser.last("limit 1");
        UserVo userVo = userMapper.selectOne(lambdaQueryUser);
        //判断用户是否为空
        if (null == userVo) {
            throw new UsernameNotFoundException("用户不存在");
        }
        //判断用户状态是否可用
        if (userVo.getStatus() == 0) {
            throw new RuntimeException("用户已禁用...");
        }
        //手动设置权限,也可以通过数据库查询获取
        List<GrantedAuthority> auths = AuthorityUtils.commaSeparatedStringToAuthorityList("addUser,findAll,ROLE_admin,ROLE_user");
        return new CustomUser(userVo, auths);
    }
}原文地址:https://blog.csdn.net/qq_37778018/article/details/134761118
本文来自互联网用户投稿,该文观点仅代表作者本人,不代表本站立场。本站仅提供信息存储空间服务,不拥有所有权,不承担相关法律责任。
如若转载,请注明出处:http://www.7code.cn/show_36046.html
如若内容造成侵权/违法违规/事实不符,请联系代码007邮箱:suwngjj01@126.com进行投诉反馈,一经查实,立即删除!
主题授权提示:请在后台主题设置-主题授权-激活主题的正版授权,授权购买:RiTheme官网
声明:本站所有文章,如无特殊说明或标注,均为本站原创发布。任何个人或组织,在未征得本站同意时,禁止复制、盗用、采集、发布本站内容到任何网站、书籍等各类媒体平台。如若本站内容侵犯了原著者的合法权益,可联系我们进行处理。


