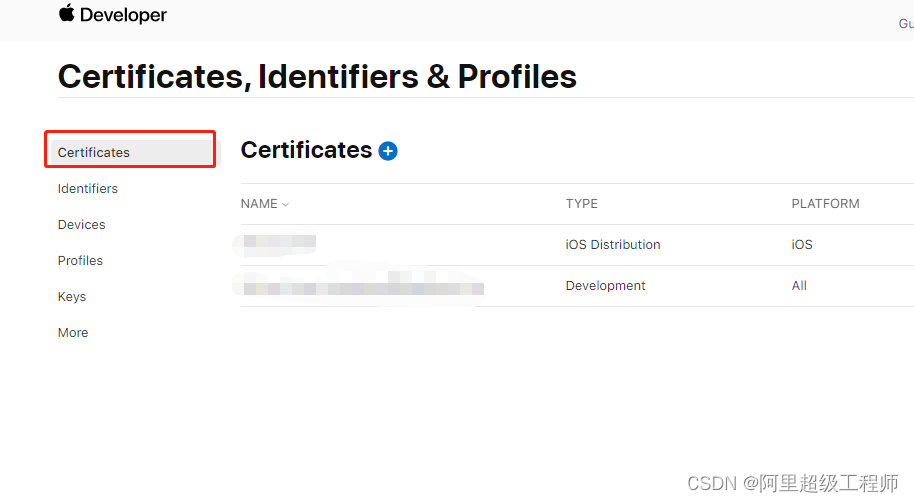
1.准备工作(developer.apple.com里面完成)
前提有 开发证书ios–dev.cer(iOS Development) 发布用到证书ios–dist.cer(iOS Distribution)
在Identifiers页面点+,添加bundle ID ,例如“com.xxx.yyy”,在配置页面下拉到Push Notifications,勾上,然后右边看到edit链接,点edit会弹窗,提示添加证书(用keychain生成一份push. certSigningRequest),相应导入certSigningRequest文件,这样就可以得到两个证书aps_development.cer(开发用到)和aps.cer(发布用到)
在Profiles页面点+,生成两份配置 push–dev(开发)和push–appstore(发布)其中的identify就选上面那个“com.xxx.yyy”对应的项
在Keys页面点+,随便填个名字,勾选“Apple Push Notifications service (APNs)”,点continue,然后下载保存好,文件名暂定叫push.p8 里面也有一个key ID 假设是“SP12345678”
#import <UserNotifications/UserNotifications.h>在- (BOOL)application:(UIApplication *)application didFinishLaunchingWithOptions:(NSDictionary *)launchOptions方法里面注册通知
[UIApplication sharedApplication].applicationIconBadgeNumber=0;
  /*
   identifier:行为标识符,用于调用代理方法时识别是哪种行为。
   title:行为名称。
   uiusernotificationactivationmode:即行为是否打开app。
   authenticationrequired:是否需要解锁。
   destructive:这个决定按钮显示颜色,yes的话按钮会是红色。
   behavior:点击按钮文字输入,是否弹出键盘
   */

  UNNotificationAction *action1 = [UNNotificationAction actionWithIdentifier:@"action1" title:@"foreground action" options:UNNotificationActionOptionForeground];
  UNNotificationAction *action2 = [UNNotificationAction actionWithIdentifier:@"action2" title:@"authentication required" options:UNNotificationActionOptionAuthenticationRequired];

  UNNotificationCategory *category1 = [UNNotificationCategory categoryWithIdentifier:@"category1" actions:@[action2,action1] intentIdentifiers:@[@"action1",@"action2"] options:UNNotificationCategoryOptionCustomDismissAction];

  [[UNUserNotificationCenter currentNotificationCenter] setNotificationCategories:[NSSet setWithObjects:category1, nil]];
  [[UNUserNotificationCenter currentNotificationCenter] requestAuthorizationWithOptions:UNAuthorizationOptionBadge|UNAuthorizationOptionSound|UNAuthorizationOptionAlert completionHandler:^(BOOL granted, NSError * _Nullable error) {
    NSLog(@"completionhandler");
  }];


  [[UIApplication sharedApplication] registerForRemoteNotifications];

[UNUserNotificationCenter currentNotificationCenter].delegate = self;- (void)application:(UIApplication *)application didFailToRegisterForRemoteNotificationsWithError:(NSError *) error {
NSLog(@"Registfail%@",error);
}
-(void)application:(UIApplication *)application didRegisterForRemoteNotificationsWithDeviceToken:(NSData *)deviceToken{
NSLog(@"%@",deviceToken);//这里的Token就是我们设备要告诉服务端的Token码,
unsigned char buffer[1024]={0};
NSMutableString *mstr = [NSMutableString string];
for (int i=0; i<deviceToken.length; i++) {
unsigned char chr = buffer[i];
[mstr appendFormat:@"%02x",chr];
}
NSLog(@"mstr=%@",mstr); //这个字符串才是需要保存到服务器上面的
//TODO:发送deviceToken到公司(个人)PHP服务器
}
https://api.sandbox.push.apple.com/3/device/{device-token} ||dev 开发
https://api.push.apple.com/3/device/{device-token} || pub 发布
添加 header:
content-type: application/json
apns-topic: com.wancaiinfo.yunzhan365app
apns-priority: 10
apns-push-type: alert
authorization: bearer $jwtbody:
{“aps":{"alert":{"title":"title test","body":"content test"},"badge":6,"sound":"default"}}其中$jwt = $header.$claims.$signCode
$header=Base64(‘{ “alg”: “ES256”, “kid“: “SP12345678(上面提到的key ID)” }’) 结果要替换+为-,/为_; 暂时定义这个函数名JWTBASE64。
$claims = JWTBASE64(‘{ “iss“: “(teamId 开发组ID,自己developer.apple.com上找)”, “iat”: (时间戳)}’);
$signCode= JWTBASE64(sign($header.$claims)); 签名后的数据还是要JWTBASE64一把。
sign签名函数可以使用JWT库做到,目前使用加密方法是ES256
4.手动测试(将下面的代码改好,保存为push_test,运行 “chomd +x push_test”加运行权限)
#!/bin/bash

# Get curl with HTTP/2 and openssl with ECDSA: 'brew install curl-openssl'
curl=/usr/bin/curl
openssl=/opt/local/bin/openssl

# --------------------------------------------------------------------------
deviceToken={这里填写在-(void)application:(UIApplication *)application didRegisterForRemoteNotificationsWithDeviceToken:(NSData *)deviceToken拿到的deviceToken字符串}

authKey="./push.p8"   #(p8文件)
authKeyId=SP12345678 #(key ID)
teamId=Sxxxxxxxxx  # (开发组ID)
bundleId=com.xxx.yyyy  #(Bundle ID)
#endpoint=https://api.development.push.apple.com
endpoint=https://api.sandbox.push.apple.com

read -r -d '' payload <<-'EOF'
{
   "aps": {
      "alert": {
         "title": " test for title",
         "body": "testing ...."
      }
   }
}
EOF

# --------------------------------------------------------------------------

base64() {
   $openssl base64 -e -A | tr -- '+/' '-_' | tr -d =
}

sign() {
   printf "$1"| $openssl dgst -binary -sha256 -sign "$authKey" | base64
}

time=$(date +%s)
header=$(printf '{ "alg": "ES256", "kid": "%s" }' "$authKeyId" | base64)
claims=$(printf '{ "iss": "%s", "iat": %d }' "$teamId" "$time" | base64)
jwt="$header.$claims.$(sign $header.$claims)"

$curl --verbose
   --header "content-type: application/json"
   --header "authorization: bearer $jwt"
   --header "apns-topic: $bundleId"
   --header "apns-push-type: alert"
   --data "$payload"
   $endpoint/3/device/$deviceToken
//—————-后续—————–
You've implemented -[<UIApplicationDelegate> application:didReceiveRemoteNotification:fetchCompletionHandler:], but you still need to add "remote-notification" to the list of your supported UIBackgroundModes in your Info.plist.这个应该是要在项目工程里面“Signing &Capabilities”点+右边的“Capability”,选择“Background Modes”,然后勾上”Remote notifications”.
原文地址:https://blog.csdn.net/ftpleopard/article/details/122060128
本文来自互联网用户投稿,该文观点仅代表作者本人,不代表本站立场。本站仅提供信息存储空间服务,不拥有所有权,不承担相关法律责任。
如若转载,请注明出处:http://www.7code.cn/show_36568.html
如若内容造成侵权/违法违规/事实不符,请联系代码007邮箱:suwngjj01@126.com进行投诉反馈,一经查实,立即删除!


