一、概述
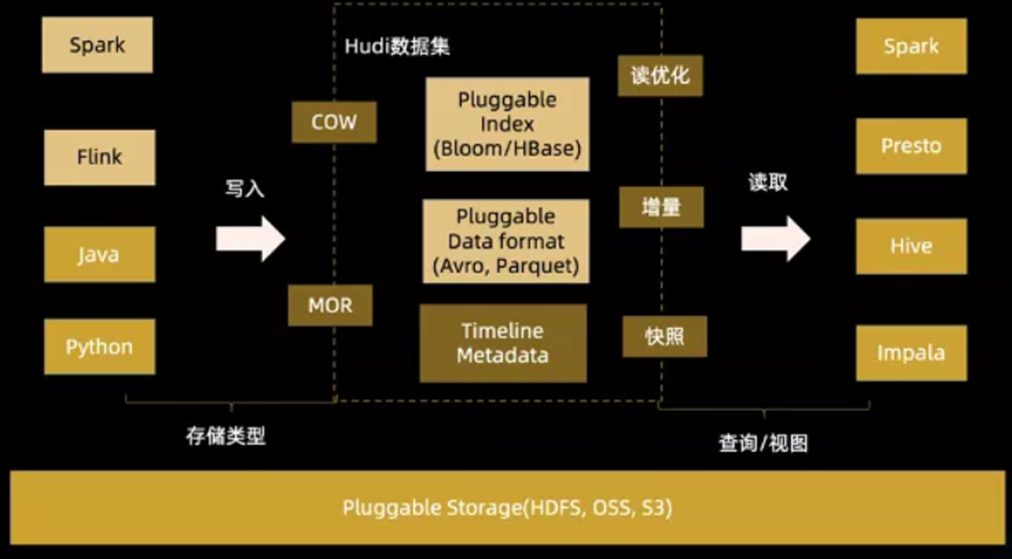
Hudi(Hadoop Upserts Deletes and Incrementals),简称Hudi,是一个流式数据湖平台,支持对海量数据快速更新,内置表格式,支持事务的存储层、 一系列表服务、数据服务(开箱即用的摄取工具)以及完善的运维监控工具,它可以以极低的延迟将数据快速存储到HDFS或云存储(S3)的工具,最主要的特点支持记录级别的插入更新(Upsert)和删除,同时还支持增量查询。
GitHub地址:https://github.com/apache/hudi
官方文档:https://hudi.apache.org/cn/docs/overview
关于Apache Hudi 数据湖 也可以参考我这篇文章:大数据Hadoop之——新一代流式数据湖平台 Apache Hudi
二、Hudi CLI
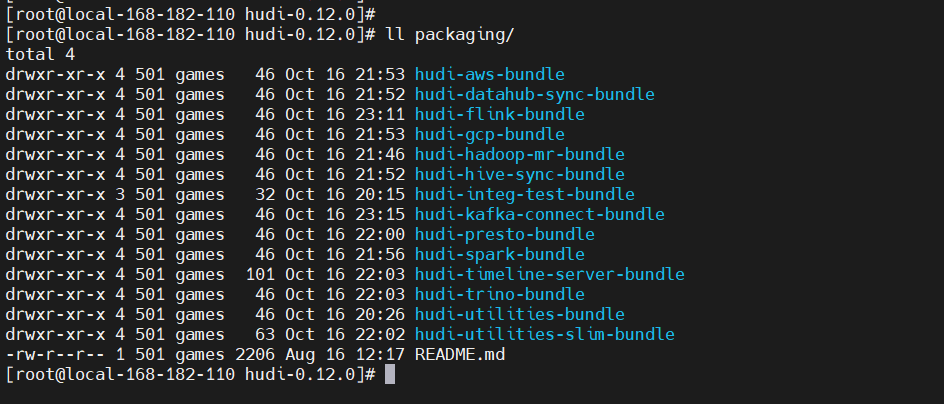
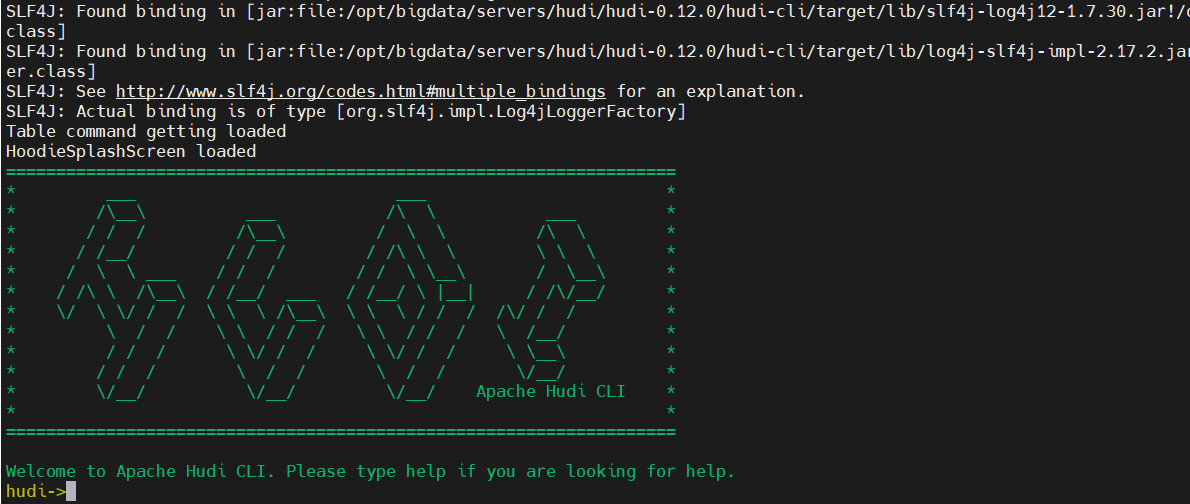
构建hudi后,可以通过cd hudi cli&&
./hudi-cli.sh启动shell。一个hudi表驻留在DFS上的一个称为basePath的位置,我们需要这个位置才能连接到hudi表。Hudi库有效地在内部管理此表,使用.hoodie子文件夹跟踪所有元数据。
# 启动
./hudi-cli/hudi-cli.sh
三、Spark 与 Hudi 整合使用
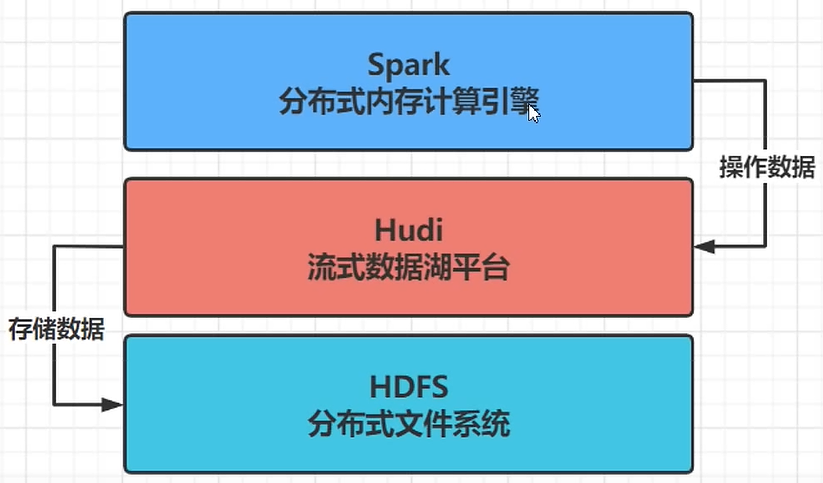
Hudi 流式数据湖平台,协助管理数据,借助HDFS文件系统存储数据,使用Spark操作数据。
Hadoop 安装可参考我这篇文章:大数据Hadoop原理介绍+安装+实战操作(HDFS+YARN+MapReduce)
Hadoop HA安装可参考我这篇文章:大数据Hadoop之——Hadoop 3.3.4 HA(高可用)原理与实现(QJM)
Spark 环境配置可以参考我这篇文章:大数据Hadoop之——计算引擎Spark
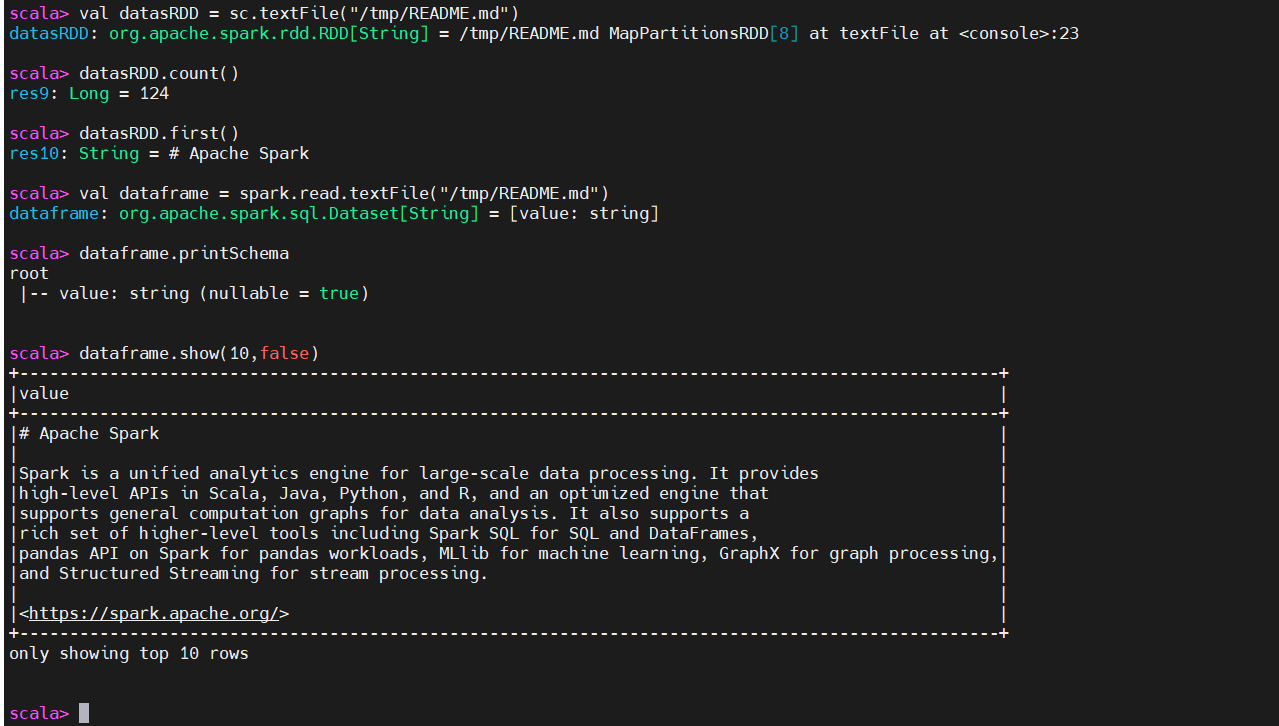
1)Spark 测试
cd $SPARK_HOME
hdfs dfs -mkdir /tmp/
hdfs dfs -put README.md /tmp/
hdfs dfs -text /tmp/README.md

# 启动spark-shell
./bin/spark-shell --master local[2]

val datasRDD = sc.textFile("/tmp/README.md")
# 行数
datasRDD.count()
# 读取第一行数据
datasRDD.first()
val dataframe = spark.read.textFile("/tmp/README.md")
dataframe.printSchema
dataframe.show(10,false)
2)Spark 与 Hudi 整合使用
官方示例:https://hudi.apache.org/docs/quick-start-guide/
在spark–shell命令行,对Hudi表数据进行操作,需要运行spark–shell命令是,添加相关的依赖包,命令如下:
1、启动spark–shell
### 启动spark-shell,使用spark-shell操作hudi数据湖
### 第一种方式
./bin/spark-shell
  --master local[2]
  --packages org.apache.hudi:hudi-spark3.2-bundle_2.12:0.12.0
  --conf 'spark.serializer=org.apache.spark.serializer.KryoSerializer'
  --conf 'spark.sql.catalog.spark_catalog=org.apache.spark.sql.hudi.catalog.HoodieCatalog'
  --conf 'spark.sql.extensions=org.apache.spark.sql.hudi.HoodieSparkSessionExtension'

### 上述命令需要联网,基于ivy下载下载相关jar包到本地,然后加载到CLASSPATH,其中包含三个jar包。
### 第二种方式,使用--jars
cd /opt/apache
wget https://repo1.maven.org/maven2/org/apache/spark/spark-avro_2.12/3.3.0/spark-avro_2.12-3.3.0.jar

cd $SPARK_HOME
./bin/spark-shell
--master local[2]
--jars  /opt/apache/hudi-0.12.0/packaging/hudi-spark-bundle/target/hudi-spark3.2-bundle_2.12-0.12.0.jar,/opt/apache/hudi-0.12.0/hudi-examples/hudi-examples-spark/target/lib/unused-1.0.0.jar,/opt/apache/spark-avro_2.12-3.3.0.jar
--conf 'spark.sql.catalog.spark_catalog=org.apache.spark.sql.hudi.catalog.HoodieCatalog'
--conf "spark.serializer=org.apache.spark.serializer.KryoSerializer"
2、导入park及Hudi相关包
import org.apache.hudi.QuickstartUtils._
import scala.collection.JavaConversions._
import org.apache.spark.sql.SaveMode._
import org.apache.hudi.DataSourceReadOptions._
import org.apache.hudi.DataSourceWriteOptions._
import org.apache.hudi.config.HoodieWriteConfig._
import org.apache.hudi.common.model.HoodieRecord
3、定义变量
val tableName = "hudi_trips_cow"
# 存储到HDFS
val basePath = "hdfs://hadoop-hadoop-hdfs-nn:9000/tmp/hudi_trips_cow"
# 存储到本地
# val basePath = "file:///tmp/hudi_trips_cow"
4、模拟生成Trip乘车数据
##构建DataGenerator对象,用于模拟生成10条Trip乘车数据
val dataGen = new DataGenerator

val inserts = convertToStringList(dataGen.generateInserts(10))
其中,DataGenerator可以用于生成测试数据,用来完成后续操作。
5、将模拟数据List转换为DataFrame数据集
##转成df
val df = spark.read.json(spark.sparkContext.parallelize(inserts,2))

##查看数据结构
df.printSchema()
##查看数据
df.show()
# 指定字段查询
df.select("rider","begin_lat","begin_lon","driver","end_lat","end_lon","fare","partitionpath","ts","uuid").show(10,truncate=false)
6、将数据写入到hudi
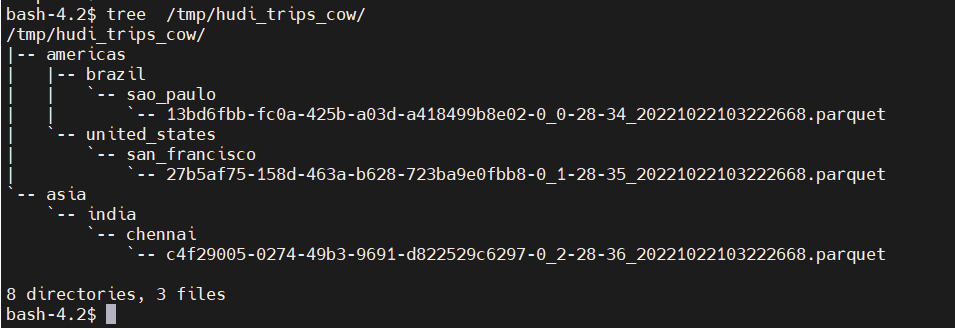
# 将数据保存到hudi表中,由于Hudi诞生时基于Spark框架,所以SparkSQL支持Hudi数据源,直接通过format指定数据源Source,设置相关属性保存数据即可,注意,hudi不是正真存储数据,而是管理数据。

df.write.format("hudi").
  options(getQuickstartWriteConfigs).
  option(PRECOMBINE_FIELD_OPT_KEY, "ts").
  option(RECORDKEY_FIELD_OPT_KEY, "uuid").
  option(PARTITIONPATH_FIELD_OPT_KEY, "partitionpath").
  option(TABLE_NAME, tableName).
  mode(Overwrite).
  save(basePath)

## 重要参数说明
#参数:getQuickstartWriteConfigs,设置写入/更新数据至Hudi时,Shuffle时分区数目
#参数:PRECOMBINE_FIELD_OPT_KEY,数据合并时,依据主键字段
#参数:RECORDKEY_FIELD_OPT_KEY,每条记录的唯一id,支持多个字段
#参数:PARTITIONPATH_FIELD_OPT_KEY,用于存放数据的分区字段
本地存储
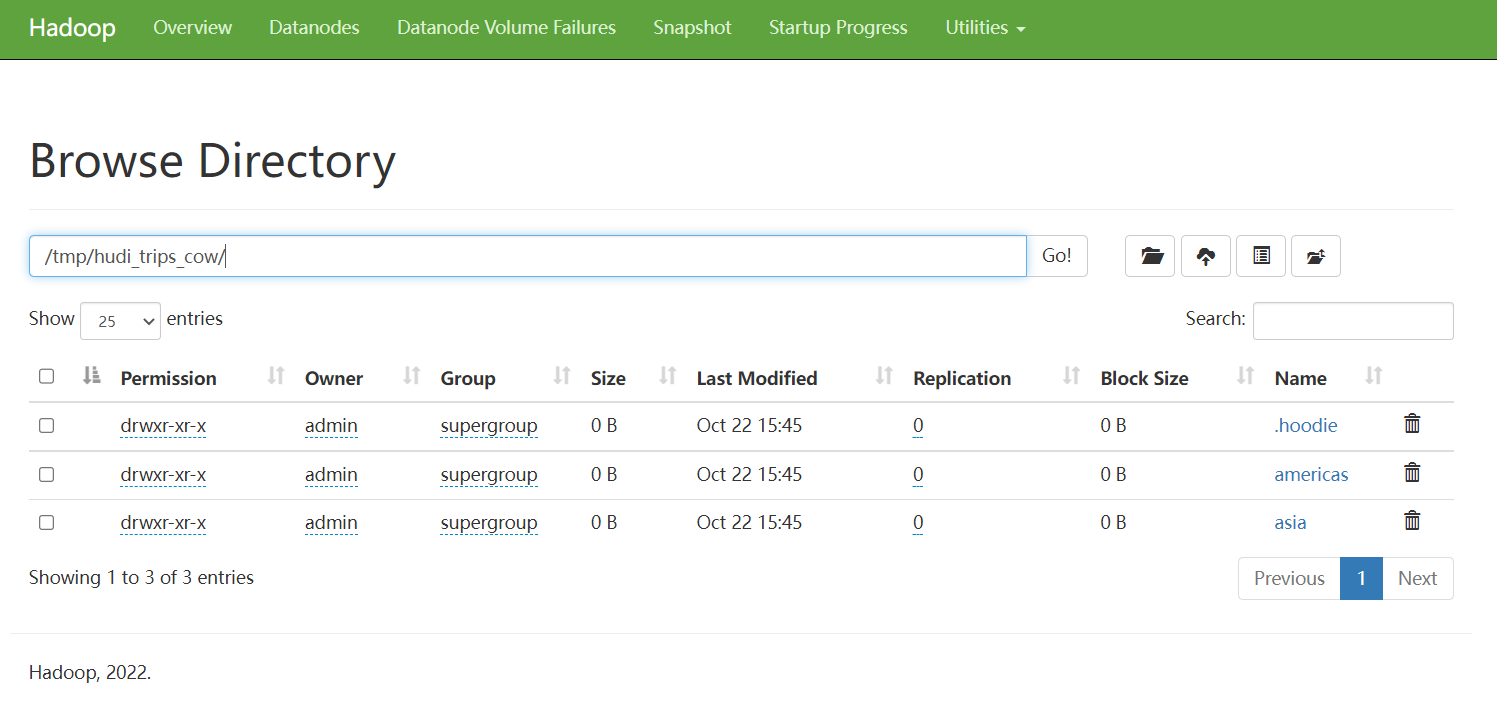
HDFS 存储
四、Flink 与 Hudi 整合使用
官方示例:https://hudi.apache.org/docs/flink-quick-start-guide
1)启动flink集群
下载地址:http://flink.apache.org/downloads.html
### 1、下载软件包
wget https://dlcdn.apache.org/flink/flink-1.14.6/flink-1.14.6-bin-scala_2.12.tgz
tar -xf flink-1.14.6-bin-scala_2.12.tgz
export FLINK_HOME=/opt/apache/flink-1.14.6

### 2、设置HADOOP_CLASSPATH
# HADOOP_HOME is your hadoop root directory after unpack the binary package.
export HADOOP_CLASSPATH=`$HADOOP_HOME/bin/hadoop classpath`
export HADOOP_CONF_DIR='/opt/apache/hadoop/etc/hadoop'

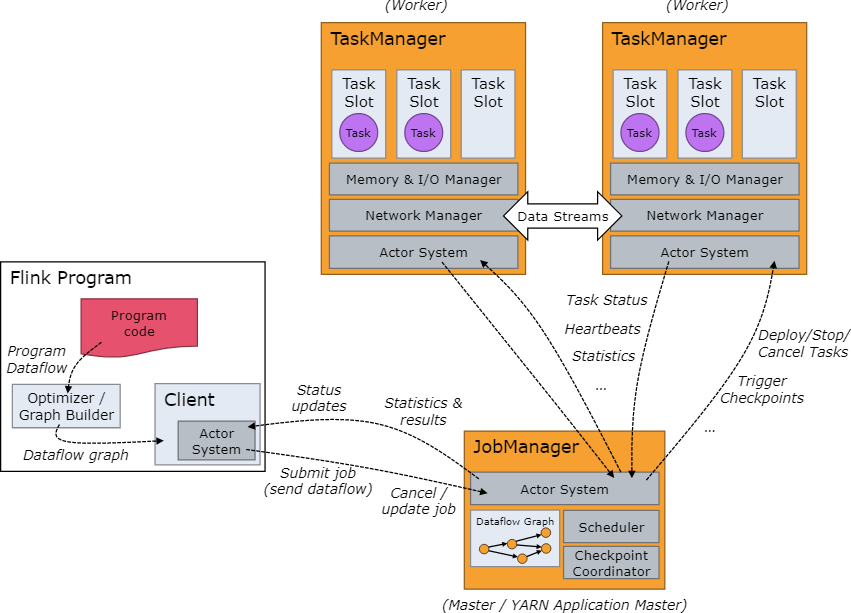
### 3、启动单节点flink 集群
# Start the Flink standalone cluster,这里先修改slot数量,默认是1,这里改成4
# taskmanager.numberOfTaskSlots: 4
cd $FLINK_HOME
./bin/start-cluster.sh

# 测试可用性
./bin/flink run  examples/batch/WordCount.jar
2) 启动flink SQL 客户端
# 【第一种方式】指定jar包
./bin/sql-client.sh embedded -j ../hudi-0.12.0/packaging/hudi-flink-bundle/target/hudi-flink1.14-bundle-0.12.0.jar shell

# 【第二种方式】还可以将jar包放在$FINK_HOME/lib目录下
./bin/sql-client.sh embedded shell
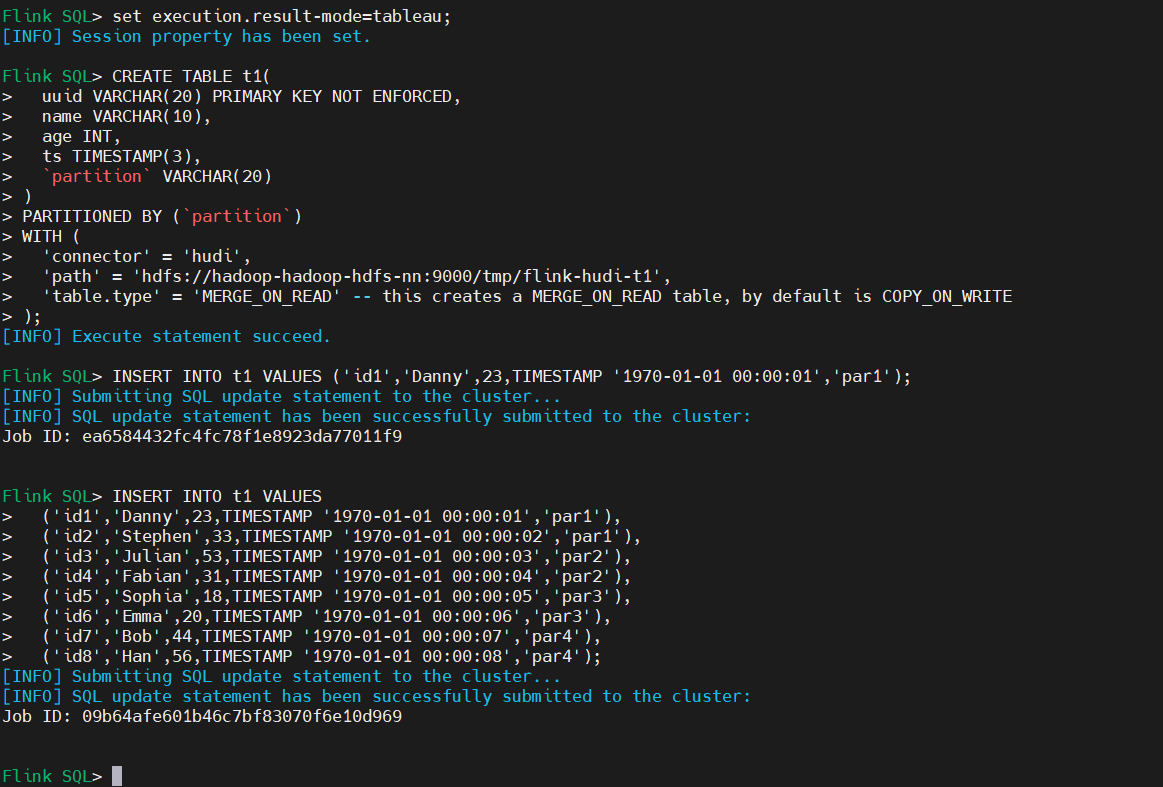
3)添加数据
-- sets up the result mode to tableau to show the results directly in the CLI
SET 'sql-client.execution.result-mode' = 'tableau';

CREATE TABLE t1(
  uuid VARCHAR(20) PRIMARY KEY NOT ENFORCED,
  name VARCHAR(10),
  age INT,
  ts TIMESTAMP(3),
  `partition` VARCHAR(20)
)
PARTITIONED BY (`partition`)
WITH (
  'connector' = 'hudi',
  'path' = 'hdfs://hadoop-hadoop-hdfs-nn:9000/tmp/flink-hudi-t1',
  'table.type' = 'MERGE_ON_READ' -- this creates a MERGE_ON_READ table, by default is COPY_ON_WRITE
);

INSERT INTO t1 VALUES ('id1','Danny',23,TIMESTAMP '1970-01-01 00:00:01','par1');
-- insert data using values
INSERT INTO t1 VALUES
  ('id1','Danny',23,TIMESTAMP '1970-01-01 00:00:01','par1'),
  ('id2','Stephen',33,TIMESTAMP '1970-01-01 00:00:02','par1'),
  ('id3','Julian',53,TIMESTAMP '1970-01-01 00:00:03','par2'),
  ('id4','Fabian',31,TIMESTAMP '1970-01-01 00:00:04','par2'),
  ('id5','Sophia',18,TIMESTAMP '1970-01-01 00:00:05','par3'),
  ('id6','Emma',20,TIMESTAMP '1970-01-01 00:00:06','par3'),
  ('id7','Bob',44,TIMESTAMP '1970-01-01 00:00:07','par4'),
  ('id8','Han',56,TIMESTAMP '1970-01-01 00:00:08','par4');
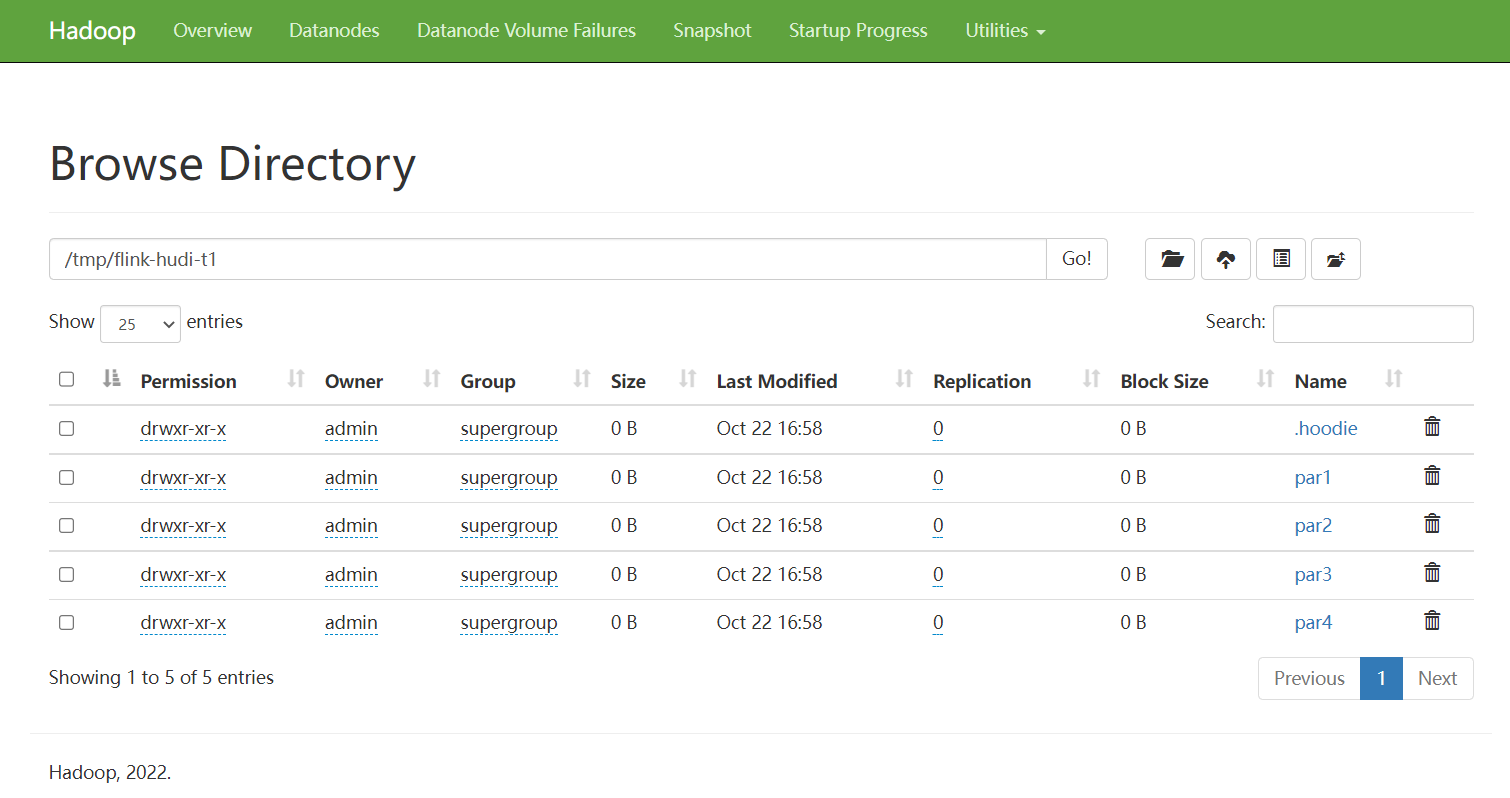
HDFS上查看
4)查询数据(批式查询)
select * from t1;

5)更新数据
-- this would update the record with key 'id1'
insert into t1 values
  ('id1','Danny',27,TIMESTAMP '1970-01-01 00:00:01','par1');
6)Streaming Query(流式查询)
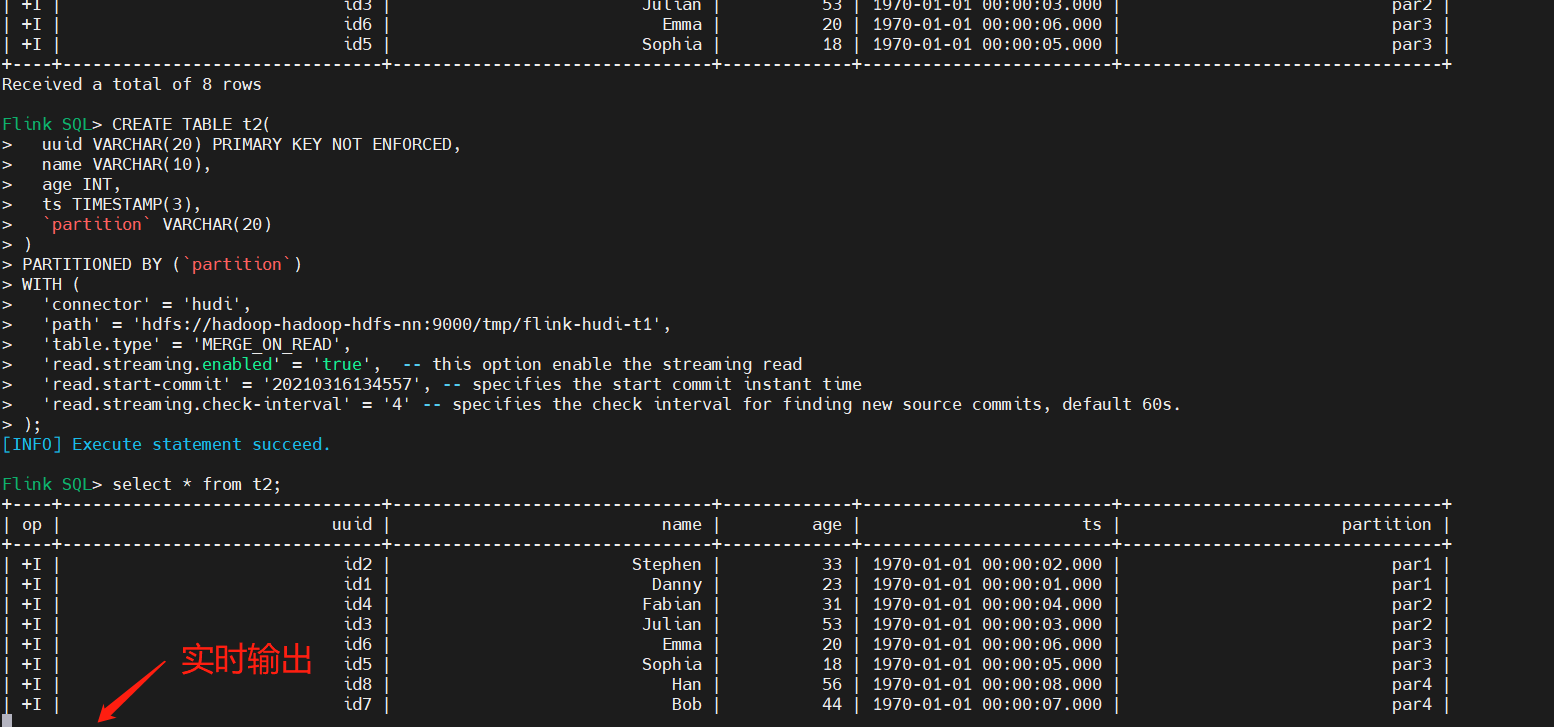
首先创建表t2,设置相关属性,以流的方式查询读取,映射到上面表:t1
read.streaming.enabled设置为true,表明通过streaming的方式读取表数据;read.streaming.check-interval指定了source监控新的commits的间隔时间4stable.type设置表类型为 MERGE_ON_READ
CREATE TABLE t2(
  uuid VARCHAR(20) PRIMARY KEY NOT ENFORCED,
  name VARCHAR(10),
  age INT,
  ts TIMESTAMP(3),
  `partition` VARCHAR(20)
)
PARTITIONED BY (`partition`)
WITH (
  'connector' = 'hudi',
  'path' = 'hdfs://hadoop-hadoop-hdfs-nn:9000/tmp/flink-hudi-t1',
  'table.type' = 'MERGE_ON_READ',
  'read.streaming.enabled' = 'true',  -- this option enable the streaming read
  'read.start-commit' = '20210316134557', -- specifies the start commit instant time
  'read.streaming.check-interval' = '4' -- specifies the check interval for finding new source commits, default 60s.
);

-- Then query the table in stream mode
select * from t2;
[ERROR] Could not execute SQL statement. Reason: java.lang.ClassNotFoundException: org.apache.hadoop.hive.ql.io.parquet.MapredParquetInputFormat
【解决】添加hadoop-mapreduce-client-core-xxx.jar和hive-exec-xxx.jar到Flink lib中。
cp /opt/apache/hadoop-3.3.2/share/hadoop/mapreduce/hadoop-mapreduce-client-core-3.3.2.jar $FLINK_HOME/lib
cp ./hudi-0.12.0/hudi-examples/hudi-examples-spark/target/lib/hive-exec-2.3.1-core.jar $FLINK_HOME/lib
Hive 与 Hudi的整合,小伙伴可以先看官网文档:https://hudi.apache.org/docs/syncing_metastore/#flink-setup
Spark 和 Hudi整合,Flink 与 Hudi整合先到这里了,还有很多其它大数据组件与Hudi的整合示例讲解会放在后面文章讲解,请小伙伴耐心等待,有任何疑问欢迎留言,会持续更新【大数据+云原生】相关的文章~
原文地址:https://blog.csdn.net/qq_35745940/article/details/127354927
本文来自互联网用户投稿,该文观点仅代表作者本人,不代表本站立场。本站仅提供信息存储空间服务,不拥有所有权,不承担相关法律责任。
如若转载,请注明出处:http://www.7code.cn/show_37680.html
如若内容造成侵权/违法违规/事实不符,请联系代码007邮箱:suwngjj01@126.com进行投诉反馈,一经查实,立即删除!

