本文介绍: 【 声明:版权所有,欢迎转载,请勿用于商业用途。 联系信箱:feixiaoxing @163.com】 每到年末或者是尾牙的时候,很多公司都会办一些年终的清楚活动,感谢员工过去一年辛苦的付出。这个时候,作为年会的重头戏,那就是抽奖环节了。抽奖一般来说,有很多的方法。比如说,可以是物理抽奖的方法,即每一个人写一个抽奖券,放在统一的池子里面;也可以是电子的方法,这就是今天说的抽奖程序。 前面既然我们已经学习了c# wpf,那么完全可以自己做一个抽奖程序出来。在做之前,我们
【 声明:版权所有,欢迎转载,请勿用于商业用途。 联系信箱:feixiaoxing @163.com】
每到年末或者是尾牙的时候,很多公司都会办一些年终的清楚活动,感谢员工过去一年辛苦的付出。这个时候,作为年会的重头戏,那就是抽奖环节了。抽奖一般来说,有很多的方法。比如说,可以是物理抽奖的方法,即每一个人写一个抽奖券,放在统一的盒子里面;也可以是电子的方法,这就是今天说的抽奖程序。
前面既然我们已经学习了c# wpf,那么完全可以自己做一个抽奖程序出来。在做之前,我们可以假定抽奖的数字有几位,有几个按钮,显示效果怎么样。这部分不要怕麻烦,可以自己设计一个效果图出来。
1、设计界面
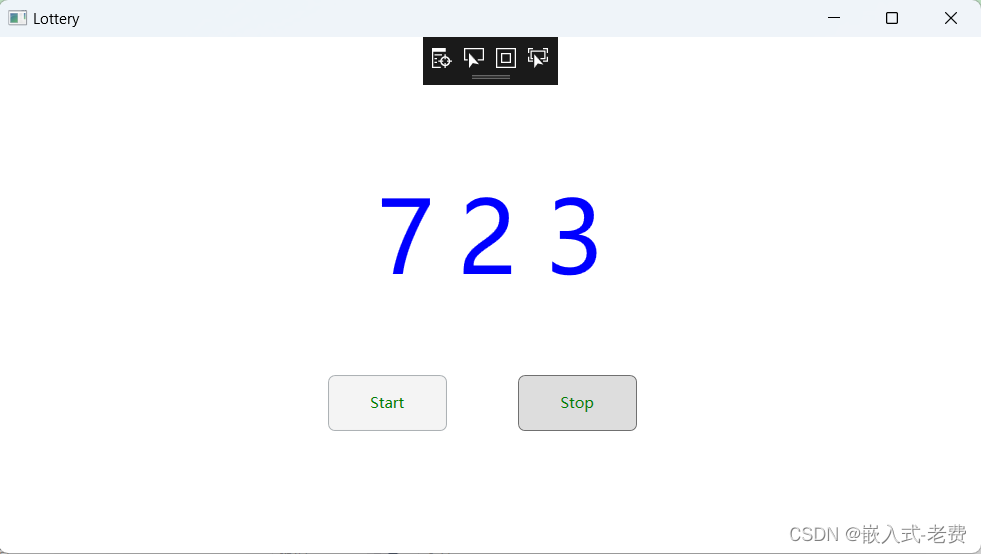
界面部分的设计可以简单一点,比如说只需要显示三个label和两个按钮。三个label,也就是快速跳动的数字。而两个按钮则分别是开始按钮、结束按钮。开始按钮按下去的时候,数字开始跳动;等到结束按钮被按下去的时候,那么屏幕上留下来的数字就是我们需要的抽奖数字。当然,目前为止,这里显示的数字只有三个,如果公司规模比较大,现实的数字可以根据需求添加几位也是可以的。设计完毕之后,它的代码是这样的,
2、实际的设计效果

3、代码编写
4、测试运行
声明:本站所有文章,如无特殊说明或标注,均为本站原创发布。任何个人或组织,在未征得本站同意时,禁止复制、盗用、采集、发布本站内容到任何网站、书籍等各类媒体平台。如若本站内容侵犯了原著者的合法权益,可联系我们进行处理。