自定义starter案例——统计独立IP访问次数

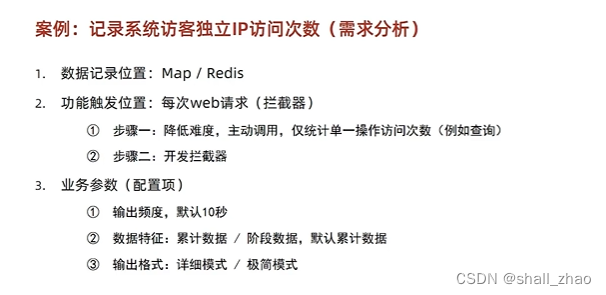
ip计数业务功能开发
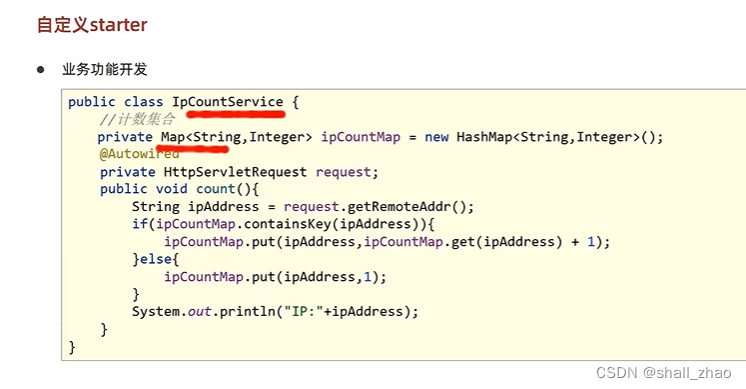
public class IpCountService {

    private Map<String,Integer> ipCountMap = new HashMap<String,Integer>();

    @Autowired
    // 当前的request对象的诸如工作由当前的starter的工程提供自动装配
    private HttpServletRequest httpServletRequest;

    public void count(){

        // 每次调用当前操作,就记录当前访问的ip,然后累加访问次数
        // 1.获取当前操作的ip地址
        String ip = httpServletRequest.getRemoteAddr();
        System.out.println("----------------------------------" + ip);
        // 2.根据ip地址从map取值,并递增
        ipCountMap.put(ip,ipCountMap.get(ip)==null? 0+1 : ipCountMap.get(ip) + 1);
    }
}
public class IpAutoCinfiguration {

    @Bean
    public IpCountService ipCountService(){
        return new IpCountService();
    }
}

org.springframework.boot.autoconfigure.EnableAutoConfiguration=
cn.itcast.autoconfig.IpAutoCinfigur

    @Autowired
    private IpCountService ipCountService;
    @GetMapping("/{currentPage}/{pageSize}")
    public R getPage(@PathVariable int currentPage,@PathVariable int pageSize,Book book){

        ipCountService.count();

        IPage<Book> page = bookService.getPage(currentPage, pageSize,book);
        // 如果当前页码值大于总页码值,那么重新执行查询操作,使用最大页码值作为当前页码值
        if (currentPage > page.getPages()){
            page = bookService.getPage((int)page.getPages(), pageSize,book);
        }
        return new R(true,page);
    }

定时任务报表开发
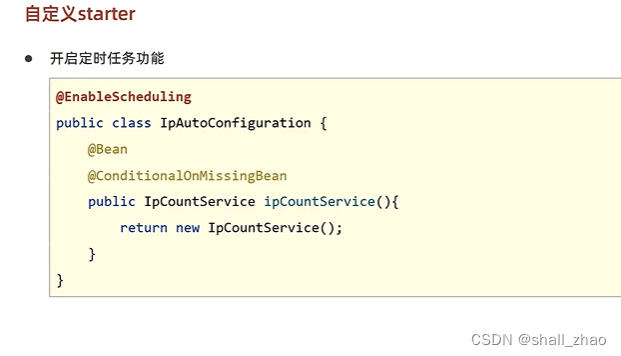
@EnableScheduling
public class IpAutoCinfiguration {

    @Bean
    public IpCountService ipCountService(){
        return new IpCountService();
    }
}
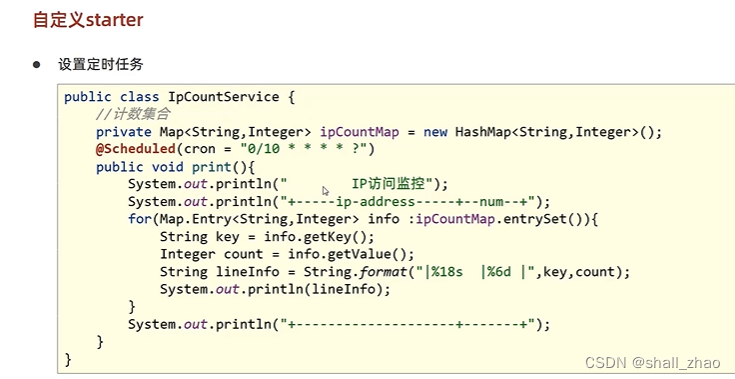
@Scheduled(cron = "0/5 * * * * ?")
    public void print(){
        System.out.println("           ip访问监控");
        System.out.println("+-----ip-address-----+---+");
        for (Map.Entry<String, Integer> entry : ipCountMap.entrySet()) {
            String key = entry.getKey();
            Integer value = entry.getValue();
            System.out.println(String.format("|%18s  |%5d  |",key,value));
        }
        System.out.println("+--------------------+---+");
    }

使用属性配置功能设置功能参数
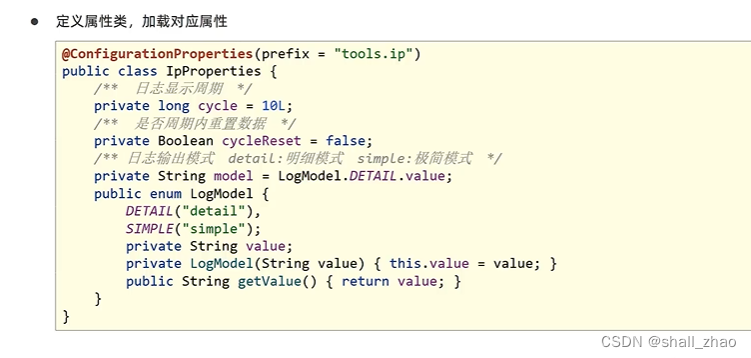
@ConfigurationProperties(prefix = "tools.ip")
public class IpProperties {

    /**
     * 日志的显示周期
     */
    private Long cycle = 5L;
    /**
     * 是否周期内重置数据
     */
    private Boolean cycleReset = false;
    /**
     * 日志的输出模式  detail:详细模式,simple:极简模式
     */
    private String model = LogModel.DETAIL.value;


    public enum LogModel{
        DETAIL("detail"),
        SIMPLE("simple");
        private String value;
        LogModel(String value){
            this.value = value;
        }
        public String getValue(){
            return value;
        }
    }

    public Long getCycle() {
        return cycle;
    }

    public void setCycle(Long cycle) {
        this.cycle = cycle;
    }

    public Boolean getCycleReset() {
        return cycleReset;
    }

    public void setCycleReset(Boolean cycleReset) {
        this.cycleReset = cycleReset;
    }

    public String getModel() {
        return model;
    }

    public void setModel(String model) {
        this.model = model;
    }
}

@EnableScheduling
@EnableConfigurationProperties(IpProperties.class)
public class IpAutoCinfiguration {

    @Bean
    public IpCountService ipCountService(){
        return new IpCountService();
    }
}
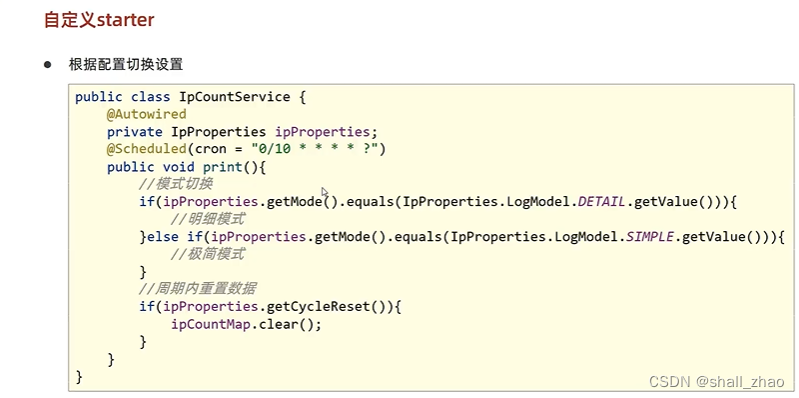
    @Autowired
    private IpProperties ipProperties;

    @Scheduled(cron = "0/5 * * * * ?")
    public void print(){

        if(ipProperties.getModel().equals(IpProperties.LogModel.DETAIL.getValue())){
            System.out.println("           ip访问监控");
            System.out.println("+-----ip-address-----+--num--+");
            for (Map.Entry<String, Integer> entry : ipCountMap.entrySet()) {
                String key = entry.getKey();
                Integer value = entry.getValue();
                System.out.println(String.format("|%18s  |%5d  |",key,value));
            }
            System.out.println("+--------------------+---+");
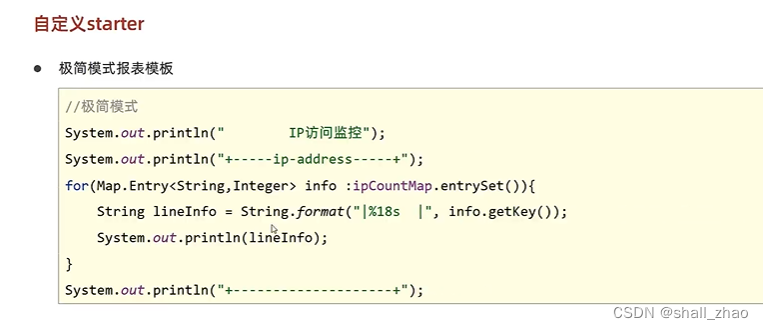
        } else if (ipProperties.getModel().equals(IpProperties.LogModel.SIMPLE.getValue())) {
            System.out.println("       ip访问监控");
            System.out.println("+-----ip-address-----+");
            for (String key : ipCountMap.keySet()) {
                System.out.println(String.format("|%18s  |",key));
            }
            System.out.println("+--------------------+");
        }

        if(ipProperties.getCycleReset()){
            ipCountMap.clear();
        }
    }
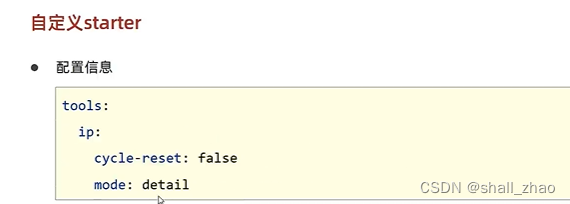
tools:
  ip:
#    cycle: 1
#    cycle-reset: true
#    model: "simple"
配置调整

自定义bean名称,原因如下:
因为我们的周期属性是要配置在cron表达式中的,但是如何获取配置的属性,需要读取到bean,但是直接找bean的话,名字特别长,而且这个bean的名字和beanName的生成器生成的名称恰巧与我们的表达式冲突,所以就曲线救国,自己给bean起个名字。
但是自己起个名字就出现了另一个问题,我们的配置类上以前是使用@EnableConfigurationProperties(IpProperties.class)注册的IpProperties的bean,现在IpProperties被注册了两次bean,又有了新的问题,所以我们在IpAutoCinfiguration上把以前的EnableConfigurationProperties的方式换成Import的方式导入bean。


自定义拦截器

public class IpCountInterceptor implements HandlerInterceptor {
    @Autowired
    private IpCountService ipCountService;
    @Override
    public boolean preHandle(HttpServletRequest request, HttpServletResponse response, Object handler) throws Exception {
        ipCountService.count();
        return true;
    }

}
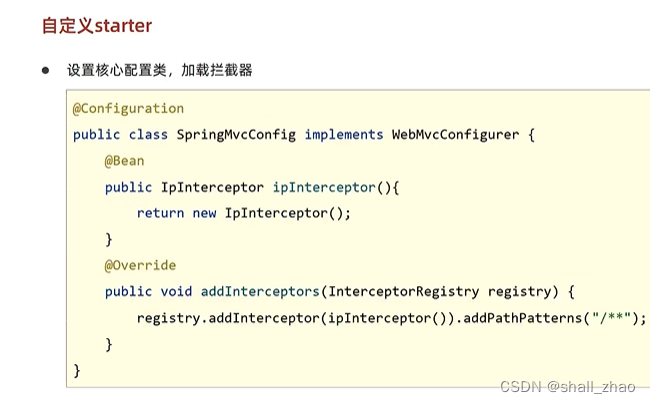
@Configuration
public class SpringMvcConfig implements WebMvcConfigurer {
    @Bean
    public IpCountInterceptor ipCountInterceptor(){
        return new IpCountInterceptor();
    }

    @Override
    public void addInterceptors(InterceptorRegistry registry) {
        registry.addInterceptor(ipCountInterceptor()).addPathPatterns("/**");
    }
}
@EnableScheduling
//@EnableConfigurationProperties(IpProperties.class)
@Import({IpProperties.class, IpCountInterceptor.class, SpringMvcConfig.class})
public class IpAutoCinfiguration {

    @Bean
    public IpCountService ipCountService(){
        return new IpCountService();
    }
}
开启yml提示功能

<!--        <dependency>-->
<!--            <groupId>org.springframework.boot</groupId>-->
<!--            <artifactId>spring-boot-configuration-processor</artifactId>-->
<!--        </dependency>-->
用这个坐标生成spring–configuration–metadata,也就是加上这个坐标,然后clean–install,就会生成这个文件,把这个文件从target目录中找到并且提出来,放到我们的配置目录下,这个坐标就可以注释了,因为上线用不到。
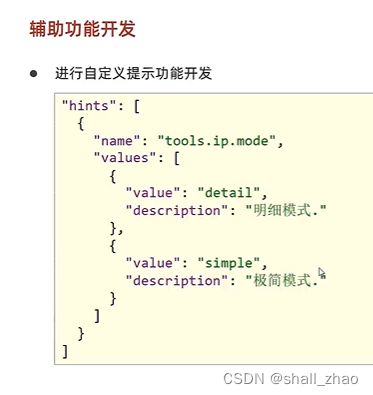
  "hints": [
    {
      "name": "tools.ip.model",
      "values": [
        {
          "value": "detail",
          "description": "详细模式."
        },
        {
          "value": "simple",
          "description": "极简模式."
        }
      ]
    }
  ]
原文地址:https://blog.csdn.net/shall_zhao/article/details/134776512
本文来自互联网用户投稿,该文观点仅代表作者本人,不代表本站立场。本站仅提供信息存储空间服务,不拥有所有权,不承担相关法律责任。
如若转载,请注明出处:http://www.7code.cn/show_43576.html
如若内容造成侵权/违法违规/事实不符,请联系代码007邮箱:suwngjj01@126.com进行投诉反馈,一经查实,立即删除!
主题授权提示:请在后台主题设置-主题授权-激活主题的正版授权,授权购买:RiTheme官网
声明:本站所有文章,如无特殊说明或标注,均为本站原创发布。任何个人或组织,在未征得本站同意时,禁止复制、盗用、采集、发布本站内容到任何网站、书籍等各类媒体平台。如若本站内容侵犯了原著者的合法权益,可联系我们进行处理。


