Nginx国密改造
所谓的国密Nginx就是指在SSL加密时将加密算法改为国密,本次演示的为Nginx单向国密
所需环境:
nginx1.18 http://nginx.org/en/download.html
国密Openssl https://github.com/guanzhi/GmSSL/archive/master.zip
centos7.6
支持国密的浏览器 https://www.gmssl.cn/gmssl/index.jsp
国密测试证书下载 https://www.gmssl.cn/gmssl/index.jsp
准备好服务器侧所需的程序包
[root@test1 nginx]# ll
总用量 7208
–rw——- 1 root root 8251537 5月 30 10:21 GmSSL-master.zip
–rw——- 1 root root 1039530 5月 26 14:18 nginx-1.18.0.tar.gz
先安装国密Openssl
[root@test1 nginx]# unzip –b GmSSL-master.zip
解压进入目录编译安装
[root@test1 nginx]# cd GmSSL-master
[root@test1 GmSSL-master]# ./config —prefix=/usr/local/gmssl —openssldir=/usr/local/gmssl no–shared && make && make install
为了验证gmssl安装是否成功,修改当前用户变量文件,添加变量,查看gmssl版本
[root@test1 ~]# echo ‘export PATH=$PATH:/usr/local/gmssl/bin’ >> ~/.bashrc
[root@test1 ~]# cat ~/.bashrc
User specific aliases and functions
alias rm=‘rm -i’
alias cp=‘cp -i’
alias mv=‘mv -i’
if [ –f /etc/bashrc ]; then
. /etc/bashrc
fi
export PATH=$PATH:/usr/local/gmssl/bin
[root@test1 ~]# source ~/.bashrc
[root@test1 ~]# gmssl version –a
gmssl安装完成,下面就开始安装nginx
[root@test1 nginx]# tar -zxf nginx-1.18.0.tar.gz
[root@test1 nginx]# cd nginx-1.18.0
在编译前需要更改解压目录内的auto/lib/openssl/conf,将全部
O
P
E
N
S
S
L
/
.
o
e
n
s
s
l
/
修改为
安装完成后,我们准备好本次用于测试的国密证书,开始修改配置文件
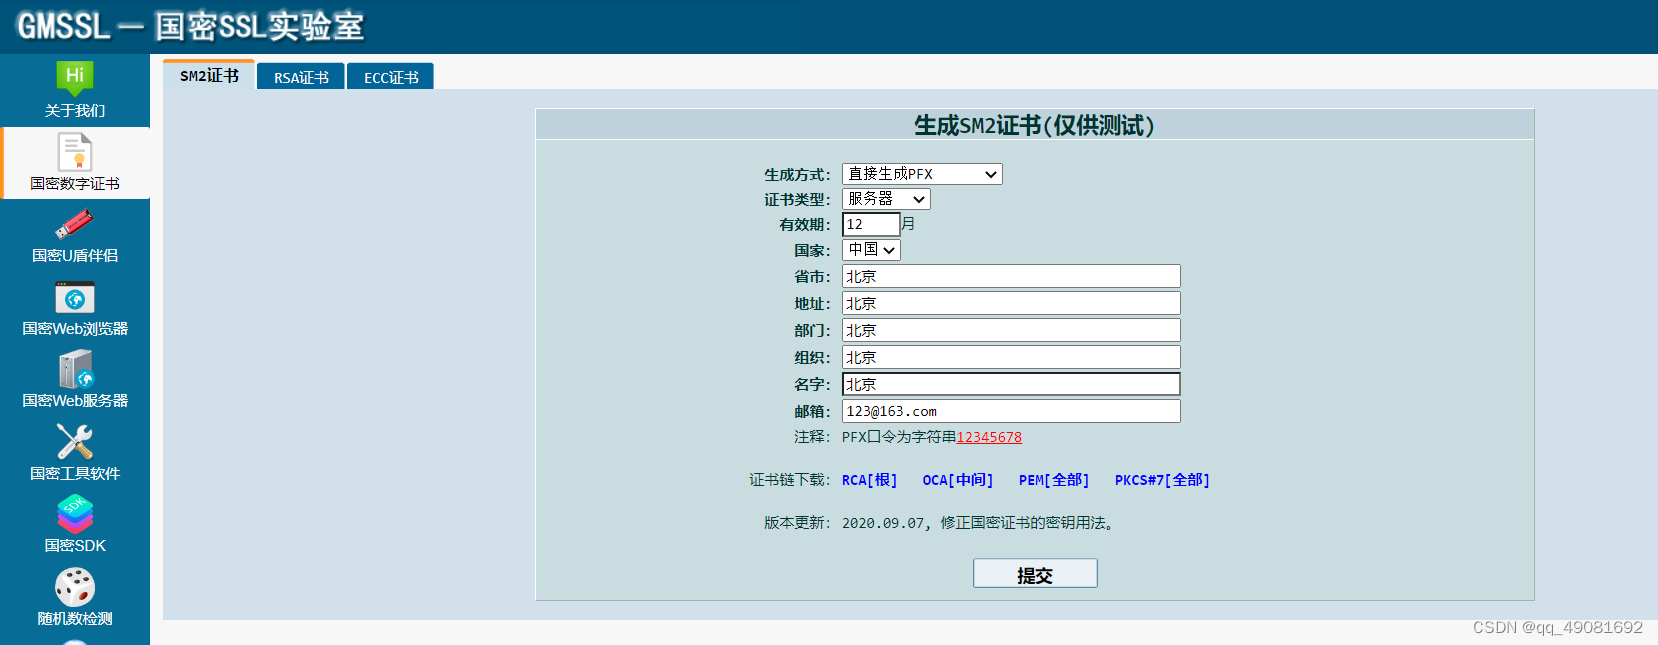
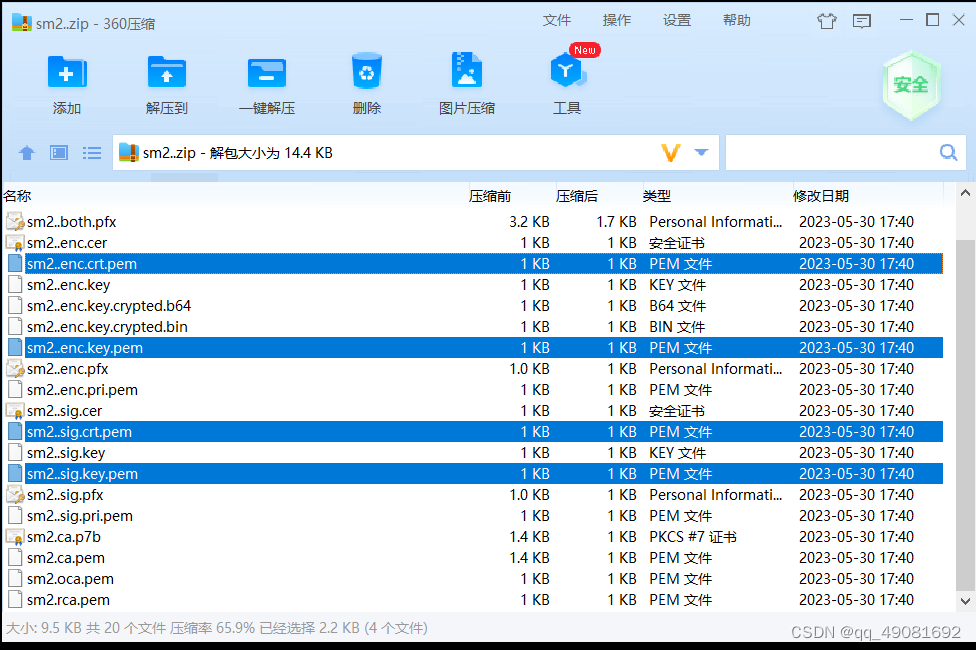
提交之后我们会下载一个SM2.zip的压缩包,打开之后就会有我们需要的四个文件了,把他们放到服务器之后开始配置nginx
[root@test1 ~]# cd /opt/nginx/gmkey/
[root@test1 gmkey]# ll
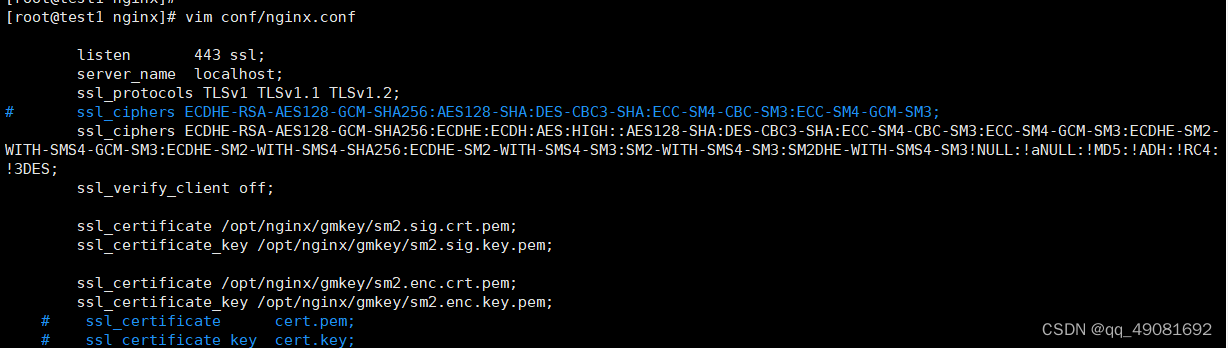
将nginx配置文件修改如下
[root@test1 gmkey]# cd /usr/local/nginx/sbin/
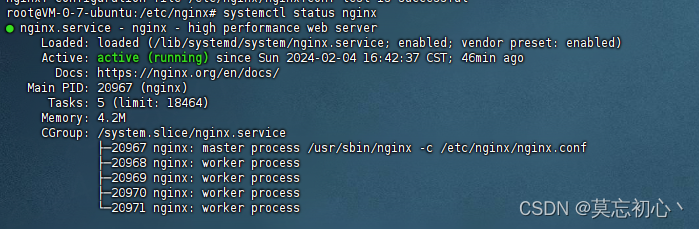
[root@test1 sbin]# ./nginx -t ###检查配置文件正确性
[root@test1 sbin]# ./nginx -s reload ### 重载nginx
[root@test1 sbin]# netstat -anput | grep nginx ###查看监听端口是否启动
[root@test1 sbin]# systemctl status firewalld ###查看防火墙状态,如果是用到了防火墙的阻断,可先放行80和443端口,防火墙拦截往往是最常见的。
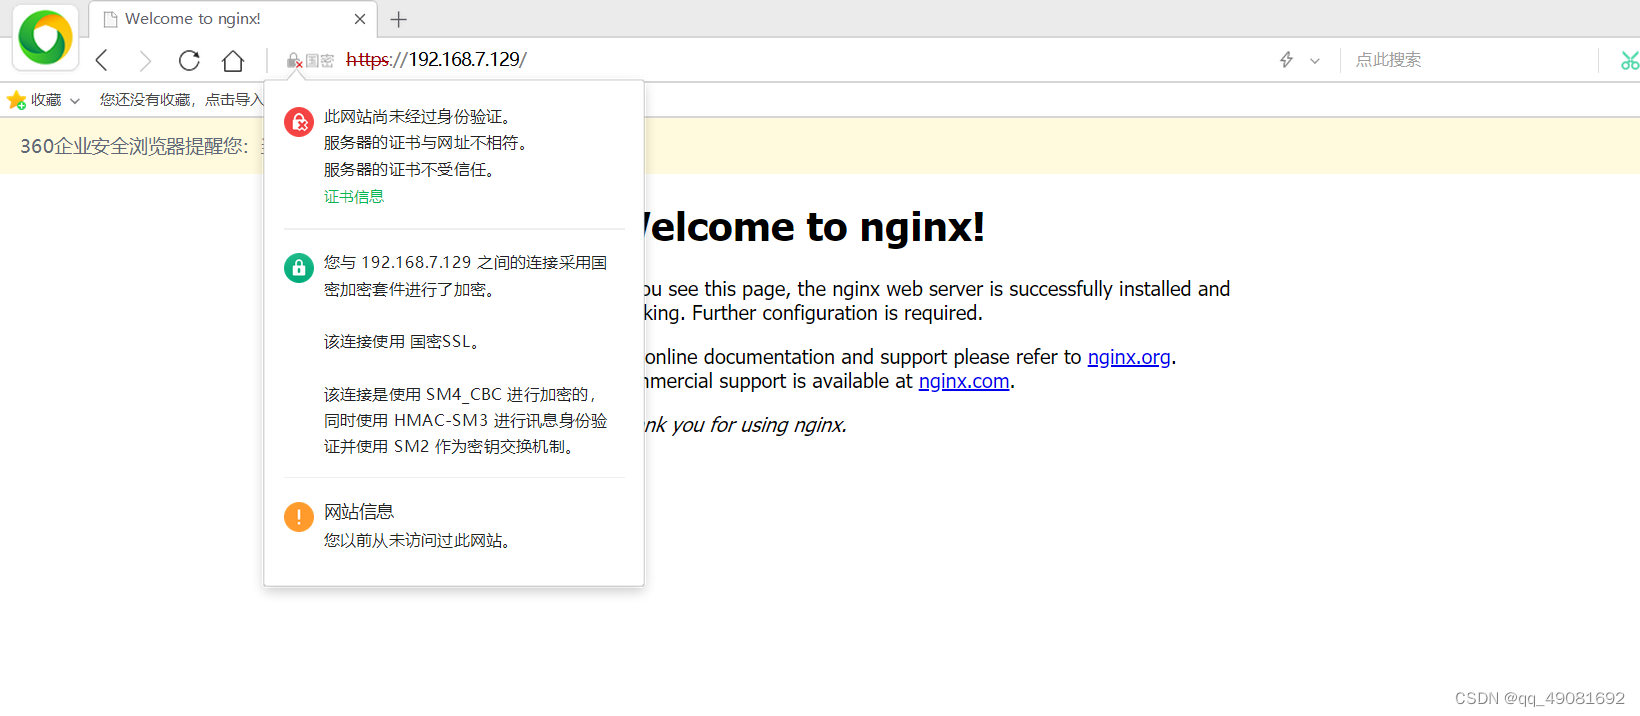
使用国密浏览器做出验证是正常显示国密了
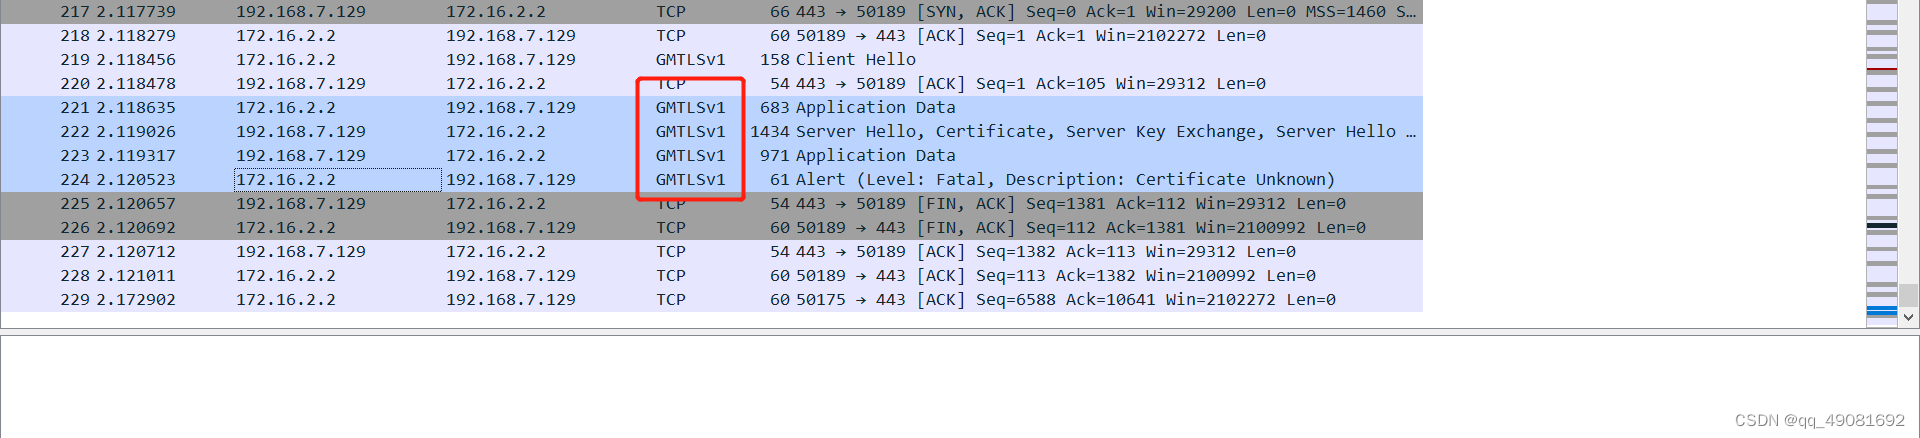
服务器上抓个包看看
[root@test1 nginx]# tcpdump -i ens192 -vnn port 443 –w /root/gm.pcap
然后需要使用支持国密的Wireshark去打开(下载地址:https://www.gmssl.cn/gmssl/down/wireshark–win32-2.9.0-gm.3.exe)
能看到GMTLSv.x即是国密算法了。
这里说写些在过程汇总遇到的问题吧
1、访问nginx的http和https返回403,这种通常是因为权限不足导致,详见error日志内出现:
chmod 644 /站点路径 修改权限便可解决
2、在nginx同时存在http和https的时候,http能够正常访问,但HTTPS不能,浏览器回显没有值得参考信息,查看error日志发现
这类日志,表示连接握手失败,通常是因为SSL算法问题,我的解决方法是将nginx配置文件内的算法扩容,解决了该问题(别忘了,修改配置文件,重载nginx生效)
这类日志,表示连接握手失败,通常是因为SSL算法问题,我的解决方法是将nginx配置文件内的算法扩容,解决了该问题(别忘了,修改配置文件,重载nginx生效)
声明:本站所有文章,如无特殊说明或标注,均为本站原创发布。任何个人或组织,在未征得本站同意时,禁止复制、盗用、采集、发布本站内容到任何网站、书籍等各类媒体平台。如若本站内容侵犯了原著者的合法权益,可联系我们进行处理。