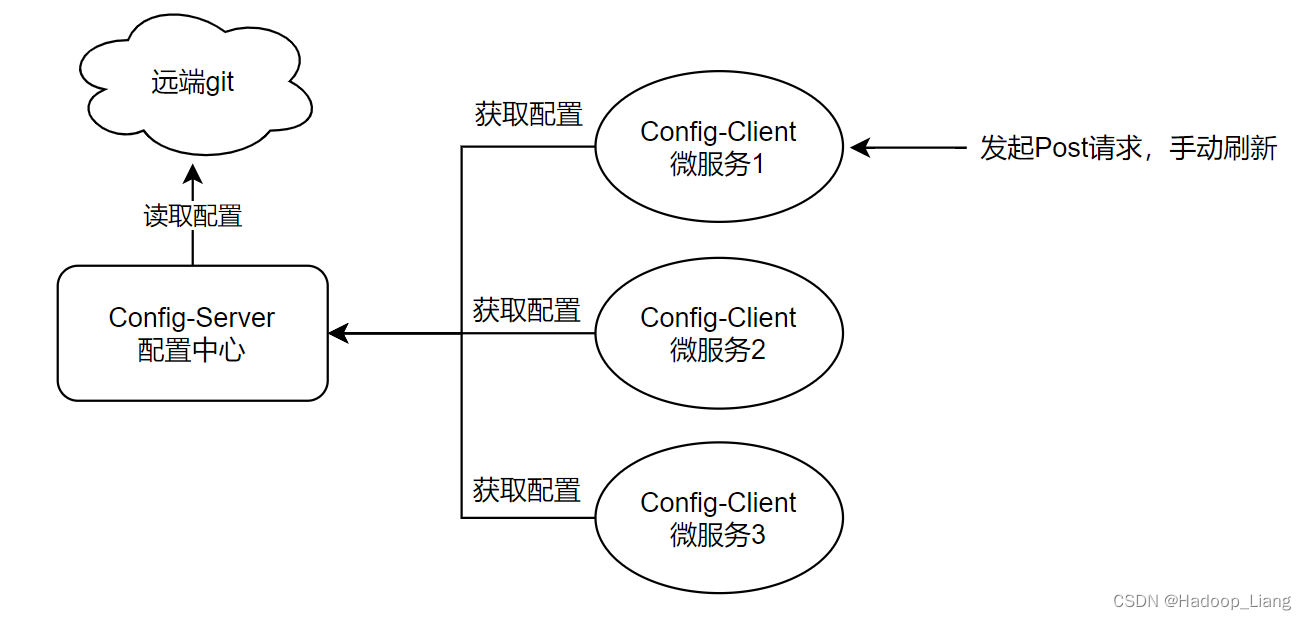
概述
因为微服务架构有很多个服务,手动一个一个管理各个服务配置很麻烦,不同的环境(开发、测试、生产)往往需要不同的配置文件,运行期间也需要动态调整配置,修改配置后微服务需要自动更新配置,所以需要一个统一管理应用配置的组件。
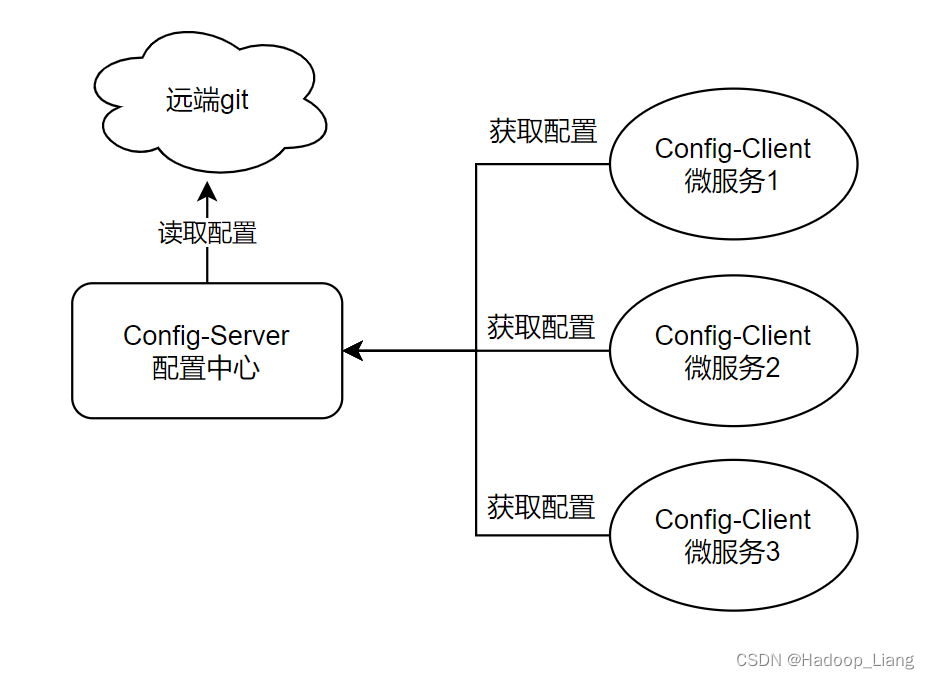
配置中心是一种统一管理各种应用配置的基础服务组件。本文讲解的配置中心组件为Spring Cloud Config。
本文的操作可在 微服务调用链路追踪 的基础上进行 或者 在 Spring Cloud Stream实践 的基础上进行。
环境说明
jdk1.8
maven3.6.3
idea2022
rabbitmq3.12.4
步骤
创建远端git仓库
创建远端git仓库,管理配置文件,使用gitee,创建仓库名称为config-repo(创建时点击创建README文件,方便直接用浏览器上传文件)

可使用远端仓库管理微服务公共的配置,而非公共的配置可放在各自微服务的application.yml中。
准备配置文件
{application}-{profile}.yml
{application}-{profile}.properties
application为应用名称 profile指的开发环境(用于区分开发环境、测试环境、生产环境等)
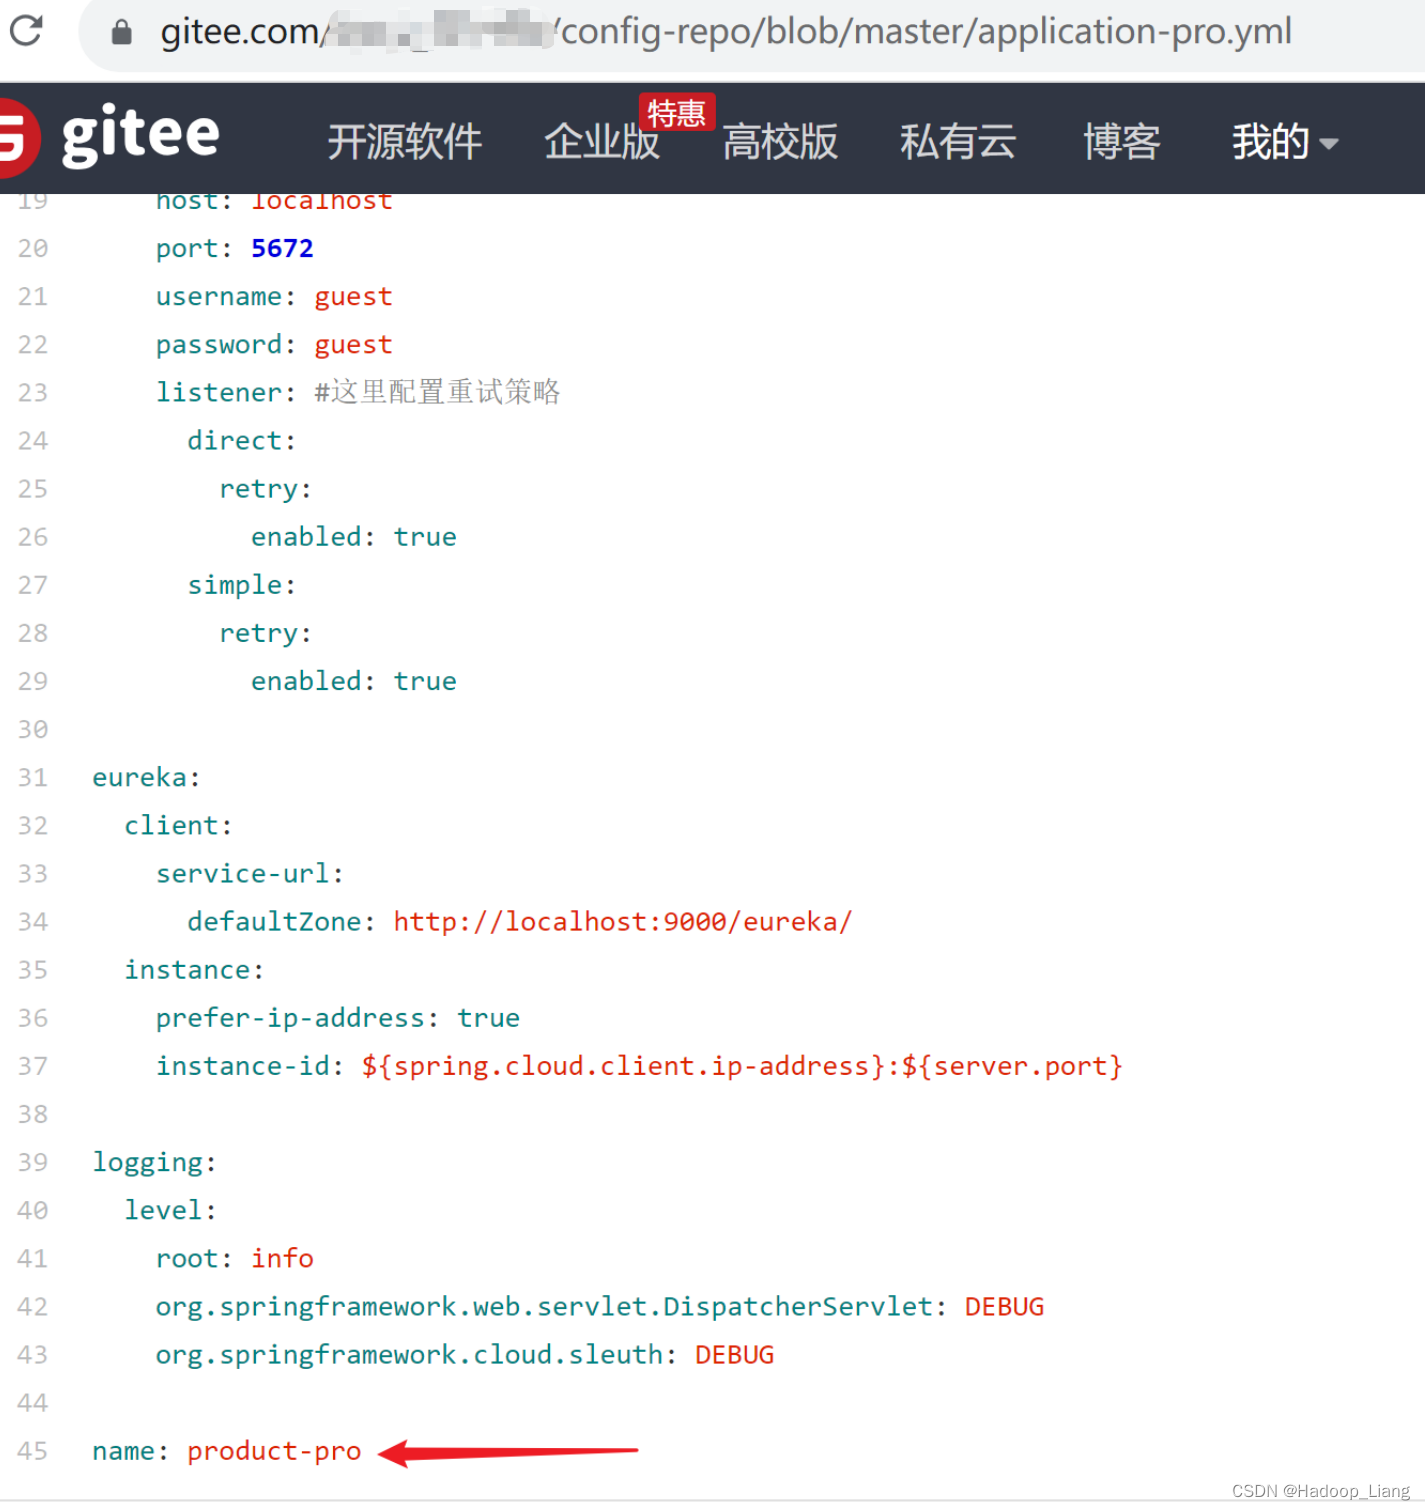
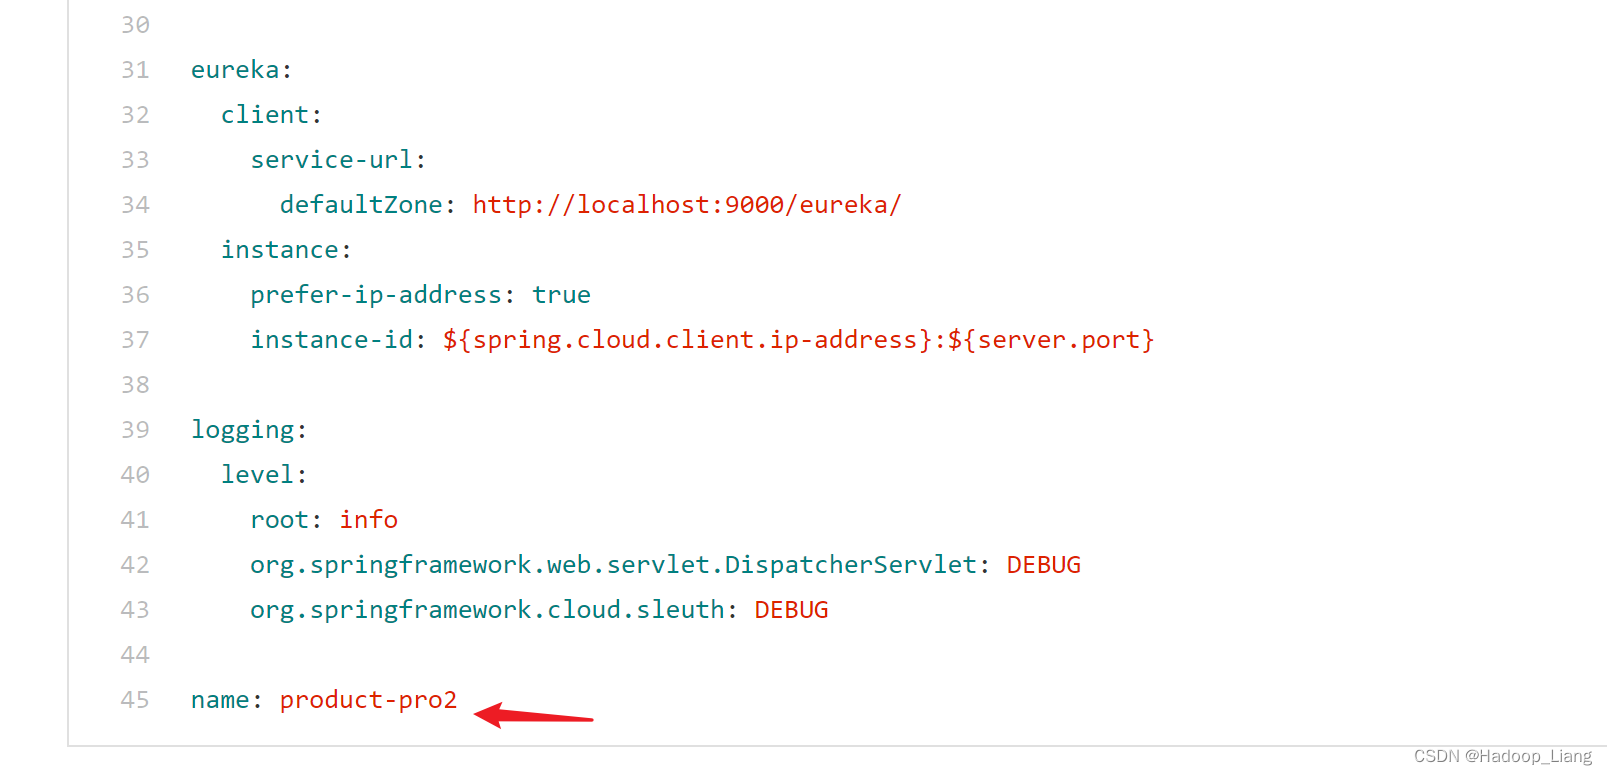
复制product-service的application.yml,重命名为application-pro.yml,抽取公共配置,例如:数据库配置、zipkin、sleuth、rabbitmq、eureka等,同时添加一个name属性(用于区别不同的环境配置),公共的配置放在远端git仓库。
spring:
  datasource:
    driver-class-name: com.mysql.cj.jdbc.Driver
    url: jdbc:mysql://localhost:3306/shop1?useUnicode=true&characterEncoding=utf-8&serverTimezone=GMT%2B8
    username: root
    password: 123
  jpa:
    database: MySQL
    show-sql: true
    open-in-view: true
    generate-ddl: true #自动创建表
  zipkin:
    sender:
      type: rabbit #数据的传输方式,以rabbit的方式向server端发送数据
  sleuth:
    sampler:
      probability: 1 #采样比,日志的采样比例,默认0.1,测试环境设置为100%收集日志
  rabbitmq:
    host: localhost
    port: 5672
    username: guest
    password: guest
    listener: #这里配置重试策略
      direct:
        retry:
          enabled: true
      simple:
        retry:
          enabled: true

eureka:
  client:
    service-url:
      defaultZone: http://localhost:9000/eureka/
  instance:
    prefer-ip-address: true
    instance-id: ${spring.cloud.client.ip-address}:${server.port}

logging:
  level:
    root: info
    org.springframework.web.servlet.DispatcherServlet: DEBUG
    org.springframework.cloud.sleuth: DEBUG

name: product-pro复制application-pro.yml得到application-dev.yml
spring:
  datasource:
    driver-class-name: com.mysql.cj.jdbc.Driver
    url: jdbc:mysql://localhost:3306/shop1?useUnicode=true&characterEncoding=utf-8&serverTimezone=GMT%2B8
    username: root
    password: 123
  jpa:
    database: MySQL
    show-sql: true
    open-in-view: true
    generate-ddl: true #自动创建表
  zipkin:
    sender:
      type: rabbit #数据的传输方式,以rabbit的方式向server端发送数据
  sleuth:
    sampler:
      probability: 1 #采样比,日志的采样比例,默认0.1,测试环境设置为100%收集日志
  rabbitmq:
    host: localhost
    port: 5672
    username: guest
    password: guest
    listener: #这里配置重试策略
      direct:
        retry:
          enabled: true
      simple:
        retry:
          enabled: true

eureka:
  client:
    service-url:
      defaultZone: http://localhost:9000/eureka/
  instance:
    prefer-ip-address: true
    instance-id: ${spring.cloud.client.ip-address}:${server.port}

logging:
  level:
    root: info
    org.springframework.web.servlet.DispatcherServlet: DEBUG
    org.springframework.cloud.sleuth: DEBUG
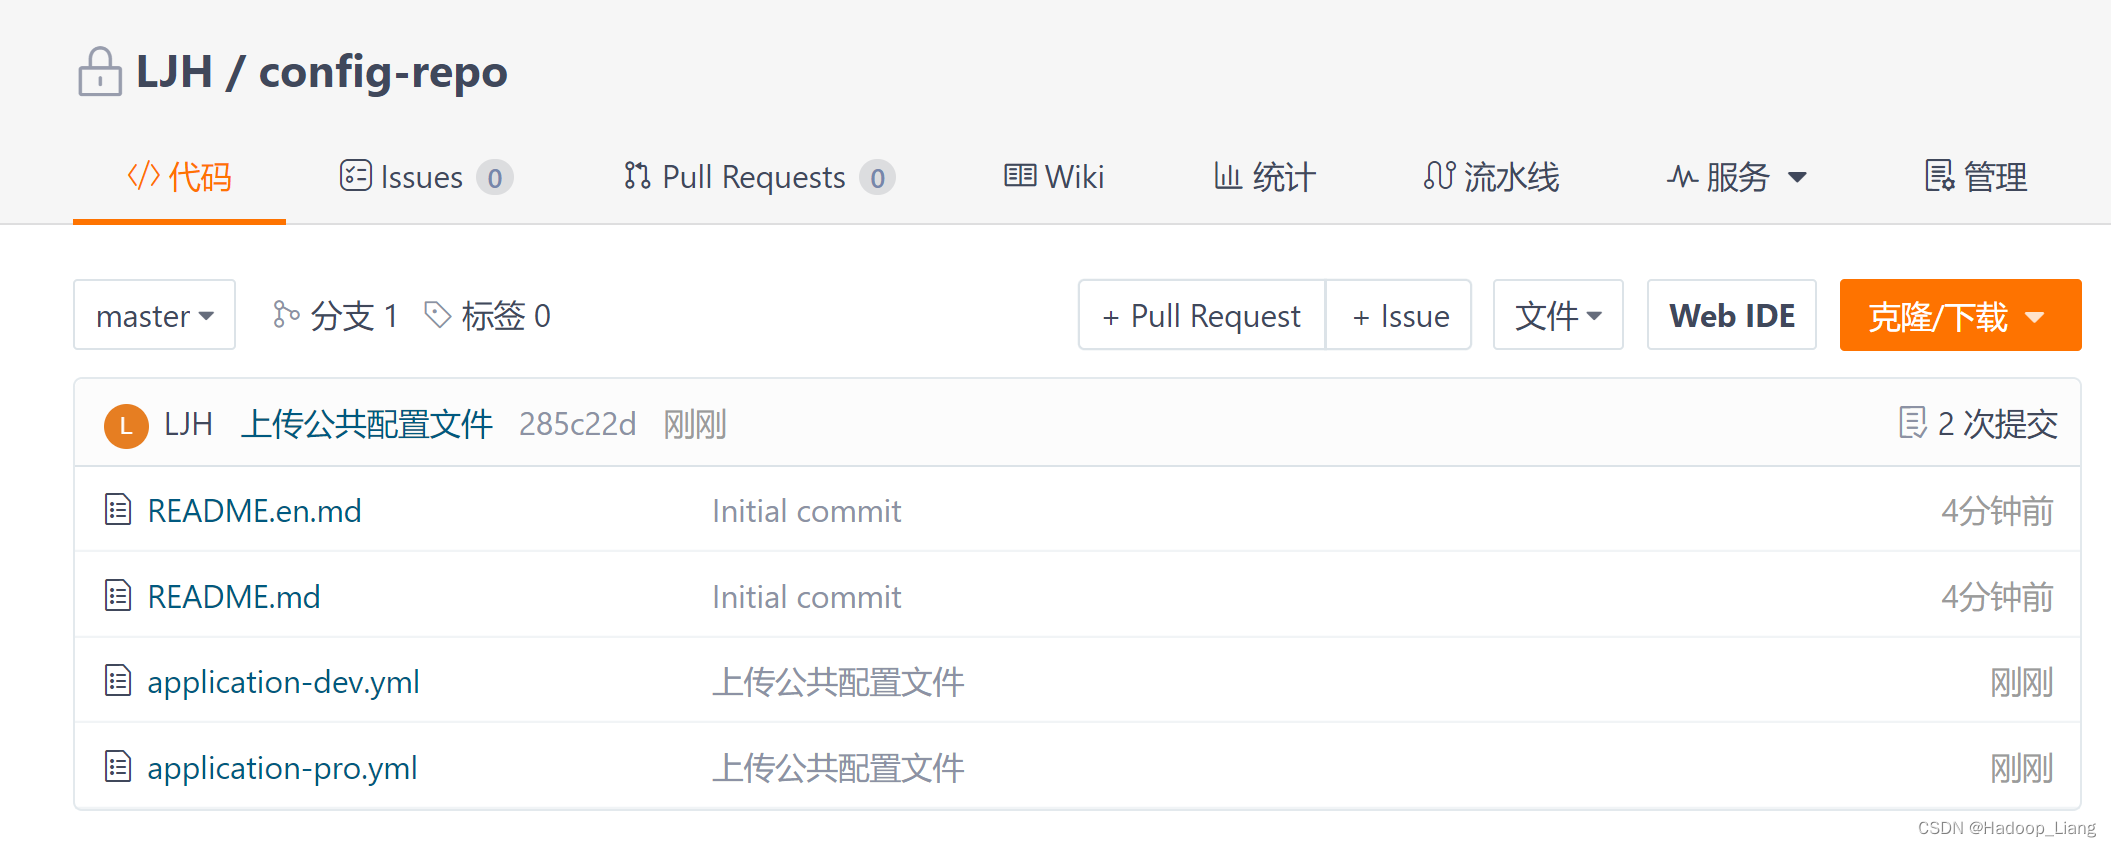
name: product-dev通过浏览器界面,手动上传application-pro.yml和application-dev.yml到git仓库
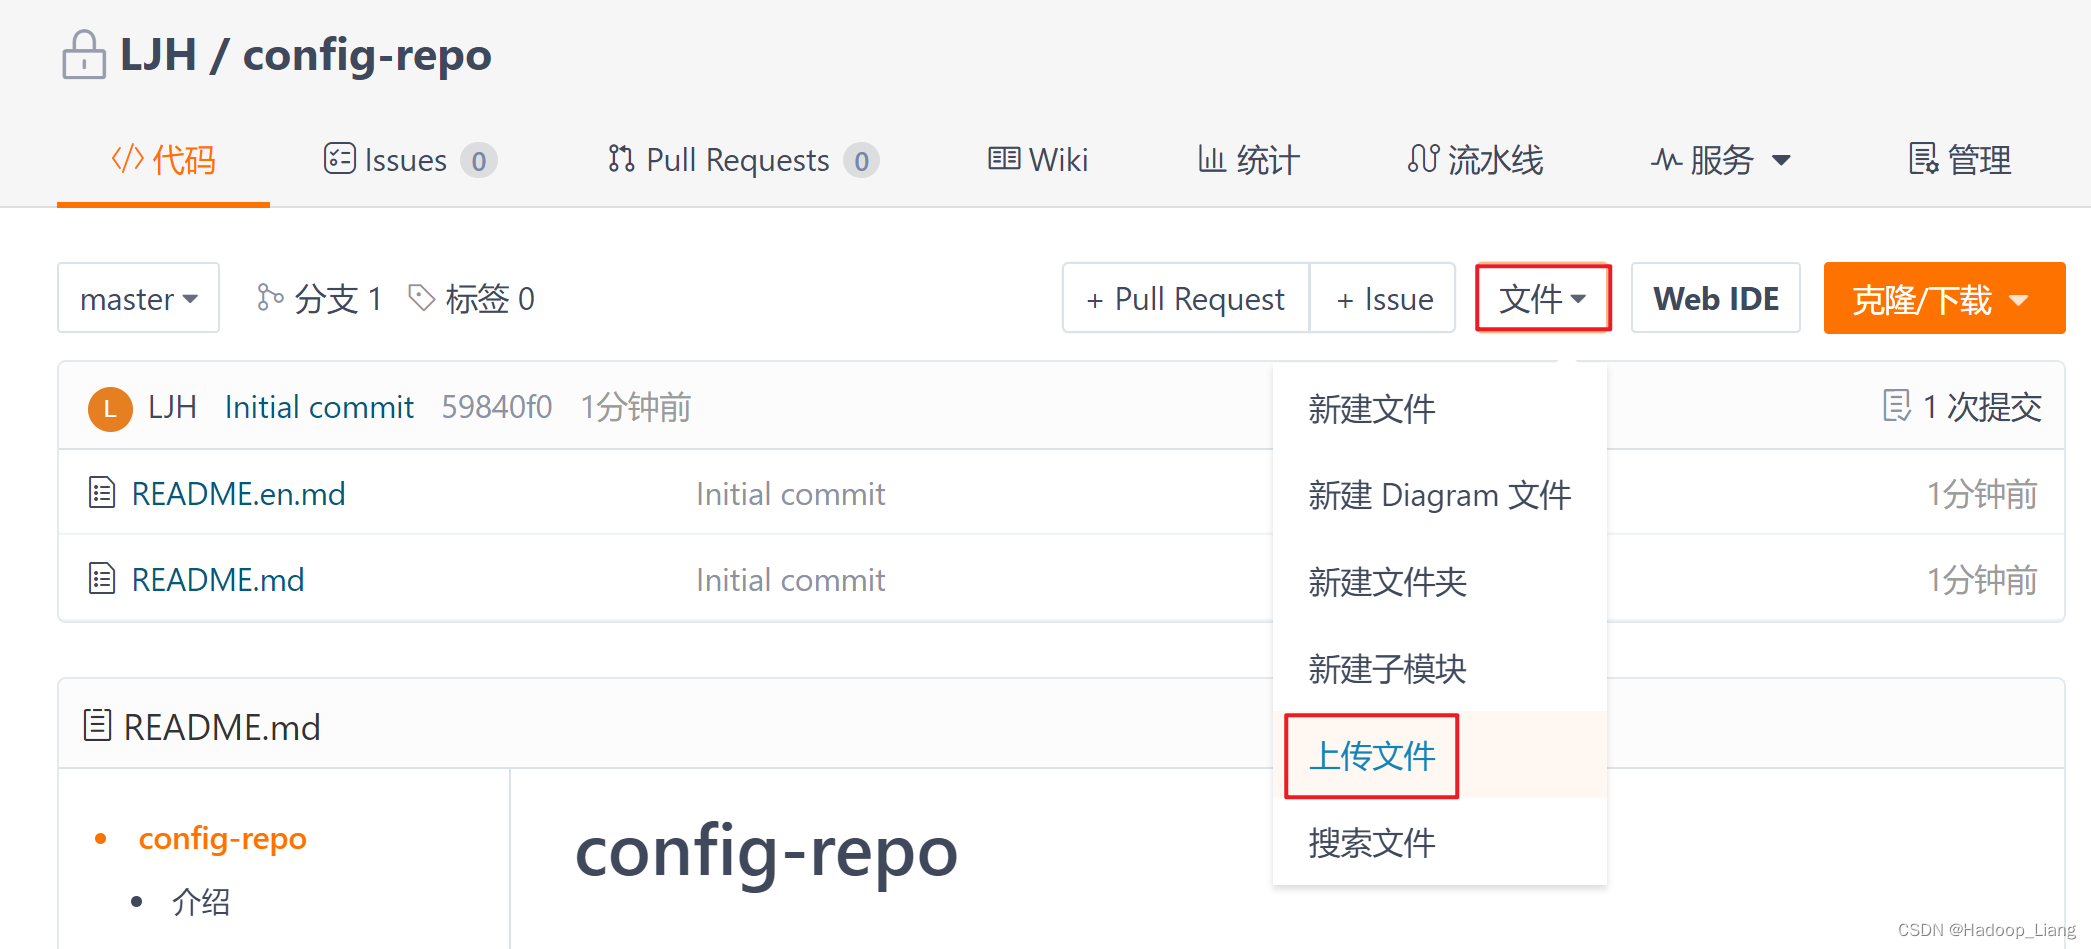
点击上传文件区域,选中需要上传的文件:application-pro.yml和application-dev.yml


配置中心—服务端
	<dependencies>
        <dependency>
            <groupId>org.springframework.cloud</groupId>
            <artifactId>spring-cloud-config-server</artifactId>
        </dependency>
</dependencies>启动类
package org.example.config;

import org.springframework.boot.SpringApplication;
import org.springframework.boot.autoconfigure.SpringBootApplication;
import org.springframework.cloud.config.server.EnableConfigServer;

@SpringBootApplication
@EnableConfigServer //开启配置中心服务端功能
public class ConfigServerApplication {
    public static void main(String[] args) {
        SpringApplication.run(ConfigServerApplication.class, args);
    }
}
server:
  port: 11111
spring:
  application:
    name: config-server
  cloud:
    config:
      server:
        git:
uri: https://gitee.com/xxx/config-repo.gituri的值是刚才创建的远端git仓库的地址,注意修改为自己的仓库地址。
原因是gitee仓库是私有的,需要把仓库公开或者配置gitee的登录信息。

cloud:
  config:
    server:
      git:
        uri: https://gitee.com/xxx/config-repo.git
        username: xxx
        password: xxx
配置中心–客户端
	<dependencies>
        <dependency>
            <groupId>org.springframework.boot</groupId>
            <artifactId>spring-boot-starter-web</artifactId>
        </dependency>
        <dependency>
            <groupId>mysql</groupId>
            <artifactId>mysql-connector-java</artifactId>
            <version>8.0.33</version>
        </dependency>
        <dependency>
            <groupId>org.springframework.boot</groupId>
            <artifactId>spring-boot-starter-data-jpa</artifactId>
        </dependency>
        <!--引入EurekaClient-->
        <dependency>
            <groupId>org.springframework.cloud</groupId>
            <artifactId>spring-cloud-starter-netflix-eureka-client</artifactId>
        </dependency>

        <dependency>
            <groupId>org.springframework.cloud</groupId>
            <artifactId>spring-cloud-starter-config</artifactId>
        </dependency>
        <dependency>
            <groupId>org.springframework.boot</groupId>
            <artifactId>spring-boot-starter-actuator</artifactId>
        </dependency>
        <!--消息总线bus-->
        <dependency>
            <groupId>org.springframework.cloud</groupId>
            <artifactId>spring-cloud-bus</artifactId>
        </dependency>
        <dependency>
            <groupId>org.springframework.cloud</groupId>
            <artifactId>spring-cloud-stream-binder-rabbit</artifactId>
        </dependency>
        <dependency>
            <groupId>org.springframework.cloud</groupId>
            <artifactId>spring-cloud-starter-bootstrap</artifactId>
        </dependency>
</dependencies>server:
port: 9101
spring:
application:
name: config-client1
spring:
  cloud:
    config:
      name: application #应用名称对应git配置文件的前半部分,例如:application-dev.yml,这里就写application
      profile: dev #开发环境
      label: master #git中的分支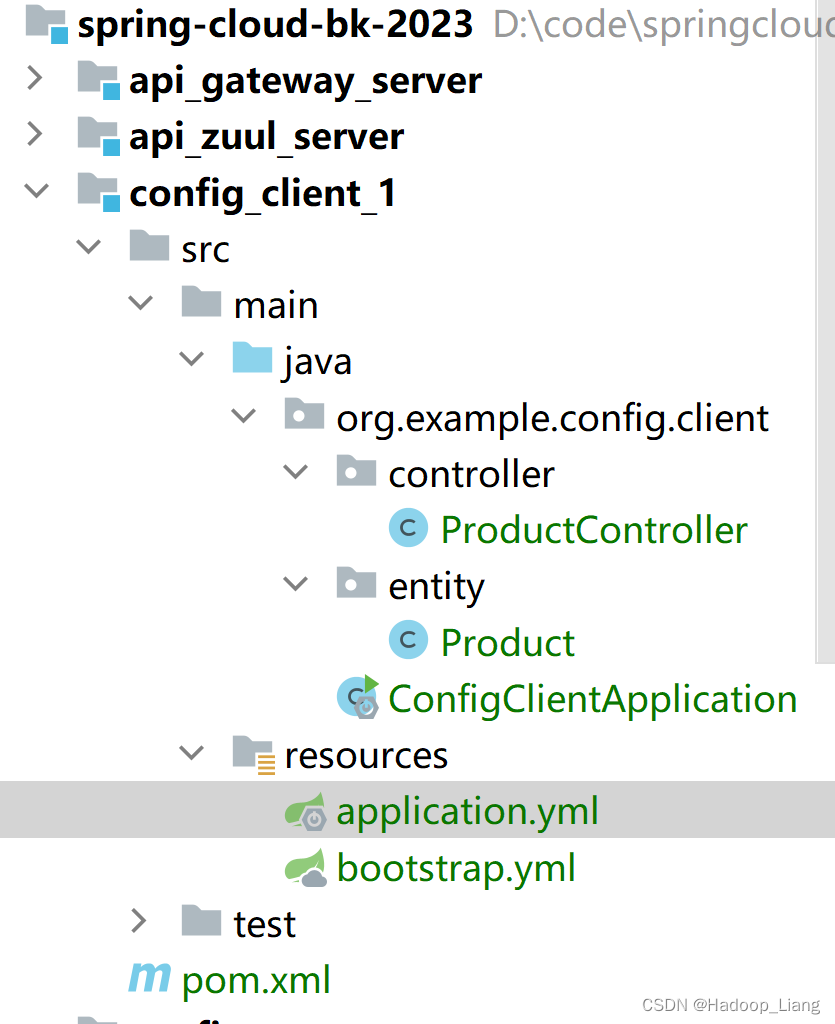
uri: http://localhost:11111 #config_server的请求地址package org.example.config.client;
import org.springframework.boot.SpringApplication;
import org.springframework.boot.autoconfigure.SpringBootApplication;
import org.springframework.boot.autoconfigure.domain.EntityScan;
@SpringBootApplication
@EntityScan("org.example.config.client.entity.Product")
public class ConfigClientApplication {
public static void main(String[] args) {
SpringApplication.run(ConfigClientApplication.class, args);
}
}package org.example.config.client.entity;
import lombok.Data;
import javax.persistence.Entity;
import javax.persistence.Id;
import javax.persistence.Table;
import java.math.BigDecimal;
/**
* 商品实体类
*/
@Data
@Entity
@Table(name="tb_product")
public class Product {
@Id
private Long id;
private String productName;
private Integer status;
private BigDecimal price;
private String productDesc;
private String caption;
private Integer inventory;
}package org.example.config.client.controller;
import org.example.config.client.entity.Product;
import org.springframework.beans.factory.annotation.Value;
import org.springframework.stereotype.Controller;
import org.springframework.web.bind.annotation.RequestMapping;
import org.springframework.web.bind.annotation.RestController;
@RestController
@RequestMapping("/config-client/product")
public class ProductController {
@Value("${name}")
private String name;
@RequestMapping("/get")
public Product getProduct(){
Product product = new Product();
product.setProductName(name);
return product;
}
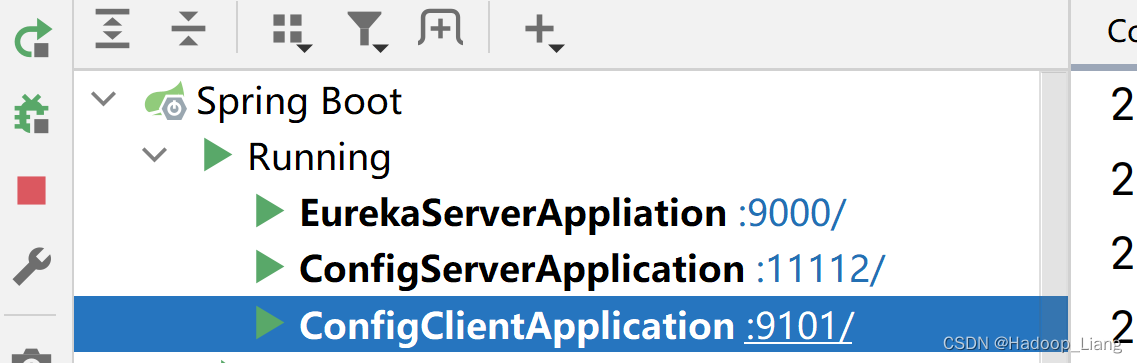
}启动eureka、config_server、config_client_1服务

注意:因为远端git仓库的配置文件有eureka配置,所以拉取到配置后,需要启动eureka服务
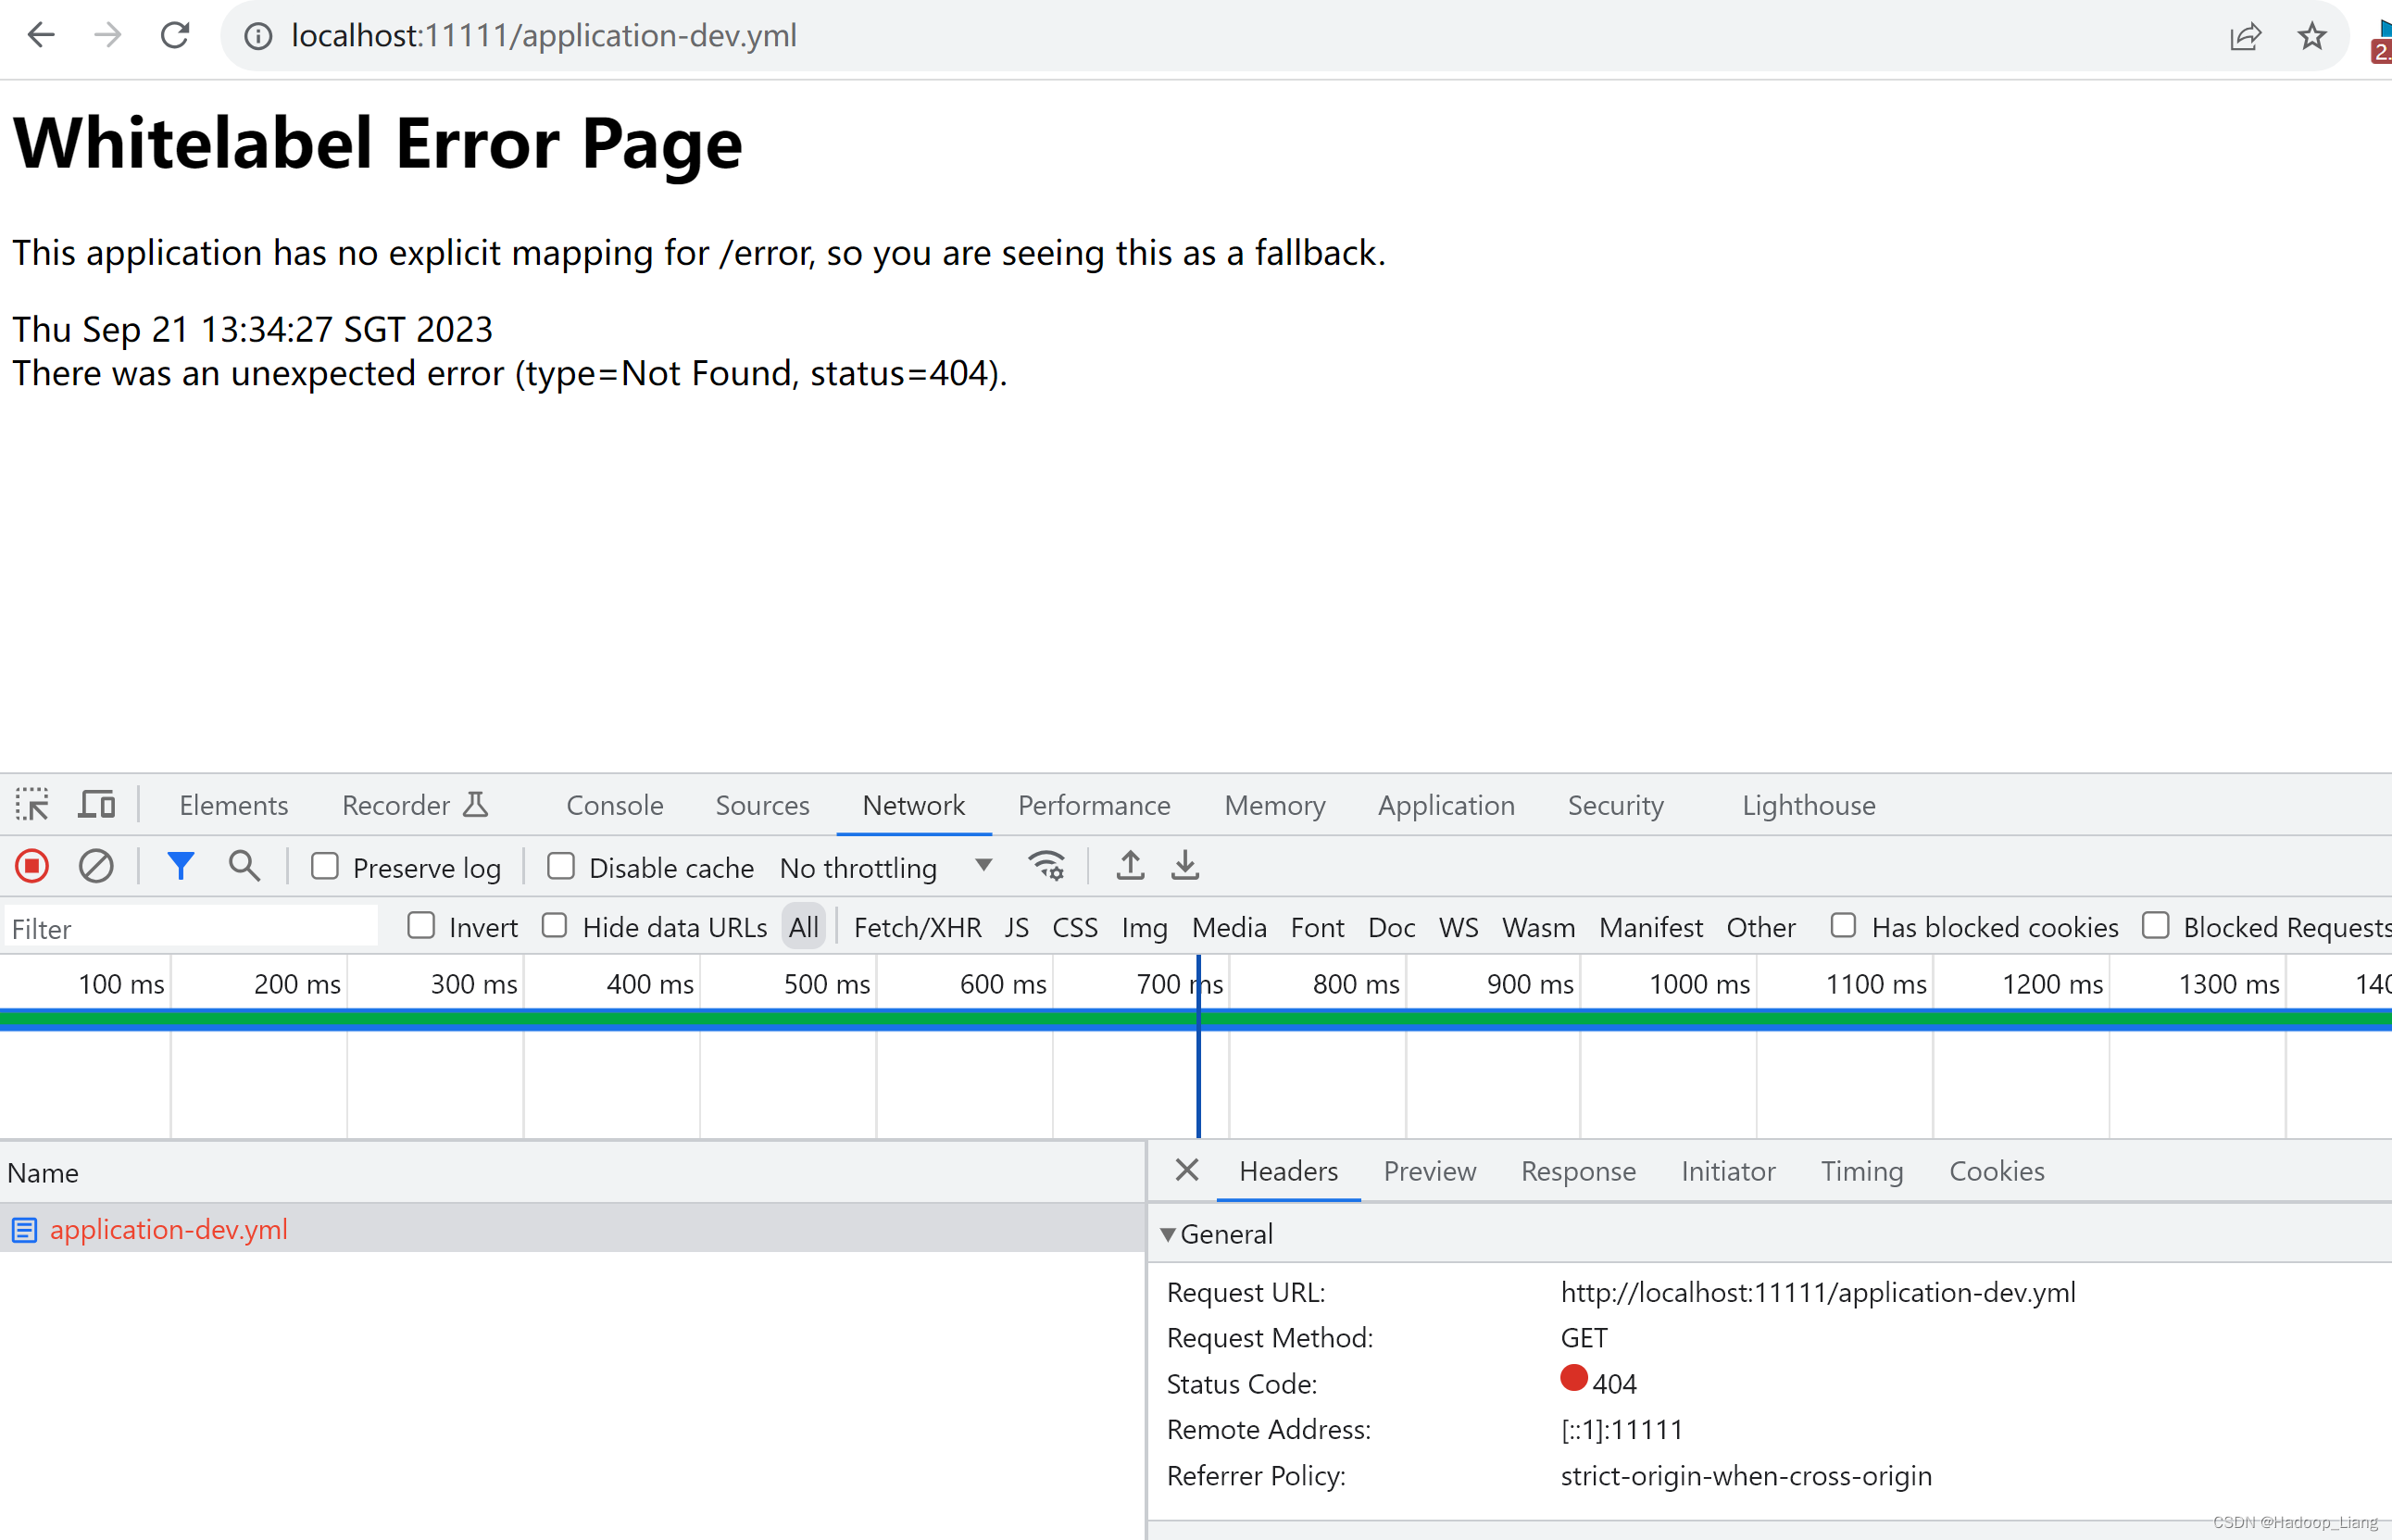
http://localhost:9101/config-client/product/get
响应
{“id”:null,”productName”:”product-dev”,”status“:null,”price“:null,”productDesc“:null,”caption”:null,”inventory“:null}
pruductName为product-dev,与git的application-dev.yml的name属性一致

将config_client_1的bootstrap.yml的profile改为pro

重启config_client_1服务
再次访问
http://localhost:9101/config-client/product/get
响应
{“id”:null,”productName”:”product-pro”,”status“:null,”price“:null,”productDesc“:null,”caption”:null,”inventory“:null}
pruductName为product-pro,与git的application-pro.yml的name属性一致
修改git的配置

把product-pro改为product-pro1
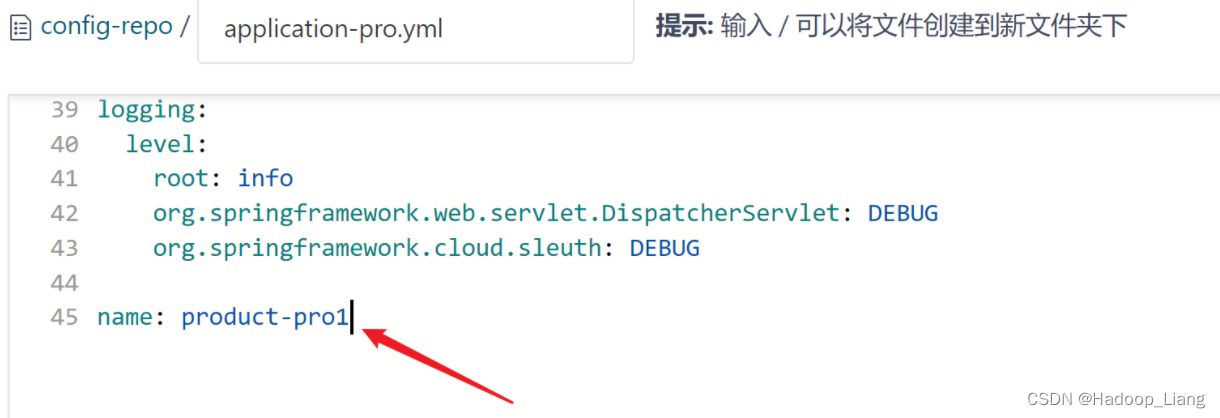
点击提交

浏览器访问

发现重启可以拿到最新数据,但是,在生产环境中,重启服务有时候不太方便。

修改config_client_1服务
pom.xml,引入actuator依赖(之前已引入,跳过)
		<dependency>
            <groupId>org.springframework.boot</groupId>
            <artifactId>spring-boot-starter-actuator</artifactId>
</dependency>在需要的更新数据的类上添加@RefreshScope,开启动态刷新

#开启动态刷新的端点
management:
  endpoints:
    web:
      exposure:
        include: refresh
重启config_client_1服务
访问

productName是product-pro1
将git配置文件的name值修改为product-pro2
curl -X POST "http://localhost:9101/actuator/refresh"可使用postman或cmd命令行发起请求,这里使用cmd命令行发起post请求

再次访问

手动刷新能解决在不重启应用情况下,能做到动态刷新配置。但当服务很多时或需要更新的数据接口很多的情况下,就需要发起很多次Post请求,手动刷新显得很麻烦。可以使用消息总线技术解决该问题。
配置中心的高可用
一台配置中心服务容易出现单点故障问题,将配置中心集群化构成高可用的配置中心可以解决配置中心单点故障问题。
将多个配置中心注册到eureka,提供统一的服务名称,客户端通过服务名称调用配置中心。
配置中心–服务端
修改config_server服务
添加依赖
        <dependency>
            <groupId>org.springframework.cloud</groupId>
            <artifactId>spring-cloud-starter-netflix-eureka-client</artifactId>
        </dependency>
        <dependency>
            <groupId>org.springframework.boot</groupId>
            <artifactId>spring-boot-starter-actuator</artifactId>
        </dependency>
刷新依赖
eureka:
  client:
    service-url:
      defaultZone: http://localhost:9000/eureka
    instance:
      prefer-ip-address: true
instance-id: ${spring.cloud.client.ip-address}:${server.port}修改config_server配置文件,添加default-label: master配置
cloud:
  config:
    server:
      git:
        uri: https://gitee.com/xxx/config-repo.git
default-label: master启动eureka、config_server服务

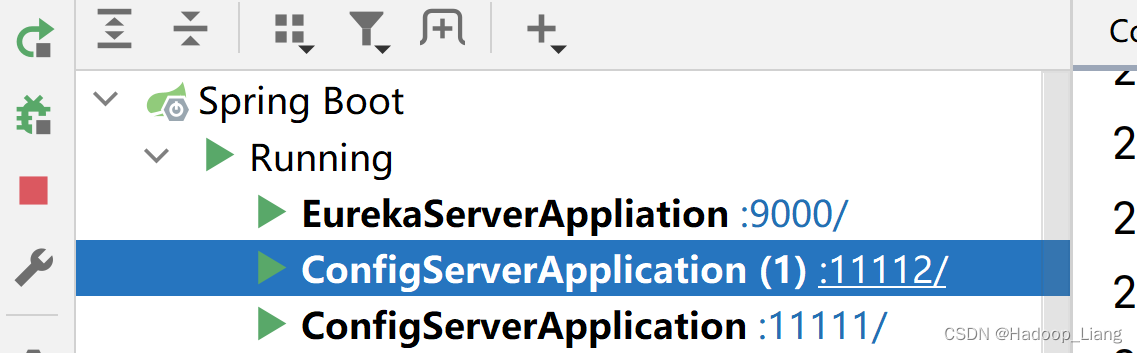
刷新查看Eureka Web UI,看到CONFIG-SERVER配置中心服务有两个实例。

配置中心–客户端
config_client_1服务
修改bootstrap.yml,添加eureka配置,修改通过服务名称(config-server)拿到配置
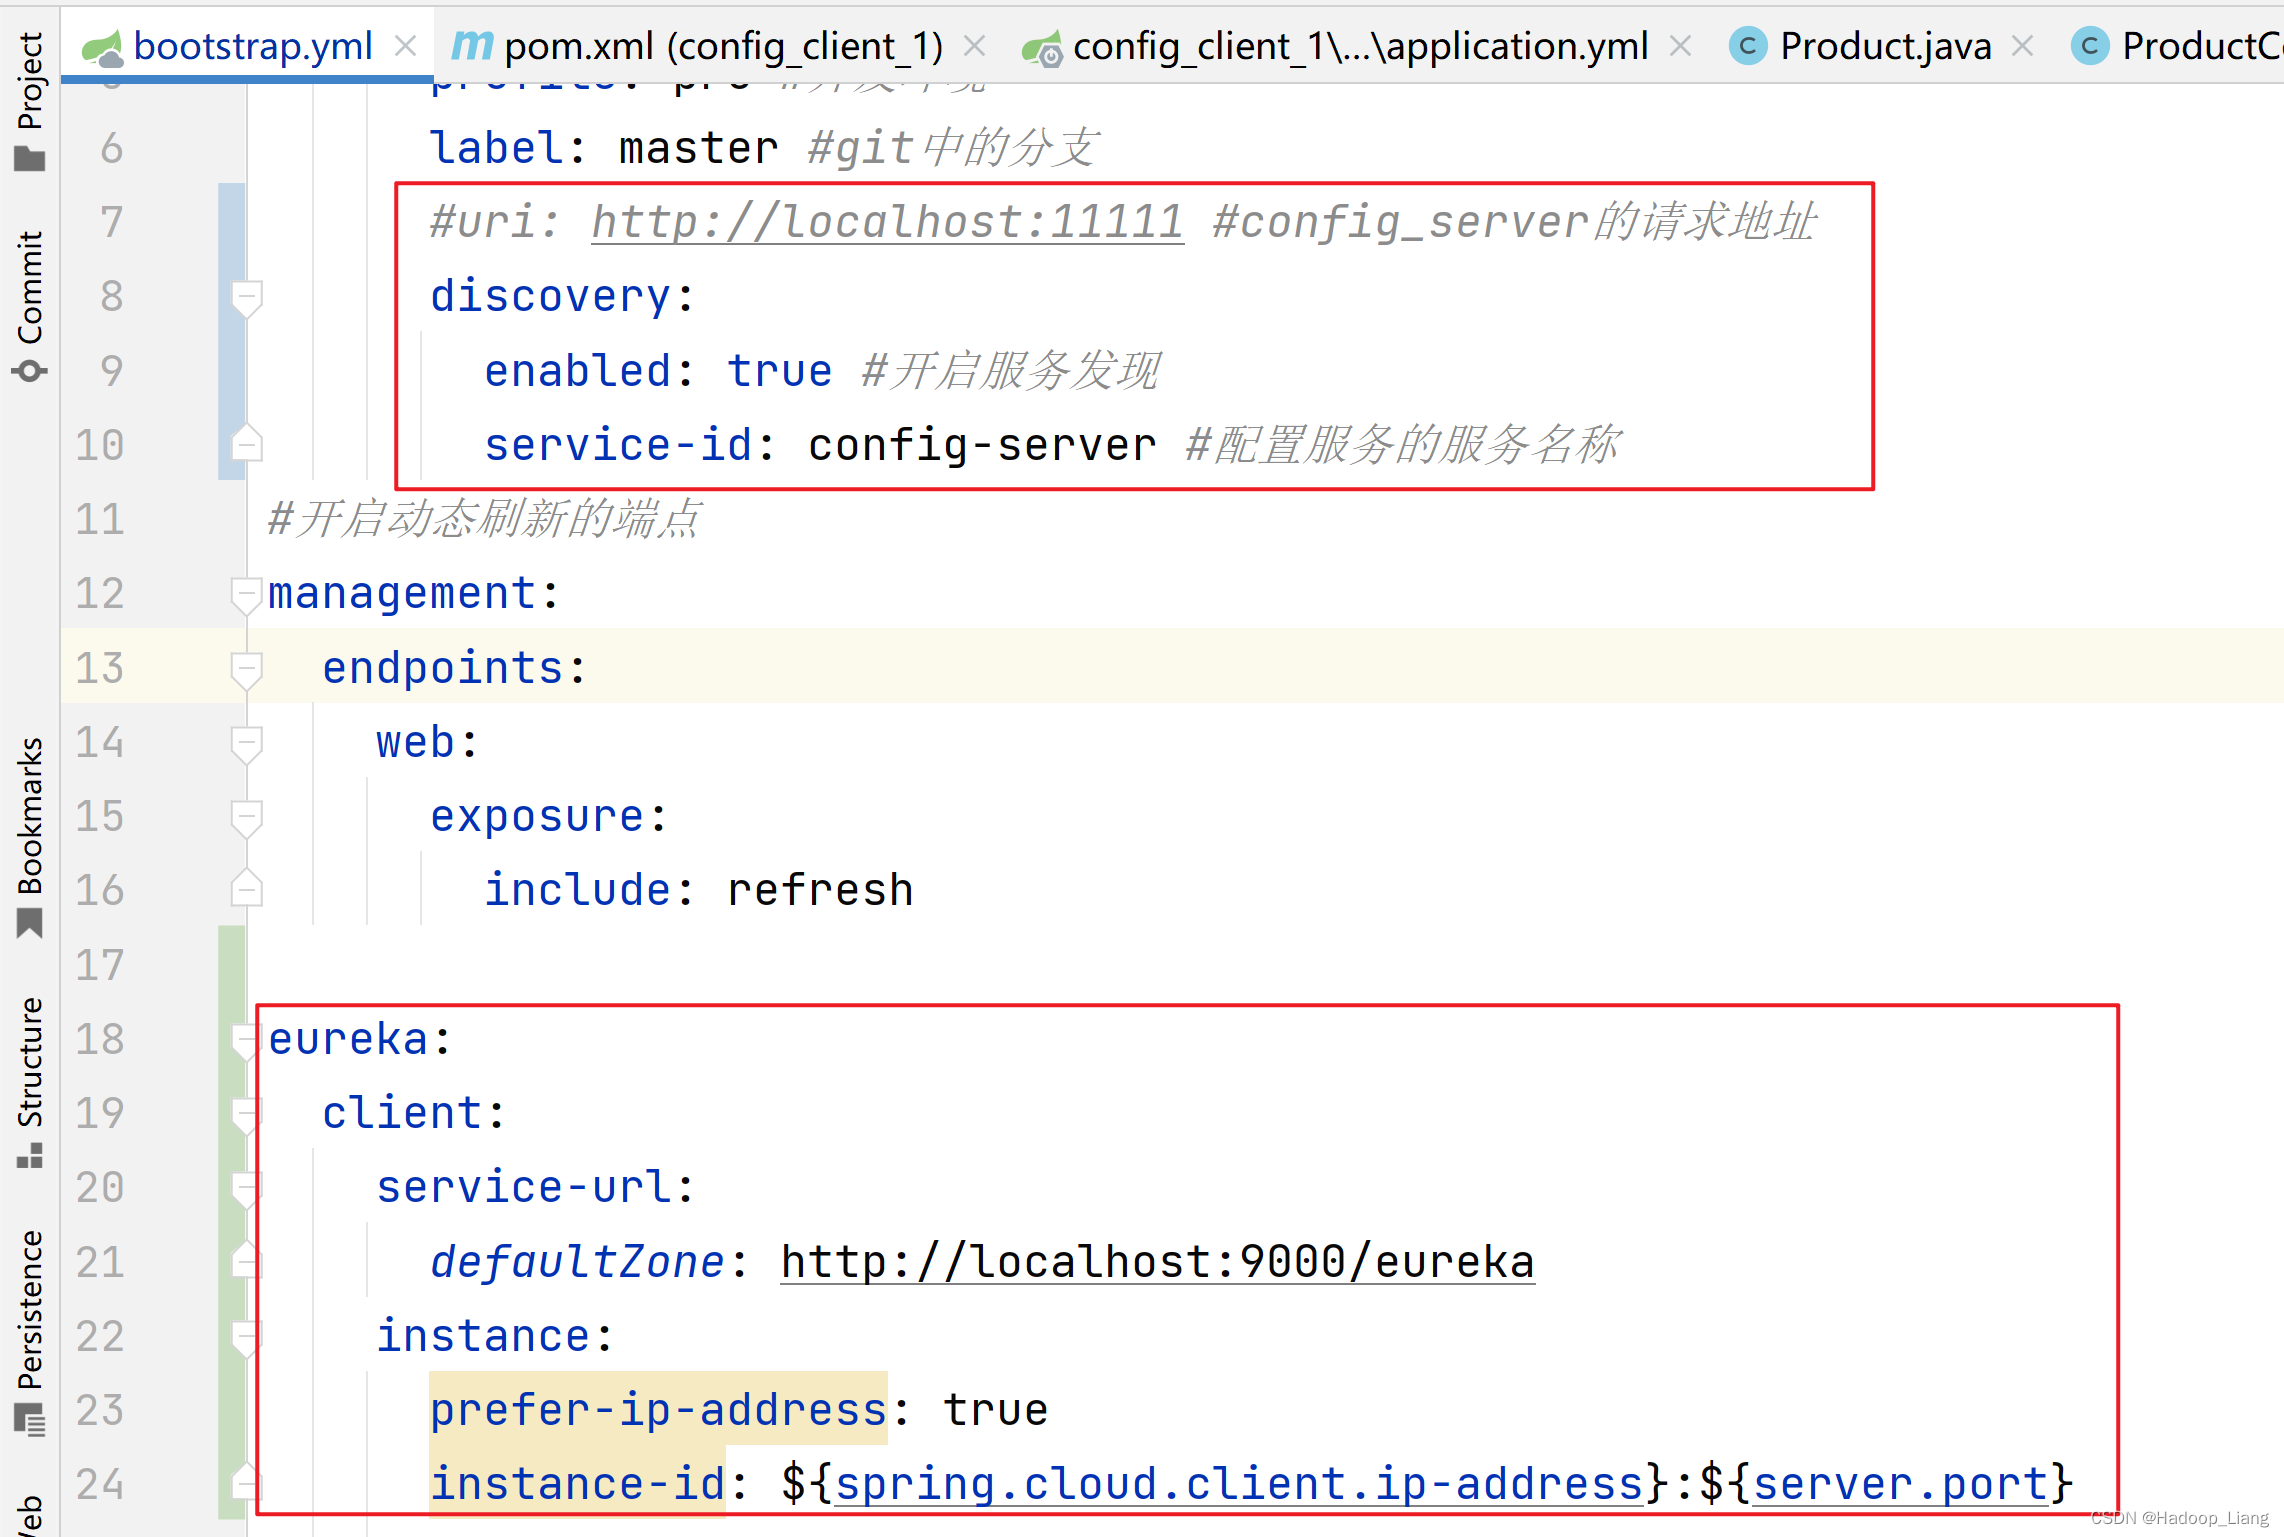
spring:
  cloud:
    config:
      name: application #应用名称对应git配置文件的前半部分,例如:application-dev.yml,这里就写application
      profile: pro #开发环境
      label: master #git中的分支
      #uri: http://localhost:11111 #config_server的请求地址
      discovery:
        enabled: true #开启服务发现
        service-id: config-server #配置服务的服务名称
#开启动态刷新的端点
management:
  endpoints:
    web:
      exposure:
        include: refresh

eureka:
  client:
    service-url:
      defaultZone: http://localhost:9000/eureka
    instance:
      prefer-ip-address: true
instance-id: ${spring.cloud.client.ip-address}:${server.port}重启config_client_1服务
访问
http://localhost:9101/config-client/product/get
响应
{“id”:null,”productName”:”product-pro2″,”status“:null,”price”:null,”productDesc“:null,”caption”:null,”inventory”:null}
能正常拿到数据,说明配置正常
高可用测试

再次访问

总结:
消息总线刷新配置
此前,通过发起Post请求手动刷新配置,服务接口很多时,就需要发起很多次Post请求,显得很麻烦。

配置中心–服务端
config_server服务
添加依赖
		<!--消息总线依赖-->
        <dependency>
            <groupId>org.springframework.cloud</groupId>
            <artifactId>spring-cloud-starter-bus-amqp</artifactId>
        </dependency>
		<dependency>
            <groupId>org.springframework.cloud</groupId>
            <artifactId>spring-cloud-starter-stream-rabbit</artifactId>
        </dependency>
刷新依赖
配置application.yml
配置Spring Cloud Bus的RabbitMQ连接信息,启用Spring Cloud Bus(spring.cloud.bus.enabled=true默认已启动),同时暴露动态刷新的端点。
server:
  port: 11112
spring:
  application:
    name: config-server
  cloud:
    config:
      server:
        git:
          uri: https://gitee.com/liang_123456/config-repo.git
          default-label: master
#    bus:
#      enabled: true
  rabbitmq:
    host: 127.0.0.1
    port: 5672
    username: guest
    password: guest

#开启动态刷新的端点
management:
  endpoints:
    bus-refresh:
      enabled: true
    web:
      exposure:
        include: bus-refresh

eureka:
  client:
    service-url:
      defaultZone: http://localhost:9000/eureka
    instance:
      prefer-ip-address: true
      instance-id: ${spring.cloud.client.ip-address}:${server.port}
注意:开启动态刷新端点的management要顶格写
配置中心–客户端
spring-client_1服务
和config_server一样,添加依赖,如果已经存在就不用再添加
		<!--消息总线依赖-->
        <dependency>
            <groupId>org.springframework.cloud</groupId>
            <artifactId>spring-cloud-starter-bus-amqp</artifactId>
        </dependency>
		<dependency>
            <groupId>org.springframework.cloud</groupId>
            <artifactId>spring-cloud-starter-stream-rabbit</artifactId>
        </dependency>
刷新依赖
配置rabbitmq信息,因为是配置中心,所以在git远端仓库的配置文件配置即可,查看远端git配置文件,已经配置,如下

重启eureka、config_server和spring-client_1服务
访问
http://localhost:9101/config-client/product/get
响应
{“id”:null,”productName”:”product-pro2″,”status“:null,”price”:null,”productDesc“:null,”caption”:null,”inventory”:null}
修改git远端配置
访问
http://localhost:9101/config-client/product/get
响应
{“id”:null,”productName”:”product-pro2″,”status“:null,”price”:null,”productDesc“:null,”caption”:null,”inventory”:null}
发起Post请求, 刷新服务端配置
注意:新版本发起post请求路径要改为busrefresh,而不是bus-refresh

访问
http://localhost:9101/config-client/product/get
响应
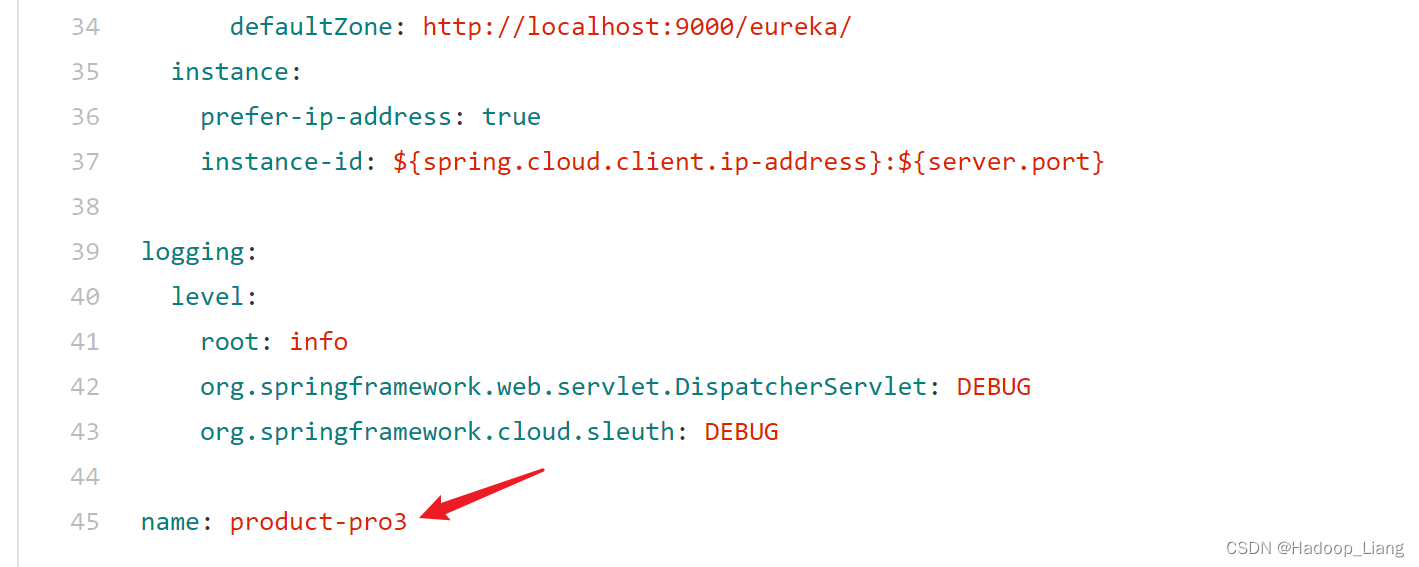
{“id”:null,”productName”:”product-pro3″,”status“:null,”price”:null,”productDesc“:null,”caption”:null,”inventory”:null}
响应的数据也是product-pro3,说明使用消息总线方式刷新配置成功。
完成!enjoy it!
原文地址:https://blog.csdn.net/qq_42881421/article/details/134431605
本文来自互联网用户投稿,该文观点仅代表作者本人,不代表本站立场。本站仅提供信息存储空间服务,不拥有所有权,不承担相关法律责任。
如若转载,请注明出处:http://www.7code.cn/show_45772.html
如若内容造成侵权/违法违规/事实不符,请联系代码007邮箱:suwngjj01@126.com进行投诉反馈,一经查实,立即删除!