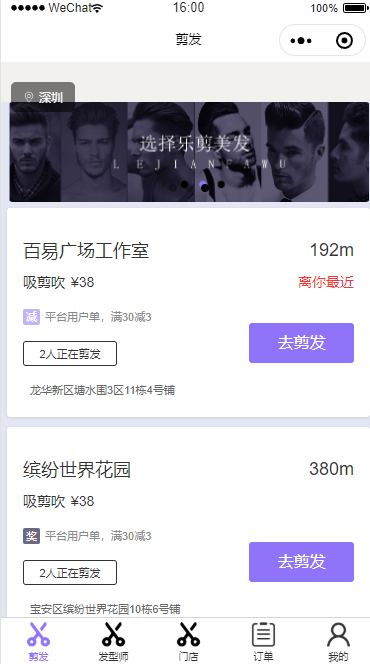
本文介绍: 实现一个顶部的全局消息通知,并且可以常驻,除非手动关闭。效果图如下收到告警通知 弹窗从顶部向下弹出,可点击跳转到对应页面,可上滑关闭弹窗,弹窗出现期间不能阻塞其他操作(切换页面、点击其他按钮…)…
uni–app 全局消息通知弹窗(App端)
实现效果


收到告警通知 弹窗从顶部向下弹出,可点击跳转到对应页面,可上滑关闭弹窗,弹窗出现期间不能阻塞其他操作(切换页面、点击其他按钮…)…
实现
思索与翻找文档良久,未得容易的实现方式,转而向 HTML5+ 寻求解答,得一解决方案,遂记之,以留痕迹便与他人。
plus.nativeObj.View 原生控件对象
原生控件对象可用于在屏幕上绘制图片或文本内容,后显示的覆盖先显示的; 调用Webview窗口对象的append方法添加到Webview中,显示在父窗口所有子Webview的上面;不添加到Webview窗口对象,显示在所有Webview的上面。
注意事项
不过可以用图片替代。
代码展示
const { statusBarHeight } = uni.getSystemInfoSync();
class NativeMsg {
	// 整个区域的宽高
	viewStyle = {
		backgroundColor: "rgba(255,255,255,0)",
		top: "0px",
		left: "0px",
		width: "100%",
		// 取图片的高度(带阴影的尺寸)
		height: `${uni.upx2px(239)}px`
	};
	constructor(item, cb) {
		// 记录内容信息,以供回调使用
		this.item = item;
		// 弹出、消失动画要用
		this.offsetTop = -statusBarHeight - uni.upx2px(159);
		// 上边界
		this.startTop = -statusBarHeight - uni.upx2px(159);
		// 下边界
		this.endTop = statusBarHeight;
		// 上滑关闭要用
		this.clientY = 0;
		// nativeObj.View 实例
		this.view = null;
		// 背景图片
		this.bgBitmap = null;
		// 回调函数
		this.cb = cb || null;
		// 隐藏过程flag,防止重复执行
		this.hiding = false;
		// 标记当前弹窗状态
		this.status = "active";
		this.create();
	}
	// 创建区域以及背景
	create() {
		this.loadBg().then(() => {
			let _view = null;
			// 创建 View区域
			_view = new plus.nativeObj.View(`alarmMsg-${this.item.alarmId || "ins"}`, this.viewStyle);
			// 画背景
			_view.drawBitmap(
				this.bitmap,
				{},
				{ width: this.viewStyle.width, height: this.viewStyle.height, left: 0, top: 0 },
				"alarm-bg"
			);
			// 拦截触摸事件: 开启后 区域内的触摸事件不会透传到下面
			_view.interceptTouchEvent(true);
			// 增加点击事件监听
			_view.addEventListener("click", () => {
				if (this.hiding) return;
				this.hiding = true;
				this.cb && this.cb({ type: "click", result: this.item });
				this.animationHide();
			});
			// 触摸事件监听
			_view.addEventListener("touchstart", res => {
				this.clientY = res.clientY;
			});
			// 触摸事件监听
			_view.addEventListener("touchmove", res => {
				const { clientY } = res;
				let offsetY = this.clientY - clientY;
				if (offsetY > 25 && !this.hiding) {
					this.hiding = true;
					this.cb && this.cb({ type: "move", result: this.item });
					this.animationHide();
				}
			});
			// 保存
			this.view = _view;
			// 画内容
			this.drawInfo();
			// 显示
			this.animationShow();
		});
	}
	// 加载背景图片
	loadBg() {
		// 创建Bitmap图片
		this.bitmap = new plus.nativeObj.Bitmap("nativeMsg-bg");
		// 以Promise方式封装 图片加载过程
		return new Promise((resolve, reject) => {
			// 加载图片, 路径需要注意
			this.bitmap.load(
				"_www/static/tpt/alarm-bg.png",
				() => {
					resolve();
				},
				error => {
					console.log(" ====> error", error);
					reject();
				}
			);
		});
	}
	// 画内容
	drawInfo() {
		const { warningTypeStr, projectName, description } = this.item;
		this.view.draw([
			{
				tag: "font",
				id: "mainFont",
				text: warningTypeStr,
				textStyles: { size: `${uni.upx2px(36)}px`, color: "#262626", weight: "bold", align: "left" },
				position: { top: `${uni.upx2px(60)}px`, left: `${uni.upx2px(80)}px`, height: "wrap_content" }
			},
			{
				tag: "font",
				id: "projectFont",
				text: projectName,
				textStyles: { size: `${uni.upx2px(24)}px`, color: "#7B7B7B", align: "right", overflow: "ellipsis" },
				position: {
					top: `${uni.upx2px(60)}px`,
					left: `50%`,
					width: `${uni.upx2px(750 / 2 - 40 - 20)}px`,
					height: "wrap_content"
				}
			},
			{
				tag: "font",
				id: "infoFont",
				text: description,
				textStyles: { size: `${uni.upx2px(28)}px`, color: "#7B7B7B", align: "left", overflow: "ellipsis" },
				position: {
					top: `${uni.upx2px(117)}px`,
					left: `${uni.upx2px(80)}px`,
					width: `${uni.upx2px(670 - 40 - 10)}px`,
					height: "wrap_content"
				}
			}
		]);
	}
	// 简易向下出现动画
	animationShow() {
		this.view.show();
		this.view.setStyle({
			...this.viewStyle,
			top: `${this.offsetTop++}px`
		});
		if (this.offsetTop >= this.endTop) {
			this.status = "active";
			return;
		}
		setTimeout(() => {
			this.animationShow();
		}, 0);
	}
	// 简易向上消失动画
	animationHide() {
		this.view.setStyle({
			...this.viewStyle,
			top: `${this.offsetTop--}px`
		});
		if (this.offsetTop <= this.startTop) {
			this.view.close();
			this.hiding = false;
			this.status = "close";
			return;
		}
		setTimeout(() => {
			this.animationHide();
		}, 0);
	}
	// 获取当前状态
	getStatus() {
		return this.status;
	}
	// 不用动画,直接消失
	hide() {
		this.view.hide();
		this.view.close();
	}
}

// 对外暴露一个创建实例的方法
export function createAlarm(item, cb) {
	return new NativeMsg(item, cb);
}
createAlarm 方法创建并返回一个 NativeMsg 的实例。
- 生成Bitmap背景图片对象 ,并加载。 方法:
loadBg(异步) - 在加载完成背景图片的回调里面创建弹窗区域以及把背景图画上去方法:
create - 区域和背景画好之后根据传递来的
item画内容,以及绑定点击click事件和滑动touch事件。 - 根据UI设计把内容话上去
drawInfo - 以动画的方式显示弹窗
animationShow
使用
import { createAlarm } from "@/utils/nativeMsg";
// ...
// 接收到消息
function onReceived(data) {
		// #ifdef APP-PLUS
		// 调用
			showAlarmMsg(message);
		// #endif
}

// 定义一个全局变量保存 NativeMsg 实例
let alarmMsgInstance = null;
function showAlarmMsg(msg) {
	console.log(" ====> msg", msg);
	// #ifdef APP-PLUS
  //	业务需求只保留一个弹窗, 当存在的时候要干掉
	if (alarmMsgInstance && alarmMsgInstance.getStatus() === "active") {
		let _oldIns = alarmMsgInstance;
		alarmMsgInstance = null;
  //延迟300 等新的弹窗出来后再消失,视觉上比较好看
		setTimeout(() => {
			_oldIns.hide();
		}, 300);
	}
	// 创建一个新的弹窗(新的会覆盖在旧的上面)
	alarmMsgInstance = createAlarm(item, res => {
		// 这里是点击或者滑动的回调 点击type是‘click’,滑动是‘move’
    // result 是传递过去的msg,原封不动的返回过来了。
		const { type, result } = res;
		if (type === "move") return;
		uni.navigateTo({
			url: `/pages/xxxxxx?id=${result.id}`
		});
	});
	// #endif
	// #ifndef APP-PLUS
	console.log(" ====> 收到消息", msg);
	// #endif
}
为什么不做成单例模式?
一开始是打算弄成单例模式,之后发现第二条消息来的时候动画效果不太满意,所以改成现在这种可以创建多个,等第二个出来之后在把底下那个干掉。
SubNvues原生子窗体?
真机效果
2023年5月17日
特意做了个demo gitHub传送门
原文地址:https://blog.csdn.net/weixin_39182097/article/details/129890011
本文来自互联网用户投稿,该文观点仅代表作者本人,不代表本站立场。本站仅提供信息存储空间服务,不拥有所有权,不承担相关法律责任。
如若转载,请注明出处:http://www.7code.cn/show_48586.html
如若内容造成侵权/违法违规/事实不符,请联系代码007邮箱:suwngjj01@126.com进行投诉反馈,一经查实,立即删除!
主题授权提示:请在后台主题设置-主题授权-激活主题的正版授权,授权购买:RiTheme官网
声明:本站所有文章,如无特殊说明或标注,均为本站原创发布。任何个人或组织,在未征得本站同意时,禁止复制、盗用、采集、发布本站内容到任何网站、书籍等各类媒体平台。如若本站内容侵犯了原著者的合法权益,可联系我们进行处理。


