【Linux 环境】安装配置Nginx
前言
又有段时间没有写文章了,奇奇怪怪的知识又增加了不少。今天我们来安装配置一下Nginx。之前也装过很多次了,但是没有做一个记录,刚好这两天需要nginx反向代理一个websocket请求,借此机会记录一下。
一、Nginx是什么?
Nginx是轻量级的HTTP服务器,可以实现反向代理和负载均衡。最初是由俄罗斯人 Igor Sysoev 开发的。Nginx 的第一个版本发布于 2004 年,其源代码基于双条款 BSD 许可证发布,因其系统资源消耗低、运行稳定且具有高性能的并发处理能力等特性,Nginx 在互联网企业中得到广泛应用,有很多网关比如K8S里的ingress,或者kong都是基于Nginx实现的,总的来说还是非常方便好用的。
二、使用Nginx
1.安装nginx
2.配置Nginx
主要是如何配置Nginx ,这里要实现的是把来自 http://localhost:8880 的请求代理到 http://test.com:9090,下面是我的配置过程,各位可以酌情参考
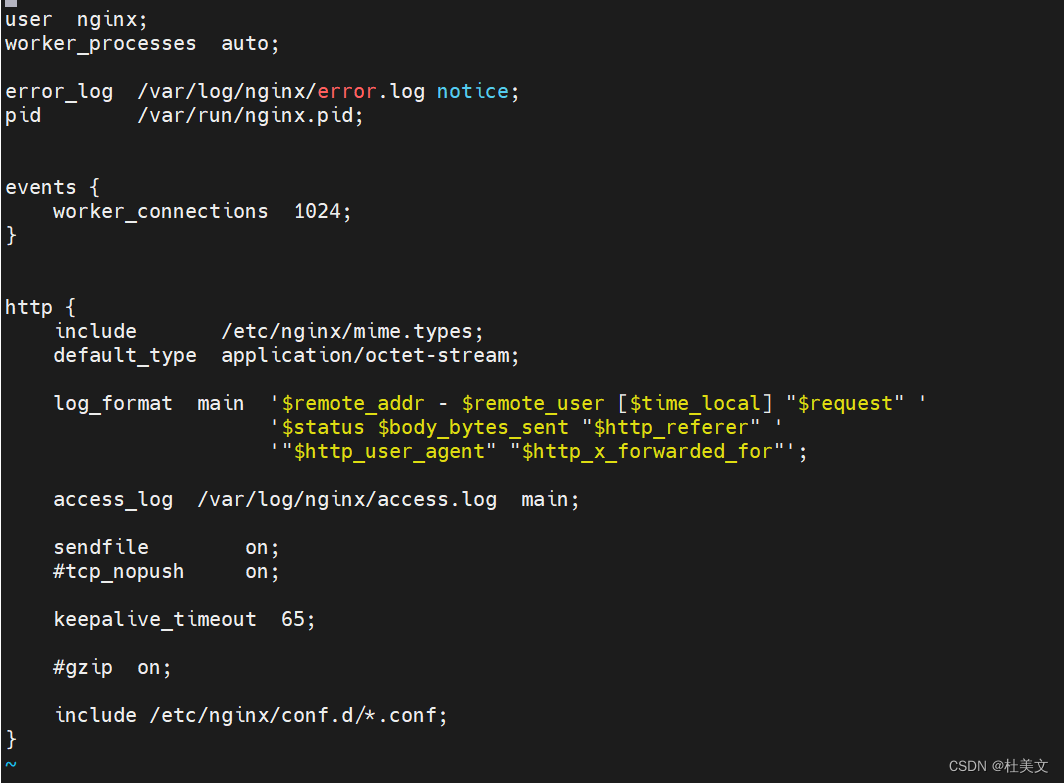
默认的nginx配置如下
在#gzip on,后面添加server代理,内容如下:
3.配置websocket
4.配置负载均衡
总结
声明:本站所有文章,如无特殊说明或标注,均为本站原创发布。任何个人或组织,在未征得本站同意时,禁止复制、盗用、采集、发布本站内容到任何网站、书籍等各类媒体平台。如若本站内容侵犯了原著者的合法权益,可联系我们进行处理。