一.知识回顾
【0.SpringBoot专栏的相关文章都在这里哟,后续更多的文章内容可以点击查看】
【1.SpringBoot初识之Spring注解发展流程以及常用的Spring和SpringBoot注解】
【2.SpringBoot自动装配之SPI机制&SPI案例实操学习&SPI机制核心源码学习】
【3.详细学习SpringBoot自动装配原理分析之核心流程初解析-1】
【4.详细学习SpringBoot自动装配原理之自定义手写Starter案例实操实战-2】
【5.IDEA中集成SpringBoot源码环境详细步骤讲解】
【6.初识SpringBoot核心源码之SpringApplication构造器以及run方法主线流程-3】
【7.详细学习SpringBoot核心源码之SpringApplication构造器&Run方法源码详细流程-4】
【8.详细学习SpringBoot核心源码之监听器原理-5(观察者设计模式、初始化并加载监听器核心流程、事件的发布器核心流程、SpringBoot中默认的监听器以及默认的事件类型)】
【9.详细学习SpringBoot源码之自定义监听器实战演练-6(自定义监听器、自定义监听事件、指定监听事件)】
二.SpringBoot源码之属性文件加载原理(application.properties|application.yaml)
2.1 属性配置文件加载原理分析
在创建SpringBoot项目的时候会在对应的application.properties或者application.yml文件中添加对应的属性信息,我们的问题是这些属性文件是什么时候被加载的?如果要实现自定义的属性文件怎么来实现呢?
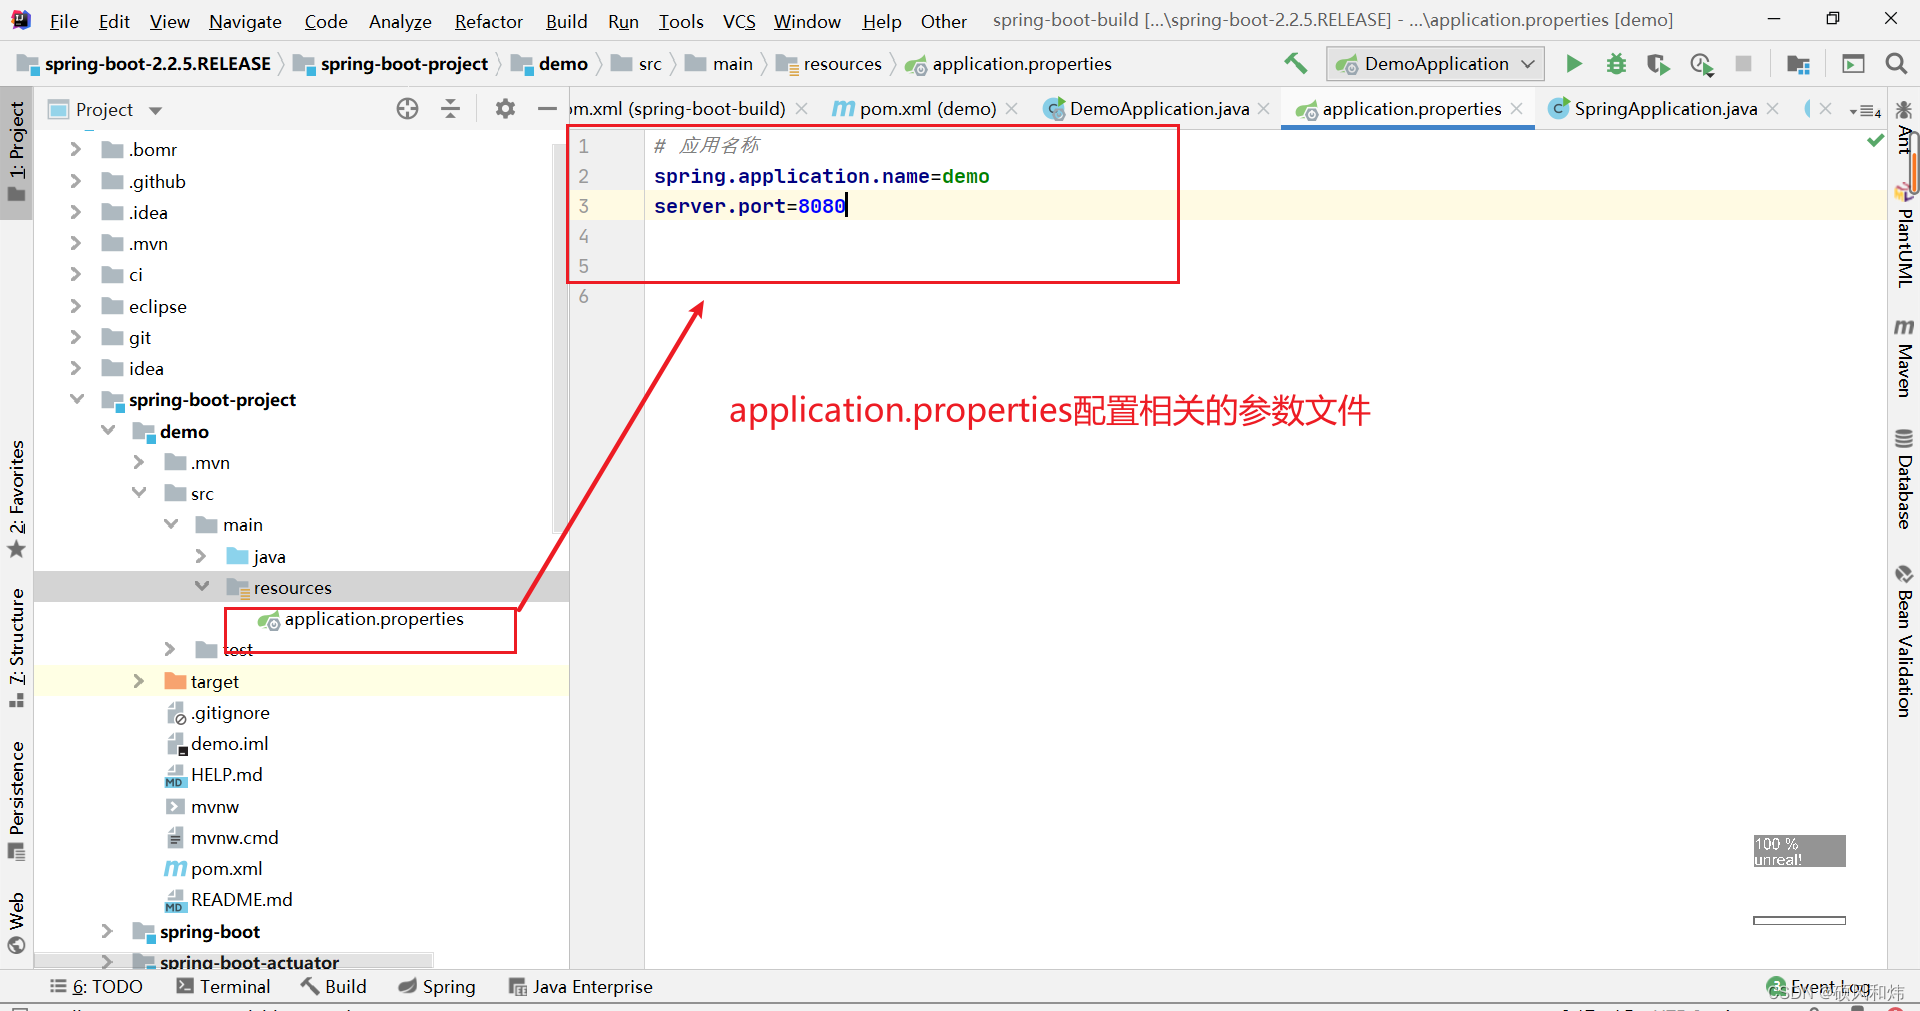
2.2 属性配置文件加载原理分析入口
结合我们前面介绍的SpringBoot中的监听事件机制,我们首先看下SpringApplication.run()方法,在该方法中会针对SpringBoot项目启动的不同的阶段来发布对应的事件。
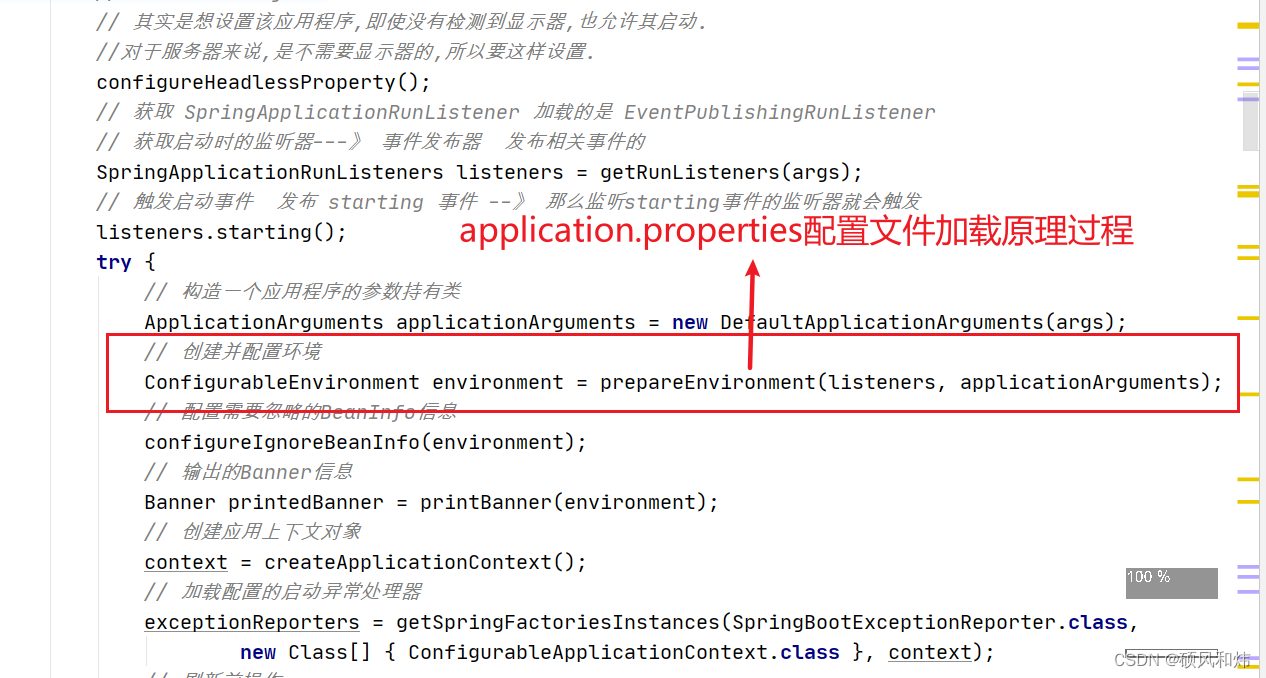
application.properties配置文件加载的过程代码如下:
private ConfigurableEnvironment prepareEnvironment(SpringApplicationRunListeners listeners,
			ApplicationArguments applicationArguments) {
		// Create and configure the environment
		ConfigurableEnvironment environment = getOrCreateEnvironment();
		configureEnvironment(environment, applicationArguments.getSourceArgs());
		ConfigurationPropertySources.attach(environment);
		// 在配置环境信息之前发布事件
		listeners.environmentPrepared(environment);
		bindToSpringApplication(environment);
		if (!this.isCustomEnvironment) {
			environment = new EnvironmentConverter(getClassLoader()).convertEnvironmentIfNecessary(environment,
					deduceEnvironmentClass());
		}
		ConfigurationPropertySources.attach(environment);
		return environment;
	}
处理属性文件加载解析的监听器是 ConfigFileApplicationListener ,这个监听器监听的事件有两个。
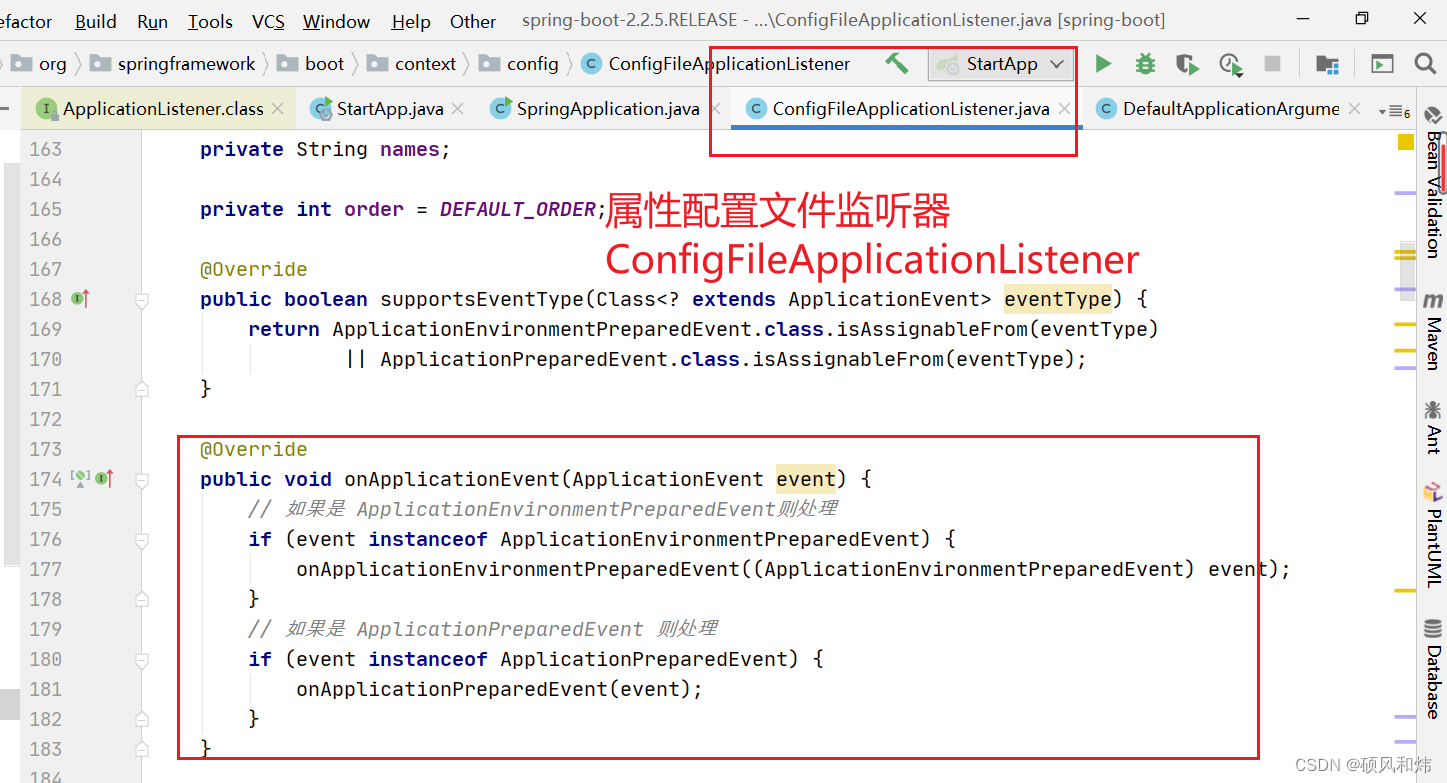
而我们进入SpringApplication.prepareEnvironment()方法中发布的事件其实就是ApplicationEnvironmentPreparedEvent事件。
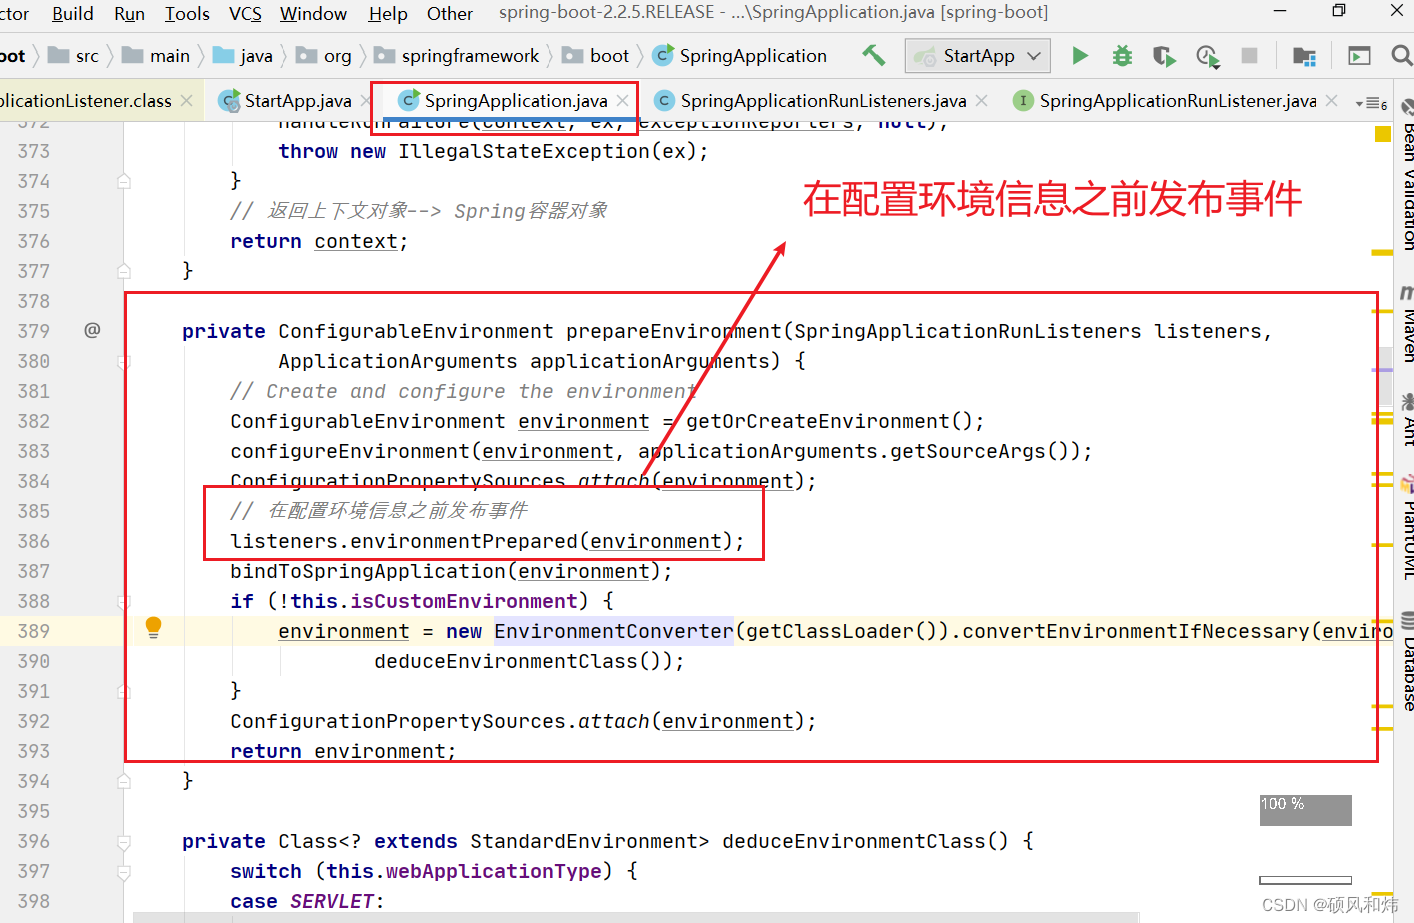
进入方法listeners.environmentPrepared(environment);
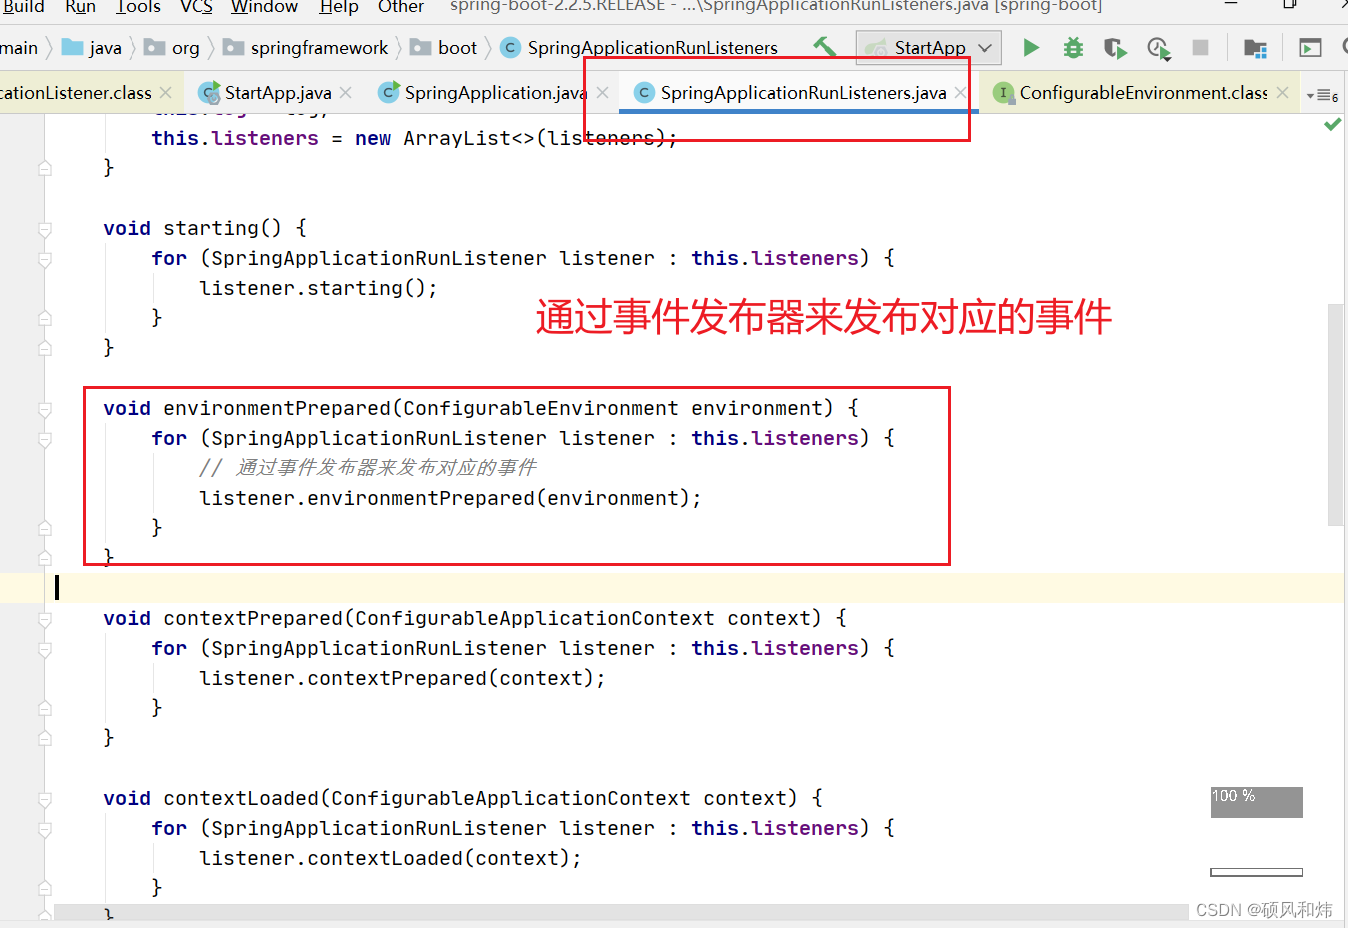
进入定义listener.environmentPrepared(environment);接口的方法
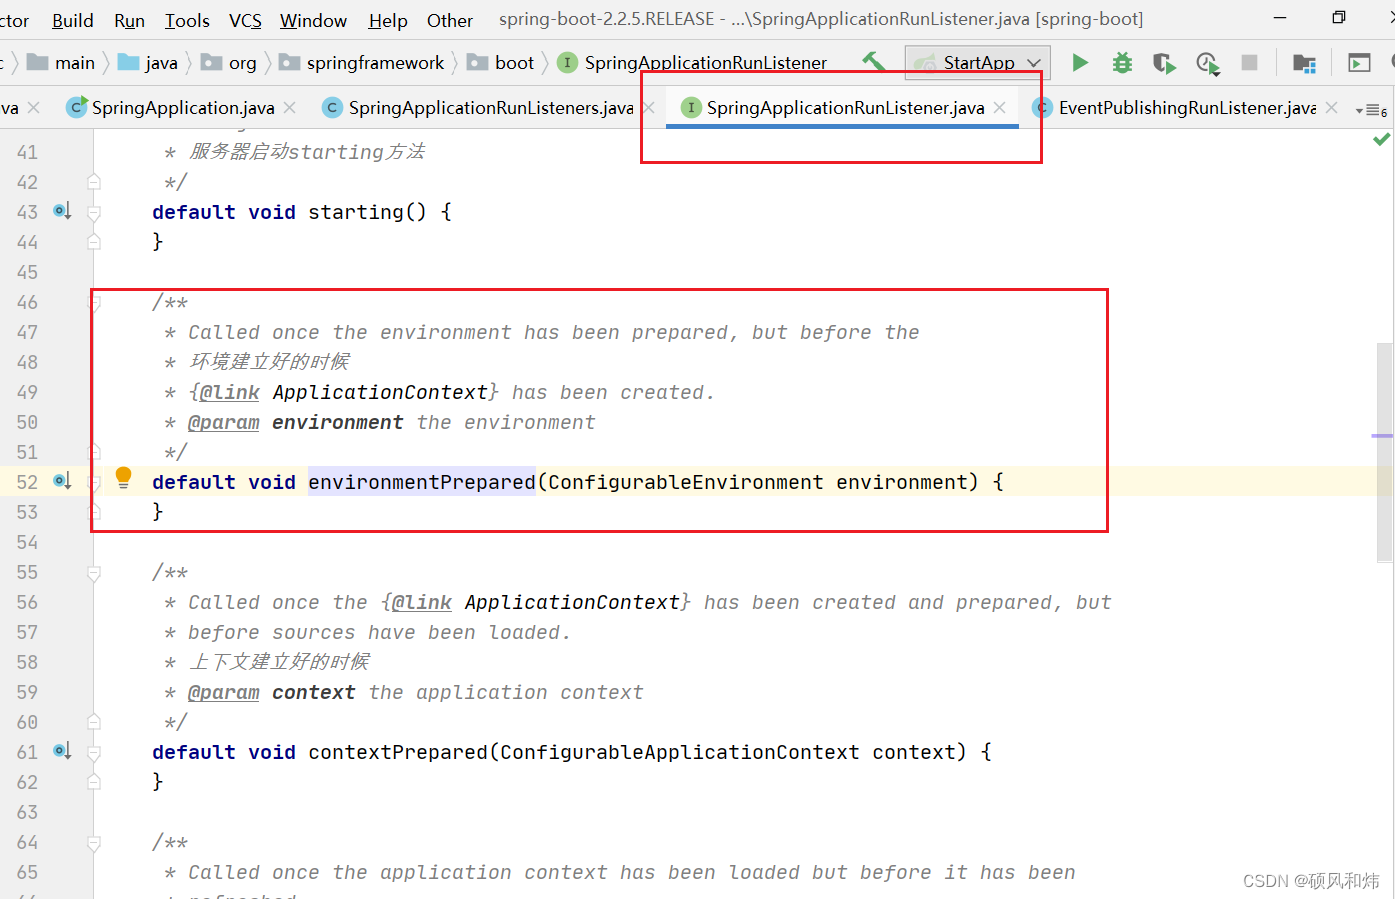
继续进入会看到对应的发布事件:ApplicationEnvironmentPreparedEvent

在此处打一个断点,通过debug运行结果:在initialMulticaster中是有ConfigFileApplicationListener这个监听器的。如果再这个位置触发了配置环境的监听器,后续的逻辑就应该进入对应的逻辑实现方法。

三.SpringBoot源码之属性配置文件监听器-ConfigFileApplicationListener监听流程分析
3.1 ConfigFileApplicationListener监听流程分析
ConfigFileApplicationListener中具体的如何来处理配置文件的加载解析的。
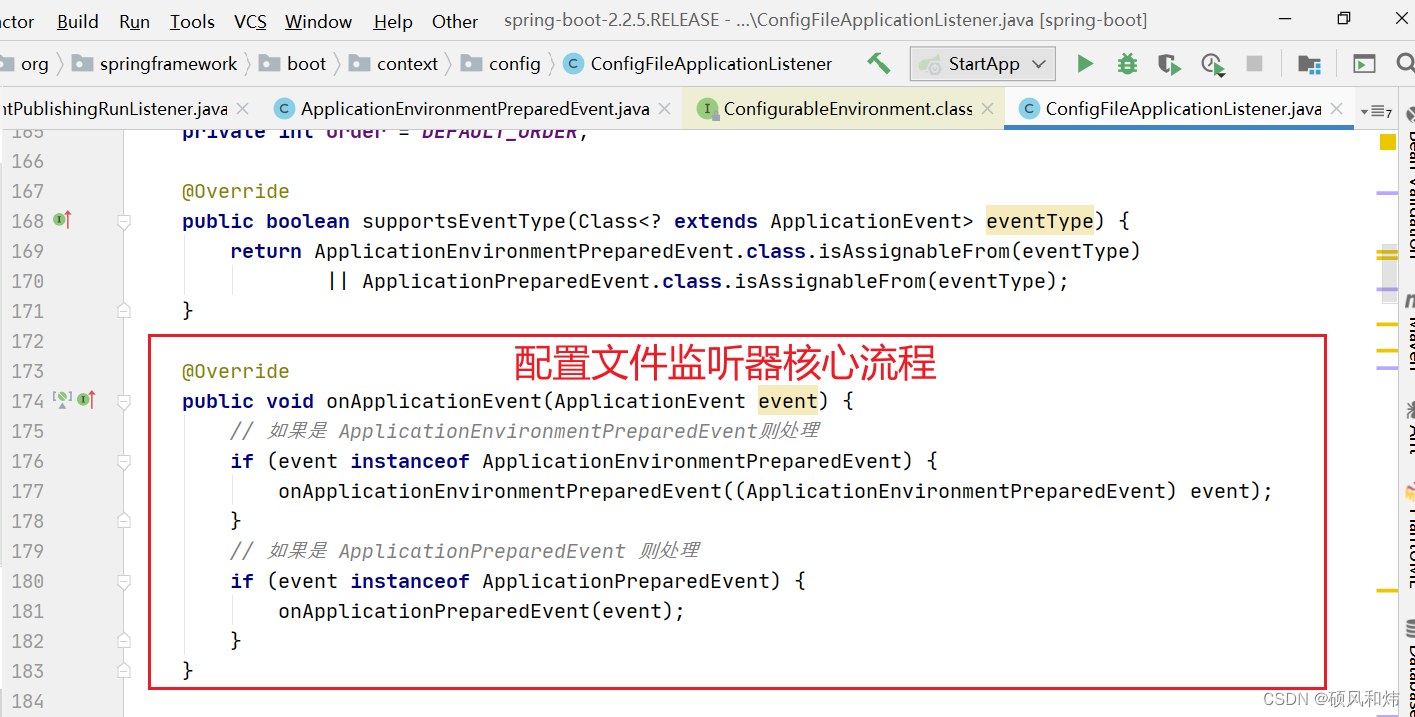
如果是 ApplicationEnvironmentPreparedEvent则进入onApplicationEnvironmentPreparedEvent((ApplicationEnvironmentPreparedEvent) event);方法
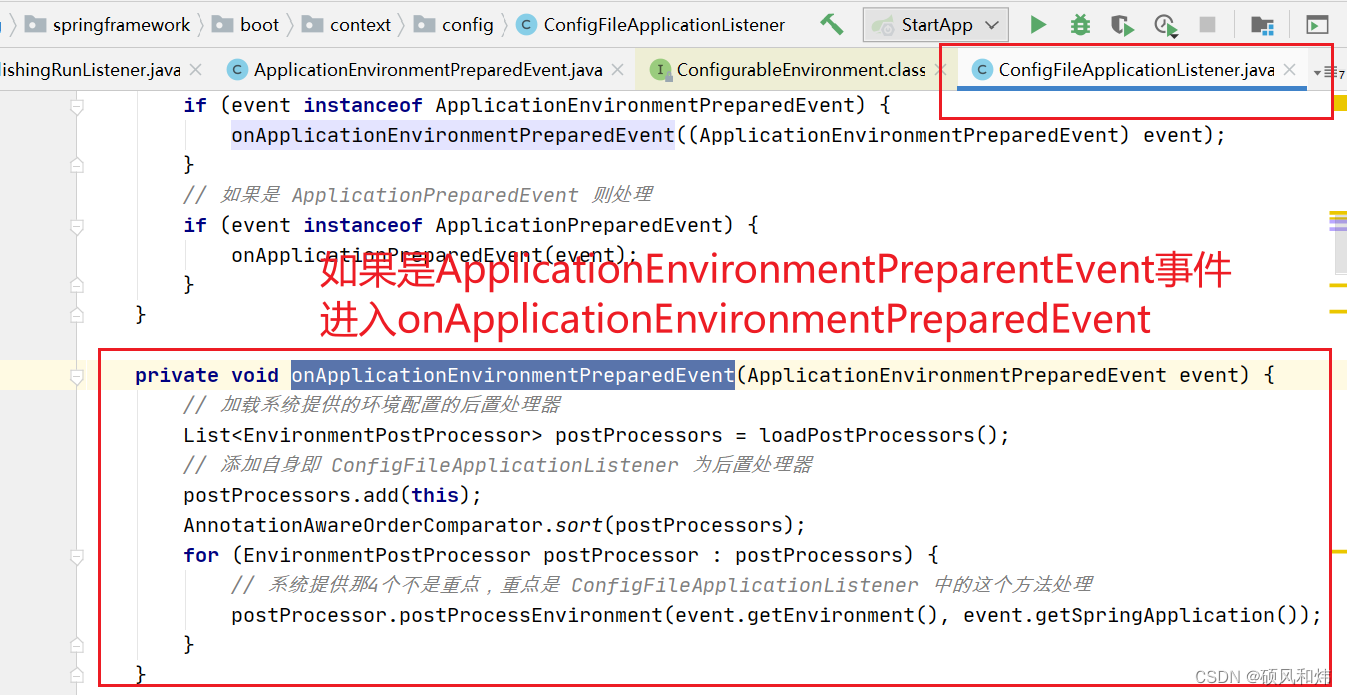
直接进入ConfigFileApplicationListener.postProcessEnvironment()方法。
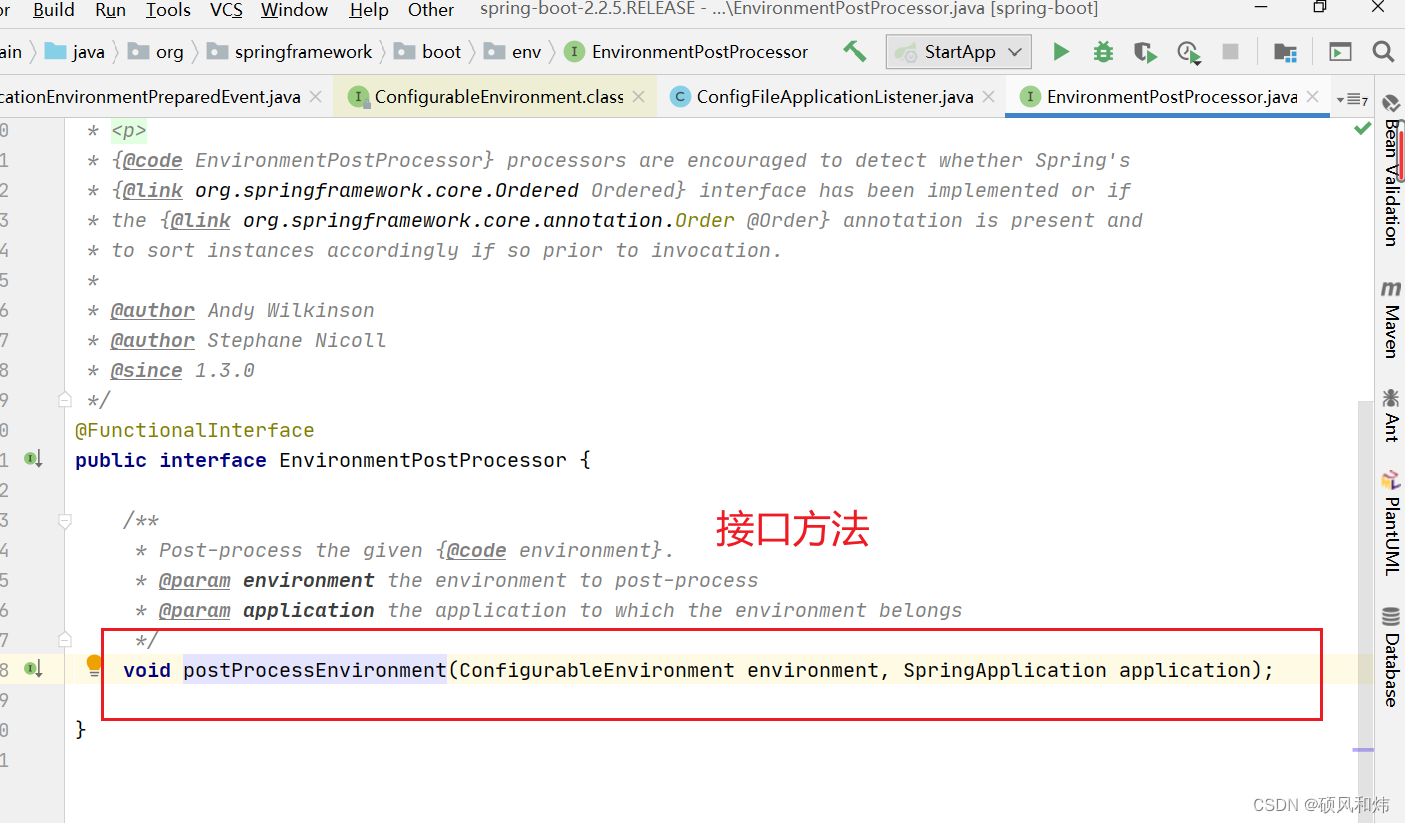
进入实现类重写的方法
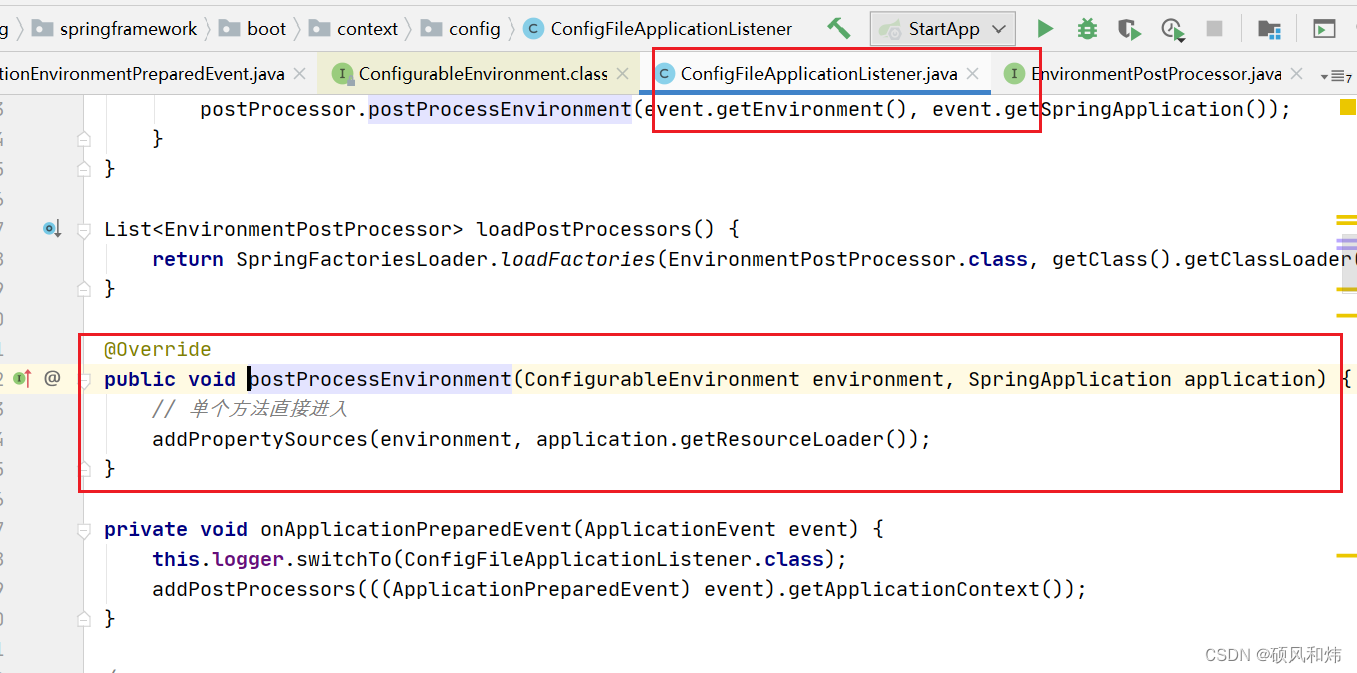
在进入addPropertySources()方法中会完成两个核心操作:
- 创建Loader对象
- 调用Loader对象的load方法
/**
	 * Add config file property sources to the specified environment.
	 * @param environment the environment to add source to
	 * @param resourceLoader the resource loader
	 * @see #addPostProcessors(ConfigurableApplicationContext)
	 */
	protected void addPropertySources(ConfigurableEnvironment environment, ResourceLoader resourceLoader) {
		RandomValuePropertySource.addToEnvironment(environment);
		// 创建Loader对象同时会完成属性加载器的加载 同时调用load方法
		new Loader(environment, resourceLoader).load();
	}
3.2 Loader构造器
在Loader构造器中执行了什么操作,最重要的就是加载解析配置文件。
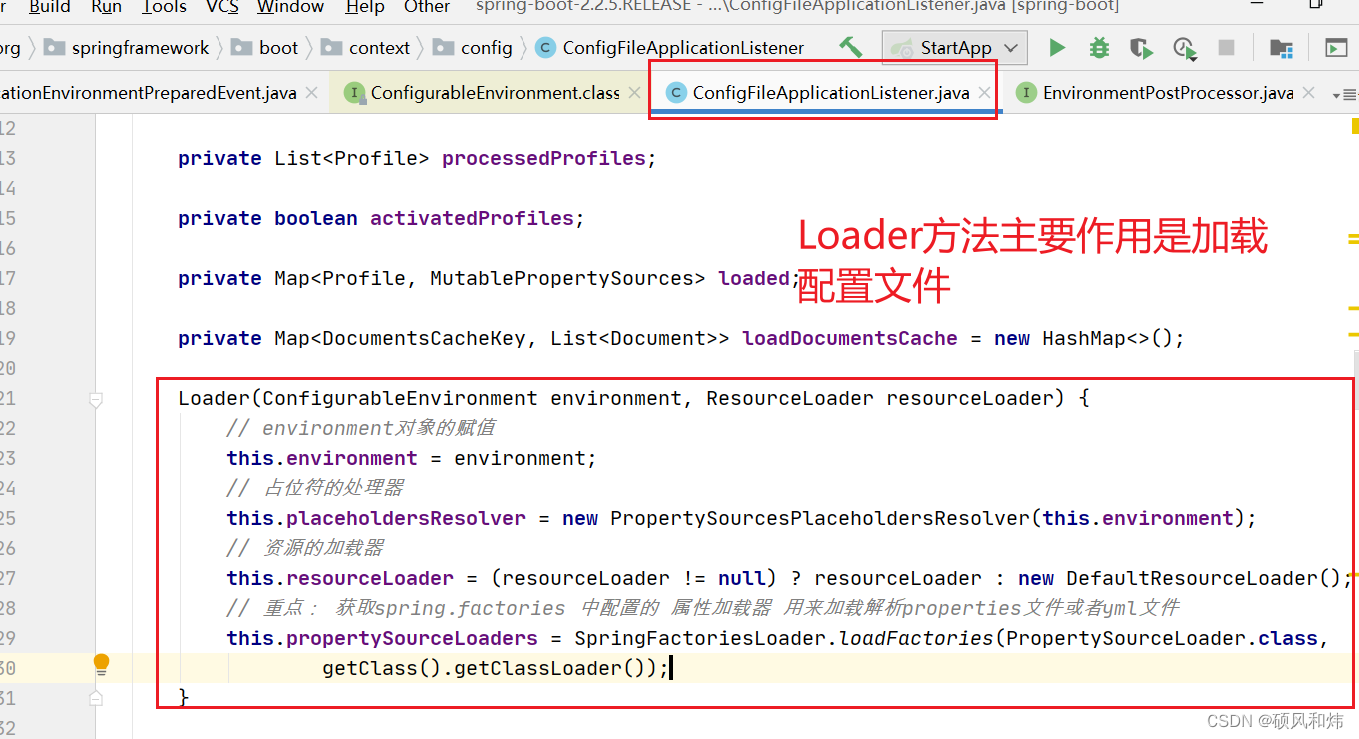
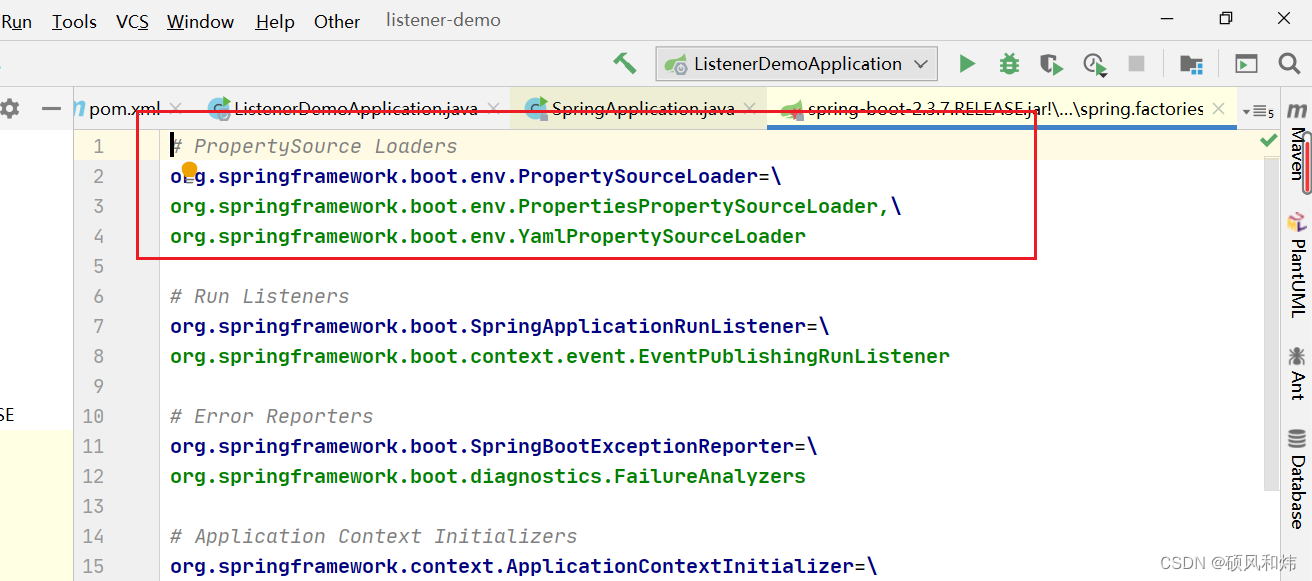
通过源码我们可以发现在其中获取到了属性文件的加载器、从spring.factories文件中获取,对应的类型是 PropertySourceLoader类型。
# PropertySource Loaders
org.springframework.boot.env.PropertySourceLoader=
# 加载Properties配置文件
org.springframework.boot.env.PropertiesPropertySourceLoader,
# 加载Yaml配置文件
org.springframework.boot.env.YamlPropertySourceLoader
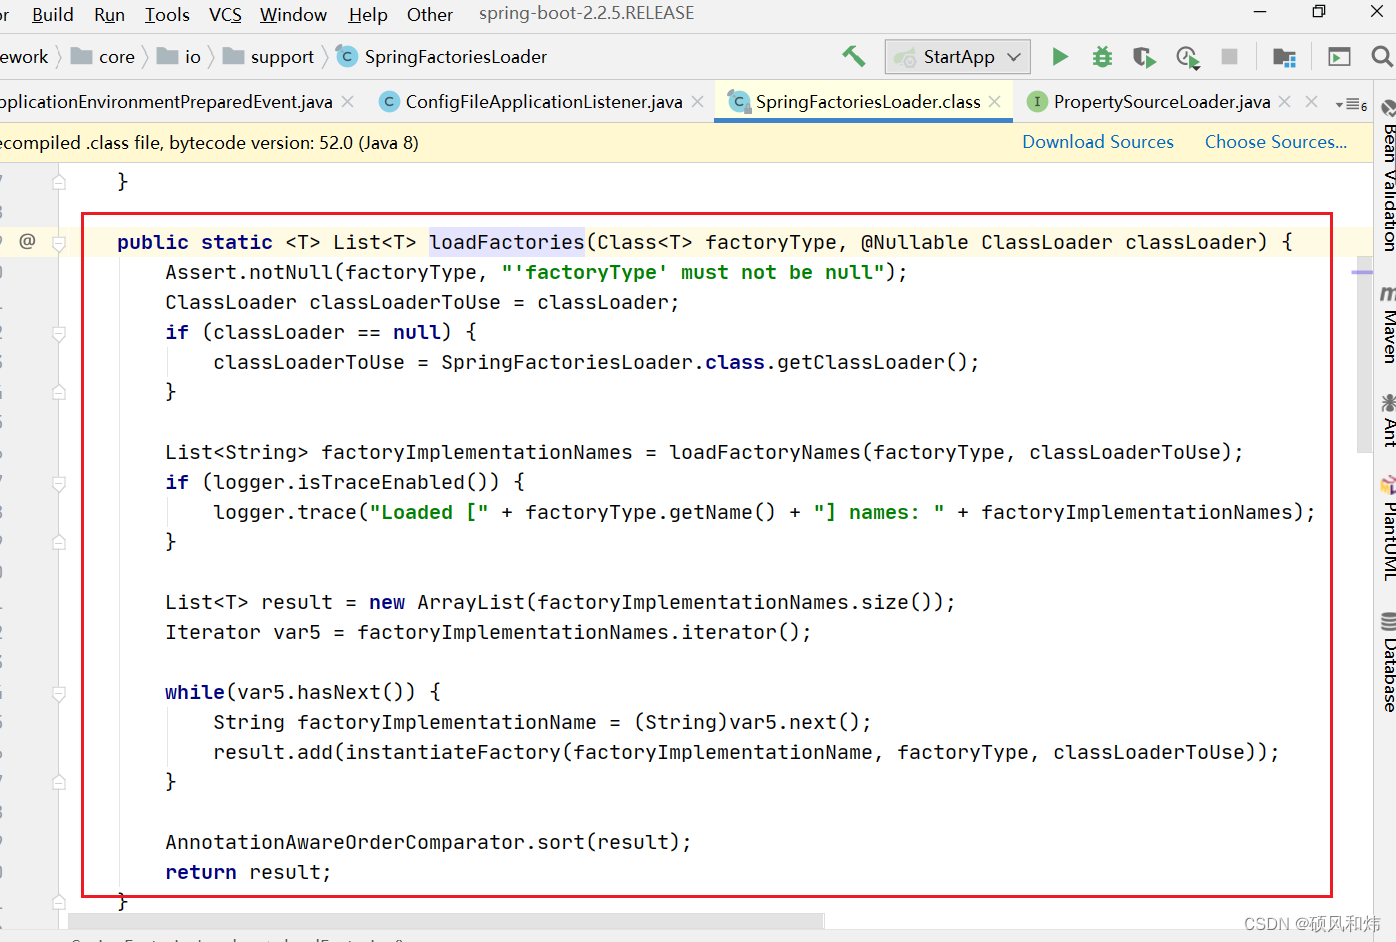
并在loadFactories方法中会完成对象的实例化。
3.3 调用Loader对象的load方法
接下来学习load()方法的执行
void load() {
			FilteredPropertySource.apply(this.environment, DEFAULT_PROPERTIES, LOAD_FILTERED_PROPERTY,
					(defaultProperties) -> {
						// 创建默认的profile 链表
						this.profiles = new LinkedList<>();
						// 创建已经处理过的profile 类别
						this.processedProfiles = new LinkedList<>();
						// 默认设置为未激活
						this.activatedProfiles = false;
						// 创建loaded对象
						this.loaded = new LinkedHashMap<>();
						// 加载配置 profile 的信息,默认为 default
						initializeProfiles();
						// 遍历 Profiles,并加载解析
						while (!this.profiles.isEmpty()) {
							// 从双向链表中获取一个profile对象
							Profile profile = this.profiles.poll();
							// 非默认的就加入,进去看源码即可清楚
							if (isDefaultProfile(profile)) {
								addProfileToEnvironment(profile.getName());
							}
							load(profile, this::getPositiveProfileFilter,
									addToLoaded(MutablePropertySources::addLast, false));
							this.processedProfiles.add(profile);
						}
						// 解析 profile
						load(null, this::getNegativeProfileFilter, addToLoaded(MutablePropertySources::addFirst, true));
						// 加载默认的属性文件 application.properties
						addLoadedPropertySources();
						applyActiveProfiles(defaultProperties);
					});
		}
然后进入具体的apply()方法
static void apply(ConfigurableEnvironment environment, String propertySourceName, Set<String> filteredProperties,
			Consumer<PropertySource<?>> operation) {
		// 获取当前环境下的所有的资源加载器
		MutablePropertySources propertySources = environment.getPropertySources();
		// 根据propertySourceName从众多的加载器中获取对应的加载器 默认的没有
		PropertySource<?> original = propertySources.get(propertySourceName);
		if (original == null) {
			operation.accept(null);
			return;
		}
		propertySources.replace(propertySourceName, new FilteredPropertySource(original, filteredProperties));
		try {
			operation.accept(original);
		}
		finally {
			propertySources.replace(propertySourceName, original);
		}
	}
退出来,再次学习load主方法流程,然后进入load(null, this::getNegativeProfileFilter, addToLoaded(MutablePropertySources::addFirst, true));
private void load(Profile profile, DocumentFilterFactory filterFactory, DocumentConsumer consumer) {
			// 获得默认的扫描路径,如果没有特殊指定 ,
			// 就采用常量 DEFAULT_ SEARCH_ LOCATIONS中定义的4个路 径 。
			// 而getSearchNames 方 法获得的就是 application 这个默认的配置文件名。
			// 然后,逐一遍历加载目录路径及其指定文件名的文件。
			// file:./config/ file:./ classpath:/config/ classpath:/ 默认的四个路径
			getSearchLocations().forEach((location) -> {
				boolean isFolder = location.endsWith("/");
				// 去对应的路径下获取属性文件 默认的文件名称为 application
				Set<String> names = isFolder ? getSearchNames() : NO_SEARCH_NAMES;
				names.forEach((name) -> load(location, name, profile, filterFactory, consumer));
			});
		}
首先是getSearchLocations()方法,在该方法中会查询默认的会存放对应的配置文件的位置,如果没有自定义的话,路径就是 file:./config/ file:./ classpath:/config/ classpath:/ 这4个
private Set<String> getSearchLocations() {
			// 如果有自定义的路径就使用自定义的
			if (this.environment.containsProperty(CONFIG_LOCATION_PROPERTY)) {
				return getSearchLocations(CONFIG_LOCATION_PROPERTY);
			}
			// 否则使用默认的4个路径 file:./config/ file:./ classpath:/config/ classpath:/
			Set<String> locations = getSearchLocations(CONFIG_ADDITIONAL_LOCATION_PROPERTY);
			locations.addAll(
					asResolvedSet(ConfigFileApplicationListener.this.searchLocations, DEFAULT_SEARCH_LOCATIONS));
			return locations;
		}
进入getSearchLocations(String propertyName) 方法
private Set<String> getSearchLocations(String propertyName) {
			Set<String> locations = new LinkedHashSet<>();
			if (this.environment.containsProperty(propertyName)) {
				for (String path : asResolvedSet(this.environment.getProperty(propertyName), null)) {
					if (!path.contains("$")) {
						path = StringUtils.cleanPath(path);
						if (!ResourceUtils.isUrl(path)) {
							path = ResourceUtils.FILE_URL_PREFIX + path;
						}
					}
					locations.add(path);
				}
			}
			return locations;
		}
然后回到load方法中,遍历4个路径,然后加载对应的属性文件。
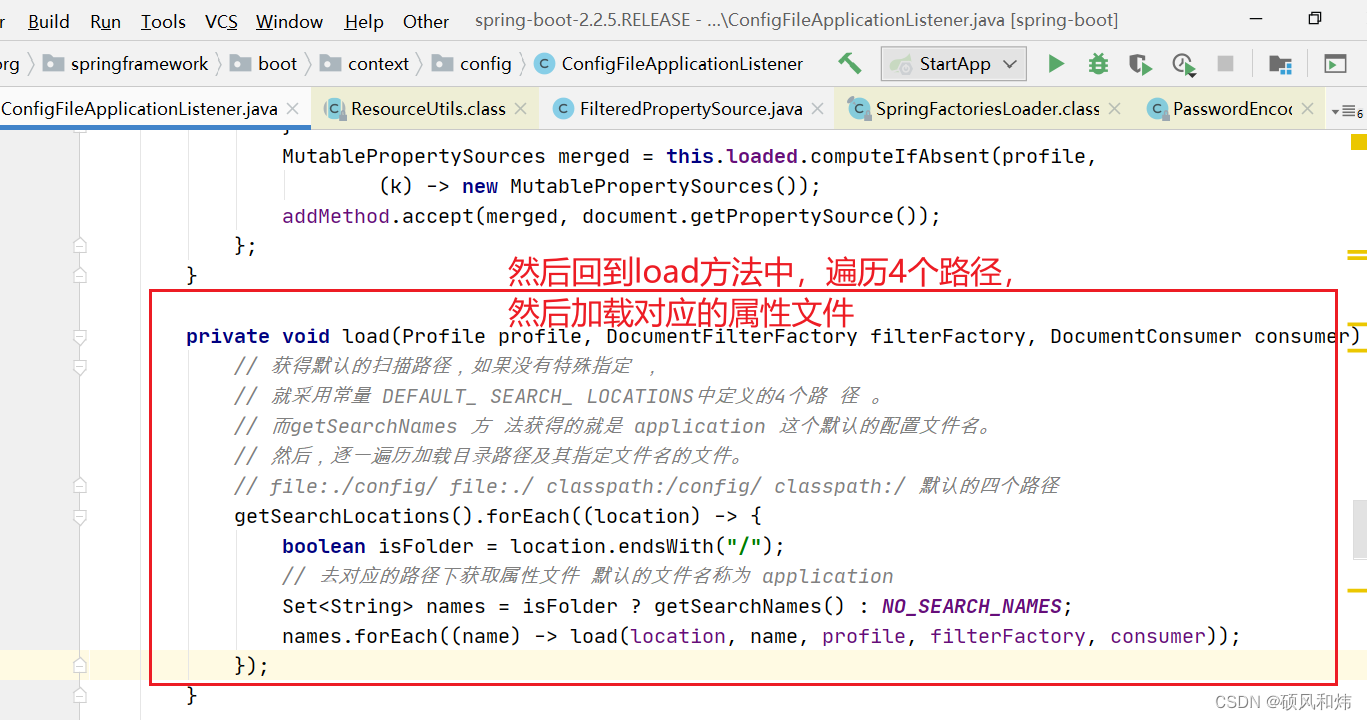
getSearchNames()获取的是属性文件的名称。如果自定义了就加载自定义的

否则加载默认的application文件。

再回到前面的方法

进入load方法,会通过前面的两个加载器来分别加载application.properties和application.yml的文件。

具体实现的代码
private void load(String location, String name, Profile profile, DocumentFilterFactory filterFactory,
				DocumentConsumer consumer) {
			if (!StringUtils.hasText(name)) {
				for (PropertySourceLoader loader : this.propertySourceLoaders) {
					if (canLoadFileExtension(loader, location)) {
						// 去对应的文件夹下加载属性文件 applicaiton.properties application.yml
						load(loader, location, profile, filterFactory.getDocumentFilter(profile), consumer);
						return;
					}
				}
				throw new IllegalStateException("File extension of config file location '" + location
						+ "' is not known to any PropertySourceLoader. If the location is meant to reference "
						+ "a directory, it must end in '/'");
			}
			Set<String> processed = new HashSet<>();
			// 获取properties和yml的资源加载器
			for (PropertySourceLoader loader : this.propertySourceLoaders) {
				// 获取对应的加载器加载的后缀 properties xml yml ymal
				for (String fileExtension : loader.getFileExtensions()) {
					if (processed.add(fileExtension)) {
						// 加载文件 application.properties application.xml
						// application.yml application.yaml
						loadForFileExtension(loader, location + name, "." + fileExtension, profile, filterFactory,
								consumer);
					}
				}
			}
		}
loader.getFileExtensions()获取对应的加载的文件的后缀。
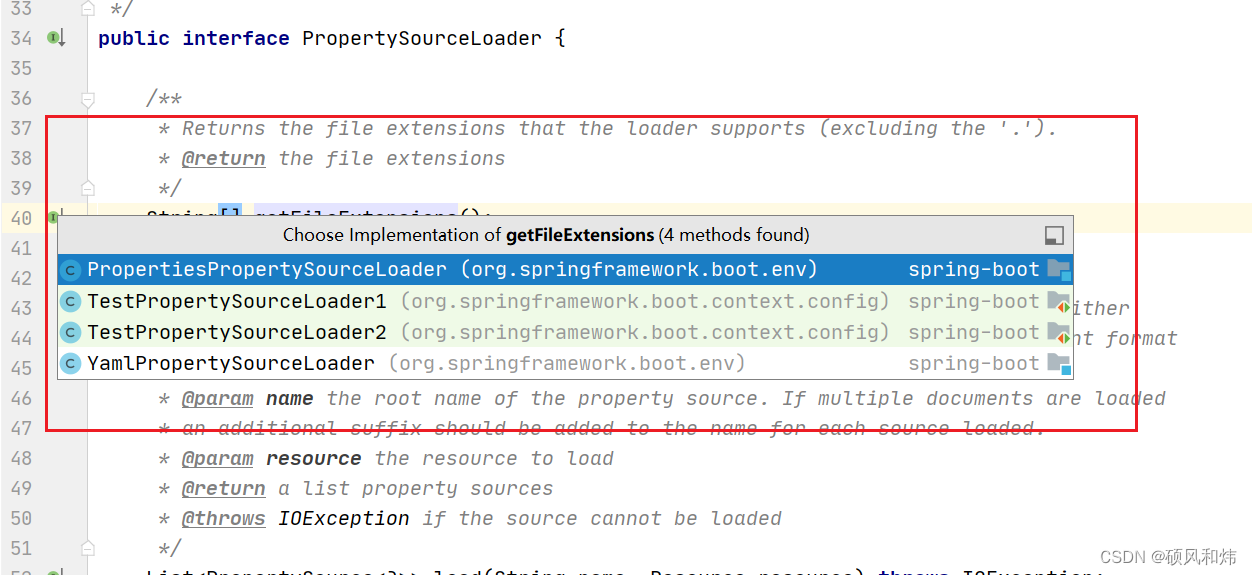
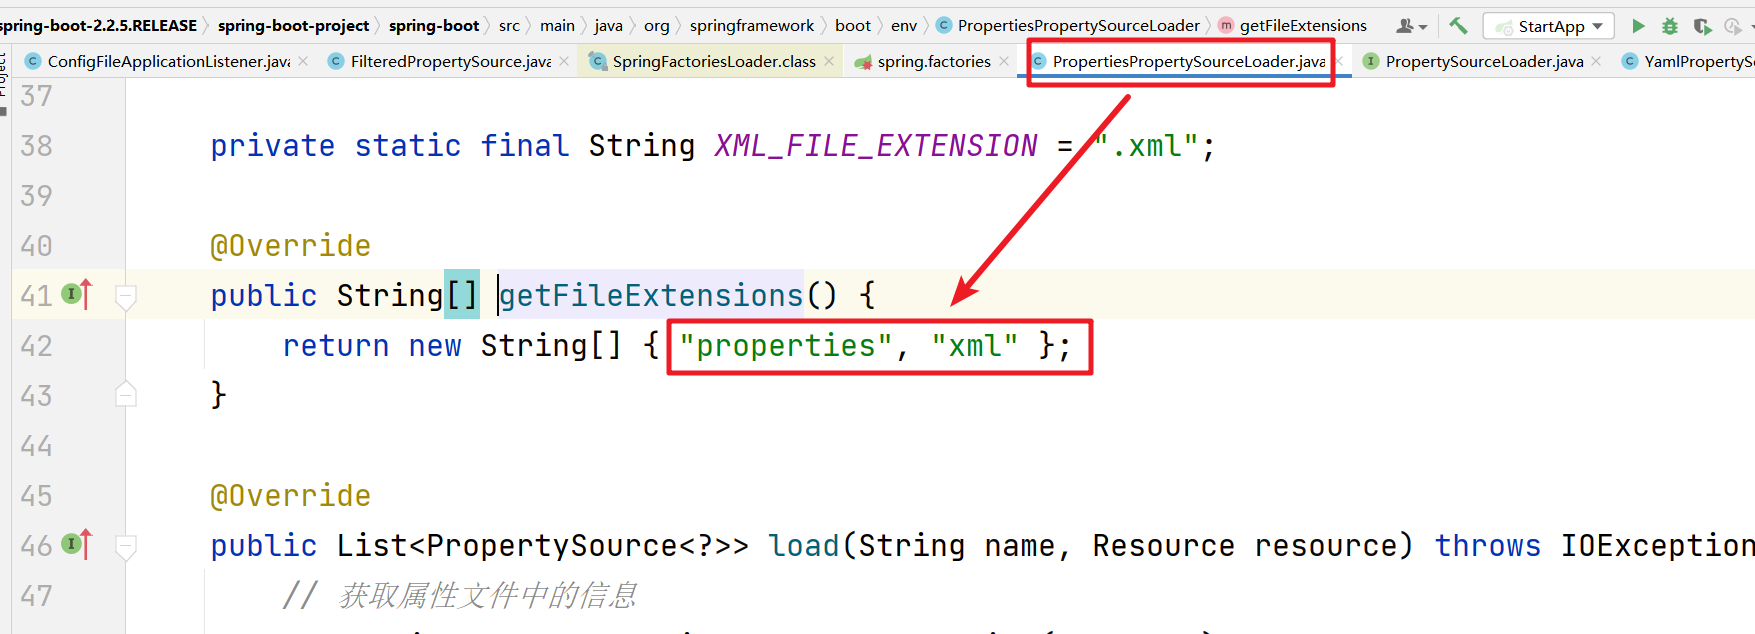

然后退出进入loadForFileExtension方法
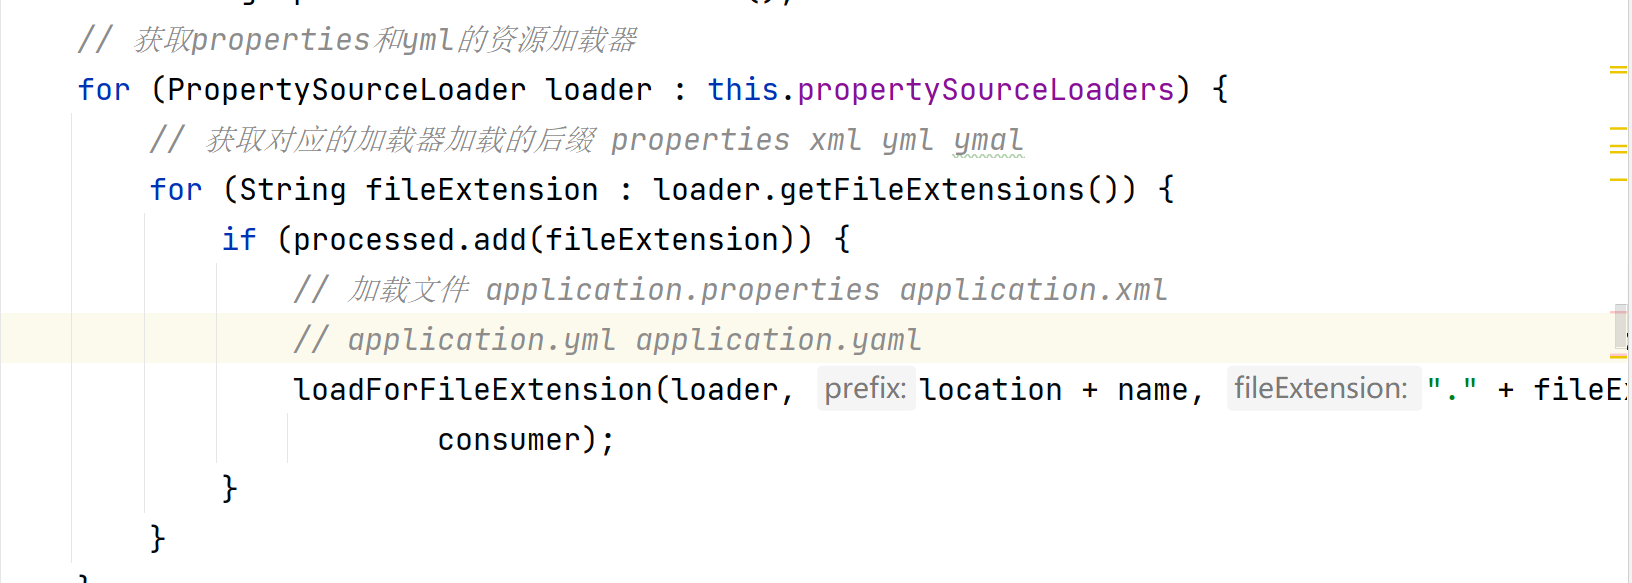
进入loadForFileExtension()方法,对profile和普通配置分别加载
private void loadForFileExtension(PropertySourceLoader loader, String prefix, String fileExtension,
				Profile profile, DocumentFilterFactory filterFactory, DocumentConsumer consumer) {
			DocumentFilter defaultFilter = filterFactory.getDocumentFilter(null);
			DocumentFilter profileFilter = filterFactory.getDocumentFilter(profile);
			if (profile != null) {
				// 如果有profile的情况比如 dev --> application-dev.properties
				String profileSpecificFile = prefix + "-" + profile + fileExtension;
				load(loader, profileSpecificFile, profile, defaultFilter, consumer);
				load(loader, profileSpecificFile, profile, profileFilter, consumer);
				// Try profile specific sections in files we've already processed
				for (Profile processedProfile : this.processedProfiles) {
					if (processedProfile != null) {
						String previouslyLoaded = prefix + "-" + processedProfile + fileExtension;
						load(loader, previouslyLoaded, profile, profileFilter, consumer);
					}
				}
			}
			// 加载正常的情况的属性文件 application.properties
			load(loader, prefix + fileExtension, profile, profileFilter, consumer);
		}
继续进入 load(loader, prefix + fileExtension, profile, profileFilter, consumer); 方法
private void load(PropertySourceLoader loader, String location, Profile profile, DocumentFilter filter,
				DocumentConsumer consumer) {
			try {
				Resource resource = this.resourceLoader.getResource(location);
				if (resource == null || !resource.exists()) {
					if (this.logger.isTraceEnabled()) {
						StringBuilder description = getDescription("Skipped missing config ", location, resource,
								profile);
						this.logger.trace(description);
					}
					return;
				}
				if (!StringUtils.hasText(StringUtils.getFilenameExtension(resource.getFilename()))) {
					if (this.logger.isTraceEnabled()) {
						StringBuilder description = getDescription("Skipped empty config extension ", location,
								resource, profile);
						this.logger.trace(description);
					}
					return;
				}
				String name = "applicationConfig: [" + location + "]";
				// 加载属性文件信息
				List<Document> documents = loadDocuments(loader, name, resource);
				if (CollectionUtils.isEmpty(documents)) {
					if (this.logger.isTraceEnabled()) {
						StringBuilder description = getDescription("Skipped unloaded config ", location, resource,
								profile);
						this.logger.trace(description);
					}
					return;
				}
				List<Document> loaded = new ArrayList<>();
				for (Document document : documents) {
					if (filter.match(document)) {
						addActiveProfiles(document.getActiveProfiles());
						addIncludedProfiles(document.getIncludeProfiles());
						loaded.add(document);
					}
				}
				Collections.reverse(loaded);
				if (!loaded.isEmpty()) {
					loaded.forEach((document) -> consumer.accept(profile, document));
					if (this.logger.isDebugEnabled()) {
						StringBuilder description = getDescription("Loaded config file ", location, resource, profile);
						this.logger.debug(description);
					}
				}
			}
			catch (Exception ex) {
				throw new IllegalStateException("Failed to load property source from location '" + location + "'", ex);
			}
		}
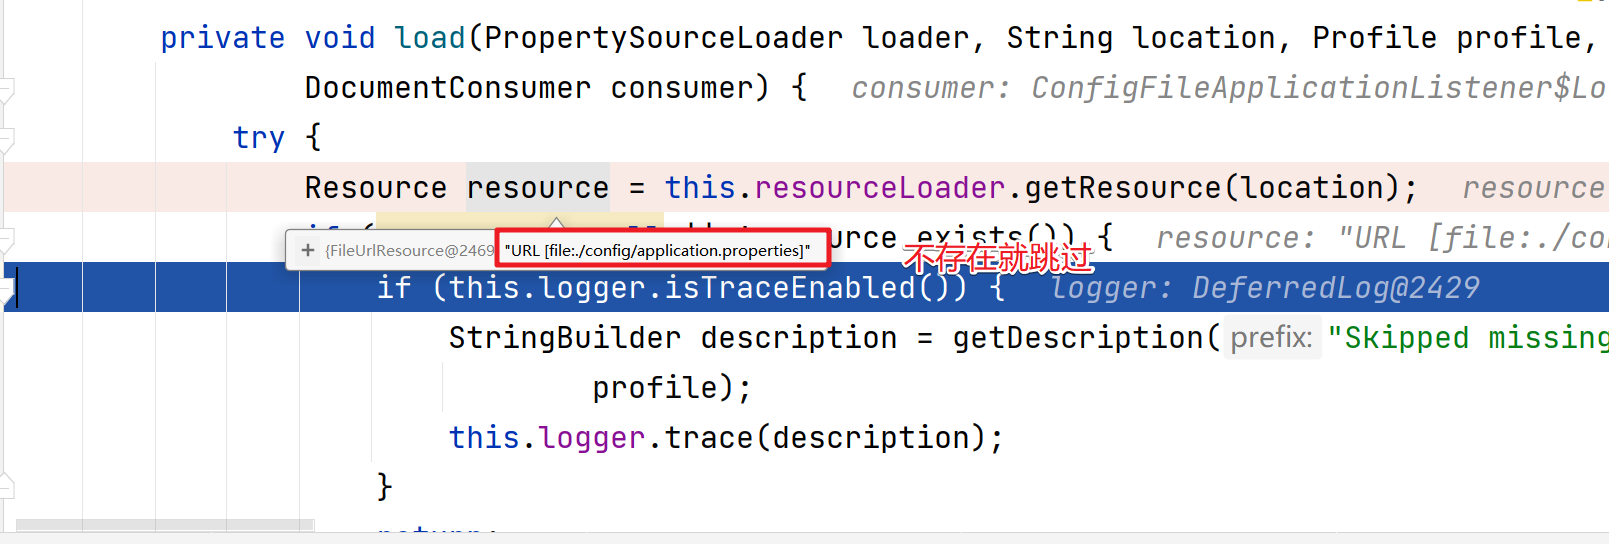

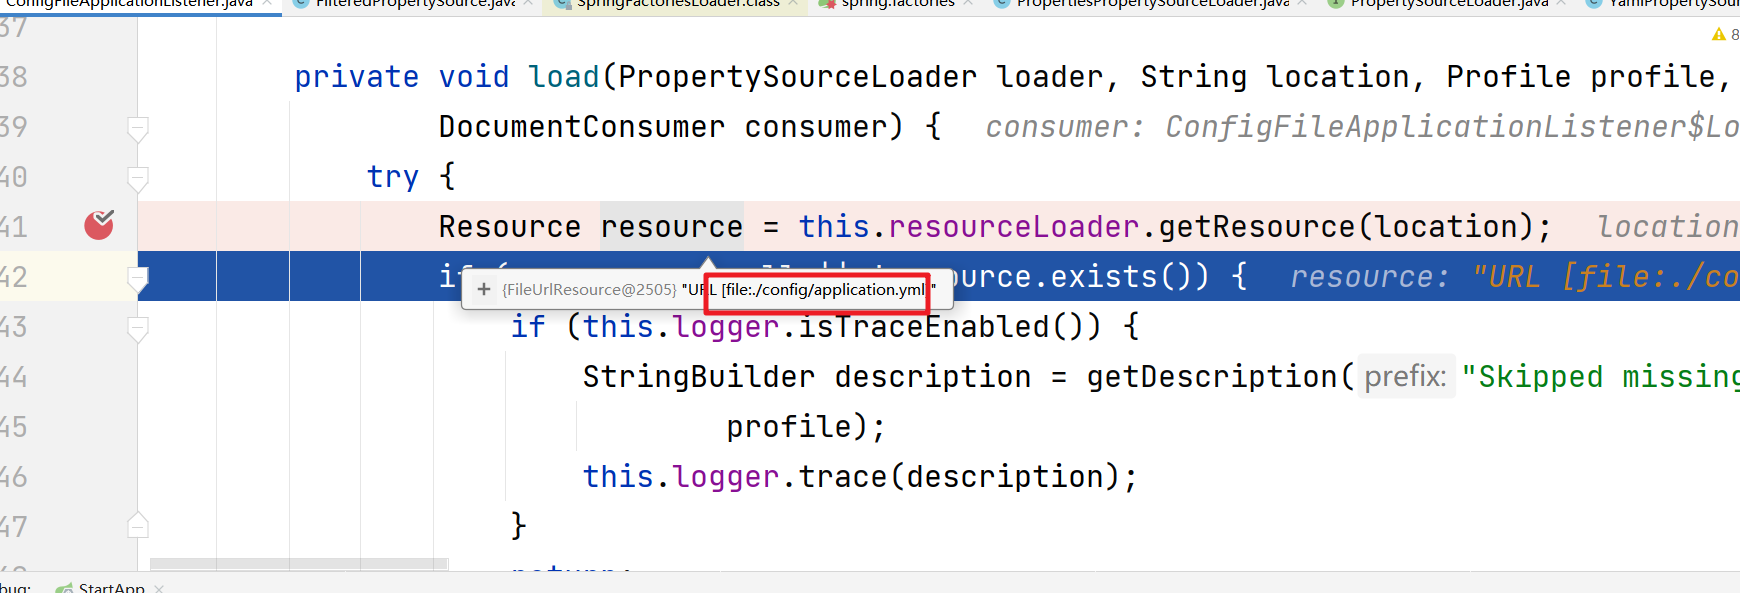
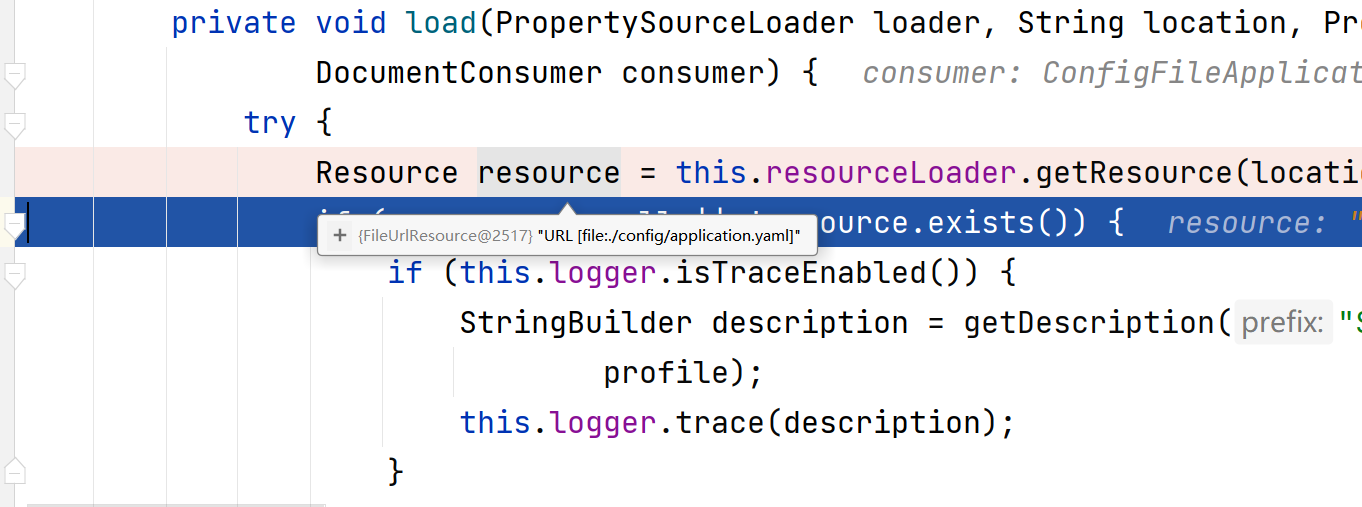
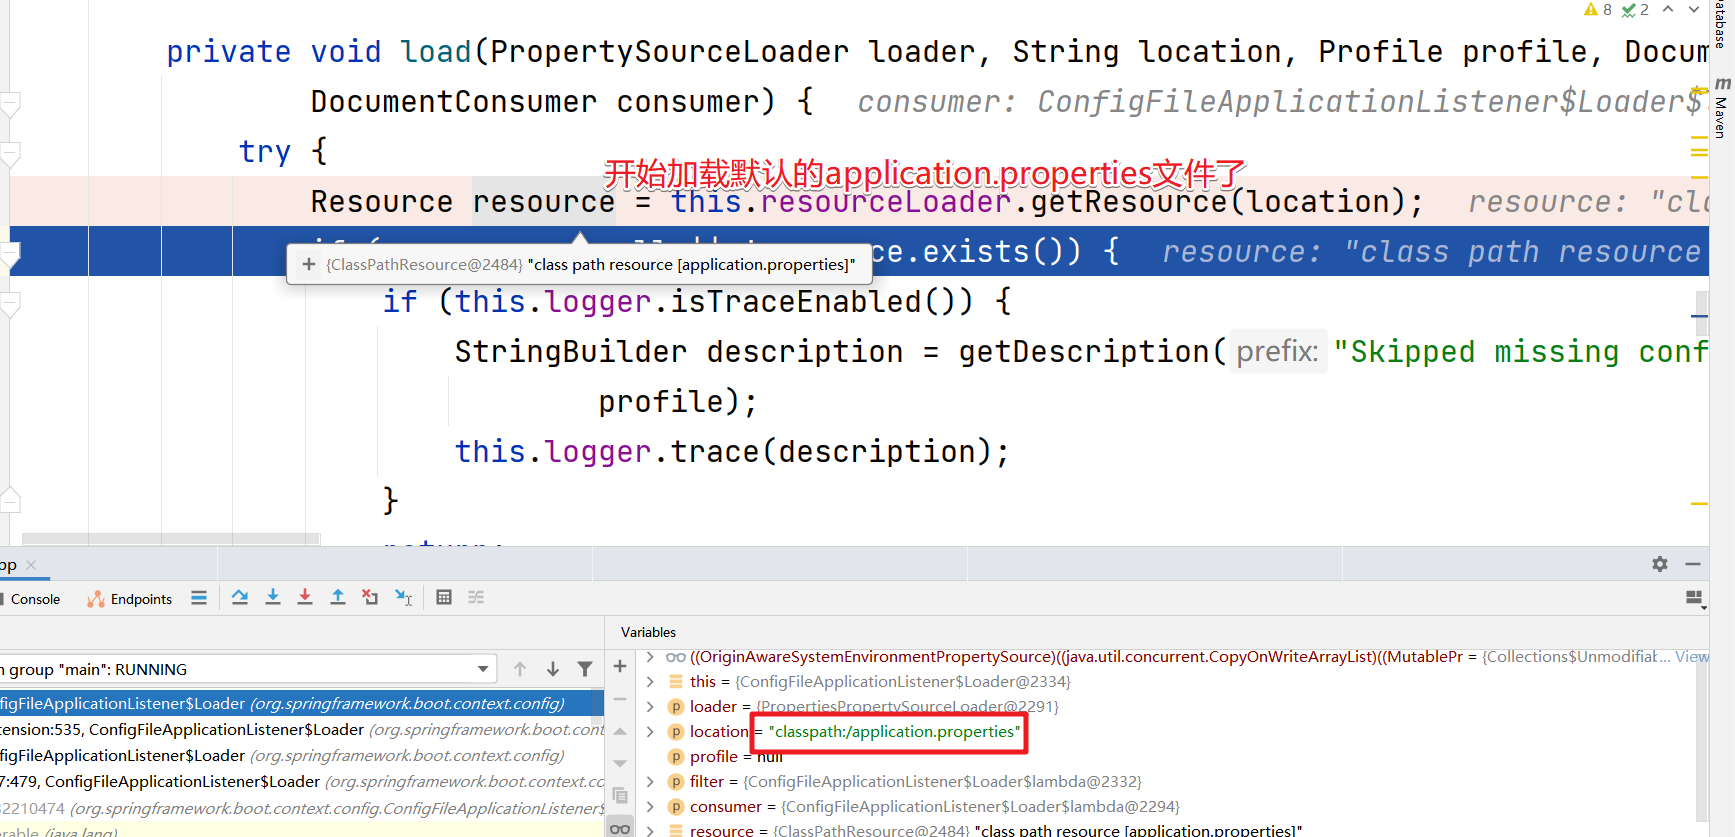
接下来我们就要开始加载我们存在的application.properties文件。
3.4 资源加载器是加载具体的文件信息(application.properties为例)
在找到了要加载的文件的名称和路径后,我们来看下资源加载器是如何来加载具体的文件信息的。
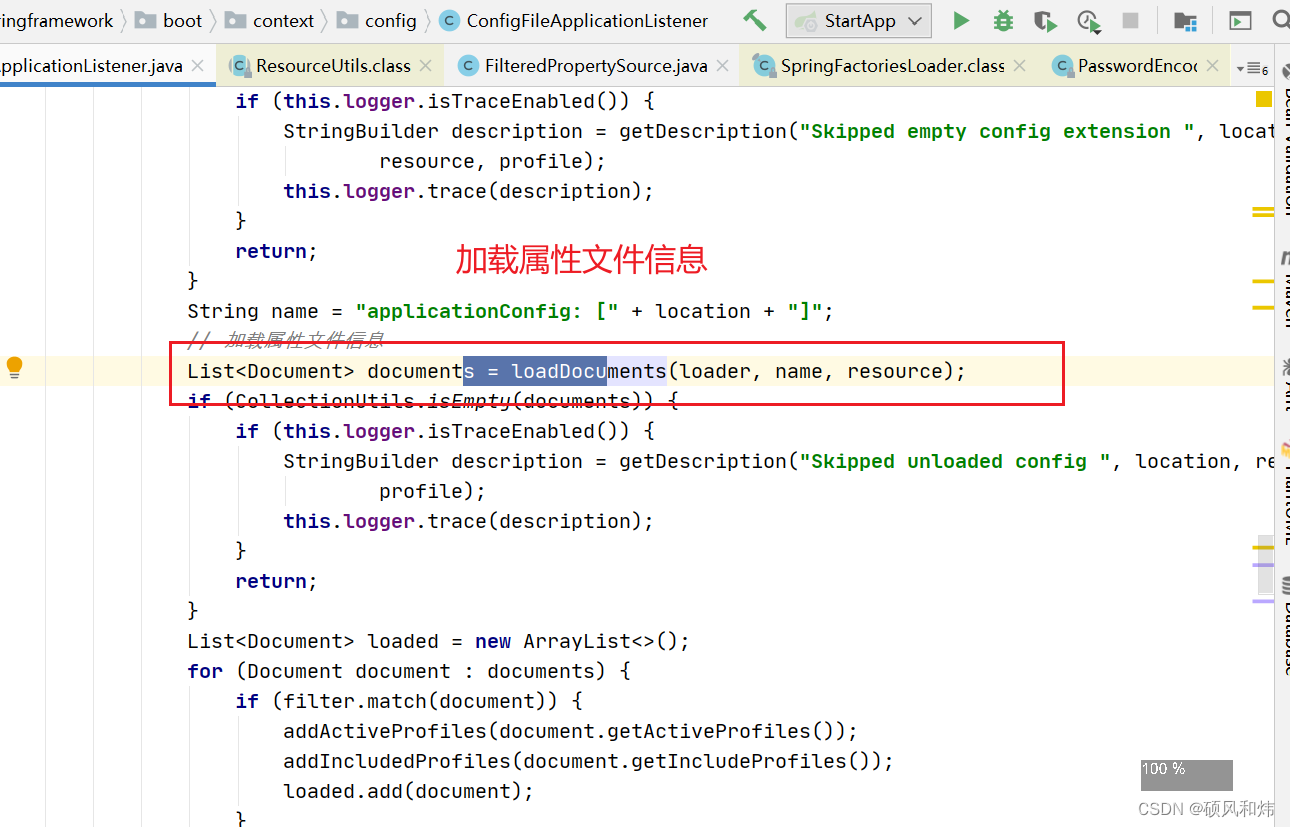
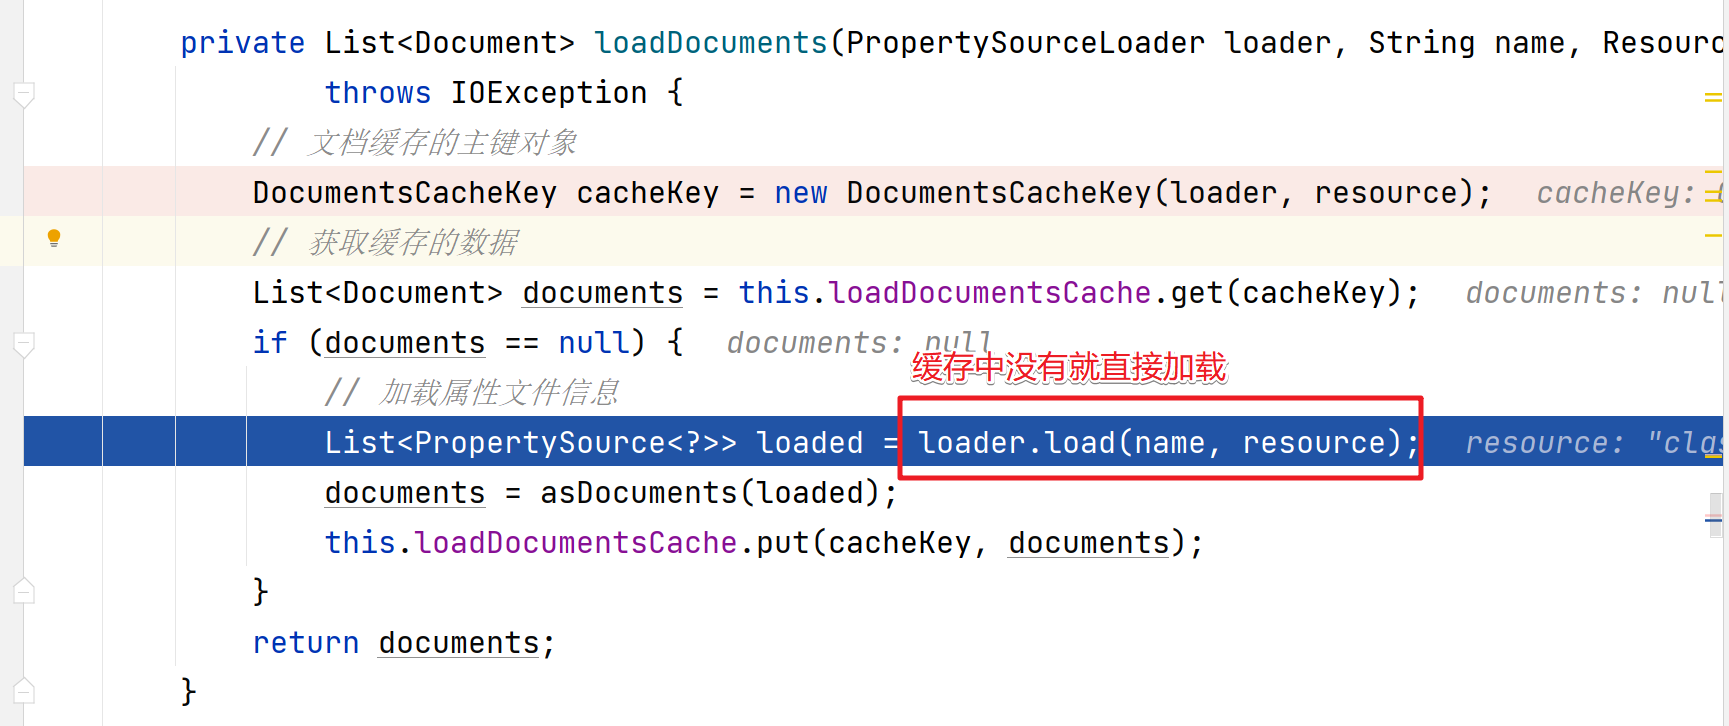
进入loadDocuments方法中,我们会发现会先从缓存中查找,如果缓存中没有则会通过对应的资源加载器来加载了。
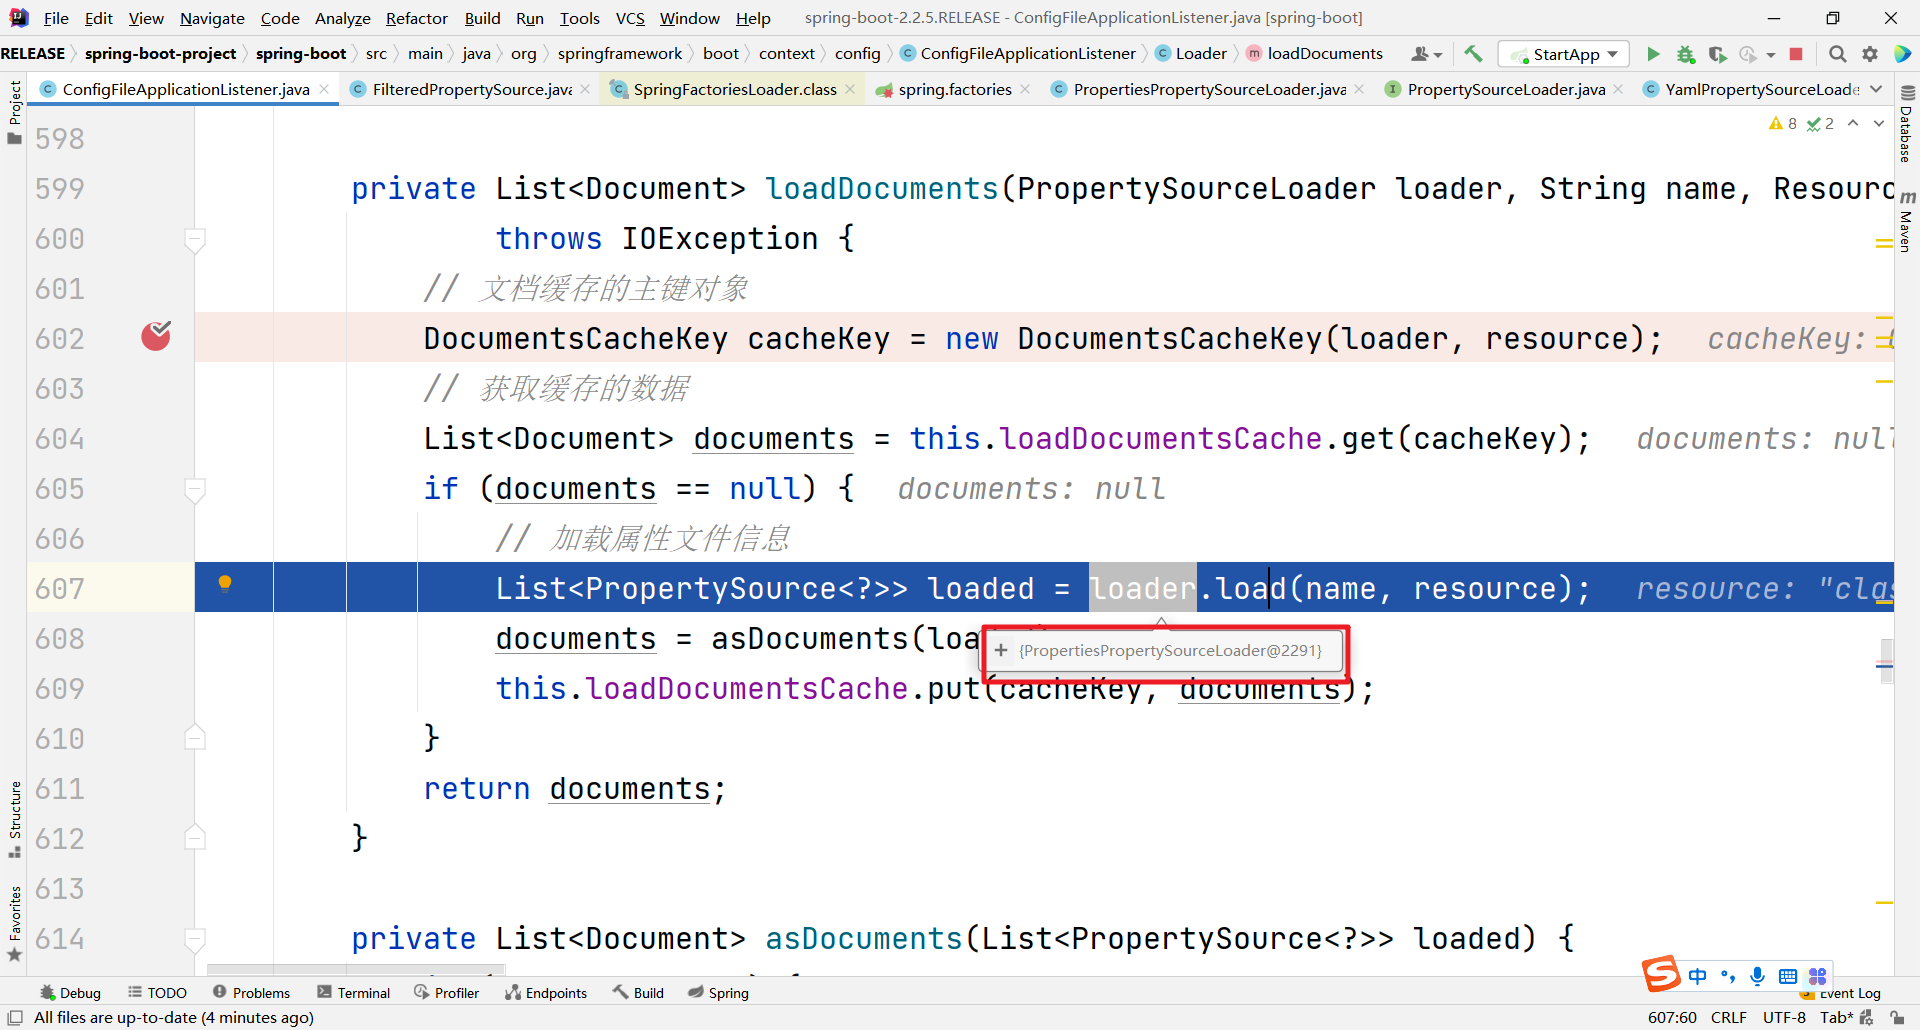
此处是PropertiesPropertySourceLoader来加载的。当然如果我们使用的是yml配置文件的话,使用的就是YamlPropertySourceLoader。
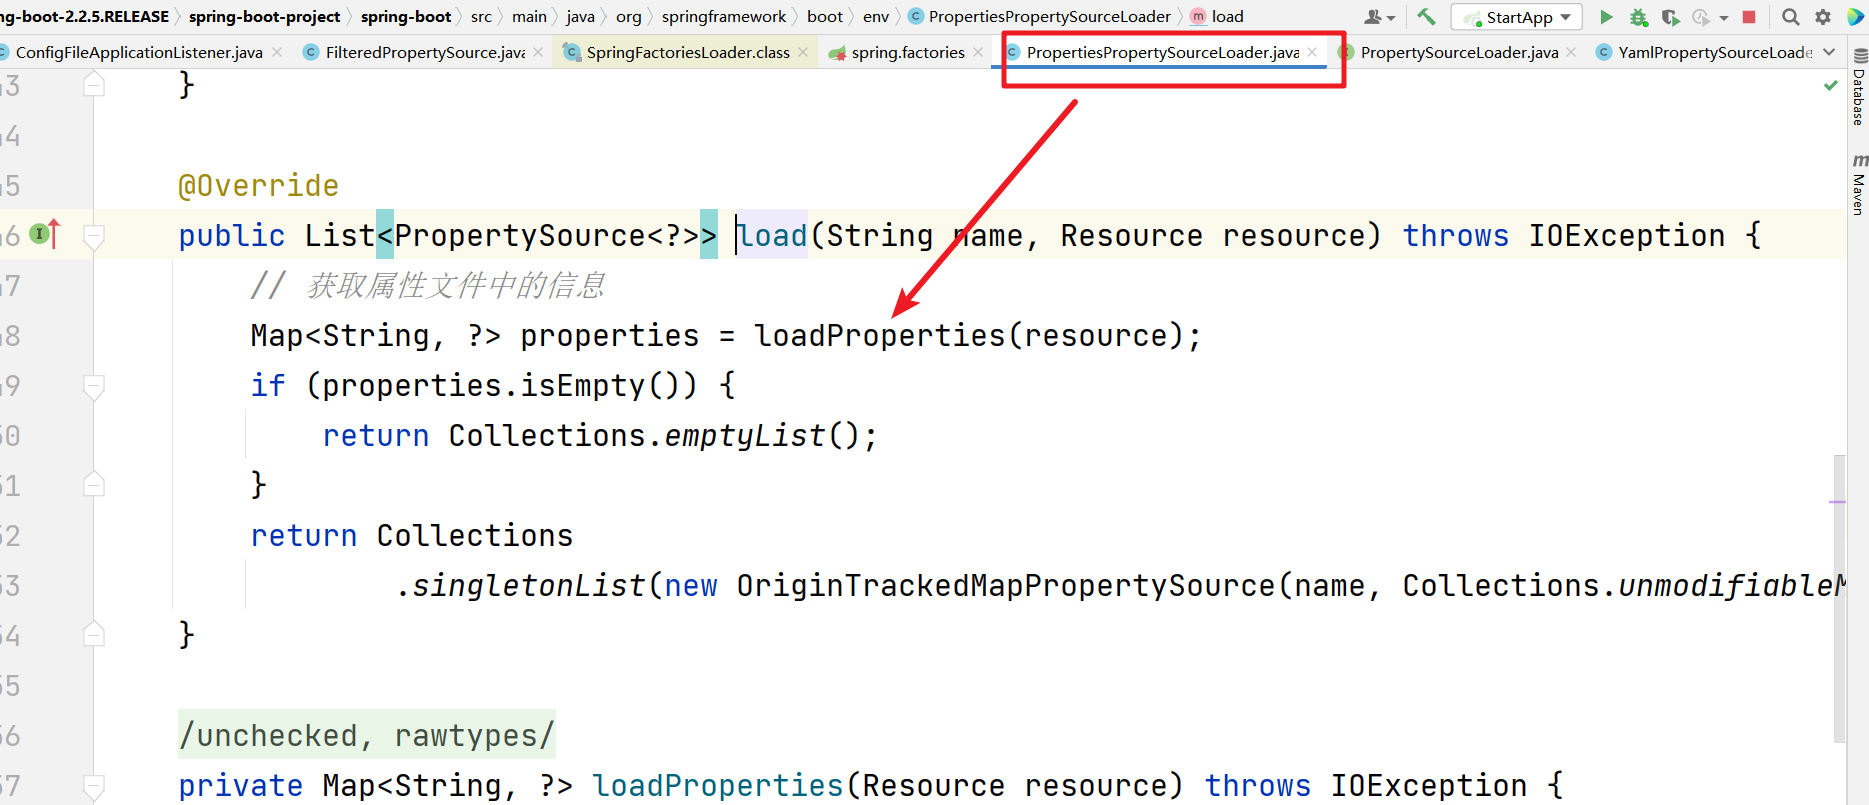
进入loadProperties方法

之后进入load()方法看到的就是具体的加载解析properties文件中的内容了。

好了,关于【详细学习SpringBoot源码之属性配置文件加载原理(application.properties|application.yaml)-7】就先学习到这里,更多的内容持续学习创作中,敬请期待。
原文地址:https://blog.csdn.net/Coder_ljw/article/details/128422712
本文来自互联网用户投稿,该文观点仅代表作者本人,不代表本站立场。本站仅提供信息存储空间服务,不拥有所有权,不承担相关法律责任。
如若转载,请注明出处:http://www.7code.cn/show_51045.html
如若内容造成侵权/违法违规/事实不符,请联系代码007邮箱:suwngjj01@126.com进行投诉反馈,一经查实,立即删除!


