前言
当初在学校学安卓的时候,老师敢教学进度,翻到单元测试这一章节的时候提了两句,没有把单元测试当重点讲,只是说我们工作中几乎不会用到,果真在之前的几年工作当中我真的没有用到,工作中都没有写过单元测试,后来我自己也下意识的忽略了这一块,直到听说现在这家公司后面会要求单元测试用例覆盖率达到百分之七十。我开始慌了,单元测试什么的,国内真的不太重视,这不,抽个周末简单学习下。对于安卓的单元测试的话,现在新建一个项目可以看到都是用的Junit4,ps:涉及Compose的单元测试本文不会过多解释。
这是官网 https://junit.org/junit4/
一、单元测试是什么?
安卓的单元测试是一种针对应用程序中的最小可测试单元——即单个函数、方法或逻辑模块——进行测试的策略。它专注于验证每个独立单元的特定功能和行为,以确保代码的正确性。
单元测试的目的是提高代码质量,减少bug,提高软件可靠性,同时降低维护成本。它是最为基础的测试形式,能够快速反馈问题,定位错误,并且在开发周期中尽早发现并解决问题,从而避免问题随着时间的推移而变得更加复杂。
虽然单元测试可能看起来很麻烦,但它的价值是无可替代的。通过单元测试,开发人员可以:
- 验证每个单元的功能是否符合预期;
- 检测代码中的潜在错误和漏洞;
- 确保代码在各种条件下都能正常运行;
- 提高代码的可读性和可维护性;
- 为代码重构提供安全保障。
在安卓开发中,由于其环境复杂性和多样性,单元测试尤为重要。通过单元测试,开发者可以更加自信地修改和优化代码,同时确保用户在使用应用程序时能够获得稳定、可靠的性能。虽然初始的投入可能会让人们觉得麻烦,但随着时间的推移,你会发现它在提高开发效率和保障应用程序质量方面具有巨大的优势。虽然单元测试可能会增加一些开发的初始工作量,但它能够为提高软件质量、减少后期维护成本提供强有力的支持。对于安卓开发来说,学会如何有效地进行单元测试,将是非常重要的一步。
二、简单使用
1.依赖
代码如下(示例):
dependencies {

    implementation("androidx.core:core-ktx:1.9.0")
    implementation("androidx.lifecycle:lifecycle-runtime-ktx:2.6.1")
    implementation("androidx.activity:activity-compose:1.7.0")
    implementation(platform("androidx.compose:compose-bom:2023.03.00"))
    implementation("androidx.compose.ui:ui")
    implementation("androidx.compose.ui:ui-graphics")
    implementation("androidx.compose.ui:ui-tooling-preview")
    implementation("androidx.compose.material3:material3")
    testImplementation("junit:junit:4.13.2")
    androidTestImplementation("androidx.test.ext:junit:1.1.5")
    androidTestImplementation("androidx.test.espresso:espresso-core:3.5.1")
    androidTestImplementation(platform("androidx.compose:compose-bom:2023.03.00"))
    androidTestImplementation("androidx.compose.ui:ui-test-junit4")
    debugImplementation("androidx.compose.ui:ui-tooling")
    debugImplementation("androidx.compose.ui:ui-test-manifest")
}
上面的是新建一个Compose项目的依赖,有Compose的物料库,我们的测试相关依赖带主要是下面几个
	testImplementation("junit:junit:4.13.2")
    androidTestImplementation("androidx.test.ext:junit:1.1.5")
    androidTestImplementation("androidx.test.espresso:espresso-core:3.5.1")
    androidTestImplementation(platform("androidx.compose:compose-bom:2023.03.00"))
    androidTestImplementation("androidx.compose.ui:ui-test-junit4")
    debugImplementation("androidx.compose.ui:ui-tooling")
    debugImplementation("androidx.compose.ui:ui-test-manifest")
我将为你解释每一行的作用:
-
testImplementation("junit:junit:4.13.2") -
androidTestImplementation("androidx.test.ext:junit:1.1.5")- 这是Android测试专用的JUnit扩展库。它提供了Android特定的功能,例如运行测试前的设备初始化等。
-
androidTestImplementation("androidx.test.espresso:espresso-core:3.5.1") -
androidTestImplementation(platform("androidx.compose:compose-bom:2023.03.00")) -
androidTestImplementation("androidx.compose.ui:ui-test-junit4") -
debugImplementation("androidx.compose.ui:ui-tooling") -
debugImplementation("androidx.compose.ui:ui-test-manifest")
这些依赖确保我们的Android项目拥有进行单元测试和Android设备测试所需的所有工具和框架。
2.单元测试代码简单模版及解释
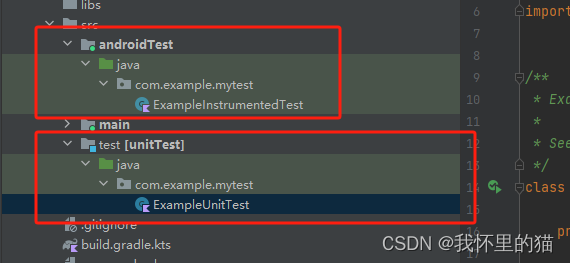
有了上面的依赖,我们就可以开始写一些简单的单元测试代码了。我们先看下项目结构

上面的androidTest包下是涉及一些页面测试的,我们本文先从单元测试开始,所以就在test包下的ExampleUnitTest.kt下编写代码就好。
代码如下(示例):
package com.example.mytest

import org.junit.After
import org.junit.Assert.assertEquals
import org.junit.Before
import org.junit.Test


/**
 * Example local unit test, which will execute on the development machine (host).
 *
 * See [testing documentation](http://d.android.com/tools/testing).
 */
class ExampleUnitTest {

    private var emptyList: List<*>? = null

    /**
     * Sets up the test fixture.
     * (Called before every test case method.)
     */
    @Before
    fun setUp() {
        emptyList = ArrayList<Any?>()
    }

    /**
     * Tears down the test fixture.
     * (Called after every test case method.)
     */
    @After
    fun tearDown() {
        emptyList = null
    }

    @Test
    fun testSomeBehavior() {
        assertEquals("Empty list should have 0 elements", 0, emptyList!!.size)
    }

    @Test(expected = IndexOutOfBoundsException::class)
    fun testForException() {
        val o = emptyList!![0]!!
    }


}
先讲注解
- @Test注解:告诉 Junit4 他是一个测试方法。
- @Before 注解:在每执行一个带有@Test注解的方法之前带有@Before 注解的方法都会执行。
- @After 注解:在每执行一个带有@Test注解的方法之后带有@After注解的方法都会执行。
…注解有很多哟,这里只是简单介绍几个
再讲方法
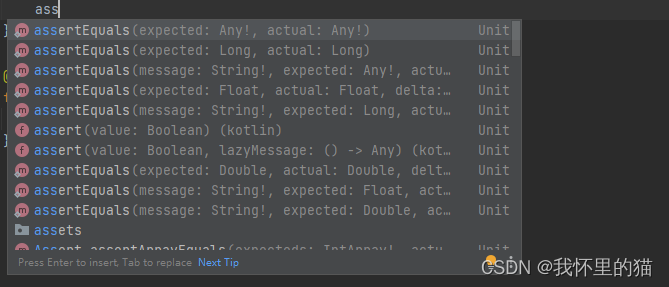
- assertEquals (描述,需要对比的值1,需要对比的值2) 如果需要对比的值1和需要对比的值2不相等则抛出异常

@Test(expected = IndexOutOfBoundsException::class)
expected 表示如果不抛出 IndexOutOfBoundsException这个异常,则方法执行失败
总结
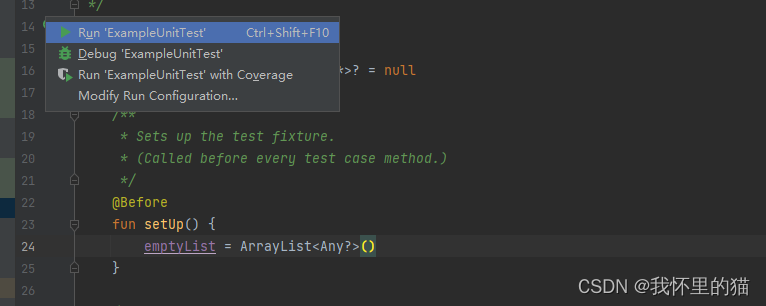
最后我们运行一下,测试通过本文完结!


原文地址:https://blog.csdn.net/shop_and_sleep/article/details/134628854
本文来自互联网用户投稿,该文观点仅代表作者本人,不代表本站立场。本站仅提供信息存储空间服务,不拥有所有权,不承担相关法律责任。
如若转载,请注明出处:http://www.7code.cn/show_534.html
如若内容造成侵权/违法违规/事实不符,请联系代码007邮箱:suwngjj01@126.com进行投诉反馈,一经查实,立即删除!


