本文介绍: 简单介绍js的节点操作,键盘事件,鼠标事件,其他事件,以及综合案例,ASCII表
节点操作
目前对于节点操作还是有些困惑,只是了解简单的案例
具体操作可以看菜鸟教程:https://www.runoob.com/js/js-htmldom-elements.html
案例-1
<!DOCTYPE html>
<html lang="en">

<head>
    <meta charset="UTF-8">
    <meta name="viewport" content="width=device-width, initial-scale=1.0">
    <title>Document</title>
</head>

<body>
    <strong>div上的一个元素节点</strong>
    <div>
        <span>span属于div的子元素节点</span>
    </div>
    <p>这个p标签属于div的兄弟元素节点</p>
    <ul>
        <li>li标签</li>
        <li>li标签</li>
        <li>li标签</li>
    </ul>

    <ul>
        <div>
            <span class="max">hello world</span>
        </div>
    </ul>
    <ol>
        <li>lililiil</li>
    </ol>

    <script>
        //获取元素
        const span = document.querySelector("span");
        console.dir(span);
        //节点操作之获取父元素节点
        const a = span.parentNode;
        console.log(a);

        //获取ul
        const ul = document.querySelector("ul");
        console.log(ul);
        // const b = ul.children;
        // 获取子元素节点
        const b = ul.childNodes;
        console.log(b);
        // 获取第一个子元素节点
        console.log(ul.childNodes[0]);
        // 获取最后一个子元素节点
        console.log(ul.childNodes[ul.children.length - 1]);

        const div = document.querySelector("div");
        //节点操作之获取兄弟节点和上一个节点
        console.log(div.nextSibling);//获取下一个节点
        console.log(div.nextElementSibling);//下一个元素节点

        console.log(div.previousSibling);//上一个节点
        console.log(div.previousElementSibling);//上一个元素节点

        const span1 = document.querySelector(".max");
        console.dir(span1);
        console.log(span1.parentNode.parentNode.nextElementSibling.children[0]);
    </script>
</body>

</html>
案例-2-节点的添加
<!DOCTYPE html>
<html lang="en">

<head>
    <meta charset="UTF-8">
    <meta name="viewport" content="width=device-width, initial-scale=1.0">
    <title>Document</title>
</head>

<body>
    <ul>
        <li>甲柒</li>
    </ul>
    <script>
        //创建一个li标签
        //语法格式
        //createElement("要创建的元素")
        const li = document.createElement("li");
        li.innerHTML = "孙行者";

        // 将创建的li标签添加到指定位置
        // 获取ul给ul添加子节点
        const ul = document.querySelector("ul");
        // ul.appendChild(li);//在末尾添加子元素

        // insertBefore("要添加的元素","要添加到那个元素的前面")
        // ul.insertBefore(li,ul.children[0]);

        console.dir(li);
        ul.innerHTML += li.outerHTML;

    </script>
</body>

</html>
下面是关于节点的示例,节点操作还是挺常见的,但是总感觉以后会用的不多。
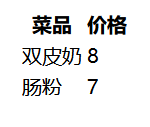
示例
代码
<!DOCTYPE html>
<html lang="en">

<head>
    <meta charset="UTF-8">
    <meta name="viewport" content="width=device-width, initial-scale=1.0">
    <title>Document</title>
    <style>
        button {
            position: relative;
            left: 1100px;
            top: 28px;
        }
    </style>
</head>

<body>
    <button>发送</button>
    <table align="center" border="1px" width="380px">
        <thead>
            <th>全选/全不选<input type="checkbox" name="" id="" class="qx" onclick="qx(this)"></th>
            <th>商品名称</th>
            <th>商品价格</th>
            <th>商品颜色</th>
            <th>操作</th>
        </thead>
        <tbody>
        </tbody>
    </table>
    <script>
        //创建发送请求的对象
        document.querySelector("button").onclick = function () {
            const xhr = new XMLHttpRequest();
            //设置请求路径
            xhr.open("GET", "test.json");
            xhr.send();
            // 监听响应状态,若状态发生改变触发函数
            xhr.onreadystatechange = function () {
                console.dir(xhr);
                //响应状态200 发送成功
                if (xhr.readyState == 4 && xhr.status == 200) {
                    XR(xhr.responseText);
                }
            }
        }
        function XR(A) {
            let str = "";
            const a = JSON.parse(A);
            for (let i = 0; i < a.length; i++) {
                str += "<tr>";
                str += "<td><input type = checkbox class='dx' οnclick='dx()'></td>";
                str += `<td>${a[i].name}</td>`;
                str += `<td>${a[i].price}</td>`;
                str += `<td>${a[i].color}</td>`;
                str += "<td><a href='#' οnclick='shan(this)'>删除</a></td>";
                str += "</tr>";
            }
            document.querySelector("tbody").innerHTML = str;
        }
        // 定义表格的body
        const body = document.querySelector("tbody");
        //删除1行
        function shan(A) {
            body.removeChild(A.parentNode.parentNode);
        }
        //全选全不选
        function qx(A) {
            //获取全选按钮
            const dx = document.querySelectorAll(".dx");
            for (let i = 0; i < dx.length; i++) {
                dx[i].checked = A.checked;
            }
        }
        //下方选中上方自动选中
        function dx() {
            const qx = document.querySelector(".qx");
            const dxs = document.querySelectorAll(".dx");
            let flag = true;
            //判断是否都选中,如果都选中不修改flag的值,如果有一个没有选中,修改flag的值
            for (let i = 0; i < dxs.length; i++) {
                //判断是否被选中 没有选中flag的值变为 false
                if (dxs[i].checked == false) {
                    flag = false;
                    break;
                }
            }
            qx.checked = flag;
        }
    </script>
</body>

</html>
键盘事件
常用键盘事件
松开的时候触发
onkeyup
按下的时候触发
onkeydown
按下的时候触发
onkeypress
keydown与keypress对比
keydown |
keypress |
|
|---|---|---|
| 效果对比 | 所有按键触发都有效 | 功能键触发无效(tab/shift/ctrl等按键) |
| ASCII对比 | 大写时,ASCII值相同 | 小写时ASCII值与keydown不同,大写时相同 |
| 相同 | 长按会一直触发,大写时ASCII值相同 |
示例代码
//添加事件
//松开时触发
document.addEventListener("keyup", function () {
    console.log("触发了keyup事件");
})
//按下时触发 所有键有效 长按会一直触发
document.addEventListener("keydown", () => {
    console.log("触发了keydown事件");
})
//按下时触发 功能键无效 长按会一直触发
document.addEventListener("keypress", () => {
    console.log("触发了keypress事件");
})

//对比 keydown 与 keypress
document.addEventListener("keydown", (k) => {
    console.log("keydown" + k.keyCode);
})
document.addEventListener("keypress", (k) => {
    console.log("keypress" + k.keyCode);
})
鼠标事件
鼠标点击
click
当鼠标在元素上移动时触发
mousemove
当鼠标移除元素时触发
mouseout
示例
代码
<!DOCTYPE html>
<html lang="en">

<head>
    <meta charset="UTF-8">
    <meta name="viewport" content="width=device-width, initial-scale=1.0">
    <title>Document</title>
    <style>
        .div1 {
            width: 400px;
            height: 400px;
            border: 1px solid red;
            font-size: 24px;
            margin: 0 auto;
        }
    </style>
</head>

<body>
    <div class="div1">

    </div>
</body>

</html>
<script>
    // 鼠标左键的点击事件
    const div1 = document.querySelector(".div1");
    div1.addEventListener("click", () => {
        console.log("触发click事件");
    })
    // pageX 鼠标的x轴 mousemove鼠标移动
    div1.addEventListener("mousemove", (m) => {
        div1.innerHTML = `当前坐标:(${m.pageX},${m.pageY})`;
    })
    // mouseout 鼠标移除
    div1.addEventListener("mouseout", () => {
        div1.innerHTML = `别干出去啊~~~`;
    })
</script>
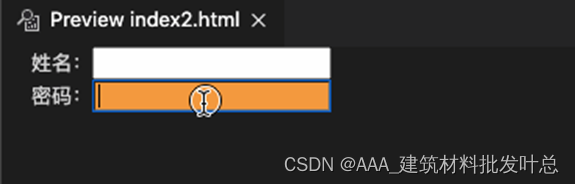
其他事件
获得焦点
focus
失去焦点
blur
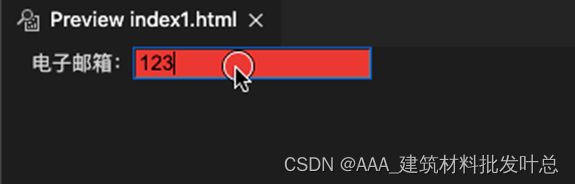
用户输入表单
input
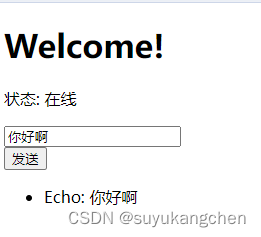
示例
代码
<!DOCTYPE html>
<html lang="en">

<head>
    <meta charset="UTF-8">
    <meta name="viewport" content="width=device-width, initial-scale=1.0">
    <title>发送评论</title>
    <style>
        .max {
            width: 400px;
            height: 600px;
            border: 1px solid red;
            border-radius: 10px;
            margin: 0 auto;
        }

        .div1 {
            width: 400px;
            height: 200px;
            line-height: 200px;
            border: 1px solid skyblue;
            text-align: center;
            border-radius: 10px;
        }

        .inp {
            border-color: aquamarine;
            outline: 0px solid orange;
            height: 40px;
            transition: all 1s;
        }

        .div2 {
            width: 400px;
            height: 400px;
            border: 1px solid orange;
            border-radius: 10px;

        }
    </style>
</head>

<body>
    <div class="max">
        <div class="div1">
            <input type="text" class="inp">
            <input type="button" value="发送" class="button">
        </div>
        <div class="div2">
            0/100字
        </div>
    </div>
</body>

</html>

<script>
    const inp = document.querySelector(".inp");
    const button = document.querySelector(".button");
    const div2 = document.querySelector(".div2");
    inp.addEventListener("focus", () => {
        inp.style.height = "60px";
        inp.style.border = "1px solid orange";
        inp.style.outline = "1px solid orange";

    })
    inp.addEventListener("input", (m) => {
        div2.innerHTML = `${inp.value.length}/100字`;
    })
    button.addEventListener("click", () => {
        if (inp.value != '') {
            div2.innerHTML = `${inp.value}`;
            inp.value = '';
        } else {
            alert("请输入评论~~~");
        }
    })
    document.addEventListener("keyup", (k) => {
        if (k.keyCode == 13) {
            if (inp.value != '') {
                div2.innerHTML = `${inp.value}`;
                inp.value = '';
            } else {
                alert("请输入评论~~~");
            }
        }
    })
</script>
补充
`${变量}`//``是反引号,在键盘左上角用英文输出
`${inp.value}`// 是 JavaScript 中的模板字面量(template literals)表达式。
这种语法允许你插入变量值到字符串中,使用 `${}` 括起变量或表达式。
在这里,`${inp.value}` 用于将输入框(`input`)的值插入字符串中,以显示输入框的当前值。
综合案例的美化
示例
代码
<!DOCTYPE html>
<html lang="en">

<head>
    <meta charset="UTF-8">
    <meta name="viewport" content="width=device-width, initial-scale=1.0">
    <title>发送评论</title>
    <style>
        body {
            background-color: #f4f4f4;
            font-family: 'Arial', sans-serif;
            display: flex;
            align-items: center;
            justify-content: center;
            height: 100vh;
            margin: 0;
        }

        .max {
            width: 400px;
            height: 600px;
            border: 1px solid #ddd;
            border-radius: 10px;
            margin: 0 auto;
            background-color: #fff;
            box-shadow: 0 0 10px rgba(0, 0, 0, 0.1);
        }

        .div1 {
            width: 100%;
            height: 200px;
            border-bottom: 1px solid #ddd;
            border-radius: 10px 10px 0 0;
            background-color: #3498db;
            display: flex;
            flex-direction: column;
            align-items: center;
            justify-content: center;
        }

        .inp {
            border: none;
            outline: none;
            height: 40px;
            width: 80%;
            border-radius: 5px;
            padding: 5px;
            margin-bottom: 10px;
            transition: all 1s;
            outline: #3498db;
            border: 1px solid #3498db;
        }

        .button {
            background-color: #2ecc71;
            color: #fff;
            border: none;
            padding: 8px 15px;
            border-radius: 5px;
            cursor: pointer;
        }

        .button:hover {
            background-color: #27ae60;
        }

        .div2 {
            width: 100%;
            height: 400px;
            border-radius: 0 0 10px 10px;
            padding: 20px;
            box-sizing: border-box;
            overflow-y: auto;
            color: #333;
        }
    </style>
</head>

<body>
    <div class="max">
        <div class="div1">
            <input type="text" class="inp" placeholder="请输入你的评论">
            <input type="button" value="发送" class="button">
        </div>
        <div class="div2">
            0/100字
        </div>
    </div>
</body>

</html>

<script>
    const inp = document.querySelector(".inp");
    const button = document.querySelector(".button");
    const div2 = document.querySelector(".div2");

    inp.addEventListener("focus", () => {
        inp.style.height = "60px";
        inp.style.border = "1px solid #3498db";
        inp.style.outline = "1px solid #3498db";
    });

    inp.addEventListener("input", () => {
        div2.innerHTML = `${inp.value.length}/100字`;
    });

    button.addEventListener("click", () => {
        if (inp.value !== '') {
            div2.innerHTML = `${inp.value}`;
            inp.value = '';
        } else {
            alert("请输入评论~~~");
        }
    });

    document.addEventListener("keyup", (k) => {
        if (k.keyCode == 13) {
            if (inp.value !== '') {
                div2.innerHTML = `${inp.value}`;
                inp.value = '';
            } else {
                alert("请输入评论~~~");
            }
        }
    });
</script>
附录-ASCII码一览表
| 二进制 | 十进制 | 十六进制 | 字符/缩写 | 解释 |
|---|---|---|---|---|
| 00000000 | 0 | 00 | NUL (NULL) | 空字符 |
| 00000001 | 1 | 01 | SOH (Start Of Headling) | 标题开始 |
| 00000010 | 2 | 02 | STX (Start Of Text) | 正文开始 |
| 00000011 | 3 | 03 | ETX (End Of Text) | 正文结束 |
| 00000100 | 4 | 04 | EOT (End Of Transmission) | 传输结束 |
| 00000101 | 5 | 05 | ENQ (Enquiry) | 请求 |
| 00000110 | 6 | 06 | ACK (Acknowledge) | 回应/响应/收到通知 |
| 00000111 | 7 | 07 | BEL (Bell) | 响铃 |
| 00001000 | 8 | 08 | BS (Backspace) | 退格 |
| 00001001 | 9 | 09 | HT (Horizontal Tab) | 水平制表符 |
| 00001010 | 10 | 0A | LF/NL(Line Feed/New Line) | 换行键 |
| 00001011 | 11 | 0B | VT (Vertical Tab) | 垂直制表符 |
| 00001100 | 12 | 0C | FF/NP (Form Feed/New Page) | 换页键 |
| 00001101 | 13 | 0D | CR (Carriage Return) | 回车键 |
| 00001110 | 14 | 0E | SO (Shift Out) | 不用切换 |
| 00001111 | 15 | 0F | SI (Shift In) | 启用切换 |
| 00010000 | 16 | 10 | DLE (Data Link Escape) | 数据链路转义 |
| 00010001 | 17 | 11 | DC1/XON (Device Control 1/Transmission On) | 设备控制1/传输开始 |
| 00010010 | 18 | 12 | DC2 (Device Control 2) | 设备控制2 |
| 00010011 | 19 | 13 | DC3/XOFF (Device Control 3/Transmission Off) | 设备控制3/传输中断 |
| 00010100 | 20 | 14 | DC4 (Device Control 4) | 设备控制4 |
| 00010101 | 21 | 15 | NAK (Negative Acknowledge) | 无响应/非正常响应/拒绝接收 |
| 00010110 | 22 | 16 | SYN (Synchronous Idle) | 同步空闲 |
| 00010111 | 23 | 17 | ETB (End of Transmission Block) | 传输块结束/块传输终止 |
| 00011000 | 24 | 18 | CAN (Cancel) | 取消 |
| 00011001 | 25 | 19 | EM (End of Medium) | 已到介质末端/介质存储已满/介质中断 |
| 00011010 | 26 | 1A | SUB (Substitute) | 替补/替换 |
| 00011011 | 27 | 1B | ESC (Escape) | 逃离/取消 |
| 00011100 | 28 | 1C | FS (File Separator) | 文件分割符 |
| 00011101 | 29 | 1D | GS (Group Separator) | 组分隔符/分组符 |
| 00011110 | 30 | 1E | RS (Record Separator) | 记录分离符 |
| 00011111 | 31 | 1F | US (Unit Separator) | 单元分隔符 |
| 00100000 | 32 | 20 | (Space) | 空格 |
| 00100001 | 33 | 21 | ! | |
| 00100010 | 34 | 22 | “ | |
| 00100011 | 35 | 23 | # | |
| 00100100 | 36 | 24 | $ | |
| 00100101 | 37 | 25 | % | |
| 00100110 | 38 | 26 | & | |
| 00100111 | 39 | 27 | ’ | |
| 00101000 | 40 | 28 | ( | |
| 00101001 | 41 | 29 | ) | |
| 00101010 | 42 | 2A | * | |
| 00101011 | 43 | 2B | + | |
| 00101100 | 44 | 2C | , | |
| 00101101 | 45 | 2D | – | |
| 00101110 | 46 | 2E | . | |
| 00101111 | 47 | 2F | / | |
| 00110000 | 48 | 30 | 0 | |
| 00110001 | 49 | 31 | 1 | |
| 00110010 | 50 | 32 | 2 | |
| 00110011 | 51 | 33 | 3 | |
| 00110100 | 52 | 34 | 4 | |
| 00110101 | 53 | 35 | 5 | |
| 00110110 | 54 | 36 | 6 | |
| 00110111 | 55 | 37 | 7 | |
| 00111000 | 56 | 38 | 8 | |
| 00111001 | 57 | 39 | 9 | |
| 00111010 | 58 | 3A | : | |
| 00111011 | 59 | 3B | ; | |
| 00111100 | 60 | 3C | < | |
| 00111101 | 61 | 3D | = | |
| 00111110 | 62 | 3E | > | |
| 00111111 | 63 | 3F | ? | |
| 01000000 | 64 | 40 | @ | |
| 01000001 | 65 | 41 | A | |
| 01000010 | 66 | 42 | B | |
| 01000011 | 67 | 43 | C | |
| 01000100 | 68 | 44 | D | |
| 01000101 | 69 | 45 | E | |
| 01000110 | 70 | 46 | F | |
| 01000111 | 71 | 47 | G | |
| 01001000 | 72 | 48 | H | |
| 01001001 | 73 | 49 | I | |
| 01001010 | 74 | 4A | J | |
| 01001011 | 75 | 4B | K | |
| 01001100 | 76 | 4C | L | |
| 01001101 | 77 | 4D | M | |
| 01001110 | 78 | 4E | N | |
| 01001111 | 79 | 4F | O | |
| 01010000 | 80 | 50 | P | |
| 01010001 | 81 | 51 | Q | |
| 01010010 | 82 | 52 | R | |
| 01010011 | 83 | 53 | S | |
| 01010100 | 84 | 54 | T | |
| 01010101 | 85 | 55 | U | |
| 01010110 | 86 | 56 | V | |
| 01010111 | 87 | 57 | W | |
| 01011000 | 88 | 58 | X | |
| 01011001 | 89 | 59 | Y | |
| 01011010 | 90 | 5A | Z | |
| 01011011 | 91 | 5B | [ | |
| 01011100 | 92 | 5C | ||
| 01011101 | 93 | 5D | ] | |
| 01011110 | 94 | 5E | ^ | |
| 01011111 | 95 | 5F | _ | |
| 01100000 | 96 | 60 | ` | |
| 01100001 | 97 | 61 | a | |
| 01100010 | 98 | 62 | b | |
| 01100011 | 99 | 63 | c | |
| 01100100 | 100 | 64 | d | |
| 01100101 | 101 | 65 | e | |
| 01100110 | 102 | 66 | f | |
| 01100111 | 103 | 67 | g | |
| 01101000 | 104 | 68 | h | |
| 01101001 | 105 | 69 | i | |
| 01101010 | 106 | 6A | j | |
| 01101011 | 107 | 6B | k | |
| 01101100 | 108 | 6C | l | |
| 01101101 | 109 | 6D | m | |
| 01101110 | 110 | 6E | n | |
| 01101111 | 111 | 6F | o | |
| 01110000 | 112 | 70 | p | |
| 01110001 | 113 | 71 | q | |
| 01110010 | 114 | 72 | r | |
| 01110011 | 115 | 73 | s | |
| 01110100 | 116 | 74 | t | |
| 01110101 | 117 | 75 | u | |
| 01110110 | 118 | 76 | v | |
| 01110111 | 119 | 77 | w | |
| 01111000 | 120 | 78 | x | |
| 01111001 | 121 | 79 | y | |
| 01111010 | 122 | 7A | z | |
| 01111011 | 123 | 7B | { | |
| 01111100 | 124 | 7C | | | |
| 01111101 | 125 | 7D | } | |
| 01111110 | 126 | 7E | ~ | |
| 01111111 | 127 | 7F | DEL (Delete) | 删除 |
对控制字符的解释
ASCII 编码中第 0~31 个字符(开头的 32 个字符)以及第 127 个字符(最后一个字符)都是不可见的(无法显示),但是它们都具有一些特殊功能,所以称为控制字符( Control Character)或者功能码(Function Code)。
这 33 个控制字符大都与通信、数据存储以及老式设备有关,有些在现代电脑中的含义已经改变了。
参考:https://c.biancheng.net/c/ascii/
原文地址:https://blog.csdn.net/qq_59621600/article/details/135896116
本文来自互联网用户投稿,该文观点仅代表作者本人,不代表本站立场。本站仅提供信息存储空间服务,不拥有所有权,不承担相关法律责任。
如若转载,请注明出处:http://www.7code.cn/show_64069.html
如若内容造成侵权/违法违规/事实不符,请联系代码007邮箱:suwngjj01@126.com进行投诉反馈,一经查实,立即删除!
声明:本站所有文章,如无特殊说明或标注,均为本站原创发布。任何个人或组织,在未征得本站同意时,禁止复制、盗用、采集、发布本站内容到任何网站、书籍等各类媒体平台。如若本站内容侵犯了原著者的合法权益,可联系我们进行处理。