本文介绍: 要在Spring Boot应用中使用Redis作为缓存,你需要遵循一些步骤来配置和使用Redis。
要在Spring Boot应用中使用Redis作为缓存,你需要遵循一些步骤来配置和使用Redis。以下是使用Spring Cache抽象与Redis进行整合的详细说明:
1. 添加依赖
首先,需要在pom.xml中添加Spring Boot的Redis starter依赖以及缓存的starter依赖。这会自动引入Spring Data Redis和相关的库。
2. 配置Redis
接下来,需要在application.properties或application.yml文件中配置Redis服务器的连接信息。
3. 启用缓存支持
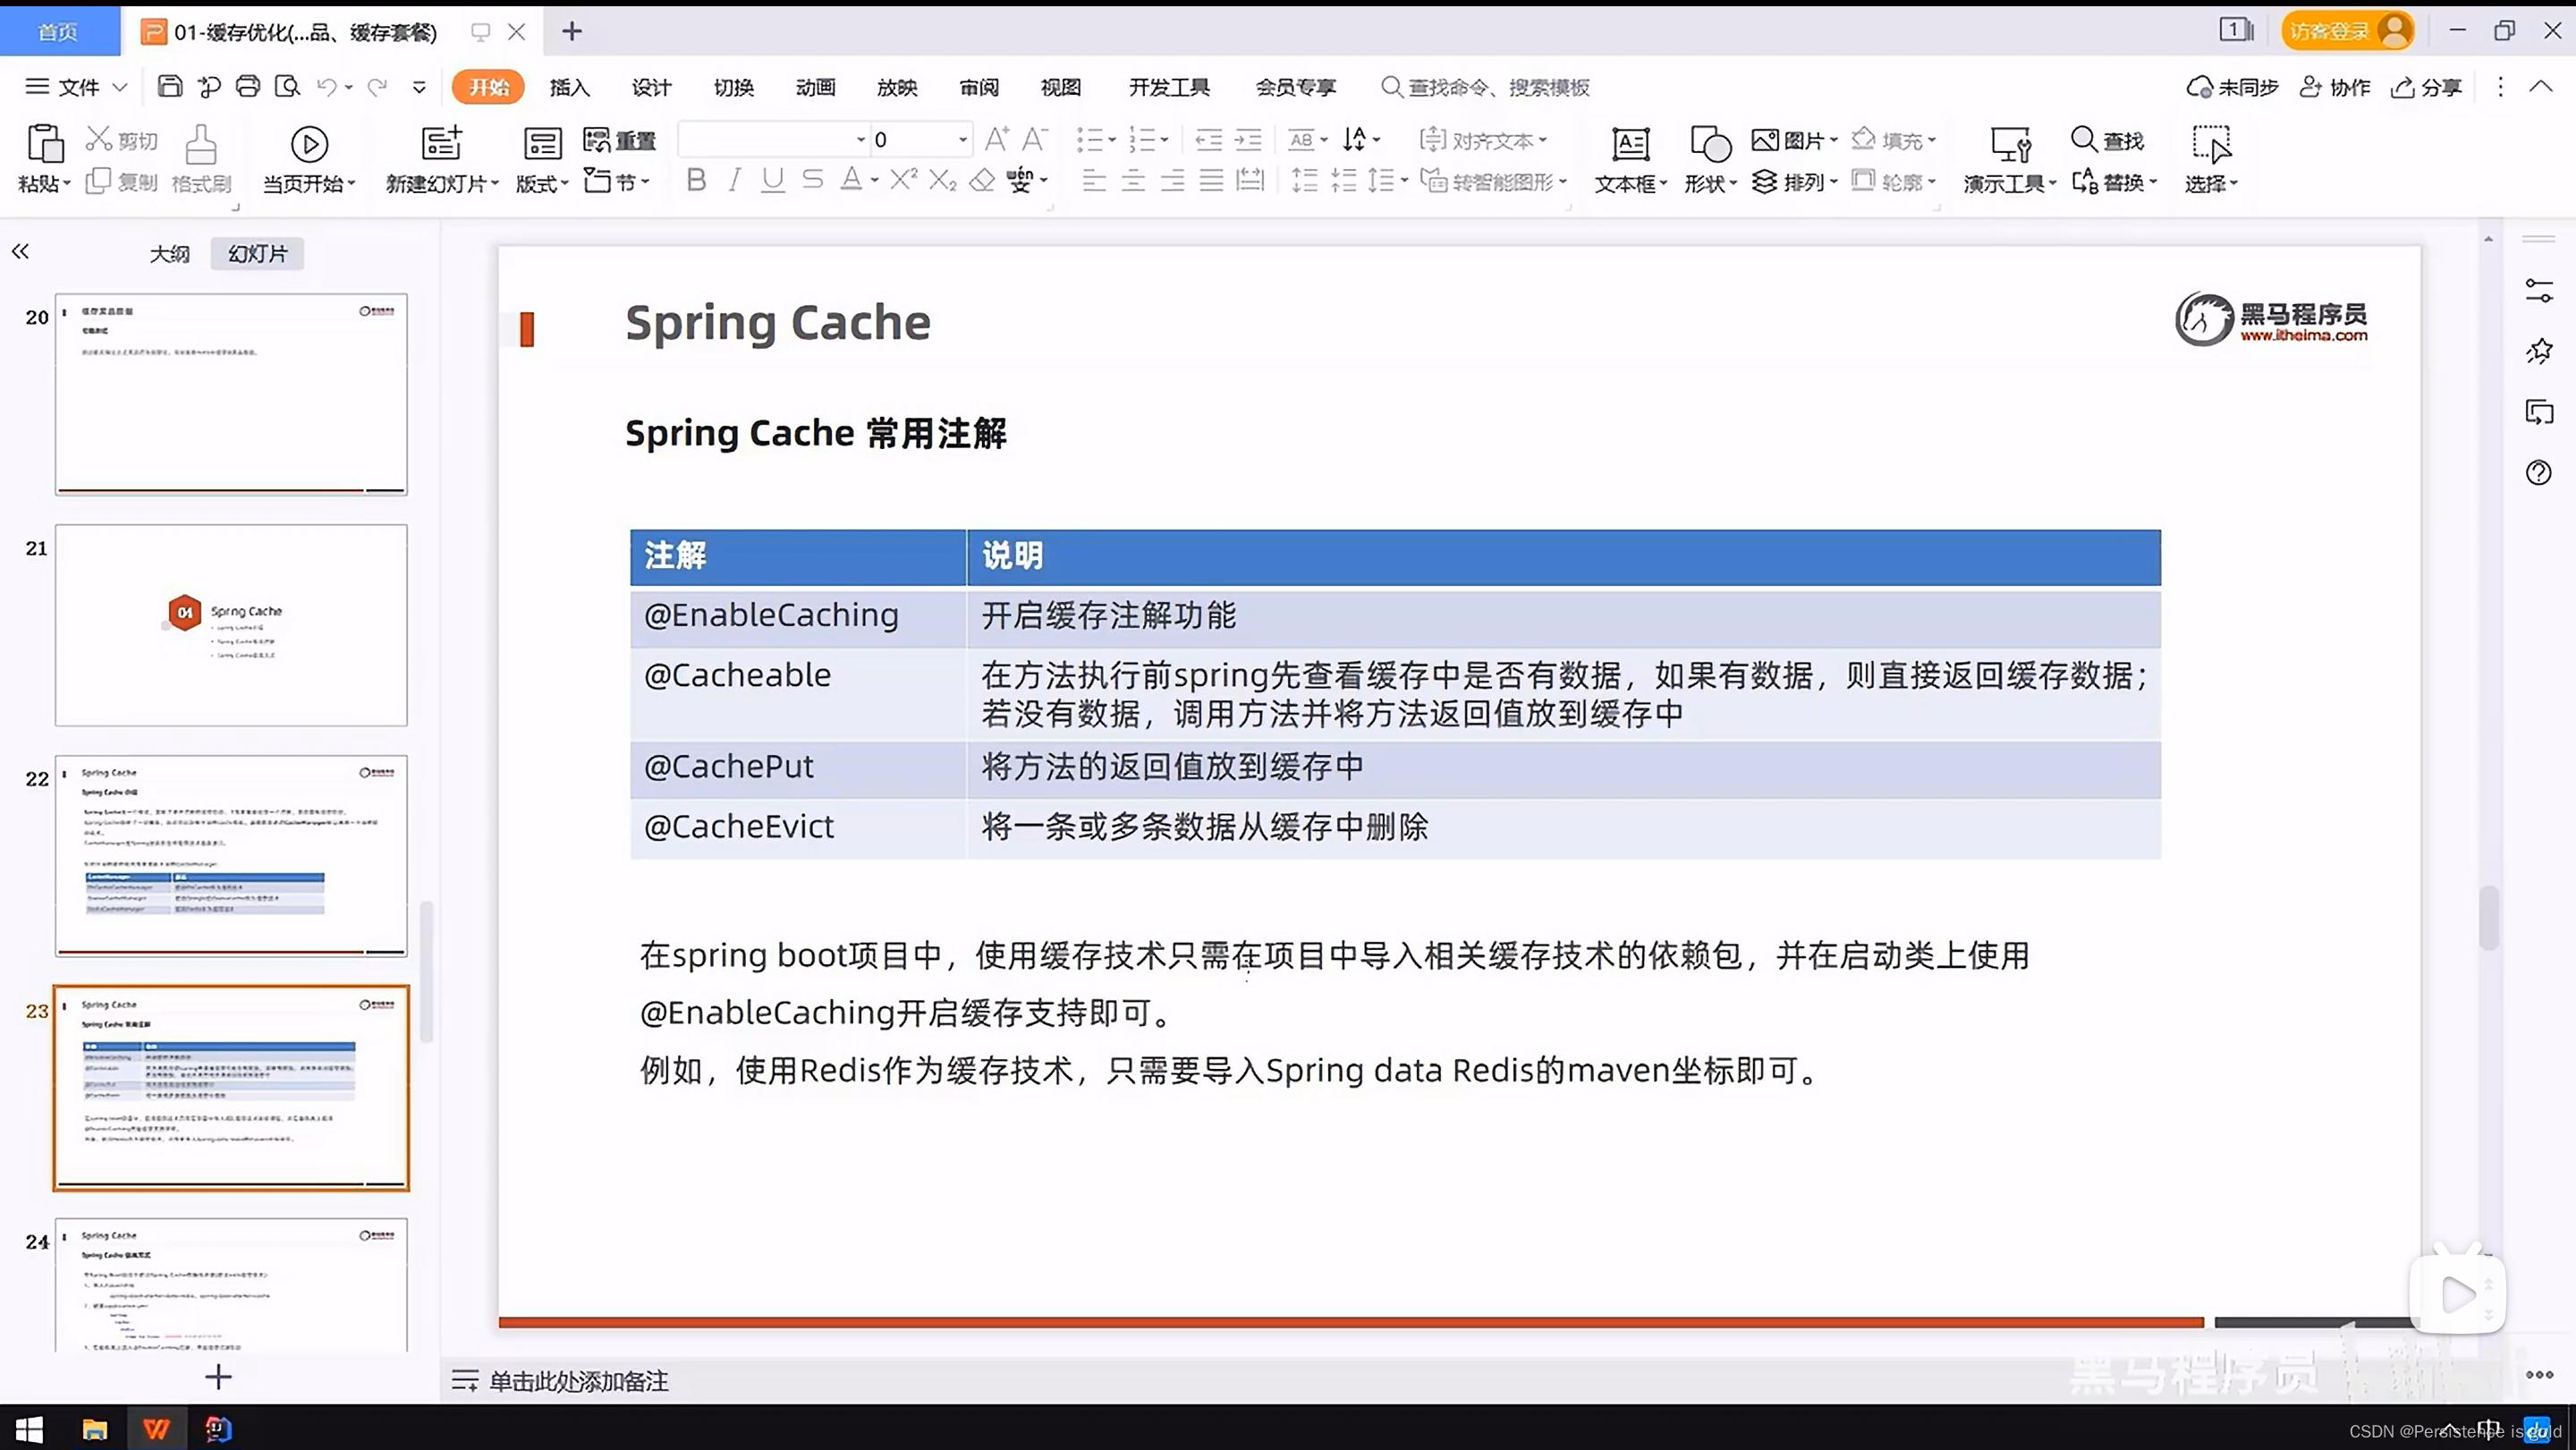
在Spring Boot的主配置类上添加@EnableCaching注解以启用缓存支持。
4. 使用缓存注解
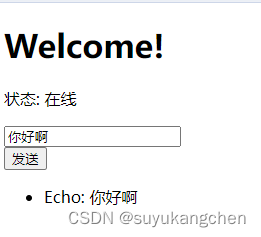
现在,你可以在服务层或其他组件中使用@Cacheable、@CacheEvict和@CachePut注解来操作缓存。
5. 配置缓存管理器(可选)
虽然Spring Boot为Redis提供了自动配置,但你可能需要自定义缓存管理器以调整其行为。你可以通过配置一个CacheManager Bean来实现这一点。
6. 运行和测试
注意事项
声明:本站所有文章,如无特殊说明或标注,均为本站原创发布。任何个人或组织,在未征得本站同意时,禁止复制、盗用、采集、发布本站内容到任何网站、书籍等各类媒体平台。如若本站内容侵犯了原著者的合法权益,可联系我们进行处理。