1. 创建一个视图控制器,并添加xib
2. 设置背景图片
3. 顶部关闭和返回
3.1 在视图中添加一个UIVIew,设置他的顶部与整个view的底部的距离
3.2 关闭按钮
在新创建的UIView中添加一个UIButton并添加图片
设置Type为Custom
设置按钮的顶部/左边/下边与UIView之间的距离

- (IBAction)close {
    [self dismissViewControllerAnimated:YES completion:nil];
}
3.3 立即注册按钮
- (IBAction)showLoginOrRegister:(UIButton*)button {
    [self.view endEditing:YES];
    // 点击按钮后判断当前登陆框左侧的位置
    if (self.leftMargin.constant) {
    	// 设置登陆输入框的左边为0
        self.leftMargin.constant = 0;
        [button setTitle:@"立即注册" forState:UIControlStateNormal];

    }else{
    	// 设置登陆输入框的左边为负的整个view 的宽度
        self.leftMargin.constant = - self.view.frame.size.width;
        [button setTitle:@"已有帐号" forState:UIControlStateNormal];
    }

    // 添加动画
    [UIView animateWithDuration:0.25 animations:^{
            [self.view layoutIfNeeded];
    }];
}
4. 中部登陆输入框
4.1 登陆输入框
4.1.1 创建imageView添加图片设置成输入框的背景
4.1.2 添加textFiled输入框
设置输入框的顶部和imageView的顶部对齐
设置输入框的宽度和imageView的宽度一致
平分imageView的高度
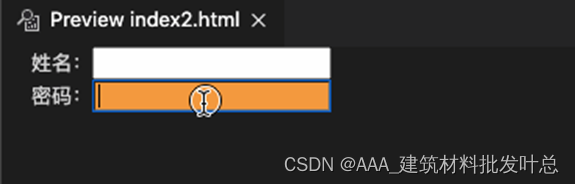
4.1.3 设置输入的光标颜色/占位文字颜色/和监听事件
#import "CHHLoginTextFiled.h"

@implementation CHHLoginTextFiled
{
    NSMutableDictionary* placeholderGrayColor;
    NSMutableDictionary* placeholderWhiteColor;
}
-(void)awakeFromNib{
    [super awakeFromNib];
    self.tintColor = [UIColor whiteColor];
    placeholderGrayColor = [NSMutableDictionary dictionary];
    placeholderGrayColor[NSForegroundColorAttributeName] = [UIColor lightGrayColor];
    placeholderWhiteColor = [NSMutableDictionary dictionary];
    placeholderWhiteColor[NSForegroundColorAttributeName] = [UIColor whiteColor];

    // 设置默认状态下的占位文字为灰色
    self.attributedPlaceholder = [[NSAttributedString alloc] initWithString:self.placeholder attributes:placeholderGrayColor];

    // 绑定开始编辑事件
    [self addTarget:self action:@selector(editingDidBegin) forControlEvents:UIControlEventEditingDidBegin];
    // 绑定结束编辑事件
    [self addTarget:self action:@selector(editingDidEnd) forControlEvents:UIControlEventEditingDidEnd];

}

-(void)editingDidBegin{
	// 开始编辑时,设置占位文字为白色
    self.attributedPlaceholder = [[NSAttributedString alloc] initWithString:self.placeholder attributes:placeholderWhiteColor];
}

-(void)editingDidEnd{
	// 结束编辑时,设置占位文字为灰色
    self.attributedPlaceholder = [[NSAttributedString alloc] initWithString:self.placeholder attributes:placeholderGrayColor];
}
@end
4.1.4 按钮设置圆角
    self.loginButton.layer.cornerRadius = 5;
    self.loginButton.layer.masksToBounds = YES;
4.1.5 点击view推出键盘
-(void)touchesBegan:(NSSet<UITouch *> *)touches withEvent:(UIEvent *)event{
    [self.view endEditing:YES];
}
4.2 注册输入框
4.2.1 复制登陆输入框
5. 底部快速登陆
5.1 创建一个View控制底部控件
5.2 创建顶部的快速登陆文字和左右两边的渐变图片
5.3 设置快速登陆的按钮
在视图中添加按钮设置宽度和高度
可以先设置一个按钮与上边的距离,另外两个按钮的top和这个按钮绑定,然后三个一起平分宽度

5.4 设置快速登陆按钮的位置
按钮的文字默认是在图片的右边的,如果我们想要设置文字在按钮的下变,我们就需要重写layoutSubviews或者设置偏移,后者不推荐。
创建一个继承UIButton的类
// xib创建的空间都会经过这个方法
-(void)awakeFromNib{
    [super awakeFromNib];
    // 设置titleLabel的文字样式居中
    self.titleLabel.textAlignment = NSTextAlignmentCenter;
}
// 设置样式的方法
-(void)layoutSubviews{
    [super layoutSubviews];
    // 设置button里面的imageView0
    // x:button的宽度/2 - imageView的宽度/2
    // y:0
    // 宽度和高度保持不变
    self.imageView.frame = CGRectMake(self.frame.size.width/2-self.imageView.frame.size.width/2, 0, self.imageView.frame.size.width, self.imageView.frame.size.height);

    // 把剩余的底部空间分配给titleLabel
    // x:0
    // y:imageView的高度
    // 宽:整个button的宽度
    // 高:button的高度-imageView的高度
    self.titleLabel.frame = CGRectMake(0, self.imageView.frame.size.height, self.frame.size.width, self.frame.size.height-self.imageView.frame.size.height);
}
6. 设置点击空白部分关闭键盘
-(void)touchesBegan:(NSSet<UITouch *> *)touches withEvent:(UIEvent *)event{
    [self.view endEditing:YES];
}
原文地址:https://blog.csdn.net/qq_42208321/article/details/129723755
本文来自互联网用户投稿,该文观点仅代表作者本人,不代表本站立场。本站仅提供信息存储空间服务,不拥有所有权,不承担相关法律责任。
如若转载,请注明出处:http://www.7code.cn/show_9995.html
如若内容造成侵权/违法违规/事实不符,请联系代码007邮箱:suwngjj01@126.com进行投诉反馈,一经查实,立即删除!
声明:本站所有文章,如无特殊说明或标注,均为本站原创发布。任何个人或组织,在未征得本站同意时,禁止复制、盗用、采集、发布本站内容到任何网站、书籍等各类媒体平台。如若本站内容侵犯了原著者的合法权益,可联系我们进行处理。